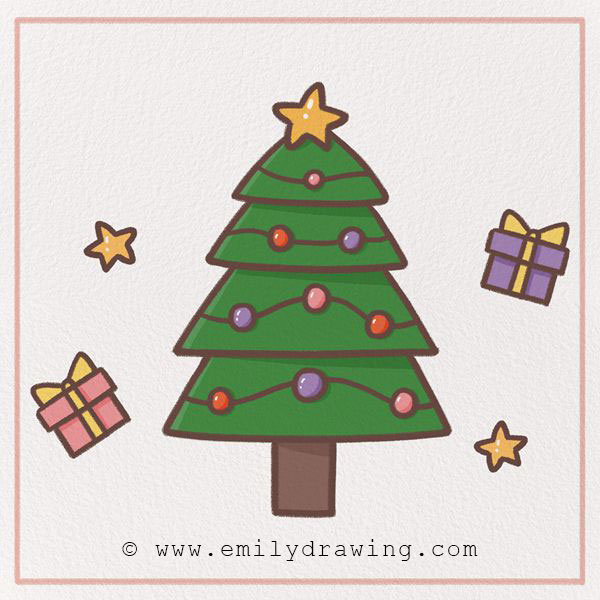
Welcome to our step-by-step drawing tutorial! Today, we are going to create a fun and easy step-by-step Christmas tree sketch!
Whether you celebrate Christmas or not, Christmas trees are a really old and fascinating tradition to learn about! Germany is credited with starting the tradition of bringing an evergreen tree inside during December to recreate the feeling of twinkling stars among evergreen trees outside. This dates back to the 16th century! However, Christmas trees didn’t become widely popular in some areas until the 1850s.
Now, Christmas trees are in so many windows around the world during the holiday season! With their twinkling lights, deep green color, and festive ornaments, they can make any room feel warm and inviting. Many people top their tree with a star, like in this tutorial, or an angel, and even use strings of popcorn around the tree!
So, grab some drawing supplies, and let’s get started on this easy Christmas tree illustration! Happy drawing!
Materials:
- a piece of paper
- a pencil for the guiding lines and sketching
- an eraser
- a black sharpie or a pen for the outlines
- markers or colored pencils for coloring
- our printable drawing guide (Join my Email List below to get this Tutorial)
Here are my RECOMMENDED Art Supplies!
- Crayola Coloring Set (140 Pieces – Mega Value!)
- 24 Colored Crayon Set
- A4 Printer Paper
- Crayola Coloring Pencils
- HP Home Printer with Instant Ink!
Time needed:
13 minutes.
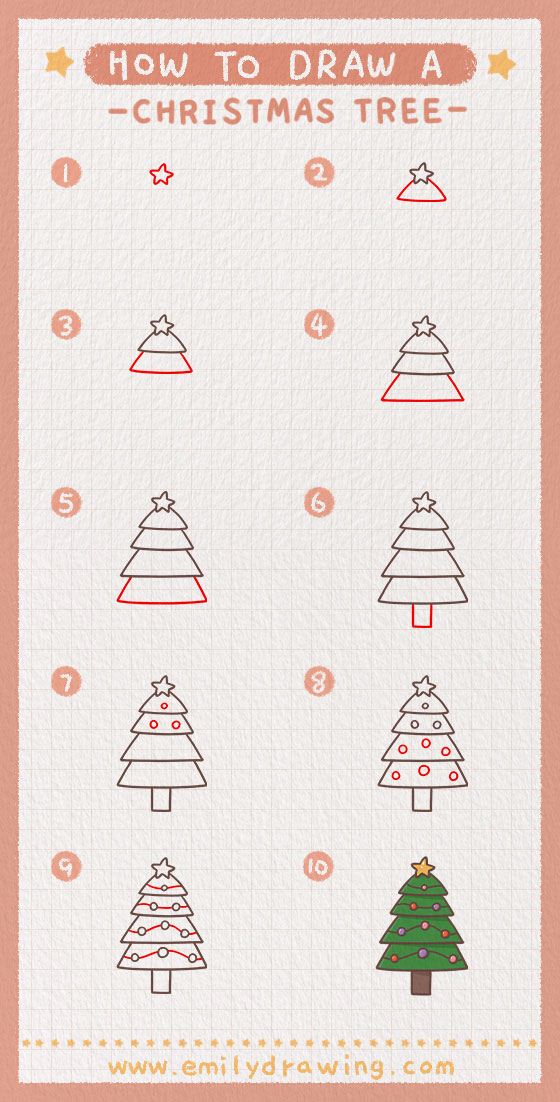
How to Draw a Christmas Tree — Let’s get started!
Step 1 – Draw a star.

Different people put different tops on their trees such as angels and stars. Sometimes, if you get too tall of a tree, it can be a challenge to put them on the very top!
For our tree, we will draw a star on the top.
So, near the top of the page, draw a small five-pointed star! It should be centered horizontally on the page. There should be plenty of room below for the rest of the tree.
Step 2 – Draw the top of the tree.
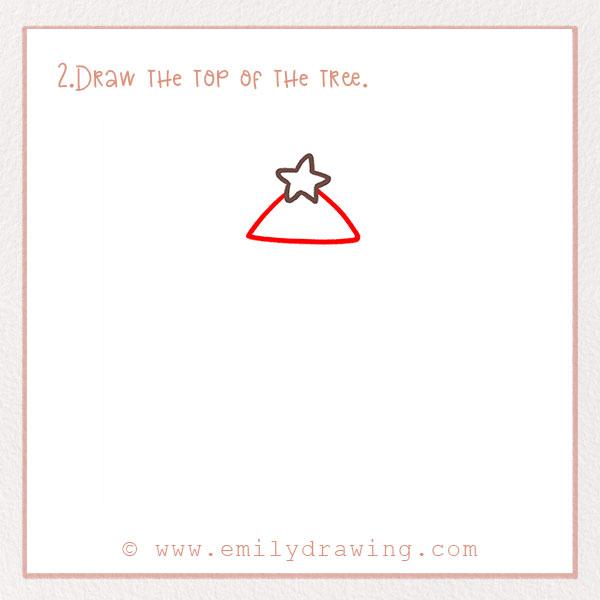
We’re going to draw the top of the tree first, and work our way down in each step. Centered below the star, draw a triangle shape. Refer to the photo!
Step 3 – Add more to the tree.
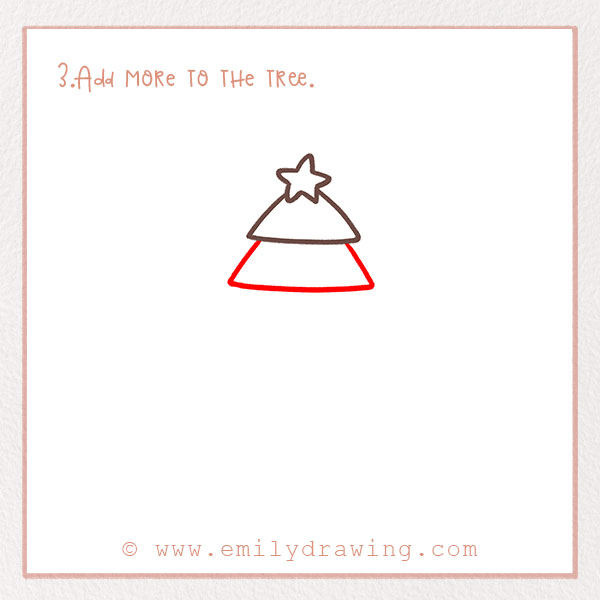
Christmas trees are evergreens, and have a triangular silhouette.
To show this, add another wider shape below the shape in Step 2. It should be a trapezoid.
Step 4 – Add (more) to the tree!
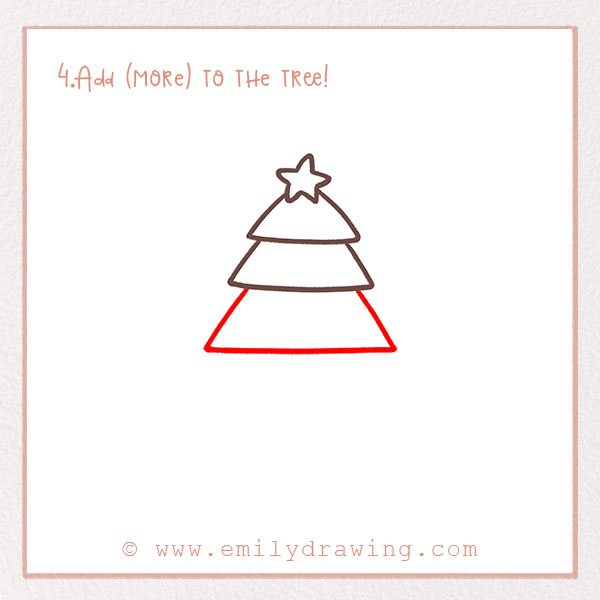
Let’s continue drawing the tree to make it taller!
Similar to Step 3, add another trapezoid shape below the last one. It should be even wider and larger.
Step 5 – Make the tree even bigger!
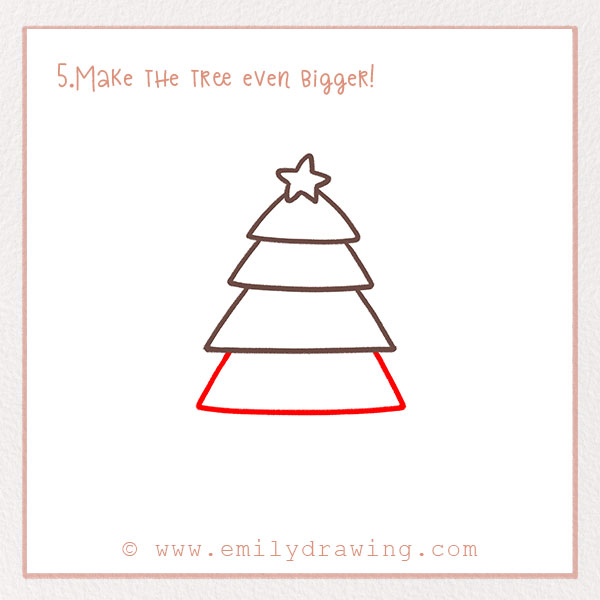
Lastly, let’s add one last trapezoid to make the tree wider! Now we have the full shape of the tree.
Step 6 – Draw the trunk of the tree.

While some Christmas trees are artificial, many people actually go out and cut down their own trees for the holiday season! Christmas trees have to have trunks so they can still absorb water throughout a few weeks.
Let’s add a trunk to our tree now. Below the tree, draw a rectangle to show the trunk. It should be in the center.
Step 7 – Add some ornaments to the tree!
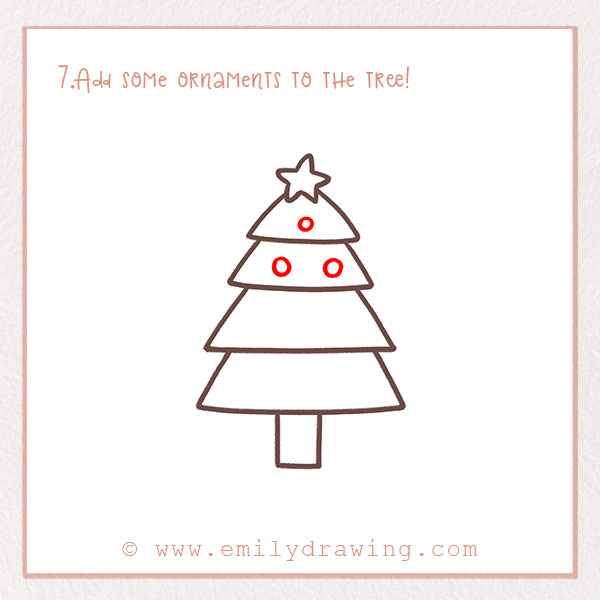
Ornaments and lights are, in part, what make Christmas trees so unique and beautiful. Popular ornaments include glass bulbs, fake snowflakes, candy canes, and homemade crafts.
So, of course our tree needs ornaments and lights too! Draw three small circles scattered throughout the two top sections of the tree. Make them slightly different sizes for visual variety.
To add more festive elements to your drawing, consider learning How to Draw a Christmas Stocking and How to Draw a Gingerbread House.
Step 8 – Add the rest of the ornaments and lights!
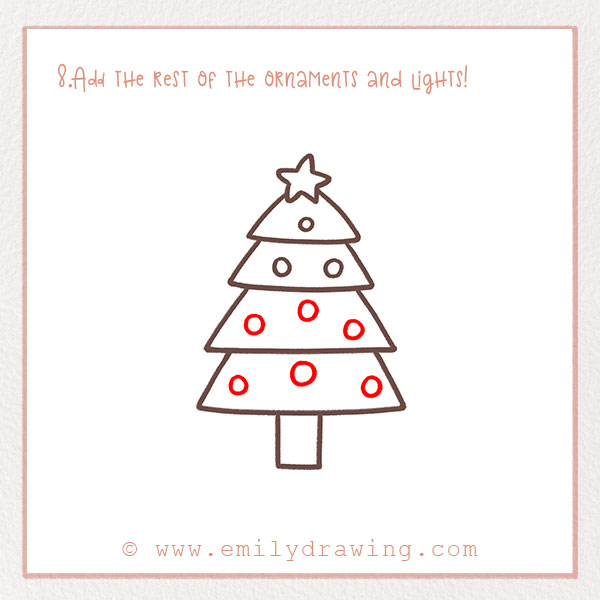
Repeat Step 7 for this step. This time, add six more circles to the bottom half of the tree. Draw the circles a little bit bigger than the ones in Step 7.
We’re nearly done with the detail on the tree—good job!
Step 9 – Draw the light strands!
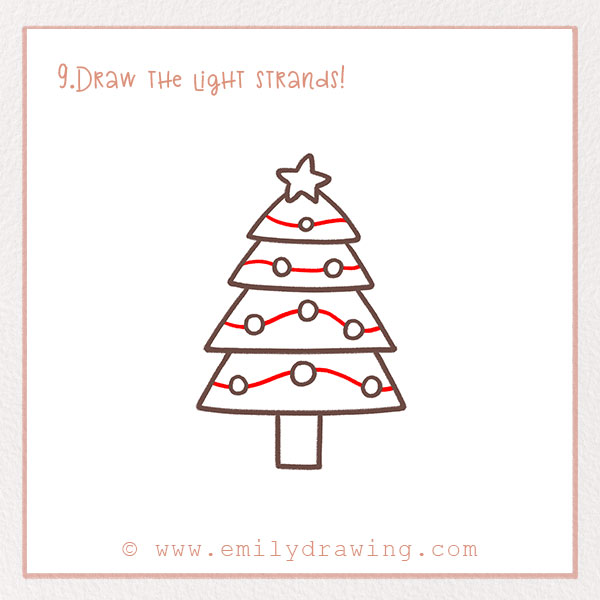
Christmas trees also have strands of lights all over! We need to make our tree look like it has strands of lights.
Draw short lines connecting all of the circles that are in the same trapezoid section of the tree. Draw them so they look like they are zigzagging! Refer to the photo. It should appear as if they are wrapping around the tree.
Step 10 – Color in your creation!
Last but not least, color in your artwork! Have fun with it. Some people use multi-colored lights on the tree while others just use white lights. Grab some cozy and warm colors and fill in the rest of the drawing!
Now that you’ve drawn your Christmas tree, you might enjoy our 25 Free Printable Christmas Tree Coloring Page Ideas to add more holiday cheer to your art collection.
All done? Great job! We hope you had fun and learned a little bit about Christmas trees in this drawing tutorial! Share it with your friends and family. You could even give it as a Christmas gift, or make your drawing come to life this holiday season.
Is there another holiday-themed drawing tutorial you’d like to see? Let us know in the comments!
If you’re interested in more holiday-themed drawings, you might also enjoy our tutorials on How to Draw Santa Claus and How to Draw a Snowman.
Pin it now, Draw later!
Get the FREE Printable Drawing Guide