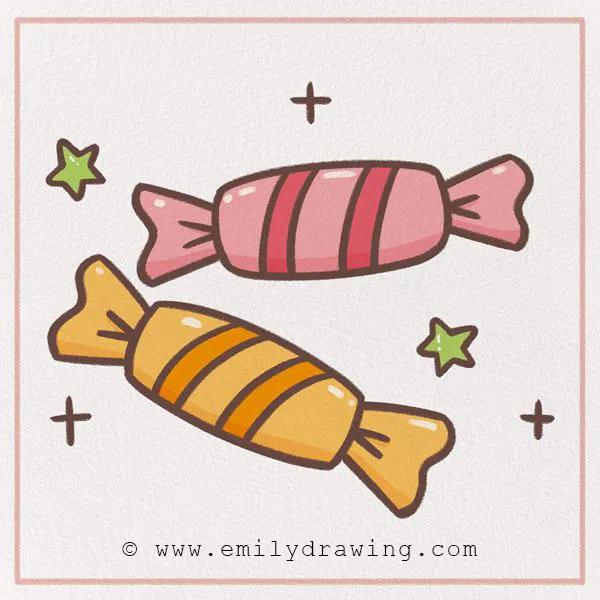
Hello and welcome to this fun, easy-to-follow Halloween drawing tutorial on how to draw Halloween sweets!
Halloween is a fun and unique holiday—if you’ve ever experienced it for yourself, you’ll know that a big part of that fun is all the yummy sweets you get while trick-or-treating! Often, kids go walking around neighborhoods with empty pillowcases to collect sweet treats dressed up in their costumes. Popular costumes are ghosts, witches, and goblins. People often put Halloween pumpkins on their porch during the festive evening.
Receiving Halloween candy from nice neighbors on this fun, creative, and sometimes spooky holiday is one of the best parts! Trick-or-treating became popular in different countries at different times. For example, the tradition of trick-or-treating on Halloween night became more common in the United States in the 1950’s. It is thought to originally have come from Celtic tradition in Europe, and slowly evolved to what we now know as trick-or-treating.
Are you ready? Go ahead and grab your drawing materials. Let’s get started! Happy drawing!
Materials:
- a piece of paper
- a pencil for the guiding lines and sketching
- an eraser
- a black sharpie or a pen for the outlines
- markers or colored pencils for coloring
- our printable drawing guide (Join my Email List below to get this Tutorial)
Here are my RECOMMENDED Art Supplies!
- Crayola Coloring Set (140 Pieces – Mega Value!)
- 24 Colored Crayon Set
- A4 Printer Paper
- Crayola Coloring Pencils
- HP Home Printer with Instant Ink!
Time needed:
15 minutes.
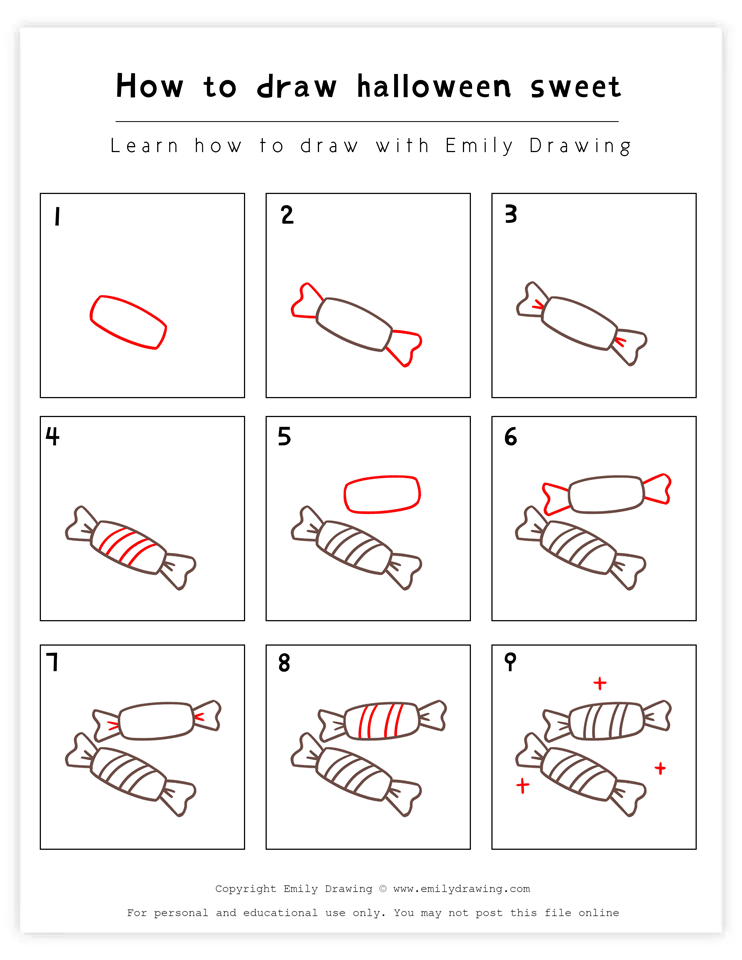
How to Draw Halloween Sweet — Let’s get started!
Step 1 – Draw a rectangle to start.
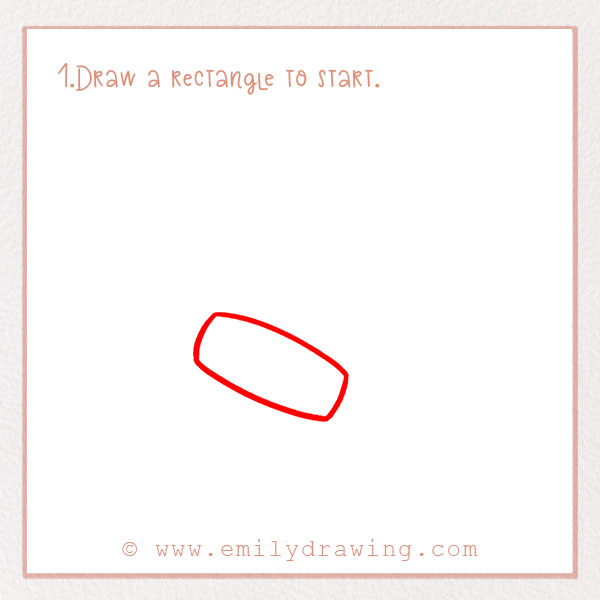
In this drawing, we’re going to draw two sweets (also called candies). So, let’s start to draw the first candy. On the lower left side of the page, draw a rectangle. Place it at an angle like the photo. Make the lines a little bit curved.
Step 2 – Add the ends of the wrapper.
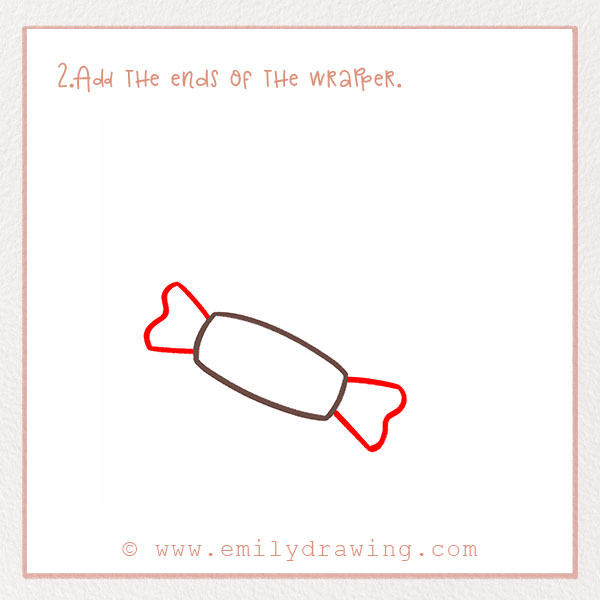
Candies are wrapped so that they stay fresh—we need to add a wrapper to our first candy now. On either side of the rectangle, add the ends of the wrapper. Look at the image for the exact shape—it should be triangular but with a curved line, kind of like a bowtie shape.
Step 3 – Add detail to the wrapper.
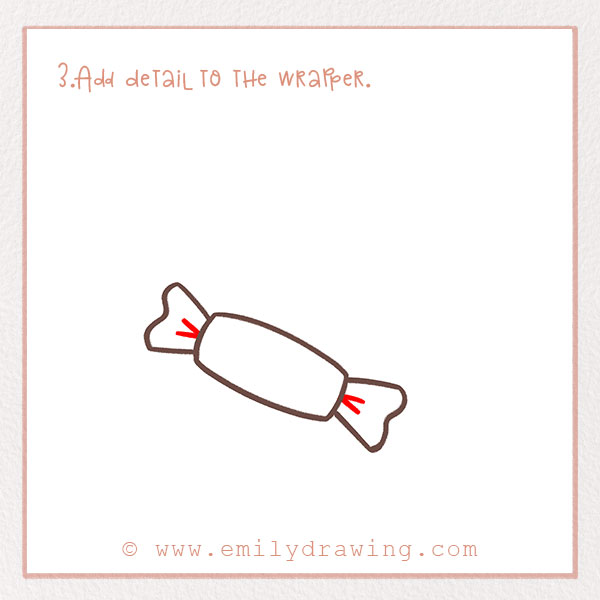
On the ends of the wrapper that we just drew, let’s add some detail. Draw two short lines that indicate the twisted and cinched material, like a tootsie pop wrapper.
Step 4 – Add (more) detail to the wrapper!
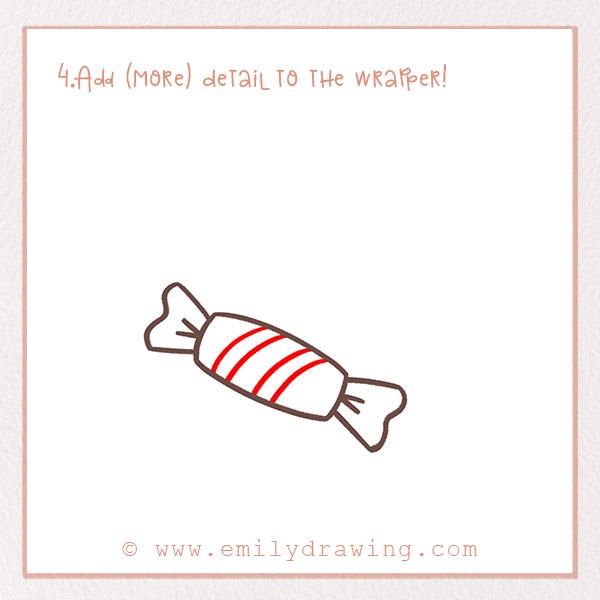
There are tons of spooky treats you can get on Halloween—chocolate, lollipops, and taffy, for example. Some people even give out caramel apples! Let’s add some detail to the wrapper by drawing a few stripes.
Draw four skinny and slightly curved lines in the wrapper. It should look like the wrapper has a striped pattern. Look at the photo!
Good job! You’ve finished your first Halloween sweet.
Step 5 – Start drawing the second candy.
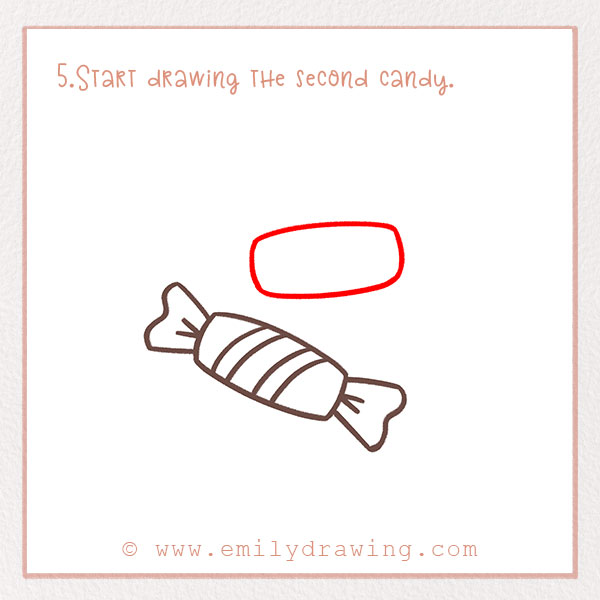
For the next four steps, we’re going to repeat what we’ve done so far but this time for the second candy. After all, normally you go trick-or-treating to several houses, and get lots of candy!
Above and slightly to the right of the first candy, draw another rounded rectangle. It should be the same shape as what you drew in Step 1. Leave some room above it to add more to the drawing.
Step 6 – Add more detail to the second candy.
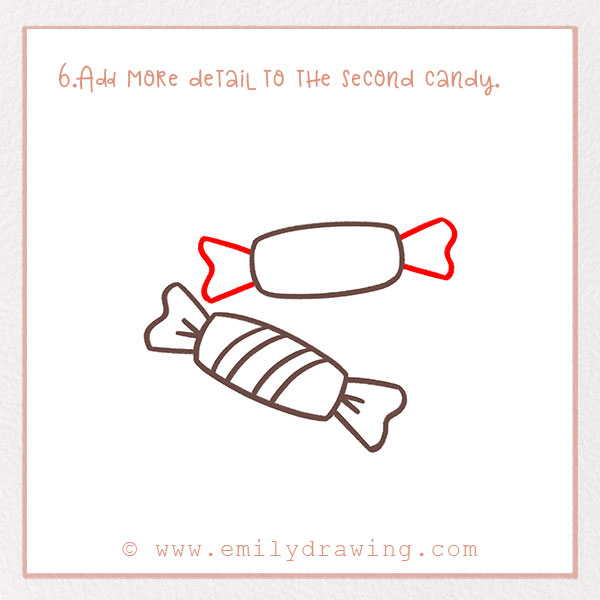
This will be very similar to Step 2—we are going to add the same bow-like detail on the ends of the rectangle. Go ahead and do that now!
Step 7 – Add detail to the second candy.
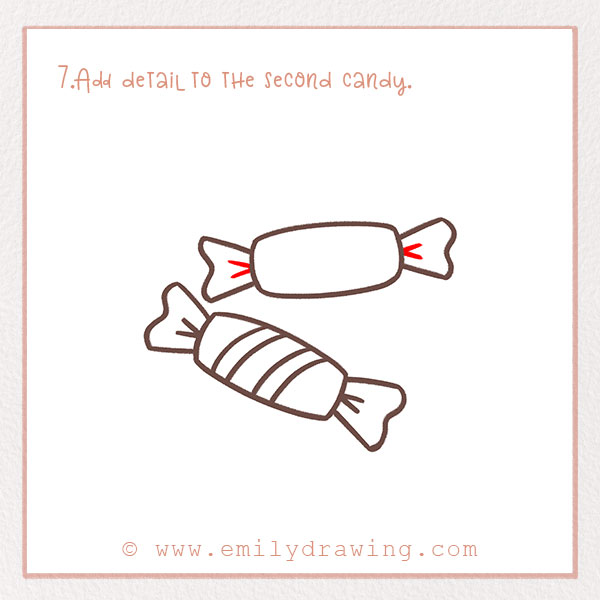
Add some lines to the end of the second candy, like in Step 3, to show the cinched material. We’re almost done!
Step 8 – Add lines to the second candy.
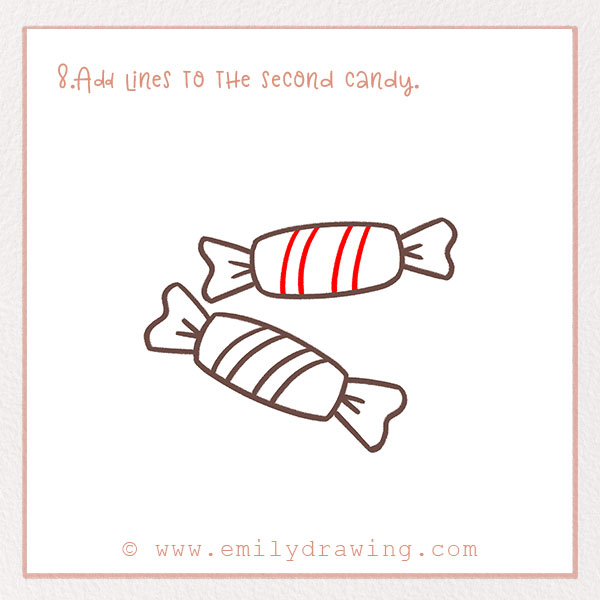
This is the last step for forming the shapes of the Halloween sweets. Similar to Step 4, draw four lines inside the second rectangle. This will be the same striped pattern as the first candy.
Step 9 – Add some details to the background!
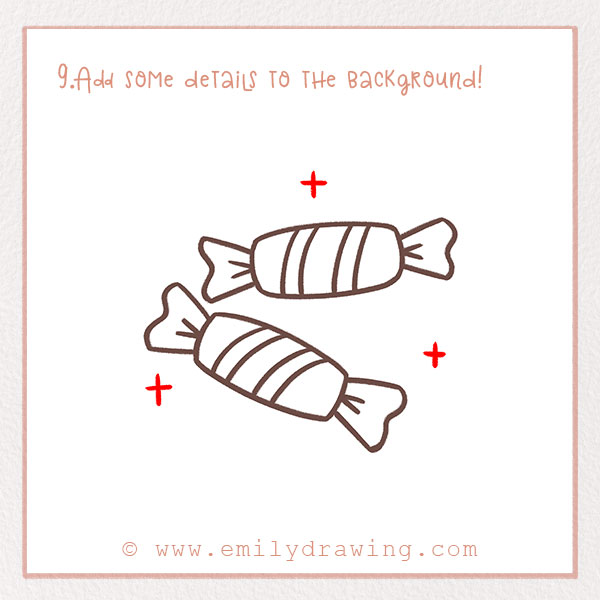
Just for fun, let’s add some sparkles around the candy. Draw little t-shapes surrounding the candy on the top center, bottom left, and bottom right. These decorations fill the page really nicely.
We’re nearly done… good job!
Step 10 – Color, color, color!
Of course, we have color in your creation! Think of your favorite candy to get some inspiration for how you want to decorate the package. Or, just go wild and make something up! Be creative, and of course, have fun with it.
Good job! You’ve finished your drawing on how to make Halloween sweets! We hope you’ve enjoyed this step-by-step guide. Thanks for following along….maybe reward yourself with a sweet! If you’re going to celebrate Halloween this year, maybe you can start brainstorming your Halloween costume!
Share your one-of-a-kind artwork with your friends or family. Comment what you thought about this tutorial!
If you liked this holiday-themed tutorial, check out our Christmas Tree, Halloween Pumpkin, and Christmas Stocking tutorials. Let us know in the comments if there’s another tutorial you’d like to see. Make sure to check back here for more!
Pin it now, Draw later!

Get the FREE Printable Drawing Guide