Hi! Welcome to another drawing tutorial. Today, we are going to learn how to draw a basketball with this step-by-step basketball drawing tutorial! More specifically, we are going to draw a basketball going into a hoop.
If you are familiar with the popular game, you’ll know that the objective of it is pretty straightforward: shoot a ball into a hoop to earn points and beat the other team.
Basketball is a great sport because of the minimal equipment required. Players don’t really need any additional gear—just some good shoes for jumping and running, a ball, and something for the hoop are the important components. The accessibility of basketball is part of the reason why it is so popular. In fact, in the early days, people just used a soccer ball for basketball games.
Normally, the game is played on a rectangular court, but the size will vary depending on the level you’re playing at. In the USA, professional basketball players use a 94 by 50 foot wide court. Each team can have five players on a court at any given time.
With all that said, let’s get to drawing a basketball!
If you enjoy drawing sports items, you might also like How to Draw a Football
Materials:
- a piece of paper
- a pencil for the guiding lines and sketching
- an eraser
- a black sharpie or a pen for the outlines
- markers or colored pencils for coloring
- our printable drawing guide (Join my Email List below to get this Tutorial)
Here are my RECOMMENDED Art Supplies!
- Crayola Coloring Set (140 Pieces – Mega Value!)
- 24 Colored Crayon Set
- A4 Printer Paper
- Crayola Coloring Pencils
- HP Home Printer with Instant Ink!
Time needed:
10 minutes.
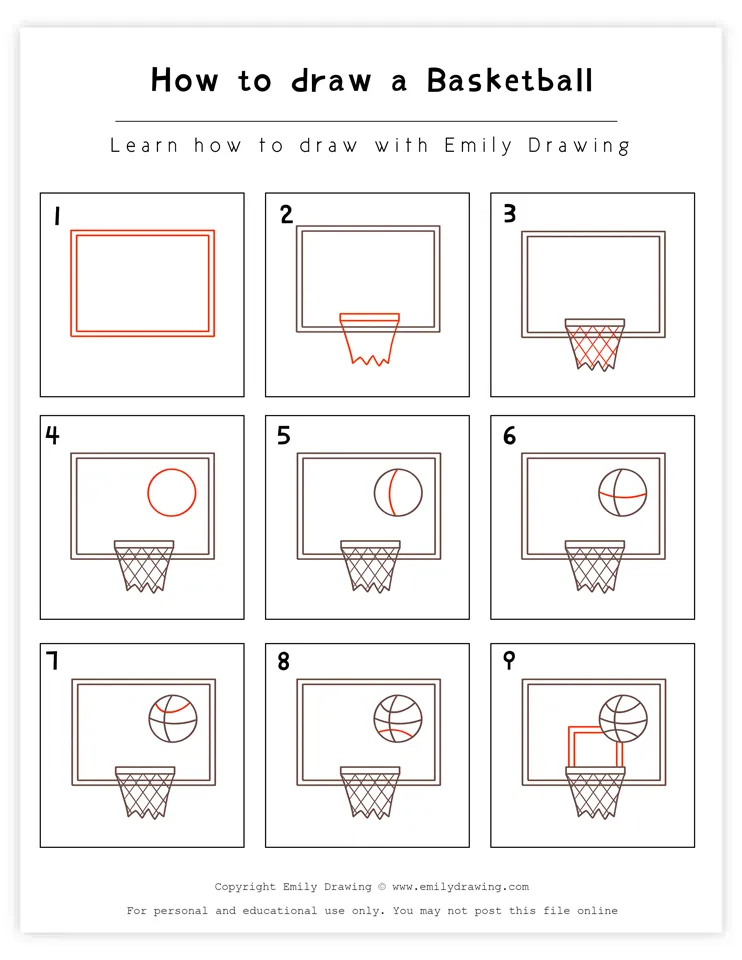
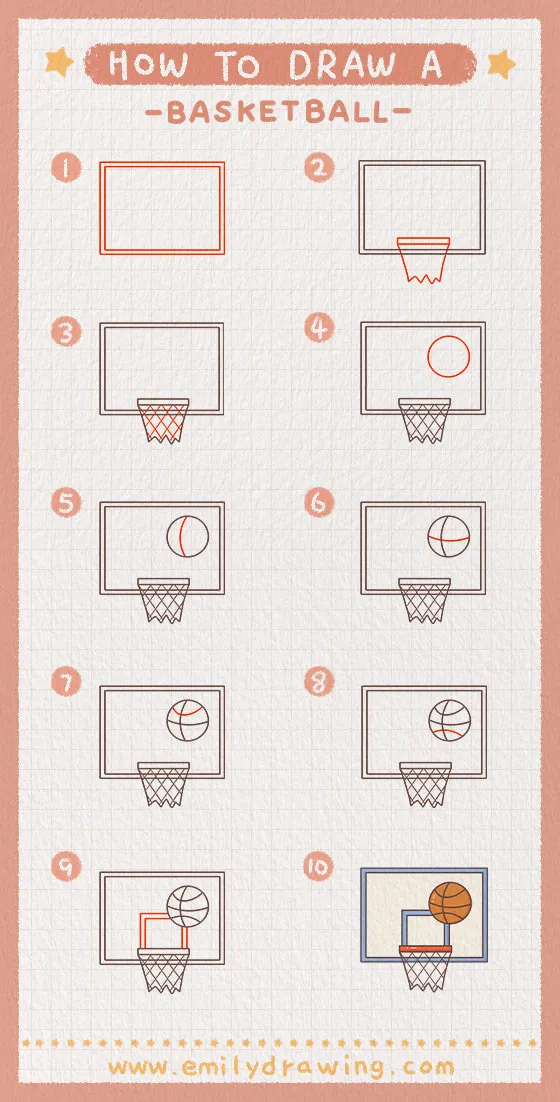
How to Draw a basketball — Let’s get started!
Step 1 – Draw the backboard.
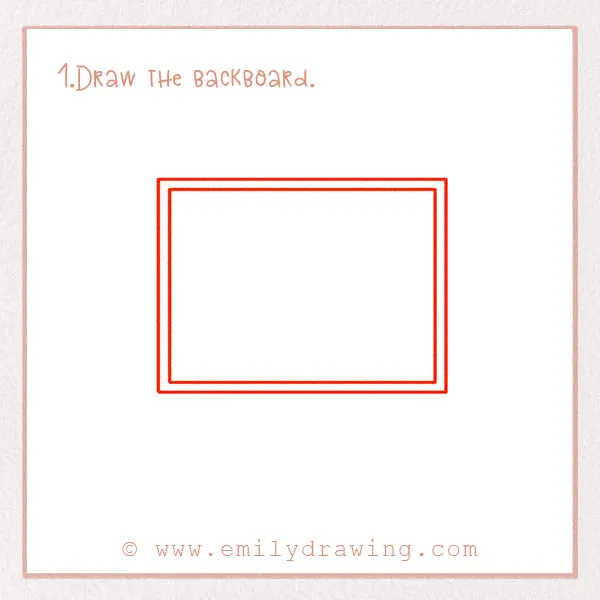
Let’s start off by drawing the backboard, which allows players to bounce the ball into the hoop easier.
Draw a big rectangle that takes up nearly the whole page. Then, draw another smaller rectangle right inside. Great job!
Step 2 – Start drawing the hoop.
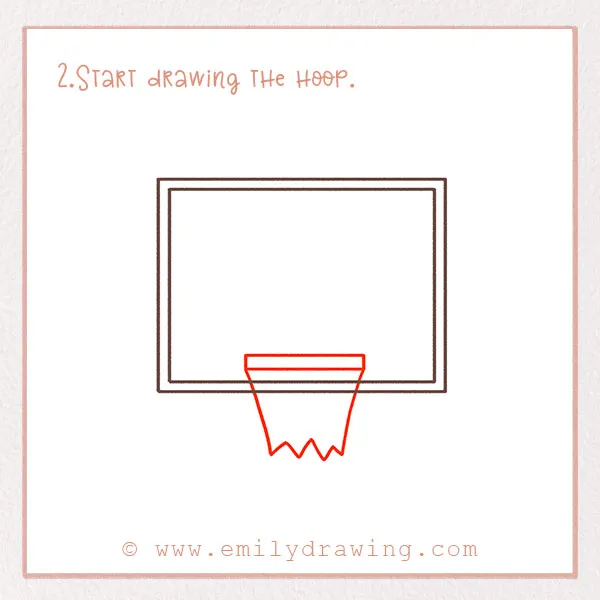
We mentioned that the hoop is an essential part of the game, so let’s add it now!
Near the bottom of the backboard, draw a short and skinny rectangle. Next, draw two slanting lines for the outline of the net. Lastly, draw a zig-zag line to connect those. Your outline of the net should overlap the backboard a little bit. Look at the photo for help!
For more tutorials involving circular shapes, check out How to Draw a Watermelon or How to Draw Earth.
Step 3 – Finish the net.
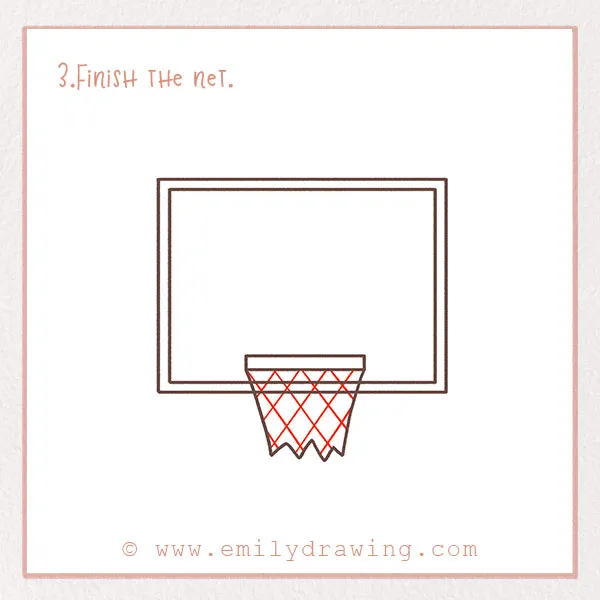
Let’s finish the basketball net in this step. Even though the professionals play with a net and our drawing will have one, it’s not entirely necessary. If you go to a court at a nearby park, you might not have a net, or it might be a different material such as small chains.
Anyways, let’s add that now. Draw four slanting lines in one direction, and then the other, forming a crosshatch pattern. Awesome!
Step 4 – Add the basketball!
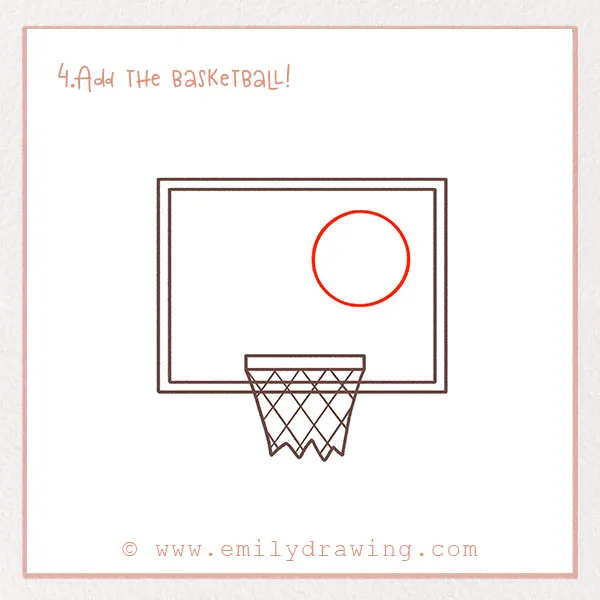
We are going to draw the picture as if someone just shot the ball and it is about to go in the net. So, let’s add the basketball in mid-air right now!
On the right side of the backboard, draw a circle for the basketball. It should look like it is overlapping with the backboard.
If you enjoy creating patterns, consider exploring How to Draw a Snake or How to Draw a Giraffe for similar techniques.
Step 5 – Add detail to the basketball.
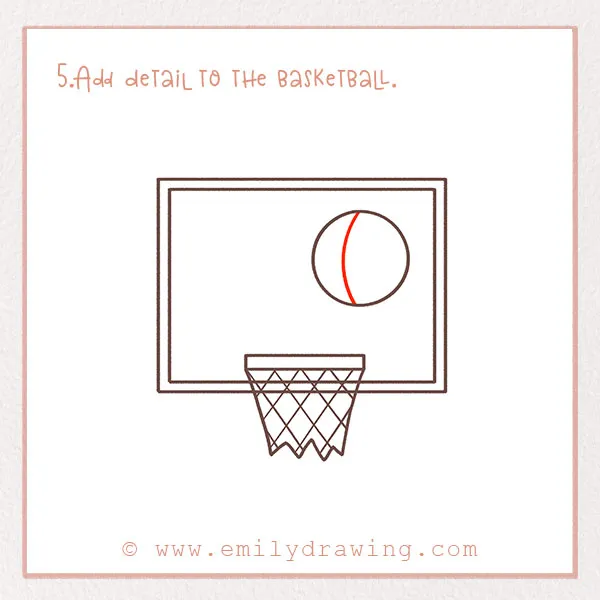
This is a quick step. Simply draw a vertical curved line in the basketball to begin creating a more realistic basketball drawing. This is the first of several steps to form the pattern on a standard basketball. This pattern helps players get a grip on the ball as well as have accurate steering and aim.
Step 6 – Draw more detail to the ball.
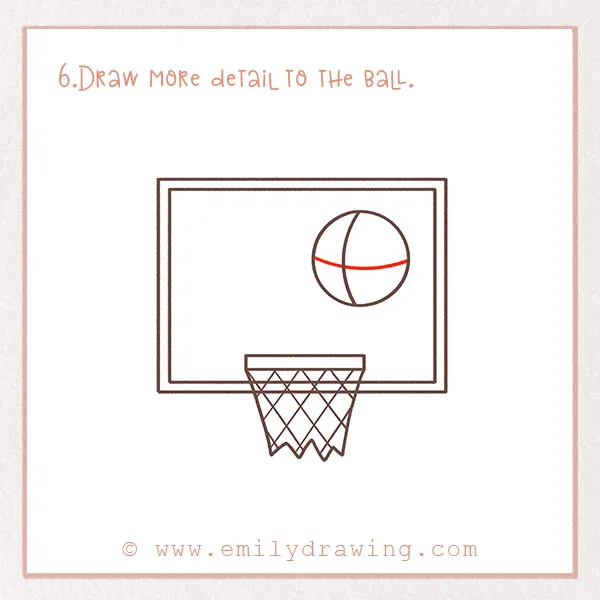
Once again, add a line to your basketball. Draw another curved line, this time spanning horizontally across the ball. Your ball should start having the illusion of being a sphere because of these lines. Good job!
Step 7 – Keep filling in the ball’s pattern.
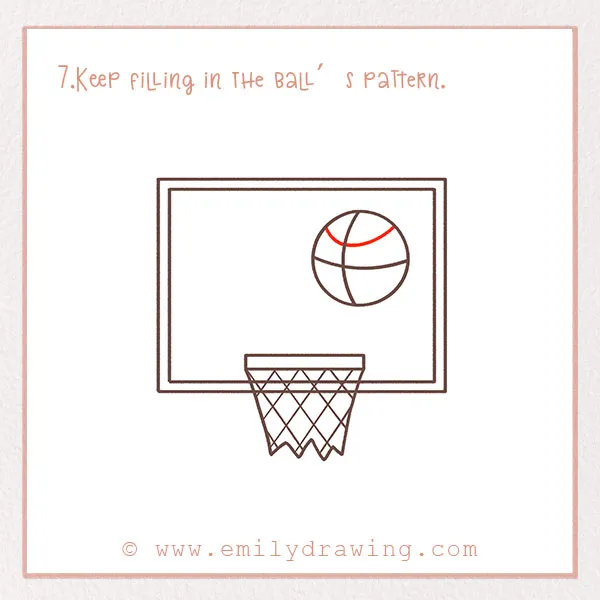
Draw another curved line above the one you just drew in Step 6. It should be a little bit more curved and shorter this time. Check out the photo!
Step 8 – Continue adding detail to the basketball.
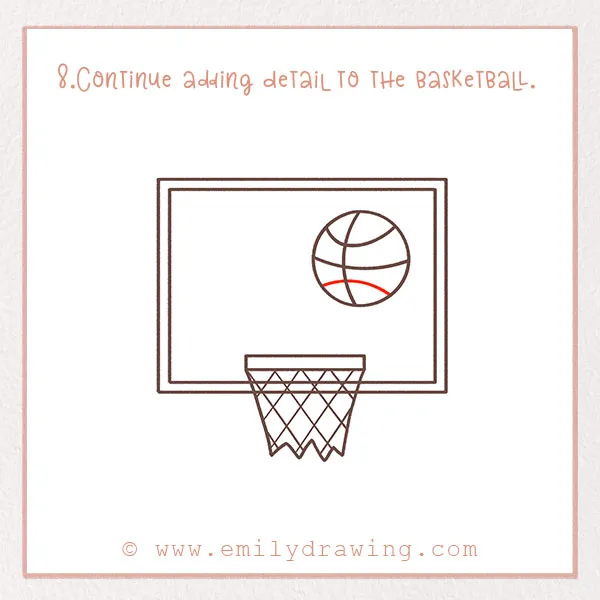
Next, add one more line, this time towards the bottom of the ball. This one should be curved too, but in the opposite direction.
Good job! This completes the ball’s pattern.
Step 9 – Add detail to the backboard.
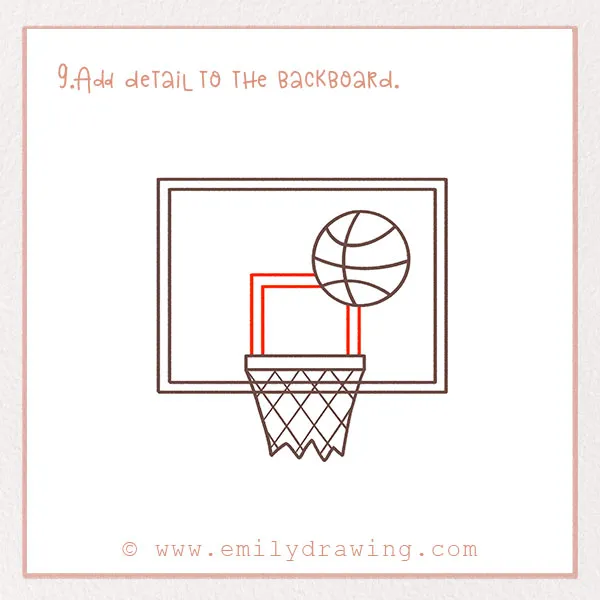
Let’s move back to the backboard for this step.
Oftentimes, backboards have a smaller box painted onto them so players can have even better aim and accuracy. Let’s add that square now.
Right above the net, draw a square. It should be slightly cut off by the basketball. Draw another rectangle right inside it. Check out the photo. Awesome job! Just one more step.
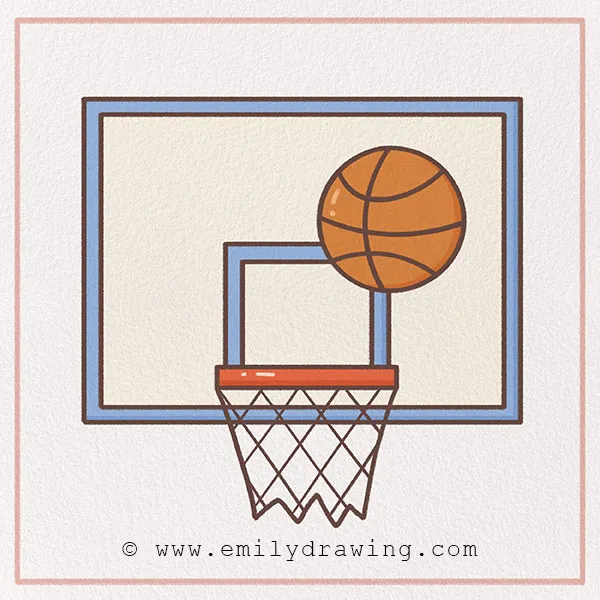
Step 10 – Color in your basketball!
Awesome, you’ve made it to the last step of this easy basketball sketch—coloring! Find some colors and fill in your picture. Often, basketballs are orange, but you can make it your own. Fill in the rest of the picture, too!
Yay! You’ve finished our ten-step basketball tutorial. If you want to do more tutorials like this one, explore our site because we have tons! There are many animal, plant, and food-themed drawings to find. There are also more people-related ones, like how to draw a firefighter.
Make sure to share your drawing with your friends and family! Maybe they’d like to do this tutorial, too, or one of the others on our site.
Pin it now, Draw later!
Get the FREE Printable Drawing Guide