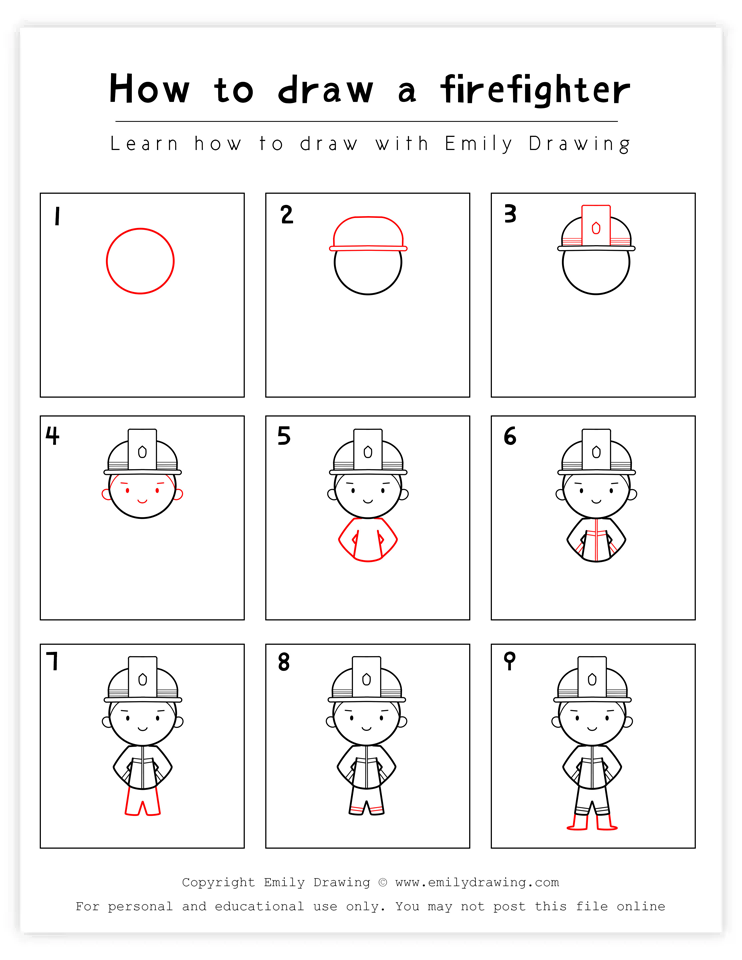
Hello, and welcome to another fun, easy-to-follow tutorial on our site! Today, we are going to learn how to sketch a firefighter in a fun and simple way, one of the bravest members in society today!
Firefighters can be traced back to ancient times, and have long been a staple of modern society around the world.
Although the word “fire” is in their name, they actually respond to a wide variety of events, like earthquakes and floods. They are first responders for housefires, wildfires, and other building emergencies—they are, needless to say, very important members of the world. In addition to these skills, some firefighters also have basic medical training.
Let’s get started! Happy drawing!
Materials:
- a piece of paper
- a pencil for the guiding lines and sketching
- an eraser
- a black sharpie or a pen for the outlines
- markers or colored pencils for coloring
- our printable drawing guide (Join my Email List below to get this Tutorial)
Here are my RECOMMENDED Art Supplies!
- Crayola Coloring Set (140 Pieces – Mega Value!)
- 24 Colored Crayon Set
- A4 Printer Paper
- Crayola Coloring Pencils
- HP Home Printer with Instant Ink!
Time needed:
15 minutes.
How to Draw a Firefighter — Let’s get started!
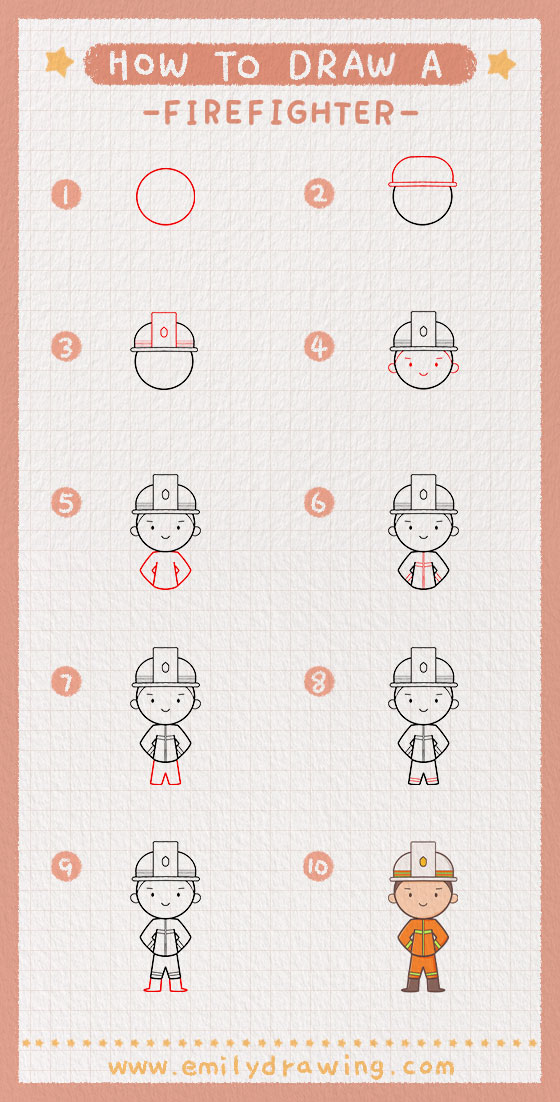
Step 1 – Draw the head of the firefighter.
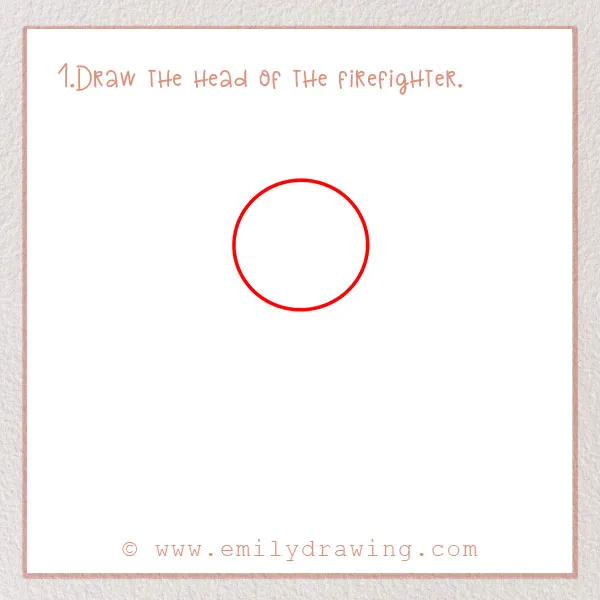
Let’s start by drawing the head of the firefighter. Three-fourths of the way up the page, draw a circle a few inches wide.
Step 2 – Add the hat.
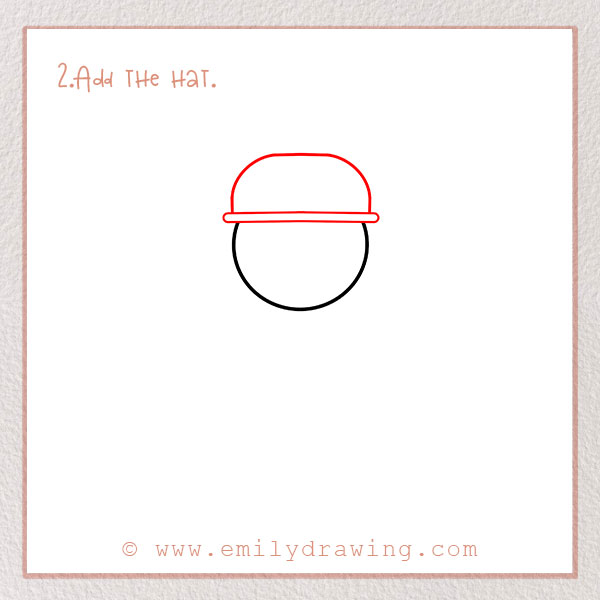
Firefighters, like many rescue workers, need to wear protective headgear. Their red hard hats are one of the most recognizable parts of their uniforms. Let’s add that now!
To do this, draw a long, skinny, rectangle on three-quarters of the way up the head. On top of this, draw a semi-circle shape to form the top of the hat.
Step 3 – Add detail to the hat.
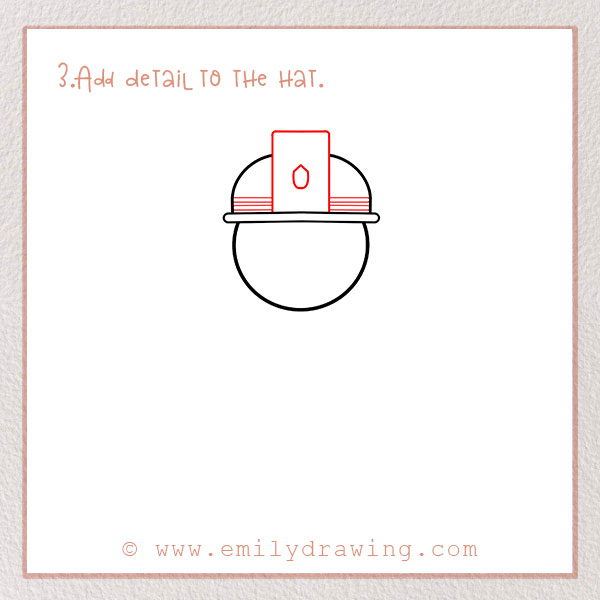
In the middle of the hat, draw a rectangle. Inside the rectangle, add a badge shape. This should be an oval shape, but with a point at the top.
Then, right above the brim of the hat, add four skinny horizontal lines. They should be close together to form a texture.
Step 4 – Add the firefighter’s face!
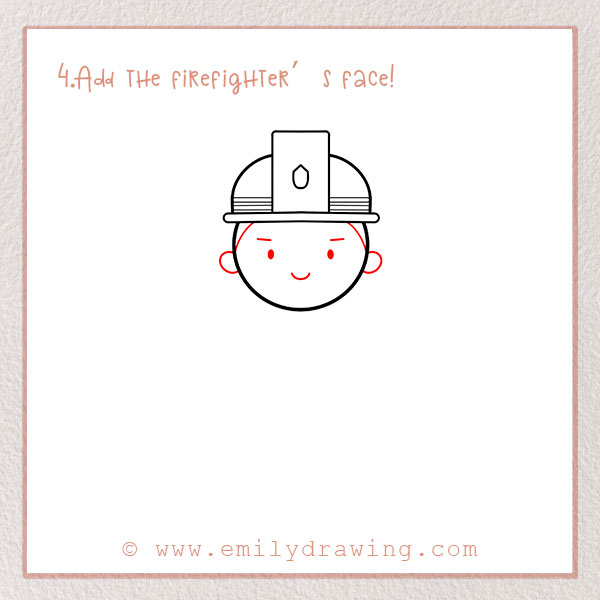
We need to add a face to the firefighter!
Let’s add the ears first. Draw two small semi-circles on the side of the head. Next, add two small dots for the eyes. Then, add eyebrows above the eyes. They should each be a short slanted line.
Next, draw a mouth. Add a small curved line a few inches centered below the eyes, so that it looks like he’s smiling.
Lastly, add a hairline. Above each ear, draw two slanted lines extending upwards to the hat.
Step 5 – Start to draw the firefighter’s outfit.
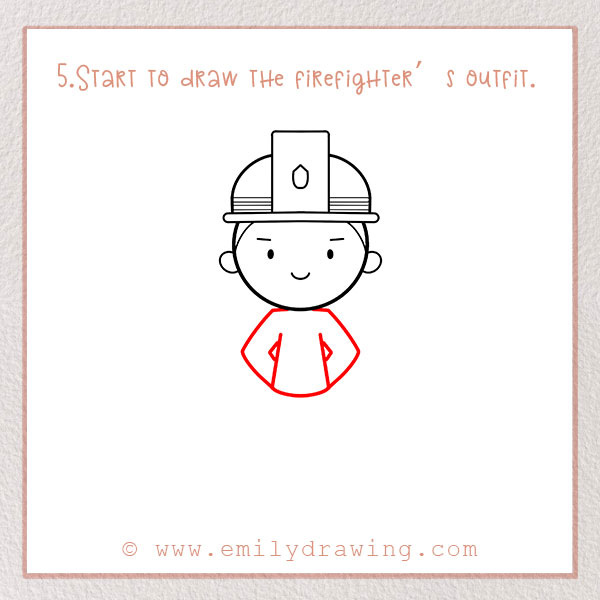
Firefighters wear uniforms that can withstand extreme conditions, like hot and cold temperatures, smoke, and uneven ground. They are normally made of very thick fabric.
We’re going to the top part of the uniform in this step. Draw two bent lines for the arms. Then, add a rectangular shape for the torso. Refer to the photo for the exact shape.
For more character drawing guides, check out How to Draw Santa Claus and How to Draw Peppa Pig.
Step 6 – Add detail to the uniform.
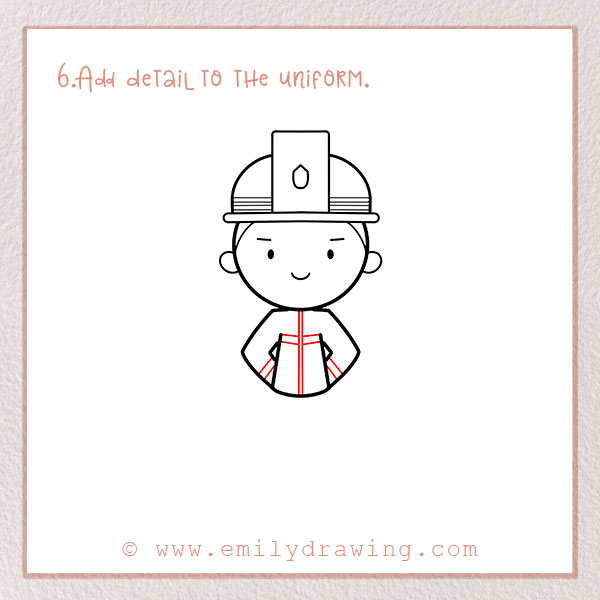
In this step, we will add detail to the outfit. Draw two skinny vertical lines down the middle of the shirt very close together. Then, add two horizontal lines going across his shirt.
Lastly, let’s add detail to the sleeves by adding two lines at the wrist. Look at the photo for reference.
Step 7 – Draw the pants of the outfit.
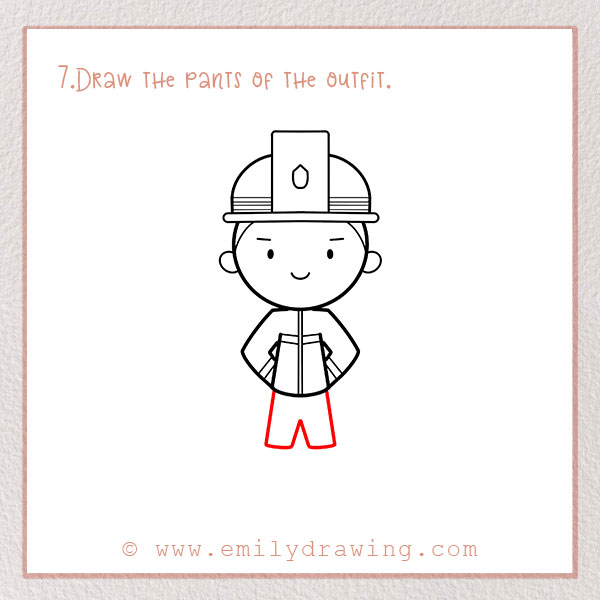
Let’s start to draw the bottom part of his uniform now! Draw two rectangular shapes to make the pants of the uniform. Leave a few inches of space at the bottom of the page for the rest of the drawing.
Step 8 – Add detail to the pants.
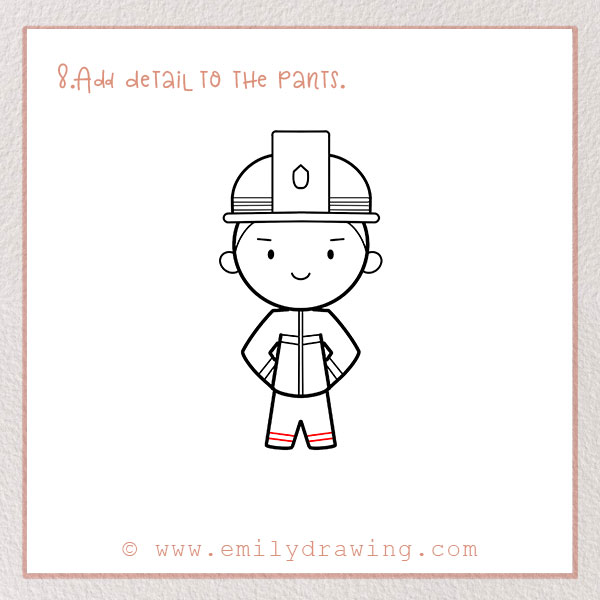
Draw two horizontal lines on each pant leg. This represents the reflective part of the uniform so that people, like other firefighters, can see them even in the dark or other bad conditions.
Step 9 – Add the firefighter’s boots!
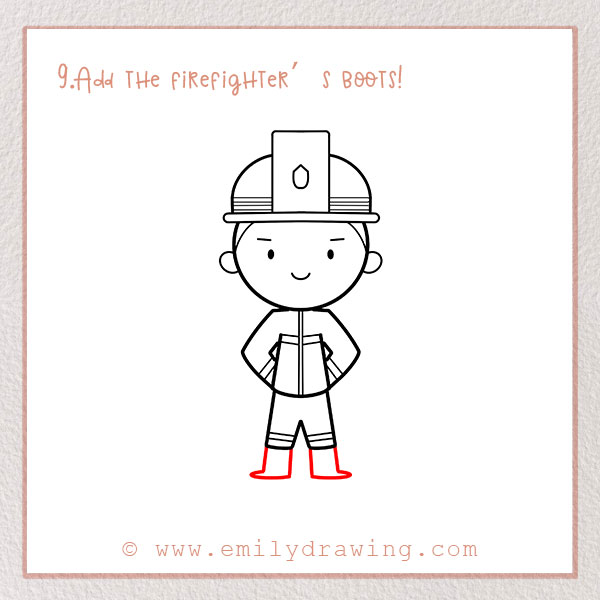
He needs boots that help him walk in different types of buildings and terrain. Let’s add boots to our firefighter!
Add two more, slightly slanted, rectangular shapes at the bottom of each pant leg. Add a small point on both boots to represent space for toes.
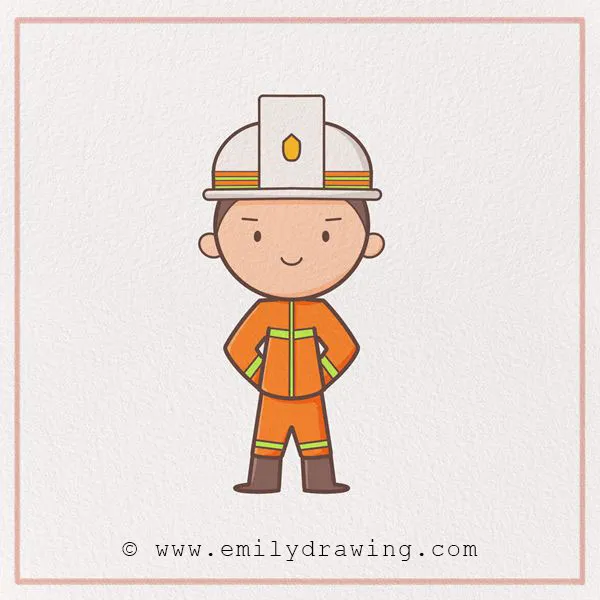
This completes our firefighter illustration!
Step 10 – Color in your drawing!
Last but not least, it is time to add some style to the firefighter! Often, firefighters wear red, yellow, or tan uniforms, in addition to a hard hat. Color your creation in! Fill in the surrounding area however you like as well! Is your firefighter outside? Inside? In front of the fire station? Be creative and have fun.
There you go! Great job! We hope you enjoyed our fireman drawing tutorial and step-by-step guide on how to draw a firefighter, and are happy with your finished artwork. Show it to friends and family!
Did you enjoy this tutorial? Did you learn new skills? Comment what you loved most about it below! Feel free to suggest more tutorials you’d also like to do.
If you’re interested in drawing more people, you might also enjoy our tutorials on How to Draw an Angel and How to Draw a Fairy.
Pin it now, Draw later!
Get the FREE Printable Drawing Guide