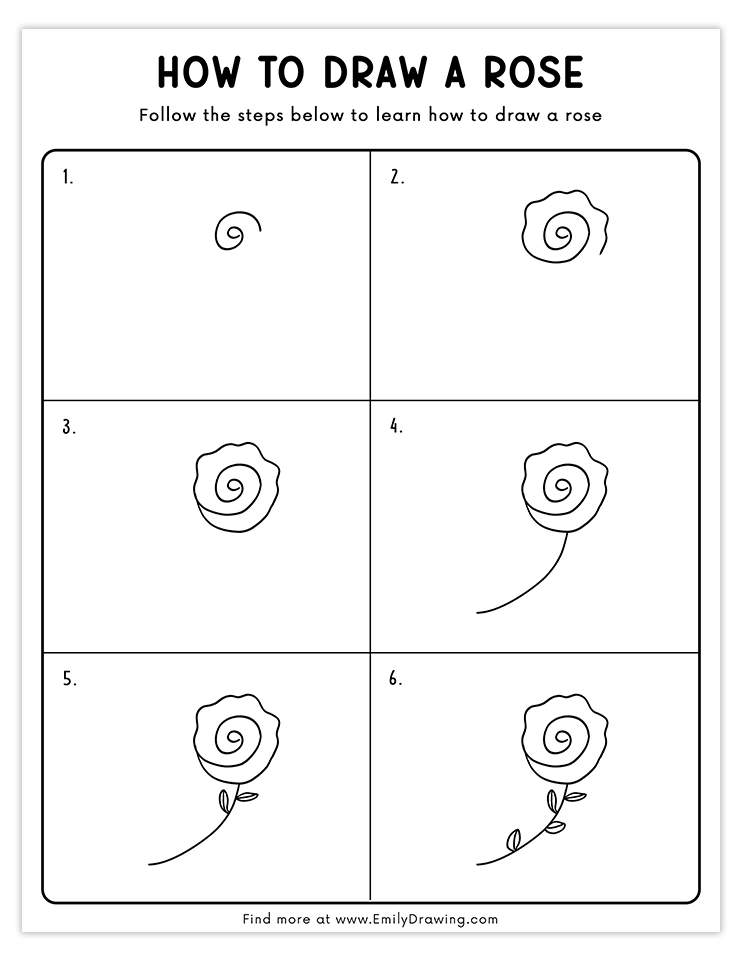
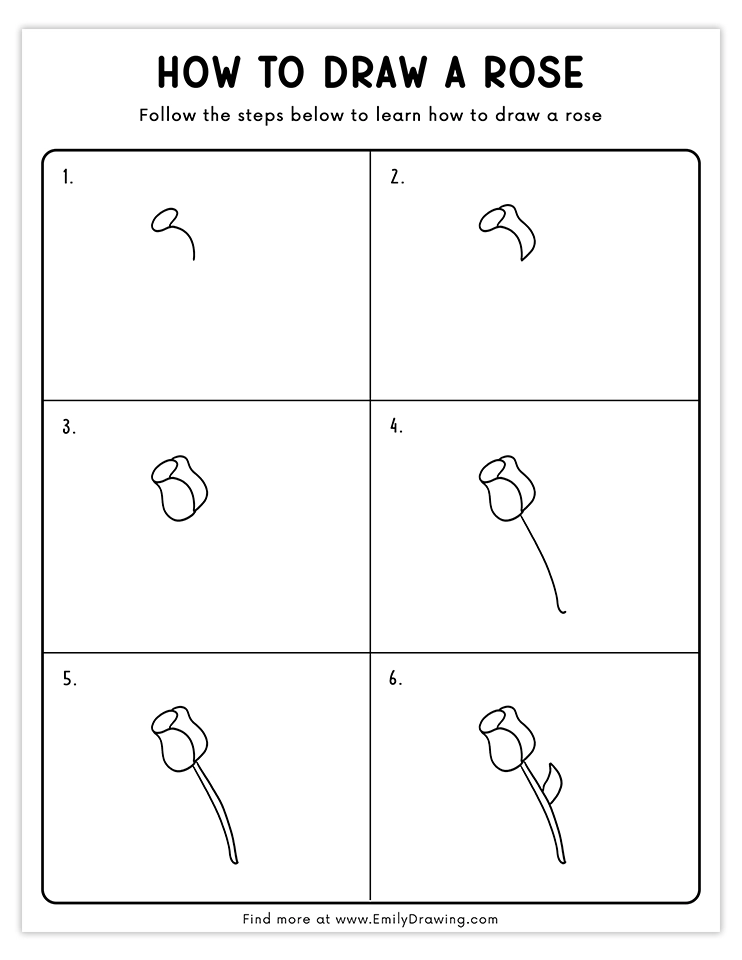
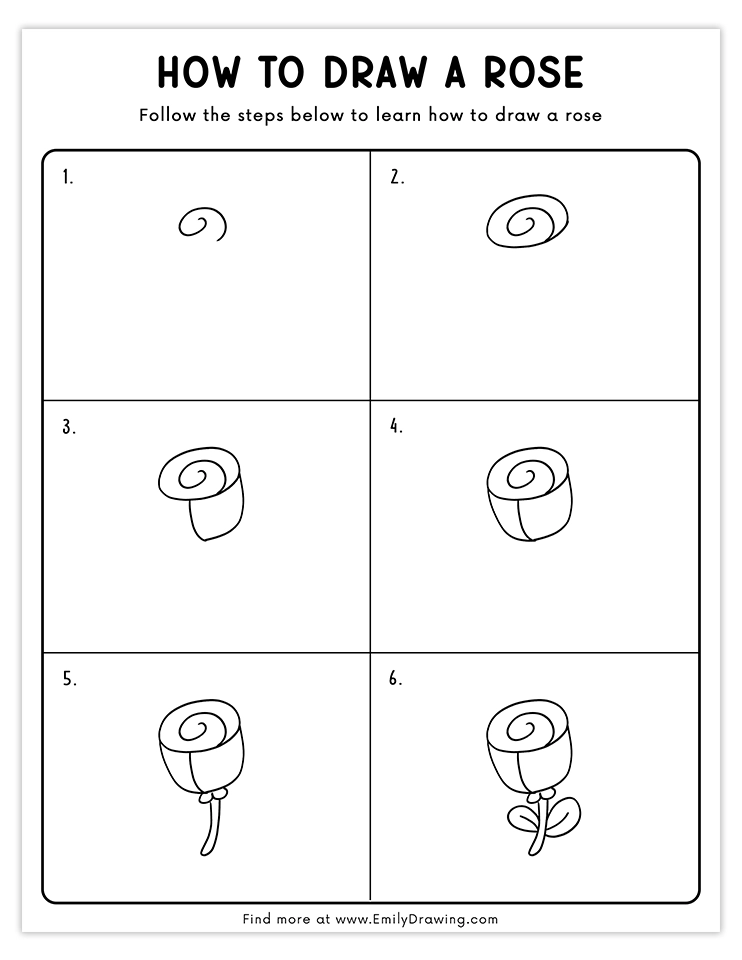
Roses are unique and beautiful flowers. Their delicate and sweet-smelling petals are especially one of a kind. In this rose drawing tutorial, we’ll learn how to draw a rose!
A common symbol of love, roses are especially popular on Valentine’s Day as a gift for loved ones, often accompanied by chocolates. They can be white, red, or pink! Their petals are especially unique.
Did you know roses grow on big bushes? Another thing you might know about roses is that they have thorns, so be careful if you’re ever holding one! Scientists believe that roses have thorns to protect themselves from animals who might want to eat them due to their sweet fragrance.
Ready? Get some drawing materials, and let’s get started!

Materials:
- a piece of paper
- a pencil for the guiding lines and sketching
- an eraser
- a black sharpie or a pen for the outlines
- markers or colored pencils for coloring
- markers or colored pencils for coloring
- our printable drawing guide (Join my Email List below to get this Tutorial)
Here are my RECOMMENDED Art Supplies!
- Crayola Coloring Set (140 Pieces – Mega Value!)
- 24 Colored Crayon Set
- A4 Printer Paper
- Crayola Coloring Pencils
- HP Home Printer with Instant Ink!
Time needed:
12 minutes.
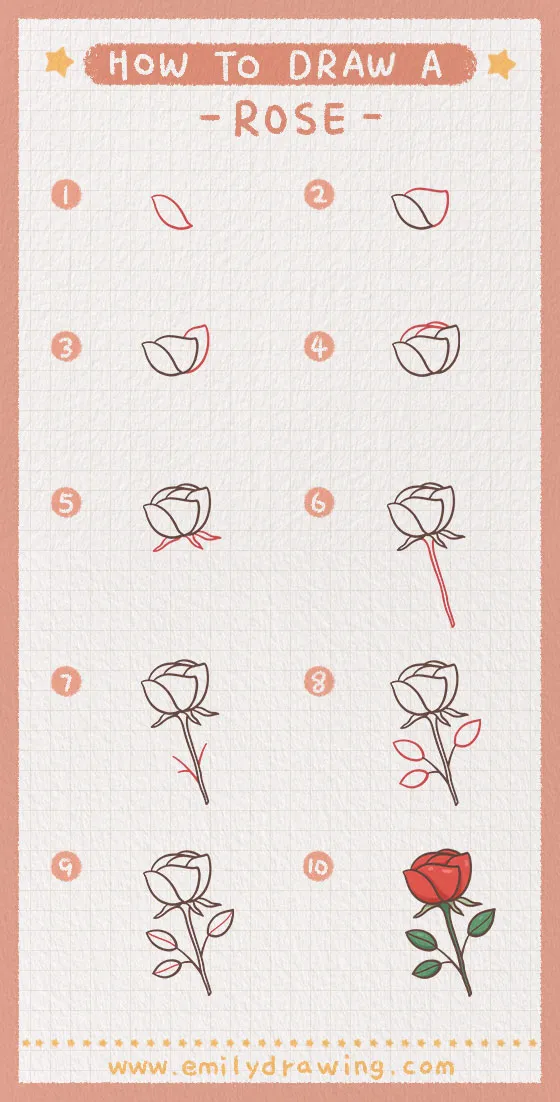
How to Draw a Rose — Let’s get started!
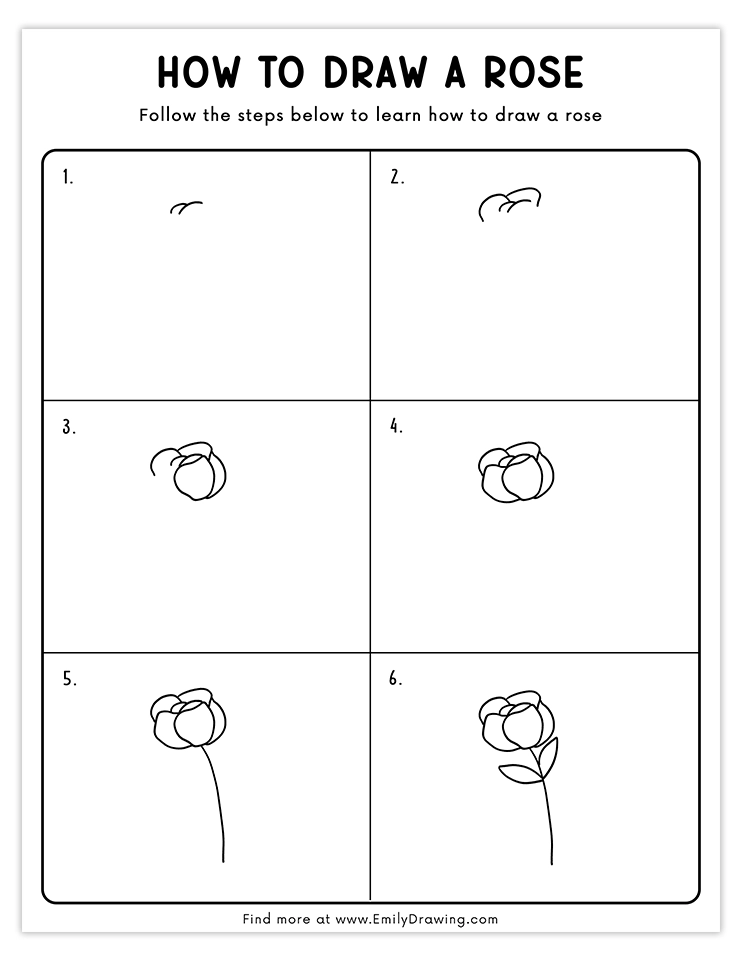
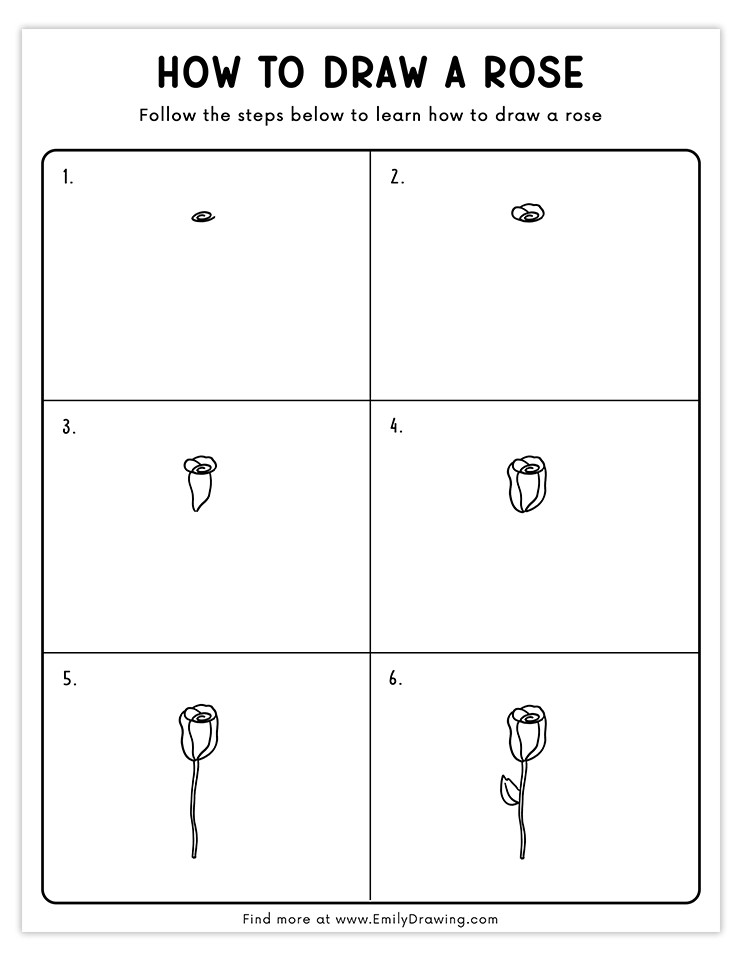
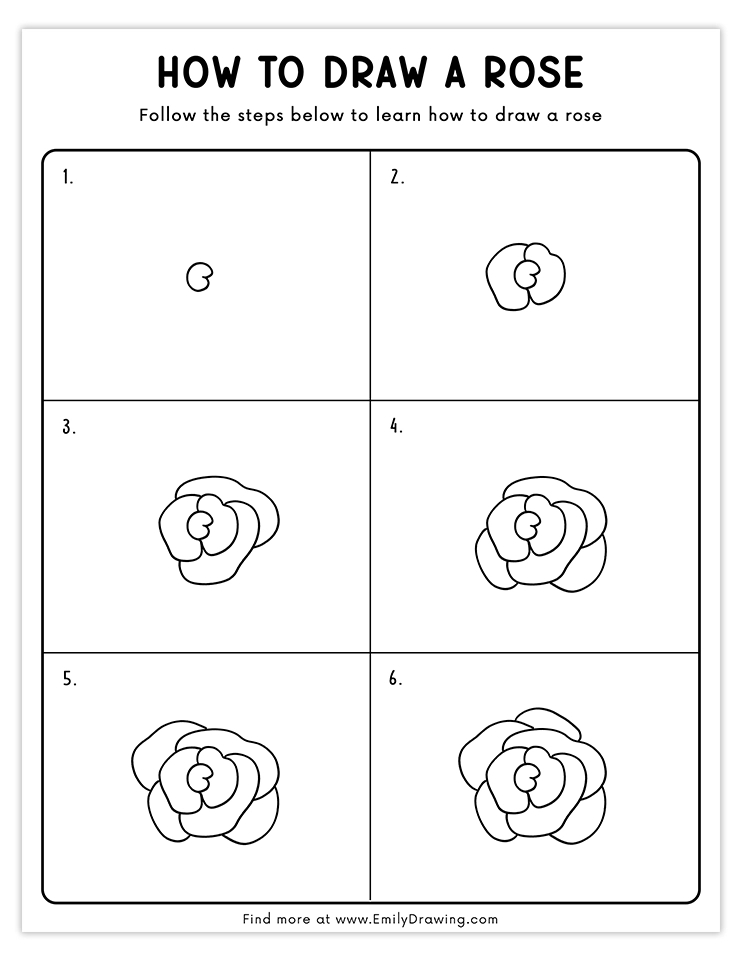
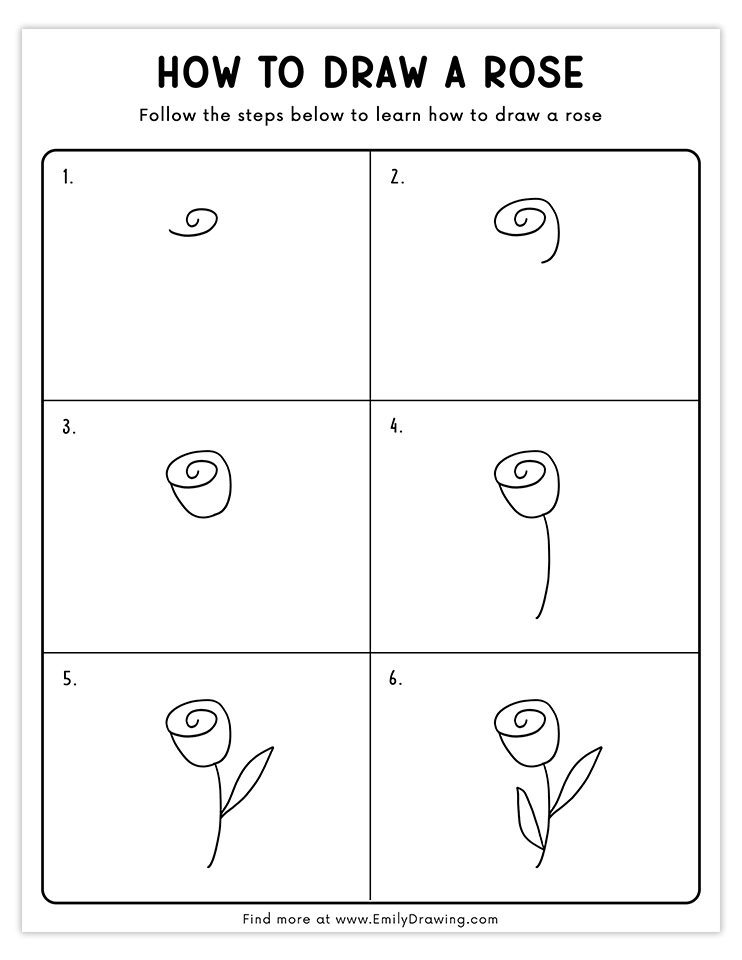
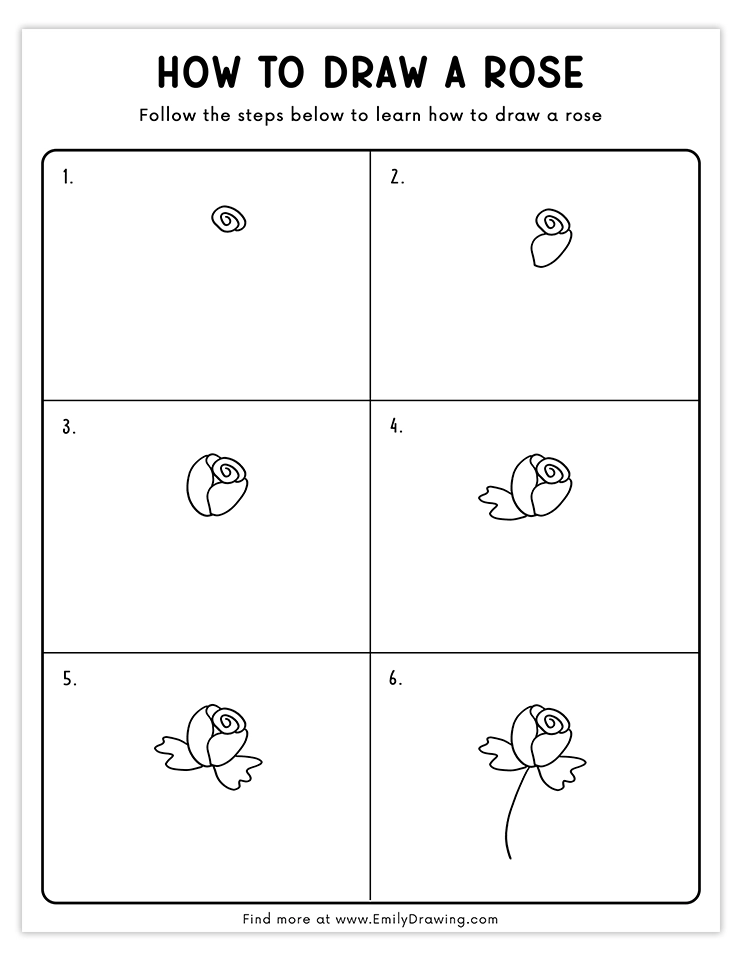
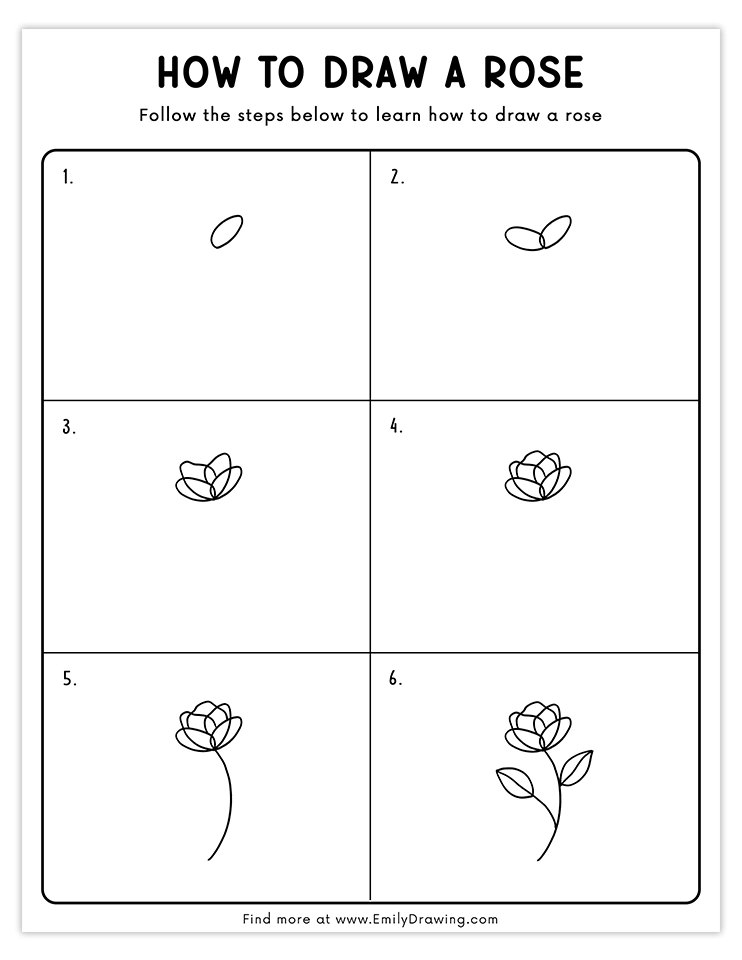
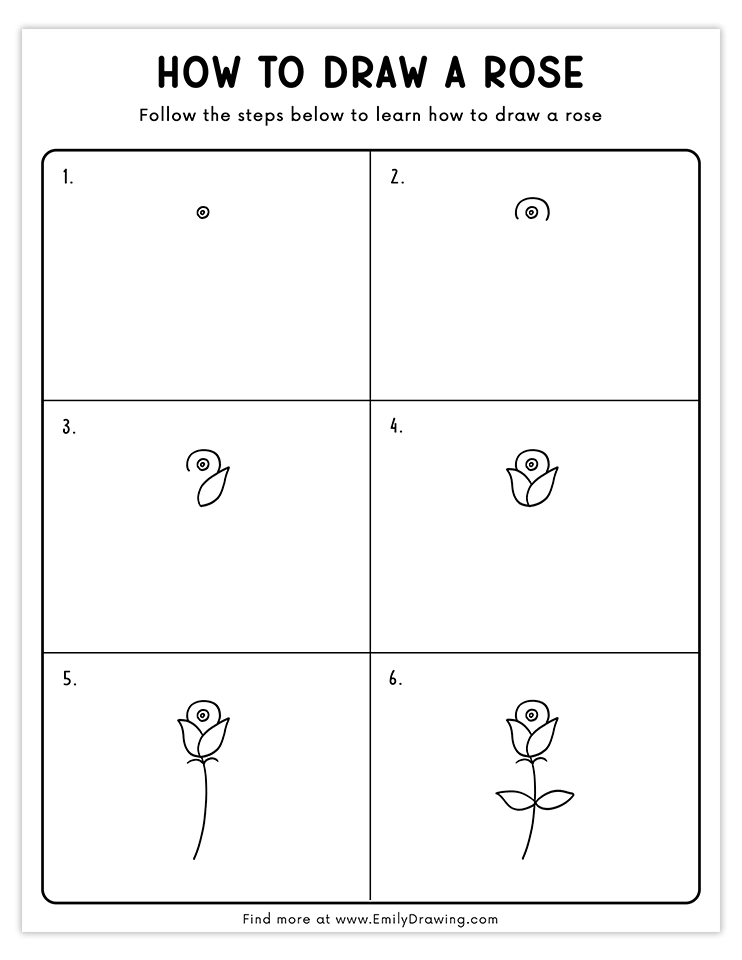
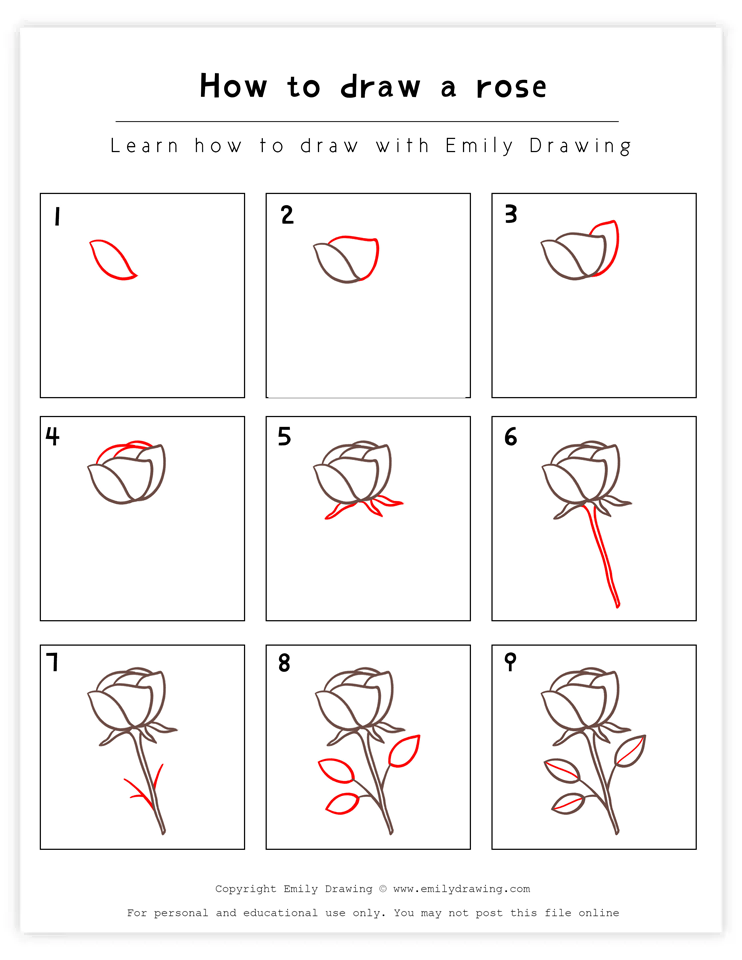
Step 1 – Draw the first petal.
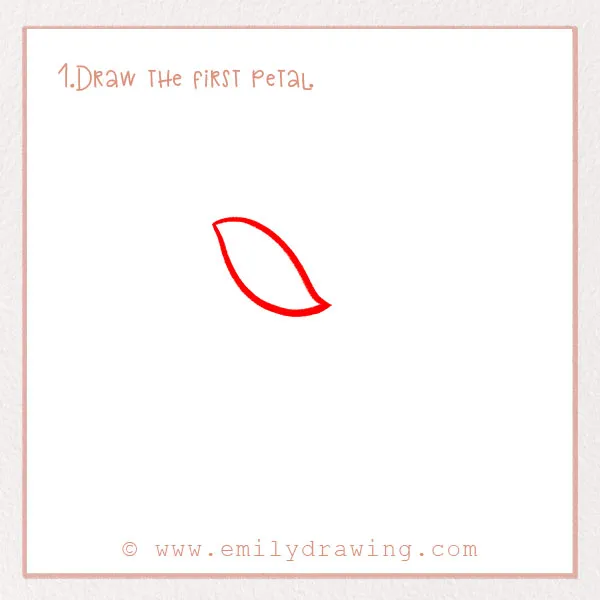
Let’s start by drawing the first petal of the rose.
In the upper-left area of the page, add a leaf shape—it should be an oval, except with pointed ends. Have it placed diagonally because we are going to add more petals!
Step 2 – Add another petal.
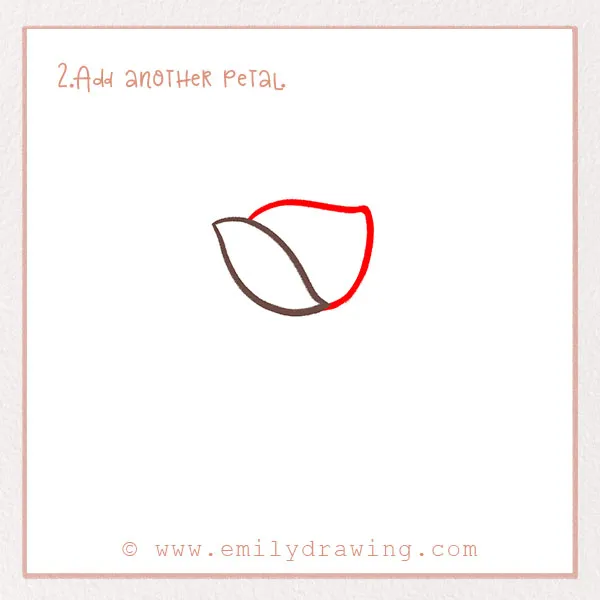
Rose petals are a bit different from other flower petals, and drawing them requires more variety of shapes. We want to draw our rose so that it looks dimensional.
For this next petal, draw a triangular shape with slightly curved lines—refer to the photo! There should be plenty of room for the rest of the drawing.
Step 3 – Add another petal!
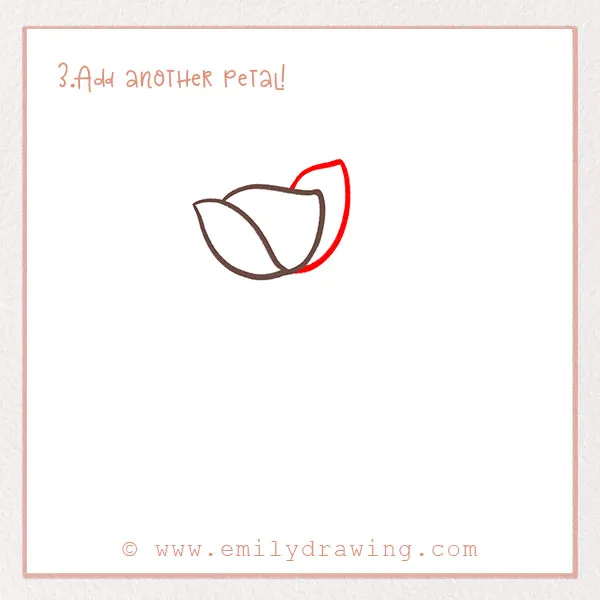
Let’s add another petal! On the right side, draw another petal. Make it a bit taller and narrower than the first two and pointed upwards to the right. It should look like it is behind the middle petal.
Step 4 – Draw the remaining petals.
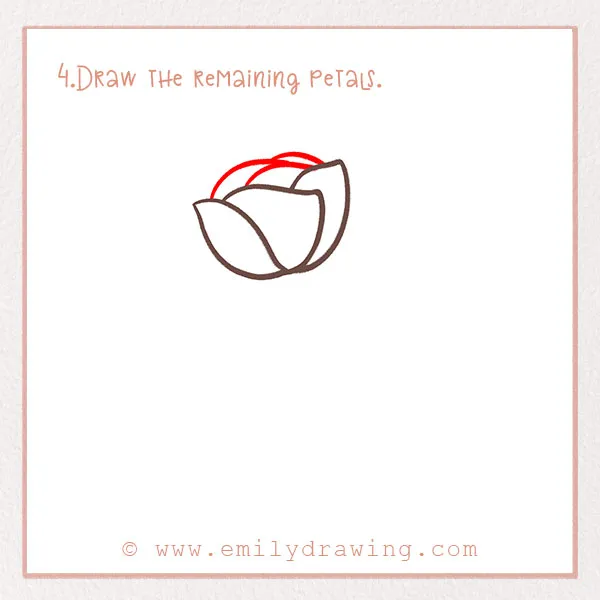
We’re going to add the rest of the petals in this step. We want to add some depth here. Draw three curved horizontal lines on top of the other petals. They should be close together.
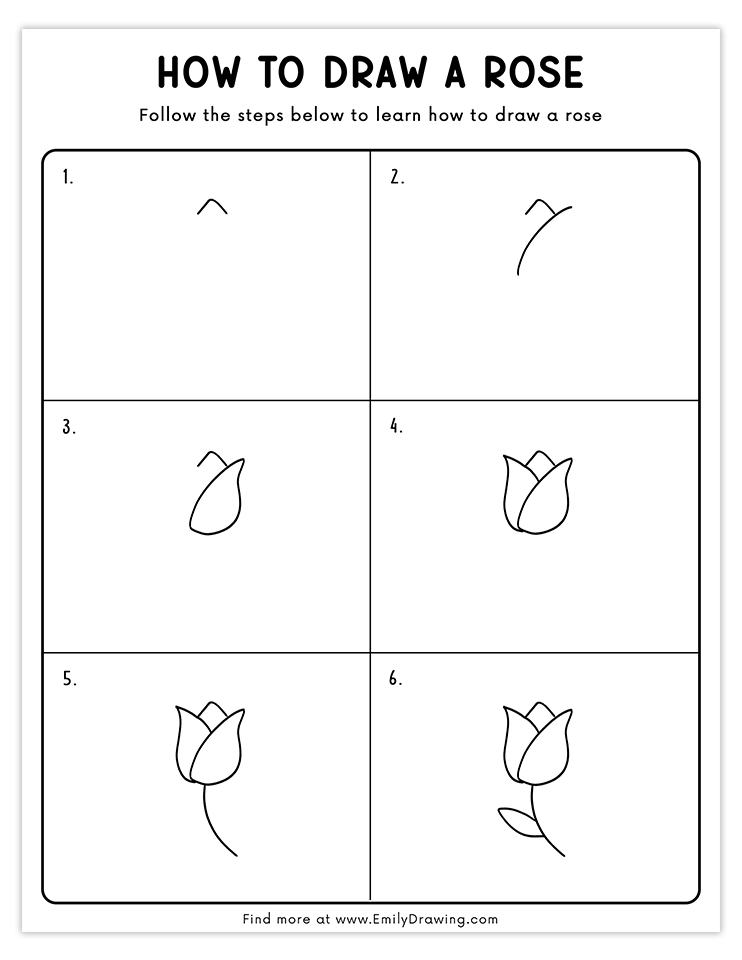
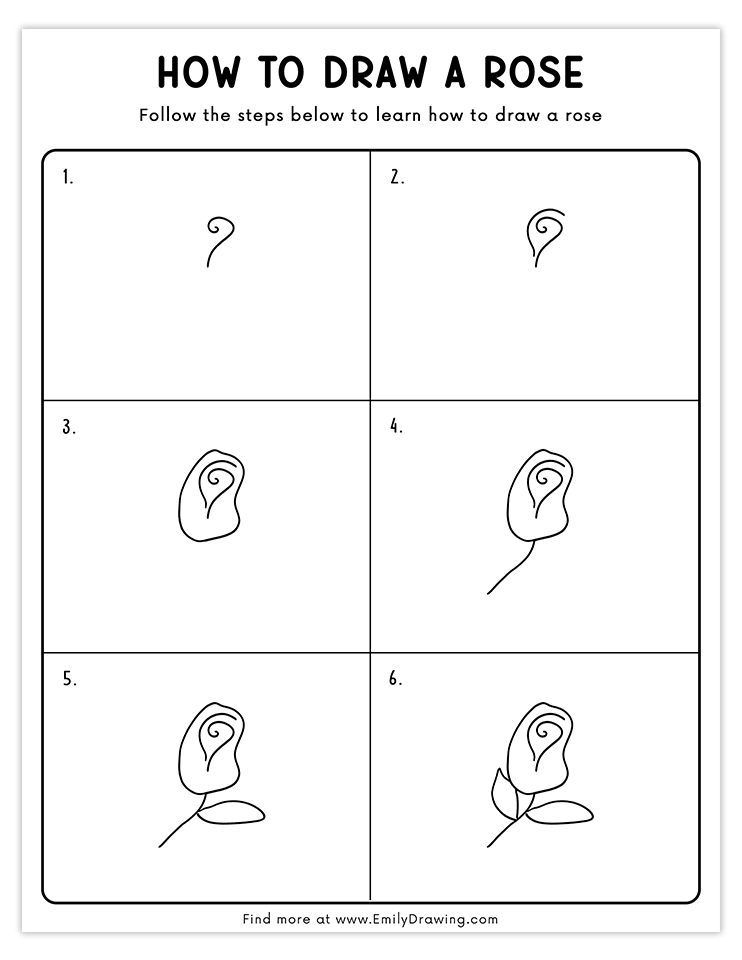
Step 5 – Draw the very top of the stem.
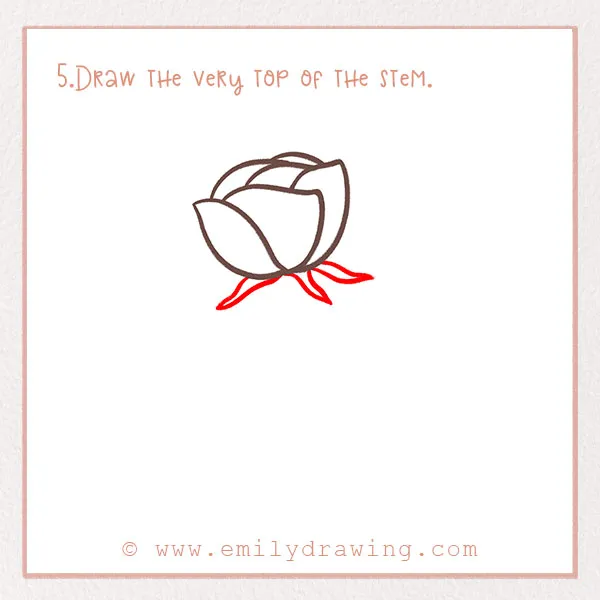
Let’s draw the area right underneath the petals and at the top of the stem. This part of the rose is actually called the sepal.
Refer to the photo for this step—these will be skinny, pointed shapes going downwards. Draw three of them: on the left, center, and right.
Step 6 – Draw the rest of the stem.
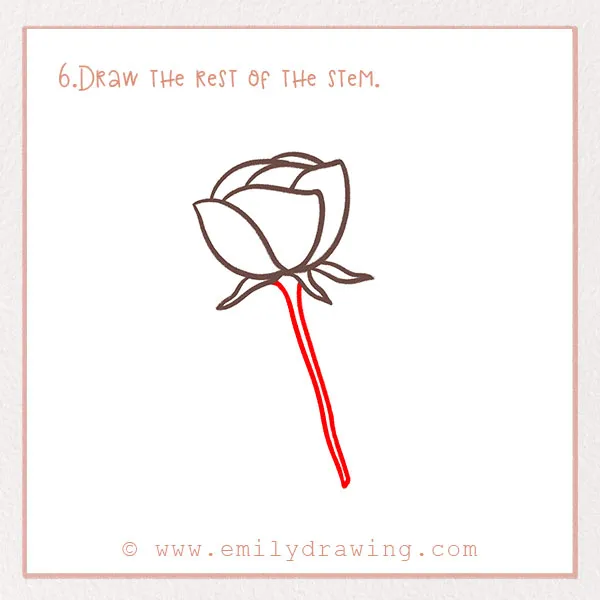
Of course, all flowers have stems! Let’s add a long, skinny stem to our rose now.
From the base of the petals, draw two lines very close to each other. Make them a little imperfect to make it look realistic! Look at the photo to see what we mean.
Draw them until nearly the end of the page. Then, connect them together with a line at the bottom. Now our rose has a long stem and could be part of a bouquet!
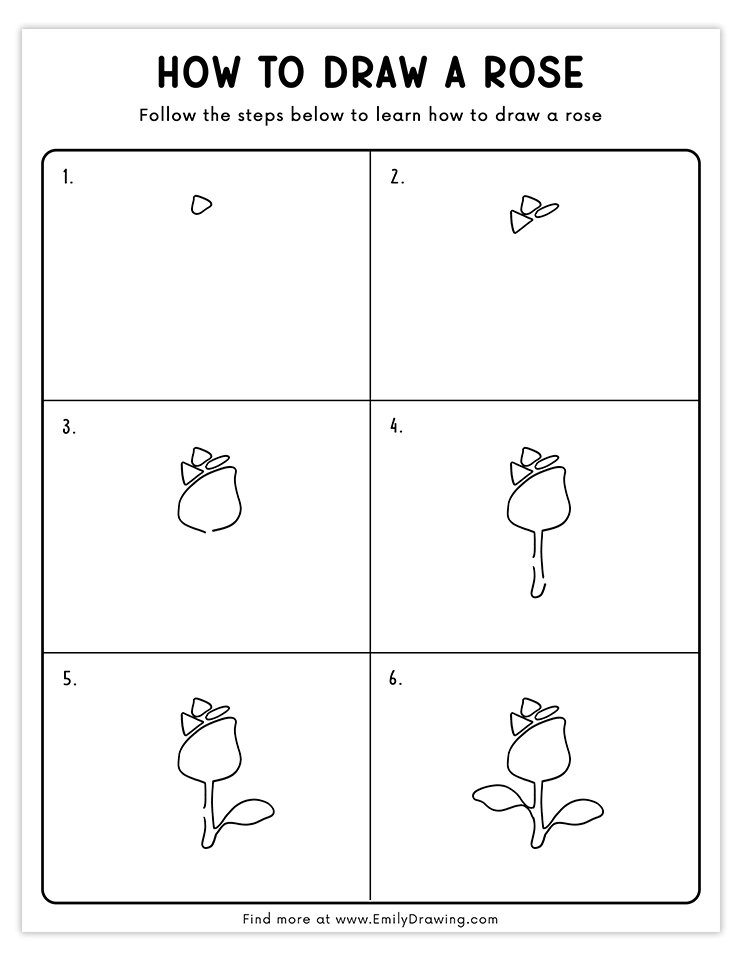
Step 7 – Add detail to the stem!
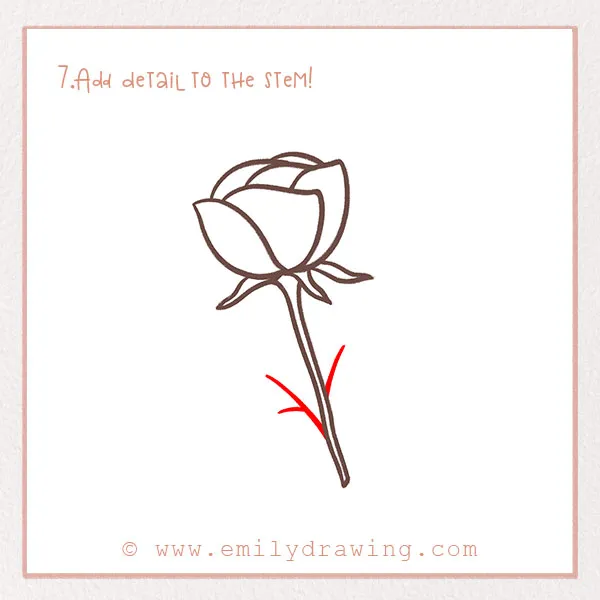
We’re going to add some detail to the stem in this step.
On the right side of the stem, draw a short and slightly curved diagonal line. It should be about an inch long.
Do the same thing on the left side of the stem. Then, add another smaller line going off from it. We will finish these in the next step by adding leaves.
Step 8 – Draw leaves on the stem.
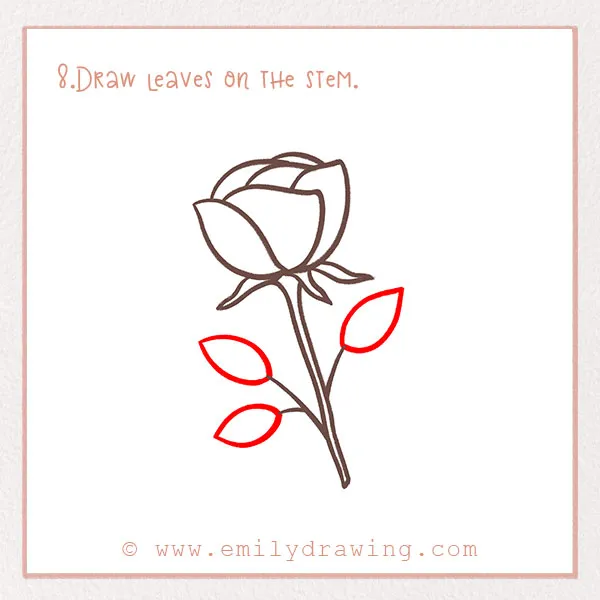
Next, let’s add some leaves to the rose! At the end of each of the small branches you drew in the last step, draw a leaf. They should all be similar sizes and shapes.
For more plant drawing guides, check out How to Draw a Cactus and How to Draw a Tree.
Step 9 – Add more detail to the leaves.
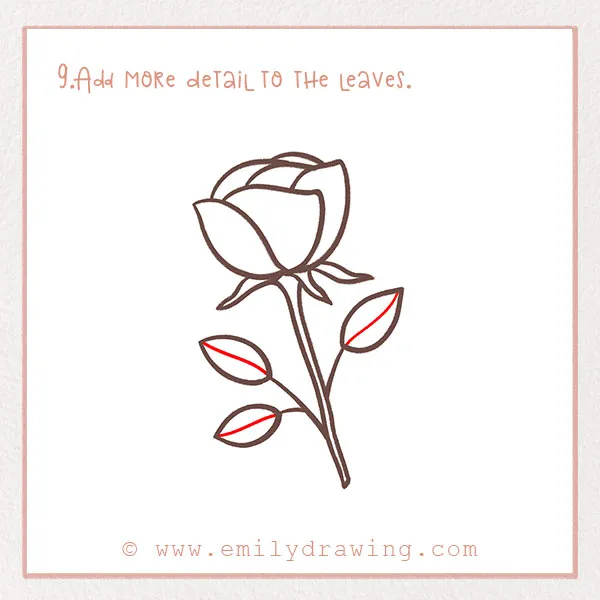
Lastly, add some detail to the inside of the leaves. To do this, draw a line down the center of each leaf going from one end to the other. These lines symbolize the veins on leaves.
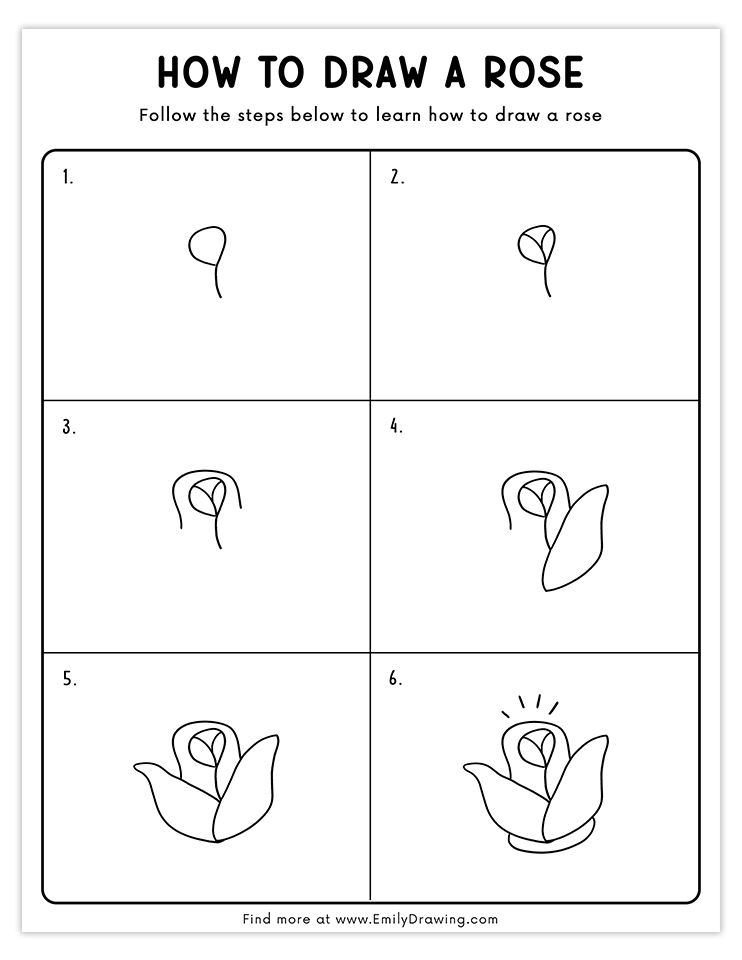
Step 10 – Color in your creation!
Find some colors and take some time to color in your rose! Reds, greens, and pinks are some colors that you could use. Color in the background, too! And of course, have fun with it.
Great job! Did you enjoy this tutorial? Let us know in the comments below, and share your newly created symbol of love with loved ones!
Now you have a beautiful rose from this step-by-step flower drawing in your portfolio! Browse our other tutorials on this site for more step-by-step projects like this easy rose sketch!
If you’re interested in drawing more flowers, you might also enjoy our tutorials on How to Draw a Tulip and How to Draw a Sunflower.
Pin it now, Draw later!
Get the FREE Printable Drawing Guide
FREE Download Printable Rose Drawings Tutorials