
Learning how to draw watering can art can be simple and fun. This easy drawing tutorial uses clear shapes, soft curves, and friendly details. Take your time with each step by step drawing, and enjoy making a cute watering can.
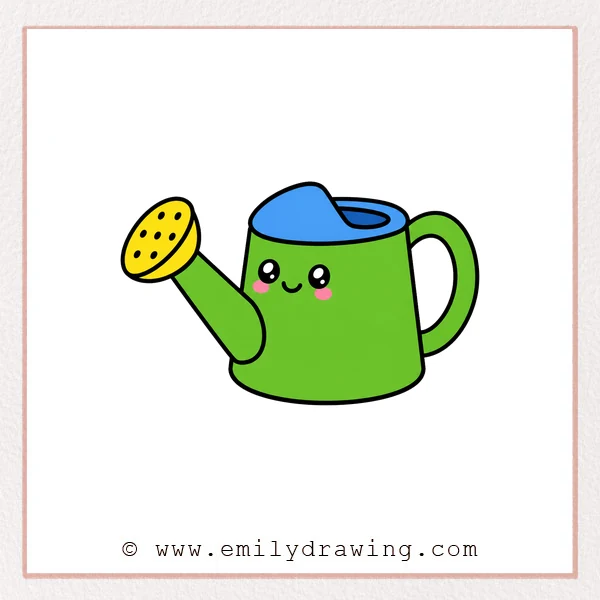
What You Will Need
- Pencil
- Eraser
- Black marker or pen
- Coloring tools
- Drawing paper
Here are my RECOMMENDED Art Supplies!
- Crayola Coloring Set (140 Pieces – Mega Value!)
- 24 Colored Crayon Set
- A4 Printer Paper
- Crayola Coloring Pencils
- HP Home Printer with Instant Ink!
Time needed:
29 minutes.
Step-by-Step Drawing Guide
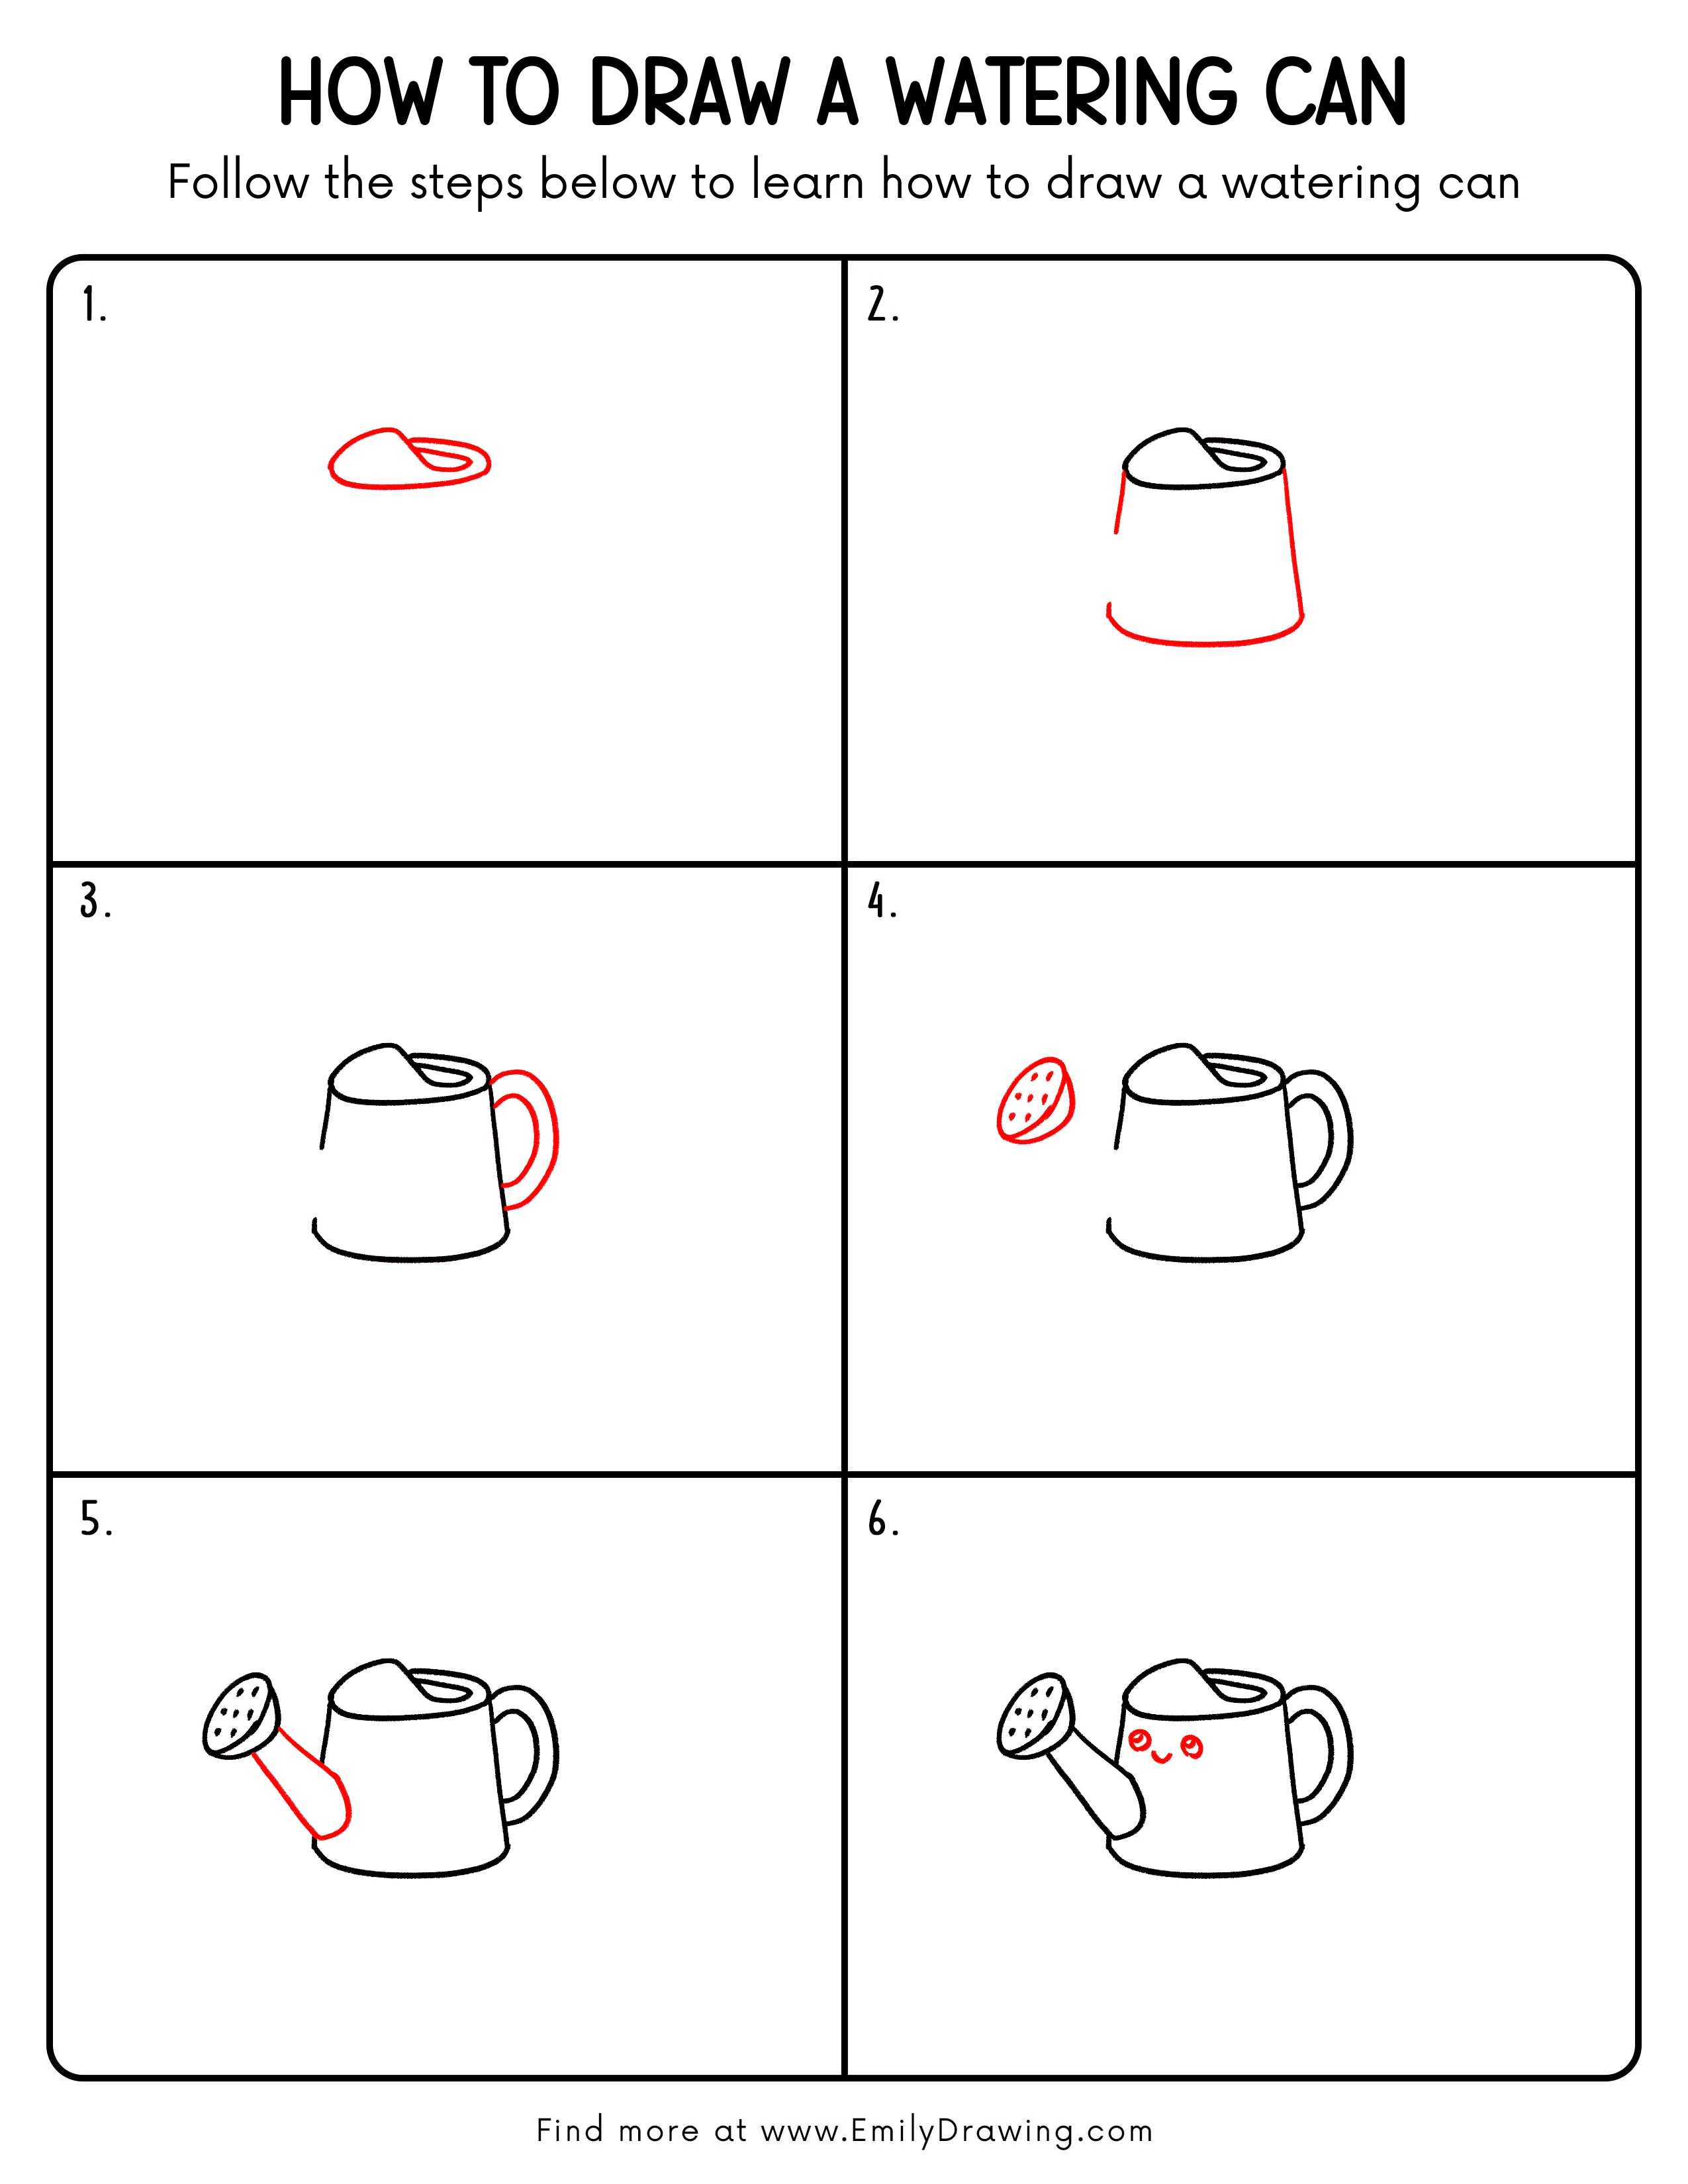
Step 1: Draw the Top Opening of the Watering Can
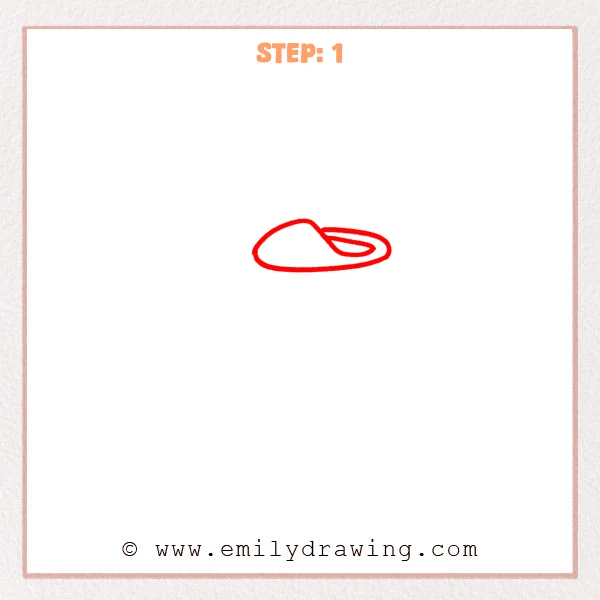
Start with a horizontal oval to form the rim of the watering can’s top opening. Add a raised curved line on the left side to give the opening a layered shape.
Pro Tip: Make the right side of the oval slightly narrower so the top feels more dimensional.
Step 2: Draw the Watering Can Body
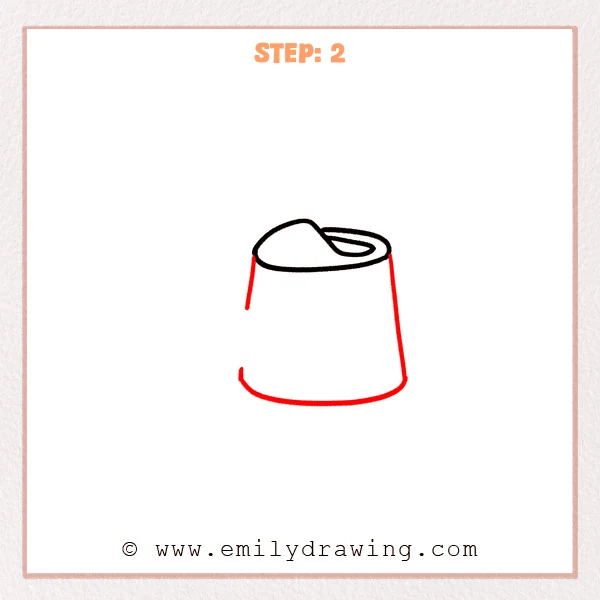
From both sides of the top, draw two slightly slanted lines downward to form the body. Connect them with a wide curved line at the bottom so the watering can looks steady.
Pro Tip: Make the bottom curve a little wider than the top so the body feels natural and sturdy.
Step 3: Add the Watering Can Handle
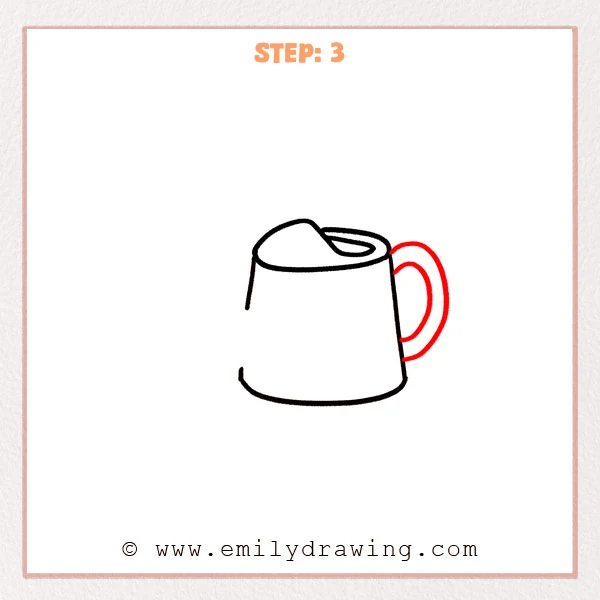
Draw a large curved handle on the right side of the body, like half of a ring. Add a smaller curved line inside it to give the handle thickness.
Pro Tip: Keep the inner and outer curves evenly spaced so the handle looks neat.
Step 4: Add the Sprinkler Head and Holes
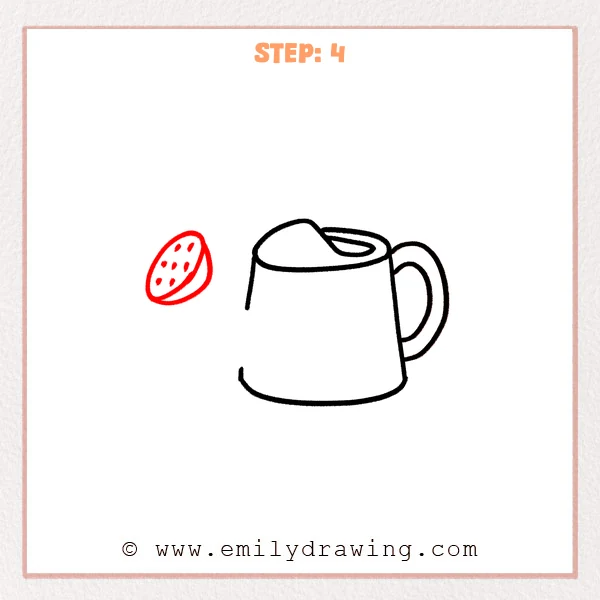
Draw a tilted oval sprinkler head on the left side of the body, like a flat disk. Add several small holes inside it to show where the water will sprinkle out.
Pro Tip: Arrange the holes in loose rows, but avoid placing them too close to the edge.
Step 5: Connect the Spout to the Body
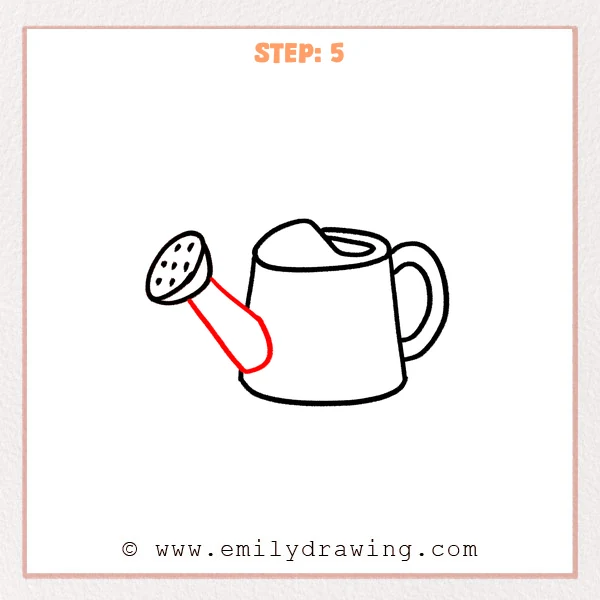
Draw two slanted lines from the back of the sprinkler head to the left side of the body. Curve the lower line slightly to form a rounded connection where the spout meets the body.
Pro Tip: Let the spout extend from the lower middle of the body so the proportions feel balanced.
Step 6: Draw a Cute Face
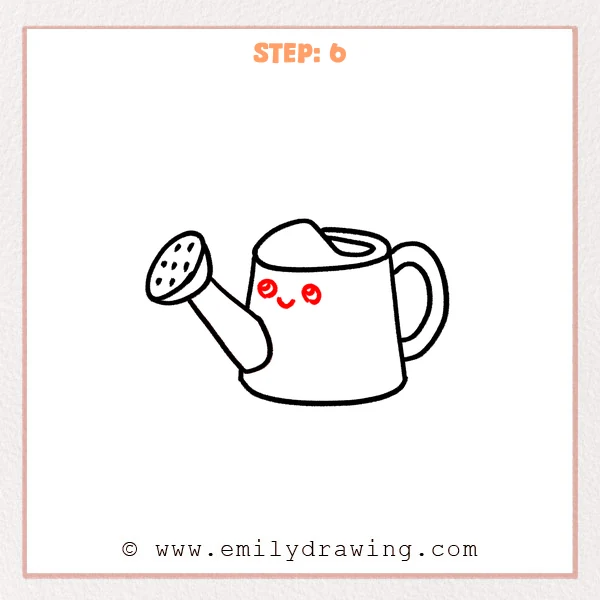
Add two round eyes on the front of the body, leaving small highlights inside. Draw a small curved line below and between the eyes to make a gentle smile.
Pro Tip: Keep both eyes at nearly the same height so the expression looks cute and balanced.
Step 7: Color in your drawing!
Fun Facts
- A watering can helps spread water gently over plants.
- Many watering cans have a sprinkler head to create soft little streams.
- Garden tools often use rounded shapes, which makes them great drawing for beginners.
Pin it now, Draw later!
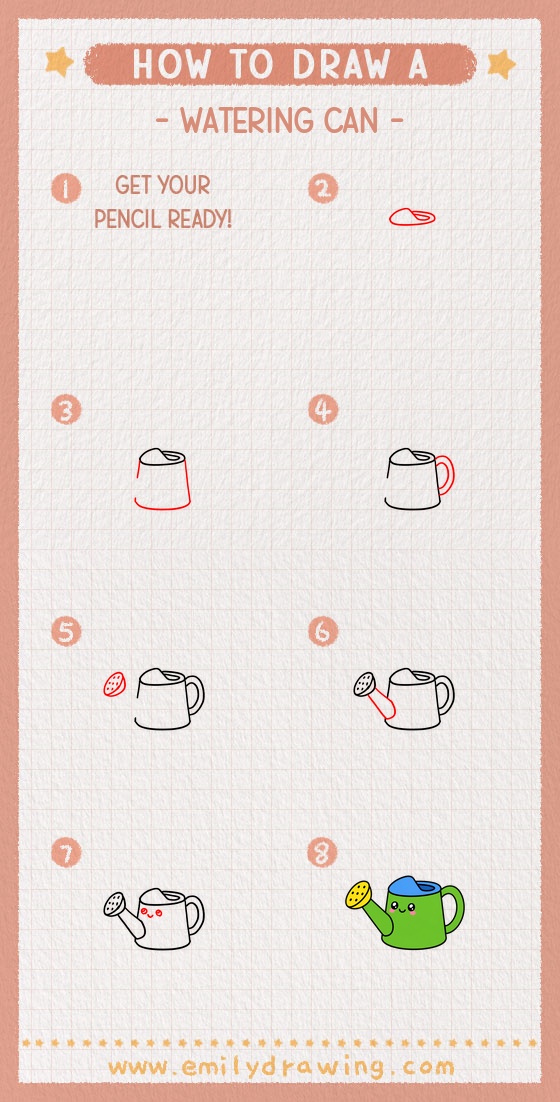
Trace your final lines with a marker when you feel ready. Erase extra pencil marks, then color your watering can with cheerful garden colors. You can add flowers, grass, or water drops to finish the scene.
Keep practicing this step by step drawing, and try changing the face or colors next time.
Get the FREE Printable Drawing Guide
FREE Download Printable Watering Can Drawing Tutorial
Frequently Asked Questions
Is this watering can drawing good for beginners?
Yes, this easy drawing tutorial uses simple ovals, curves, and rounded lines.
How can I make my watering can look cuter?
You can add rosy cheeks, bigger eyes, or small water drops near the sprinkler head.
What colors work well for a watering can?
Soft blue, green, yellow, or pink all work well for a friendly watering can drawing.



