Learn how to draw witch hat with a simple step by step drawing guide. This easy drawing tutorial is made for beginners who want clear shapes and calm instructions. Take your time, and build the hat one small part at a time.
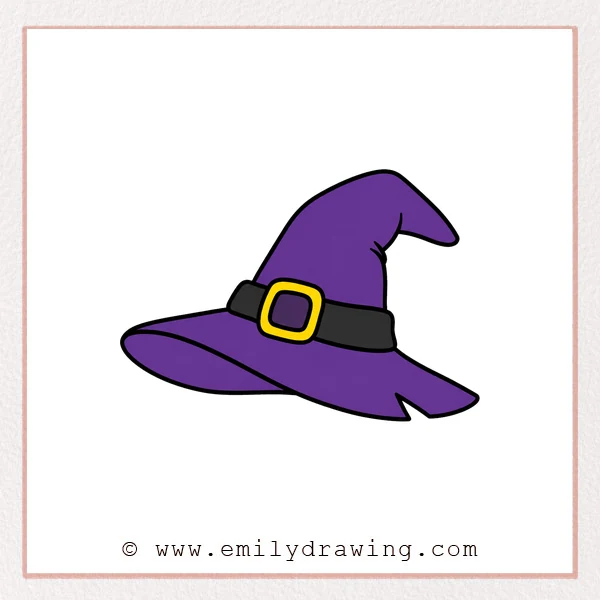
What You Will Need
- Pencil
- Eraser
- Black marker or pen
- Paper
- Coloring tools, such as crayons or colored pencils
Here are my RECOMMENDED Art Supplies!
- Crayola Coloring Set (140 Pieces – Mega Value!)
- 24 Colored Crayon Set
- A4 Printer Paper
- Crayola Coloring Pencils
- HP Home Printer with Instant Ink!
Time needed:
28 minutes.
Step-by-Step Drawing Guide
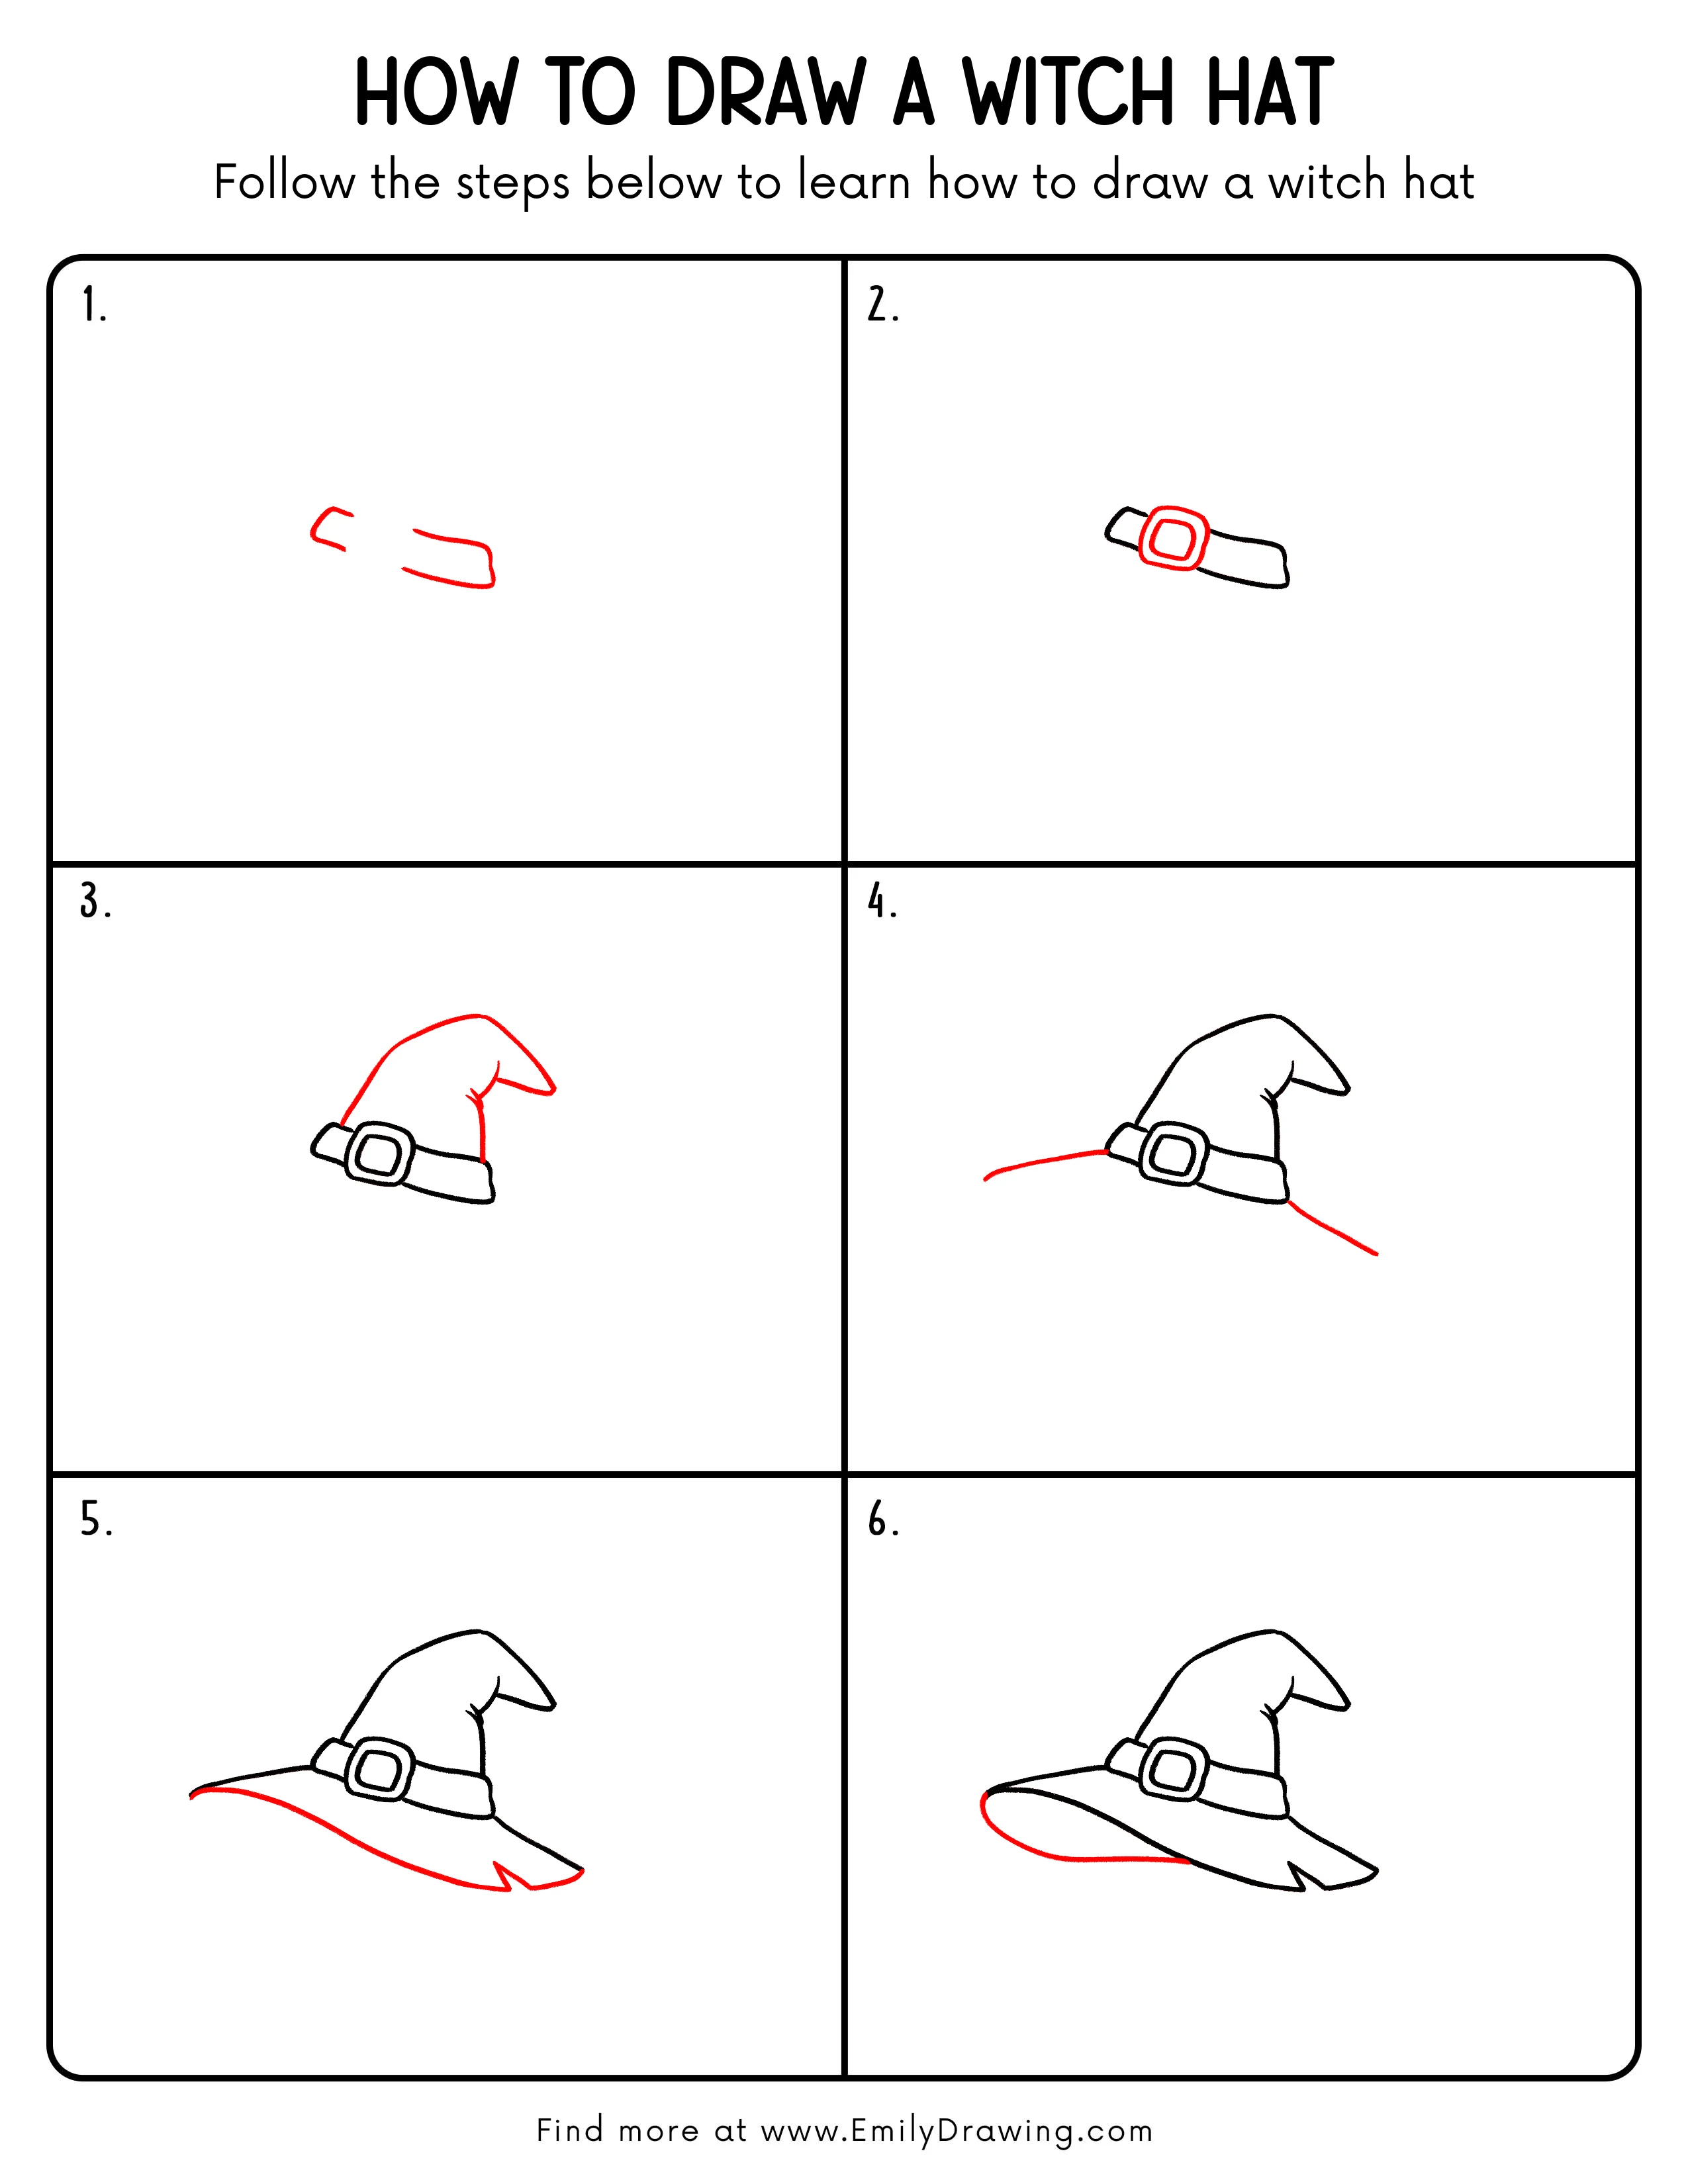
Step 1: Draw the Brim and Buckle Base
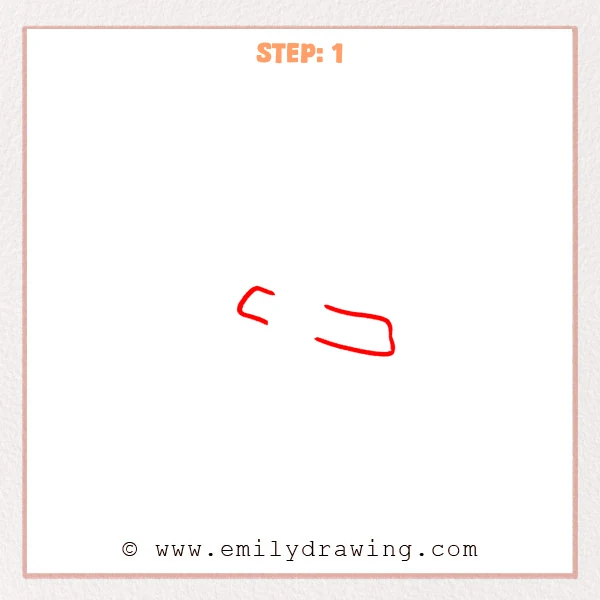
Start with a long sideways curved shape for the witch hat brim. Add a small open angled shape on the left as the beginning of a buckle or decoration.
Pro Tip: Keep the brim long and narrow, with a slightly rounded right end.
Step 2: Complete the Band and Buckle
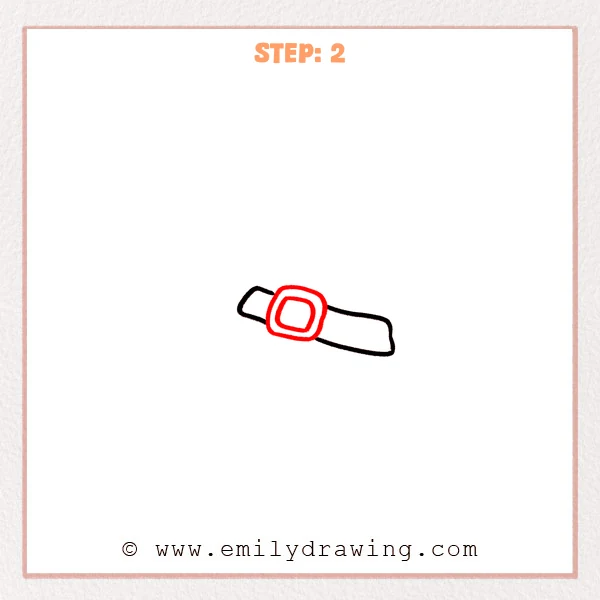
Darken the brim line on the right and let it continue past the buckle. Draw a rounded square in the center, then add a smaller inner frame for the witch hat buckle.
Pro Tip: Keep the spacing even between the two squares so the buckle looks neat.
Step 3: Draw the Curved Hat Tip
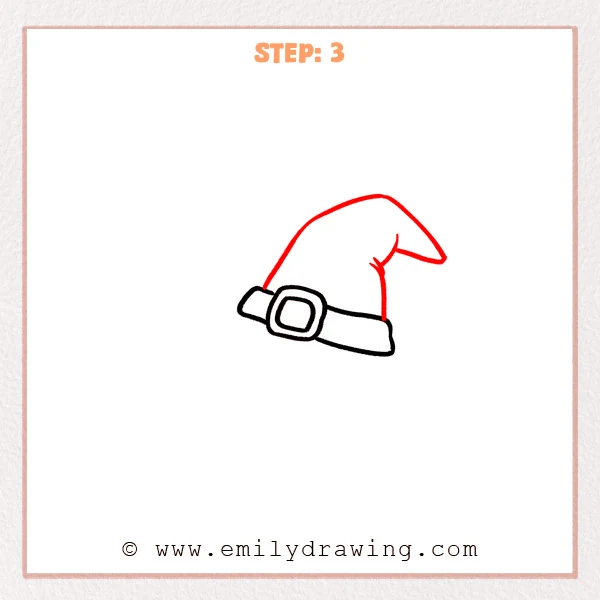
From above the band, draw a tall curved outline to form the witch hat peak. Let the right tip bend downward, then add a short folded line to show a crease.
Pro Tip: Let the tip be slightly uneven so the witch hat feels naturally bent.
Step 4: Extend the Wide Brim
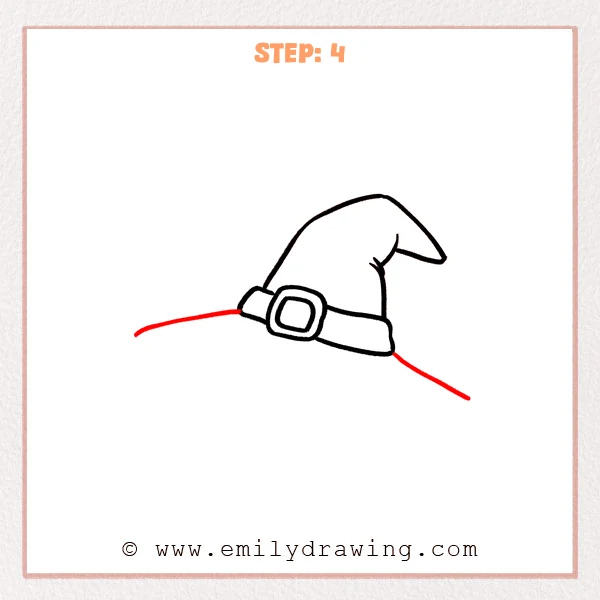
From the left edge of the band, draw a long curved line outward. Add another long downward curve on the right to make the witch hat look wider.
Pro Tip: The brim sides can be different lengths, but keep both curves gentle.
Step 5: Connect the Outer Brim
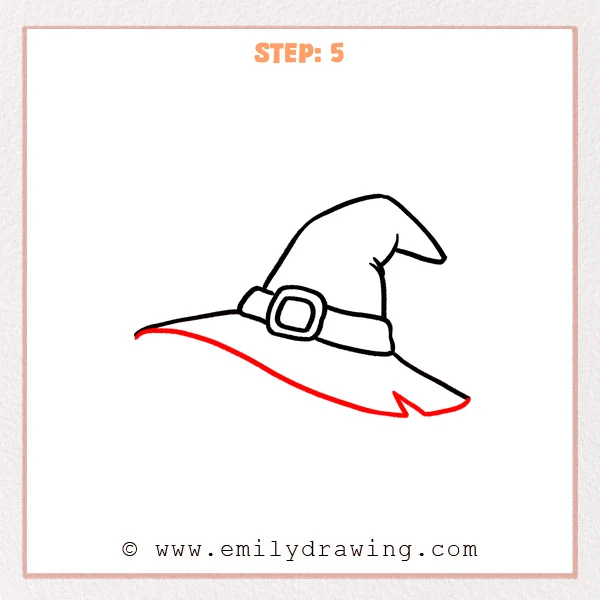
Use a long curved line to connect the left and right sides of the brim. Add a small pointed fold near the lower right to make the witch hat brim look wrinkled.
Pro Tip: Draw the long curve slowly so the brim edge stays smooth and connected.
Step 6: Complete the Left Brim Thickness
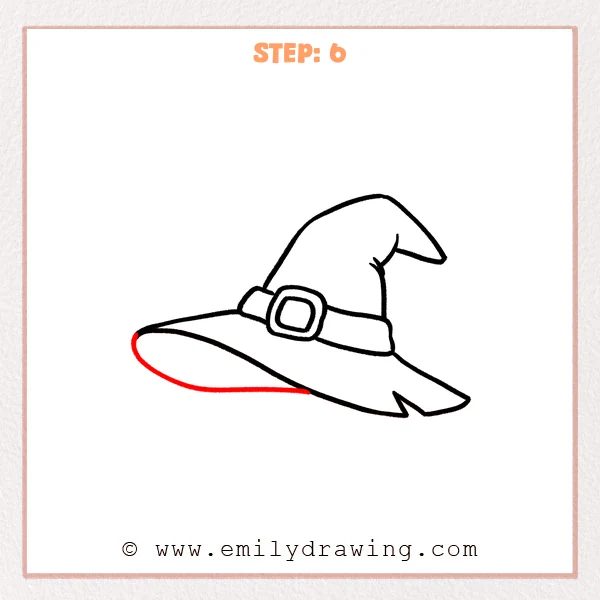
Add a rounded curve under the left side of the brim to show its thickness. Let this line move gently back toward the middle and sit close to the existing brim edge.
Pro Tip: Avoid making the lower line too straight, because a soft curve gives the brim more form.
Step 7: Color in your drawing!
Fun Facts
Witch hats are often drawn with tall, bent tips to make them look magical and playful. A wide brim helps the hat feel dramatic, even in a simple drawing for beginners. Buckles and bands are useful details because they break the shape into easy parts.
Pin it now, Draw later!
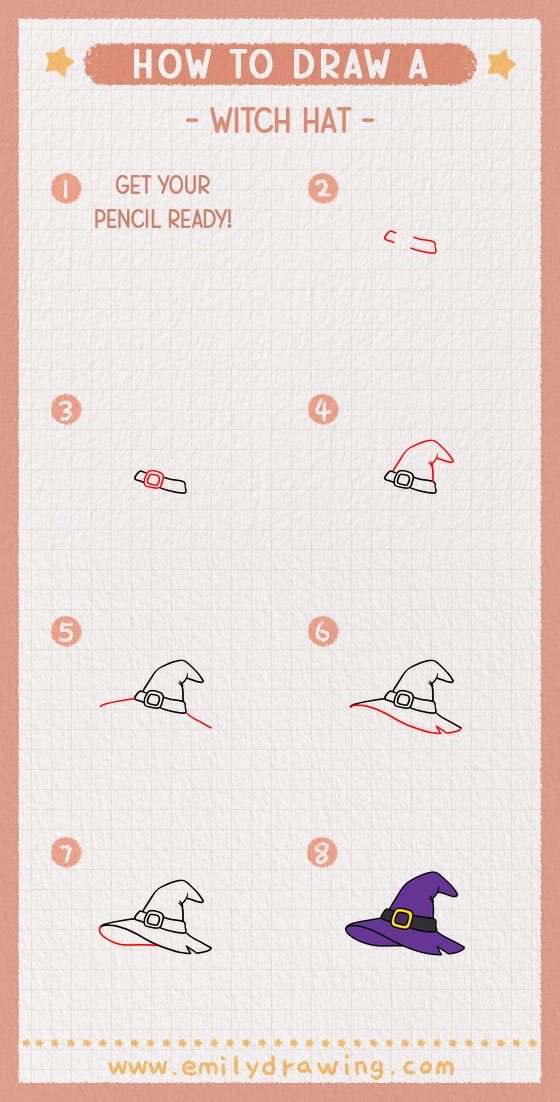
Trace your best lines with a black marker when the pencil sketch feels ready. Erase extra marks carefully, then color the hat with deep purple, black, gray, or any spooky color you like. Try this easy drawing tutorial again and make a new witch hat with a taller tip or wider brim.
Get the FREE Printable Drawing Guide
FREE Download Printable Witch Hat Drawing Tutorial
Frequently Asked Questions
Is this witch hat drawing good for beginners?
Yes, this step by step drawing uses simple curves, rounded squares, and easy folded shapes.
How can I make my witch hat look more magical?
Add stars, small patches, or a bright buckle after finishing the main outline.
What colors work well for a witch hat?
Black, purple, gray, and dark blue all work well for a classic witch hat.