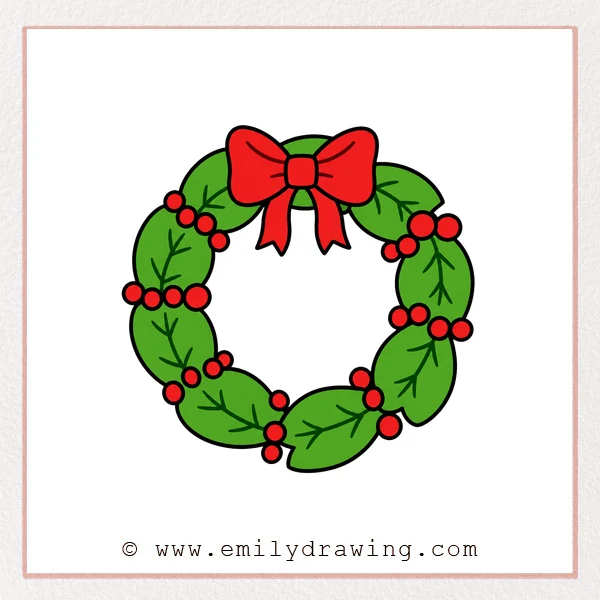
Learning how to draw wreath can be calm and enjoyable. This step by step drawing guide shows how to build the wreath with curved lines, berries, leafy branches, and a bow. Take your time with each part, and let the round shape grow gently.
What You Will Need
- Pencil
- Eraser
- Drawing paper
- Black marker or pen
- Red marker or colored pencil
Here are my RECOMMENDED Art Supplies!
- Crayola Coloring Set (140 Pieces – Mega Value!)
- 24 Colored Crayon Set
- A4 Printer Paper
- Crayola Coloring Pencils
- HP Home Printer with Instant Ink!
Time needed:
30 minutes.
Step-by-Step Drawing Guide
Step 1: Draw the Basic Wreath Curve
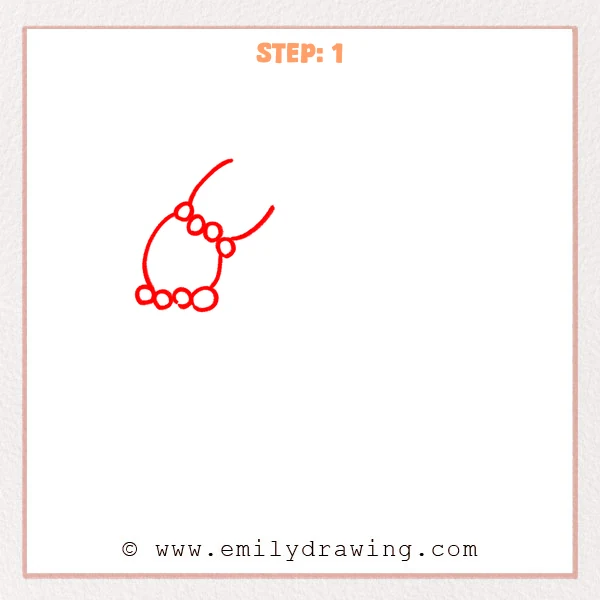
Start with a large curved line for the left side of the wreath. Add several small circles and ovals along the curve, like decorative berries. Draw another outward curve on the upper right, keeping the wreath open for now.
Pro Tip: Let the circles vary slightly in size to make the wreath look more natural.
Step 2: Extend the Lower Wreath Lines
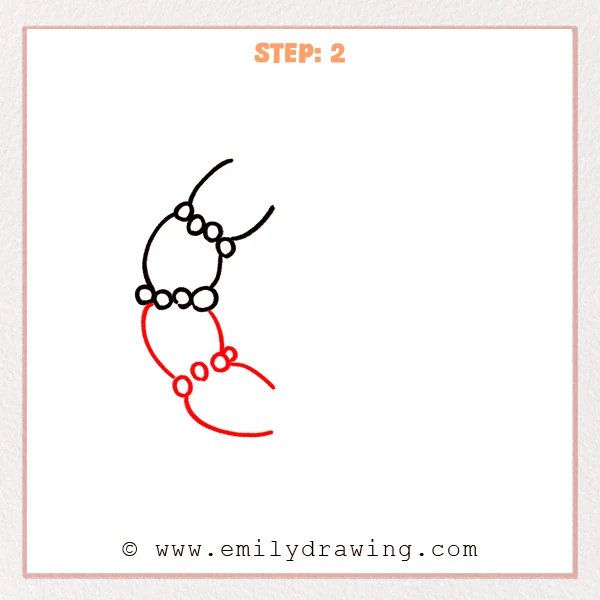
From the lower-left circle, draw a large curve bending downward. Add a few new small circles below to continue the berry shapes. Extend another curve from the right circle so the lower half of the wreath begins to form.
Pro Tip: Keep the lower curve wider than the upper one so the wreath feels light and rounded.
Step 3: Lengthen the Right Side of the Wreath
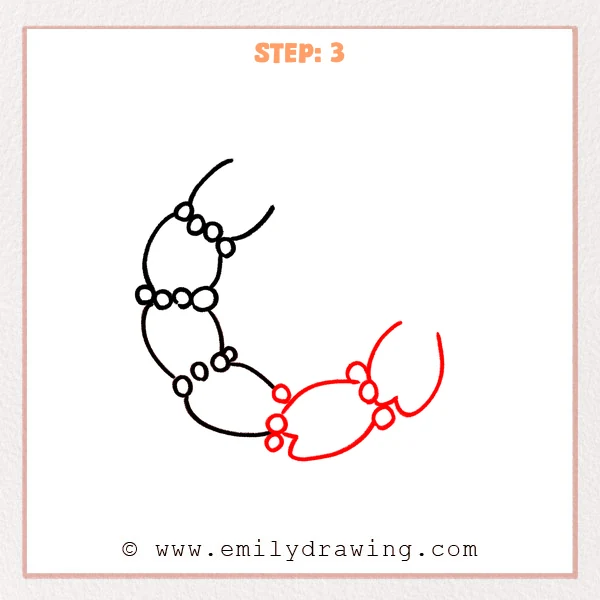
Draw a long curve from the lower berries, extending gently to the right. Add several round berries along the new curve to keep the decoration flowing. On the far right, draw an upward open curve to widen the overall wreath shape.
Pro Tip: The right curve can be longer, but keep it following the same circular direction as the left side.
Step 4: Add the Upper-Right Wreath Section
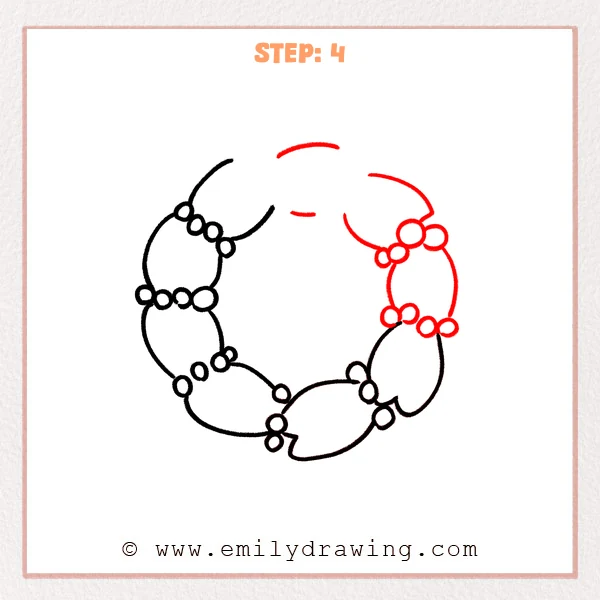
Add a new group of round berries on the upper right, turning the wreath upward. Draw short curved lines to connect these berries and form the upper-right arc. Leave small gaps near the top so the wreath still feels light and natural.
Pro Tip: Keep the upper-right berries slightly clustered to balance the larger curve on the left.
Step 5: Add Leafy Branch Details
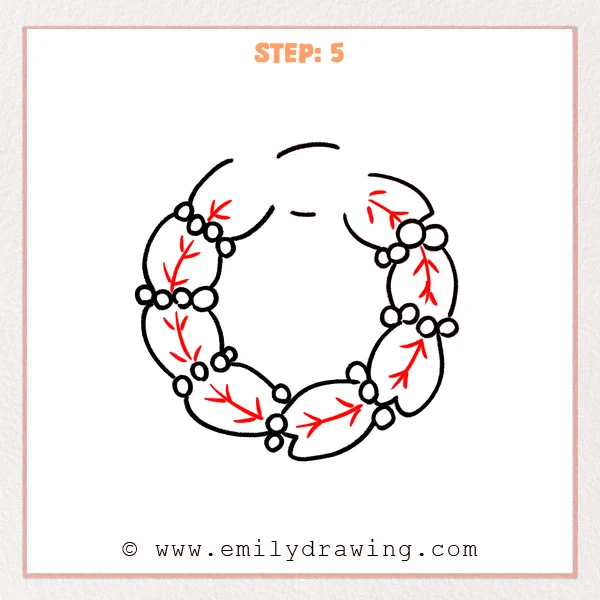
Add several groups of thin short branches inside the wreath. Let each branch grow from near the curved line, then split into two or three small leaf-like strokes. Place these details around the left, right, and lower areas to give the wreath more layers.
Pro Tip: Angle the small branches with the wreath’s circular flow so the whole drawing feels smoother.
Step 6: Draw the Top Bow
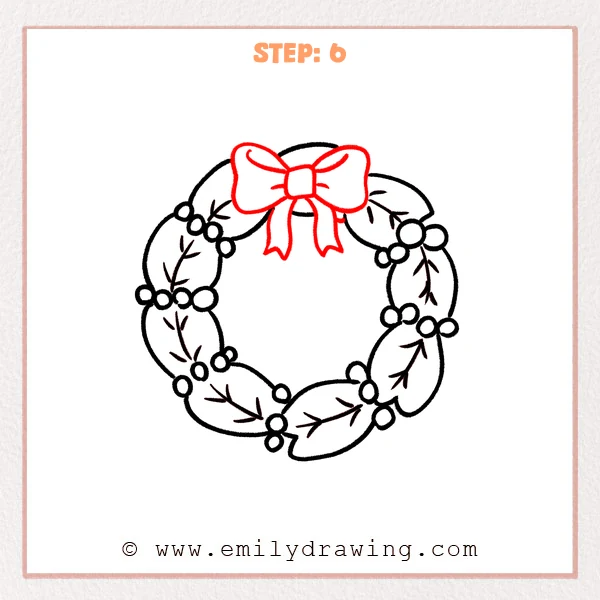
Add a bow at the top center of the wreath, starting with a small square knot. Draw two wide rounded bow loops to the left and right, letting them gently overlap the upper curve. Add two hanging ribbon tails below the knot, with small notches at the ends.
Pro Tip: Keep the two bow loops close in size so the top of the wreath feels balanced.
Step 7: Color in your drawing!
Fun Facts
Wreaths are often used as decorations for holidays, seasons, and celebrations. Many wreath designs include leaves, berries, ribbons, flowers, or small ornaments. A circular wreath can also suggest welcome, warmth, and togetherness.
Pin it now, Draw later!
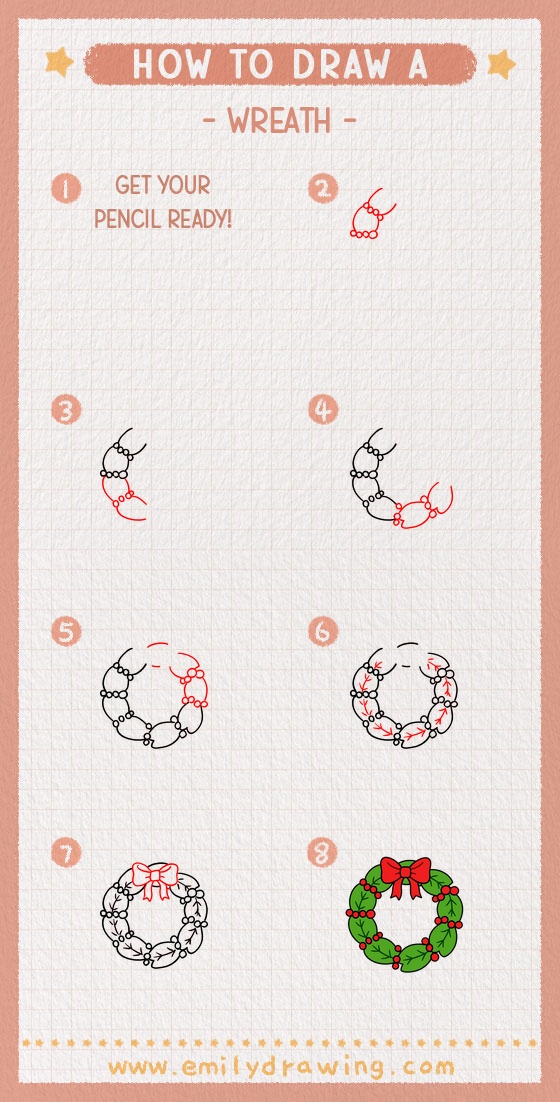
Now your wreath drawing has a full round form, berry clusters, leafy branches, and a cheerful bow. Trace the final lines with a marker, then erase any extra pencil marks. Try coloring the berries, leaves, and ribbon to make your wreath feel festive and bright.
Keep practicing this easy drawing tutorial, and enjoy making your own wreath designs with different details.
Get the FREE Printable Drawing Guide
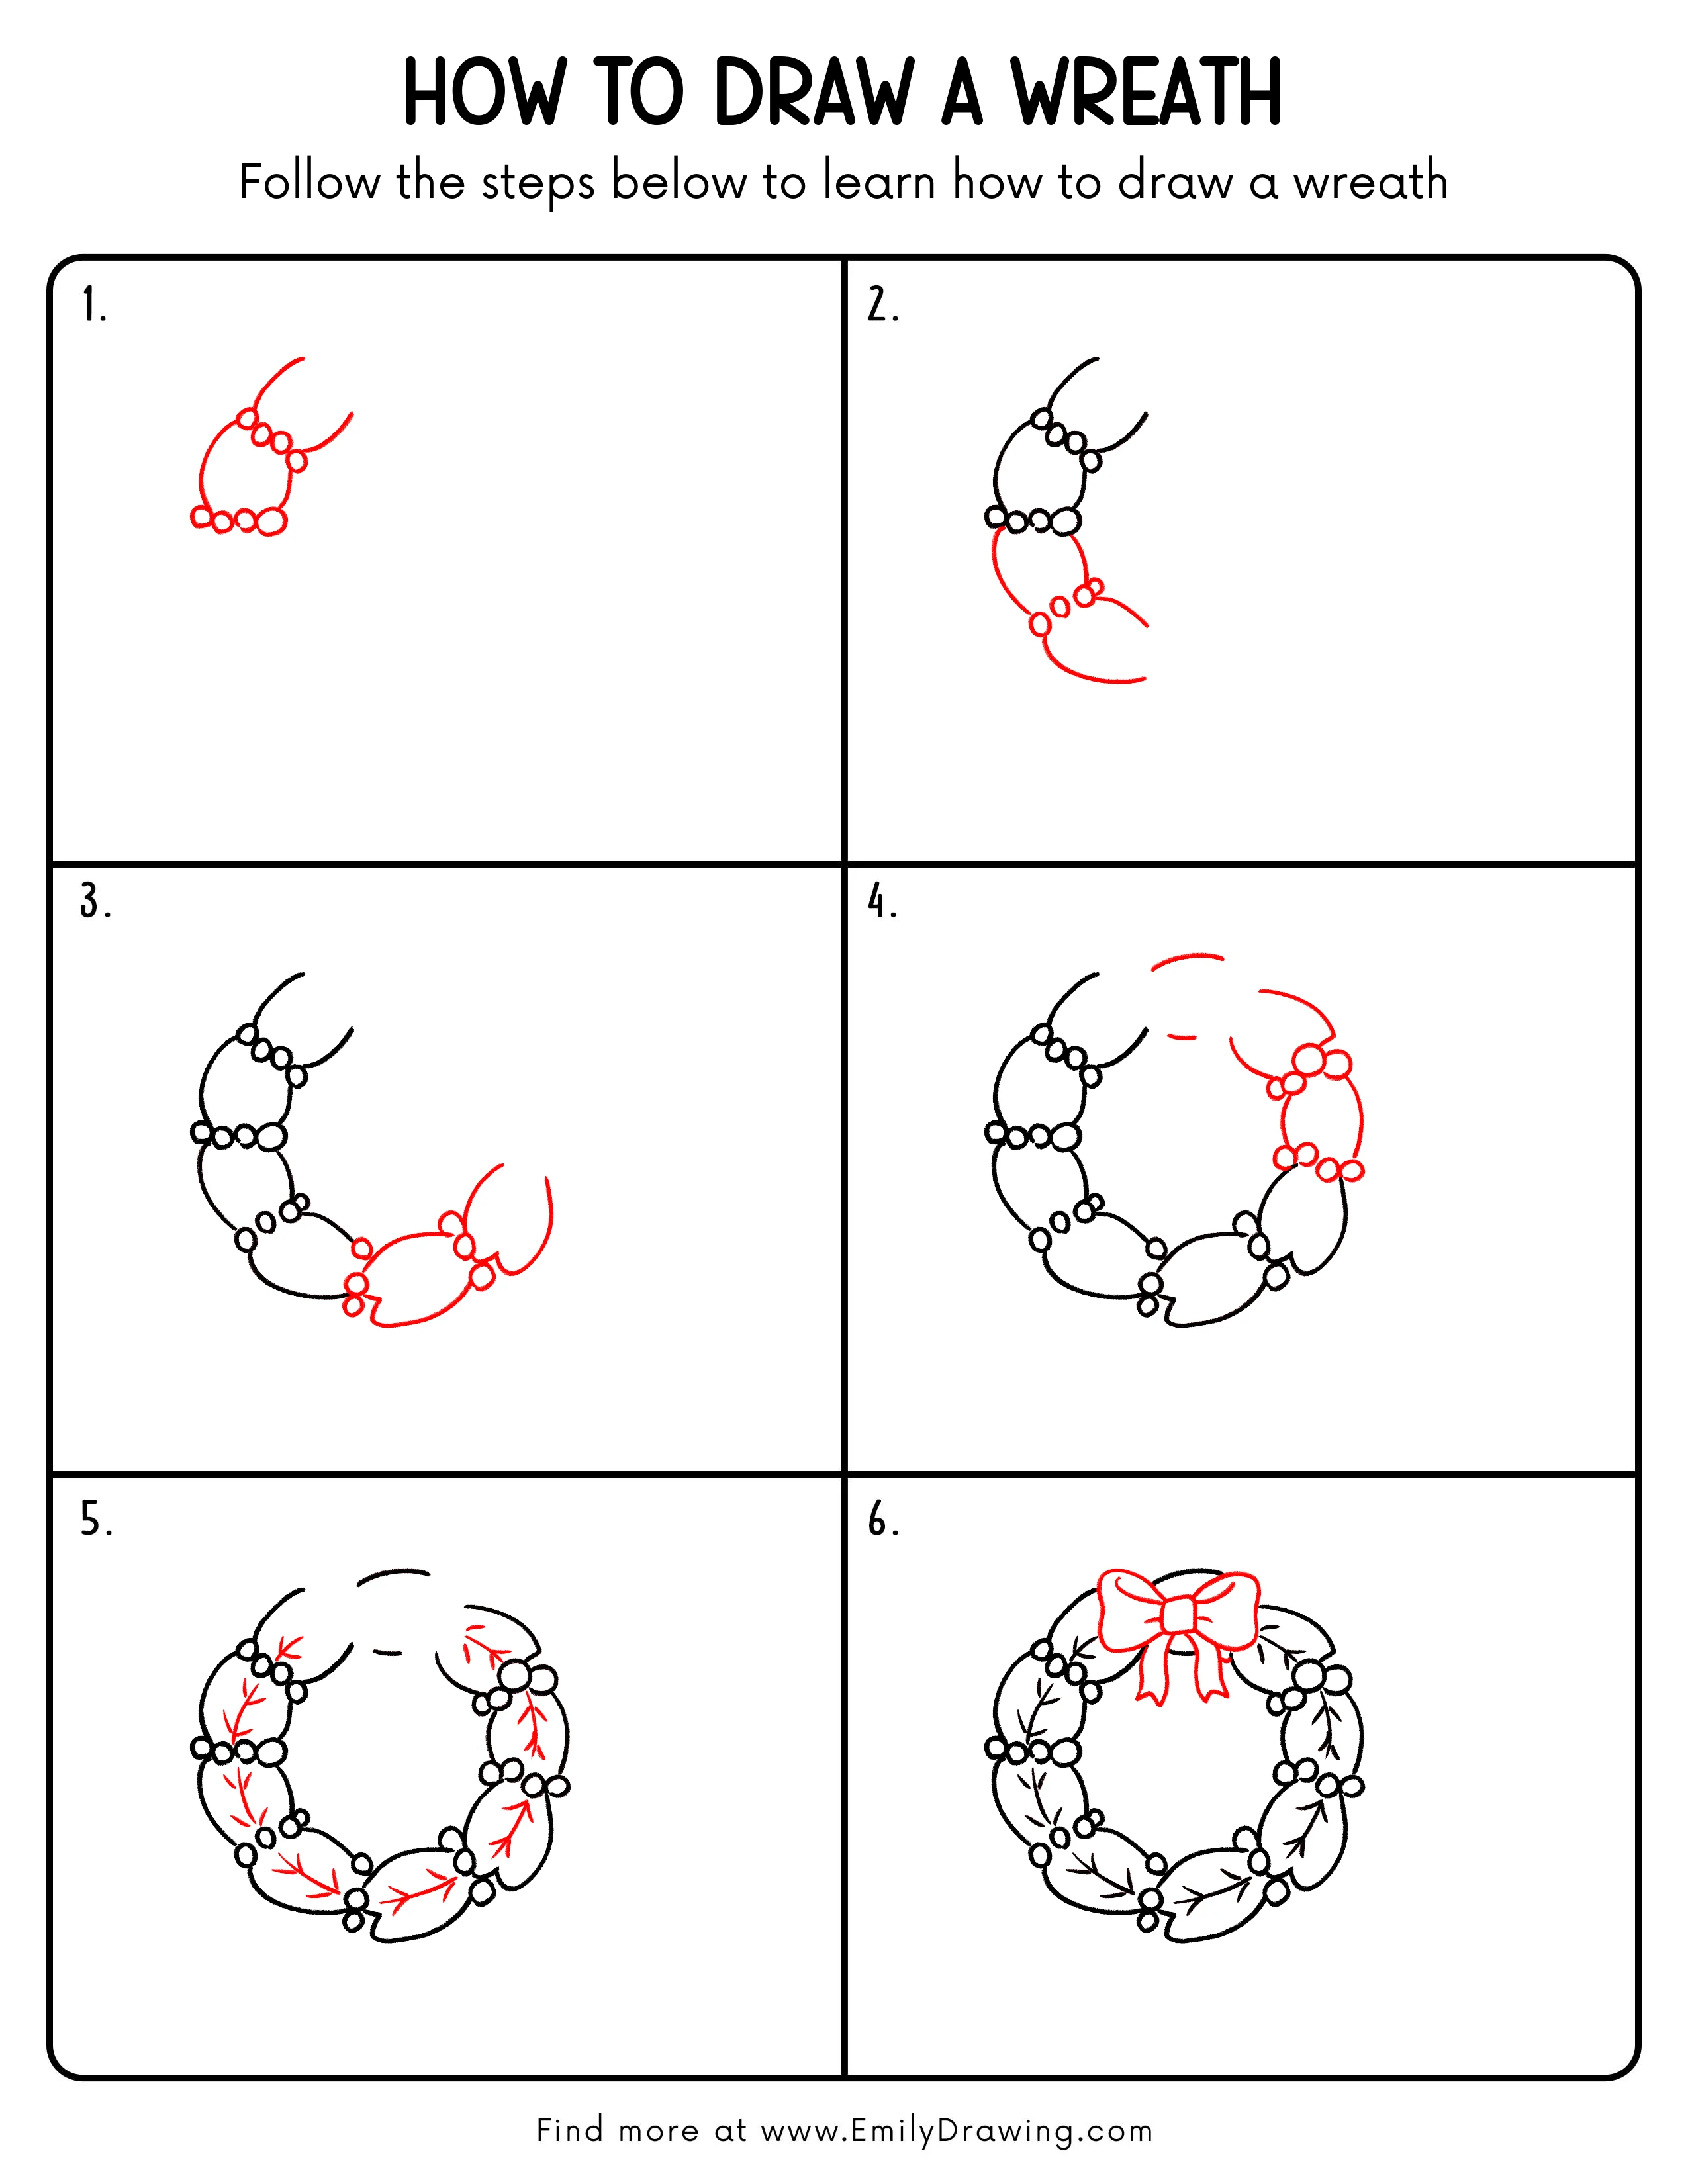
FREE Download Printable Wreath Drawing Tutorial
Frequently Asked Questions
Is this wreath drawing for beginners?
Yes, this wreath drawing for beginners uses simple circles, curves, and short branch lines.
How can I make my wreath look fuller?
Add more small leaves, berries, or short curved lines around the circle.
Can I change the bow shape?
Yes, you can make the bow loops wider, smaller, rounder, or more pointed.