
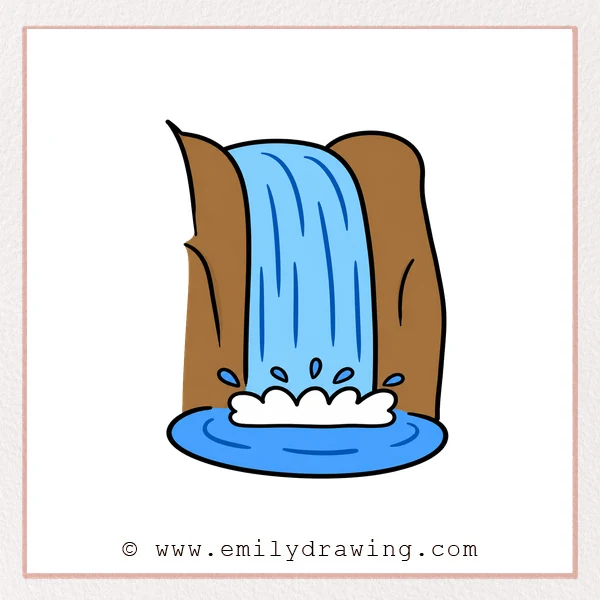
Learning how to draw waterfall can be simple and relaxing. This easy drawing tutorial uses curved lines, flowing shapes, and small splash details. Follow each step slowly, and your waterfall drawing will become clear and balanced.
What You Will Need
- Pencil
- Eraser
- Black marker or pen
- Drawing paper
- Colored pencils or crayons, optional
Here are my RECOMMENDED Art Supplies!
- Crayola Coloring Set (140 Pieces – Mega Value!)
- 24 Colored Crayon Set
- A4 Printer Paper
- Crayola Coloring Pencils
- HP Home Printer with Instant Ink!
Time needed:
18 minutes.
Step-by-Step Drawing Guide
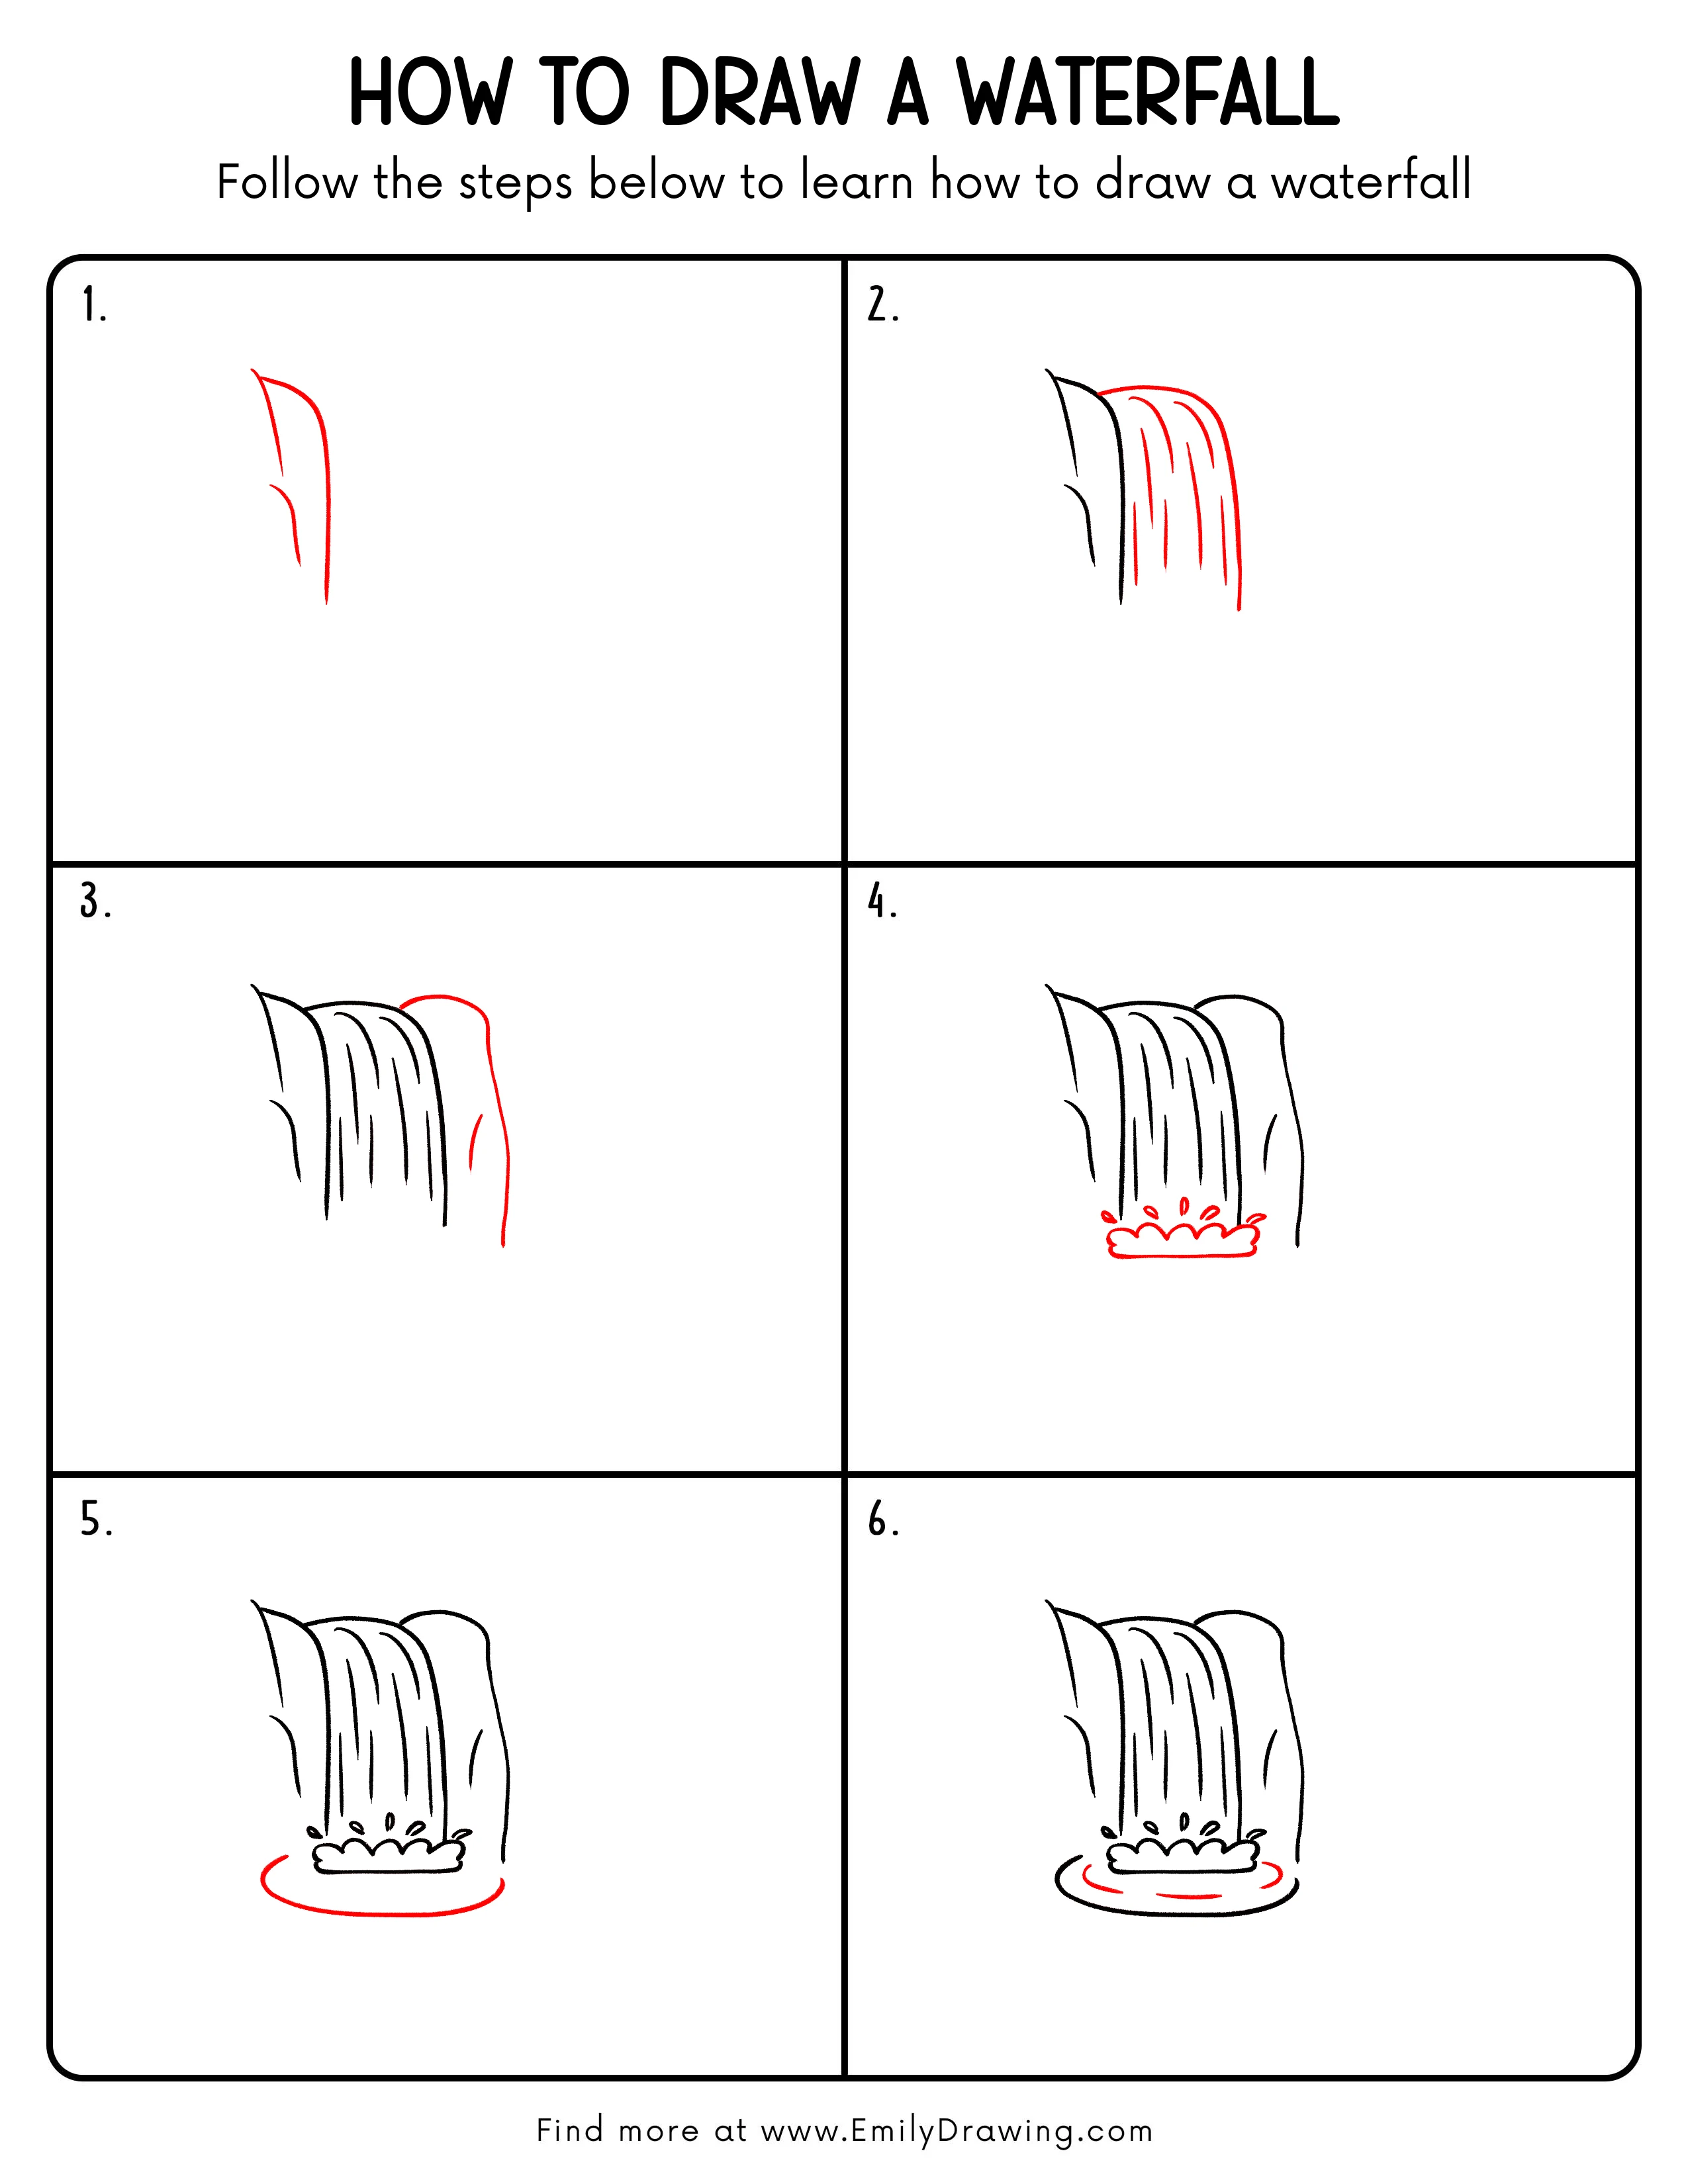
Step 1: Draw the Waterfall Outline
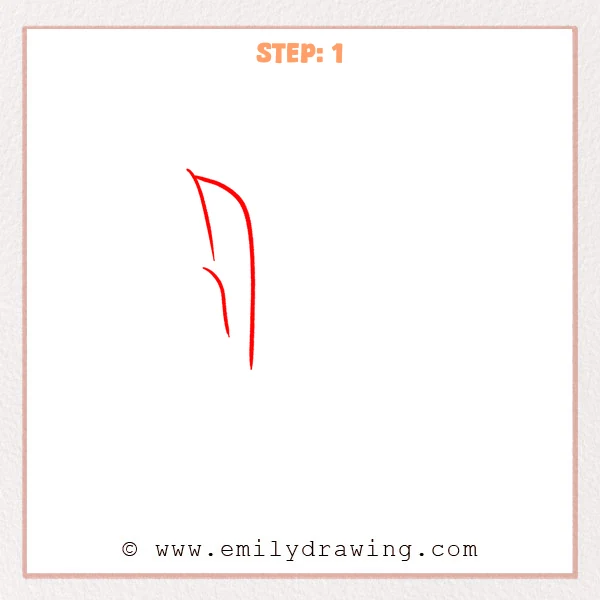
Start near the top and draw one long curve bending down to the right. Add a shorter inner curve on the left to show the falling edge of the waterfall.
Pro Tip: Let the two lines fall naturally, without making them perfectly parallel.
Step 2: Extend the Water Curtain
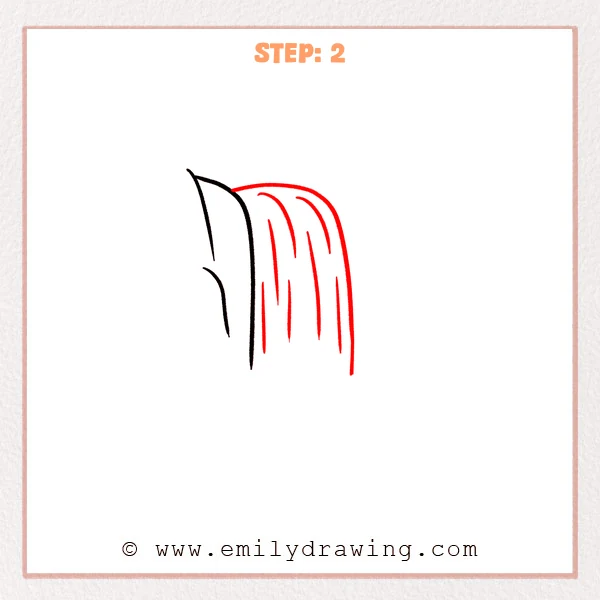
Draw a wide curved outer line on the right to make the waterfall look fuller. Add several downward curved lines inside the curtain to show separate streams of falling water.
Pro Tip: Let the inner water lines vary in length so the flow looks more natural.
Step 3: Add the Right Rock Wall
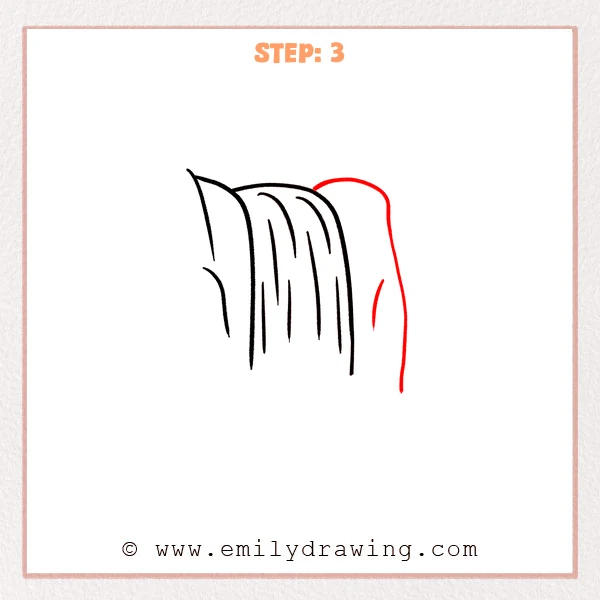
Draw a tall curved outer line on the right side of the waterfall to form the nearby rock wall. Add one short curved line inside it to show a simple rock texture.
Pro Tip: Keep the rock wall line steadier than the water lines so the two shapes are easy to tell apart.
Step 4: Draw the Splash at the Bottom
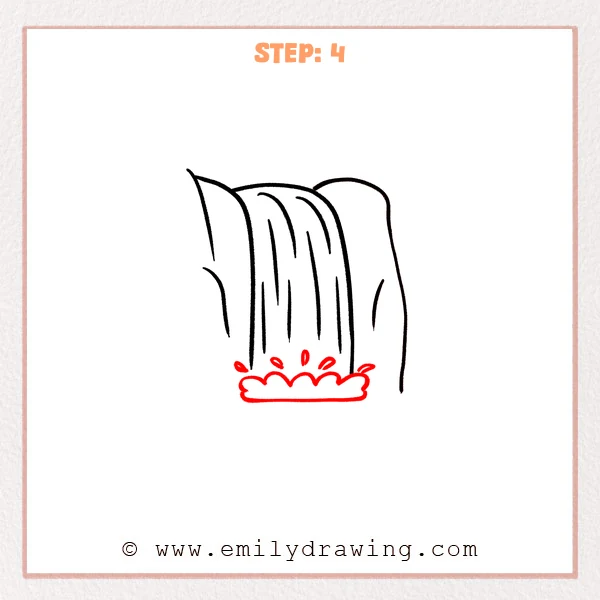
Draw a row of rounded splash curves at the bottom of the waterfall. Add a few small droplets rising upward to show the water hitting the surface.
Pro Tip: Vary the size of the splash curves to make the bottom feel more lively.
Step 5: Add the Pool Outline
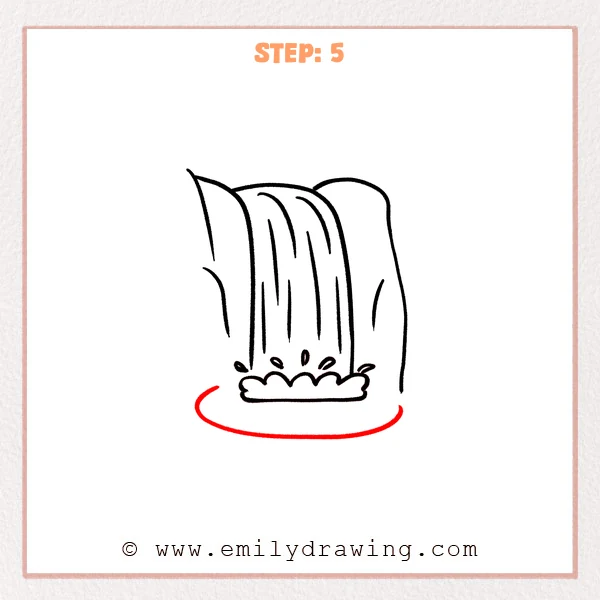
Draw a wide curved line below the splash to form the pool where the waterfall lands. Let both ends curve gently upward to show the water surrounding the base.
Pro Tip: Make the pool wider than the waterfall base so the drawing feels balanced.
Step 6: Draw the Water Ripples
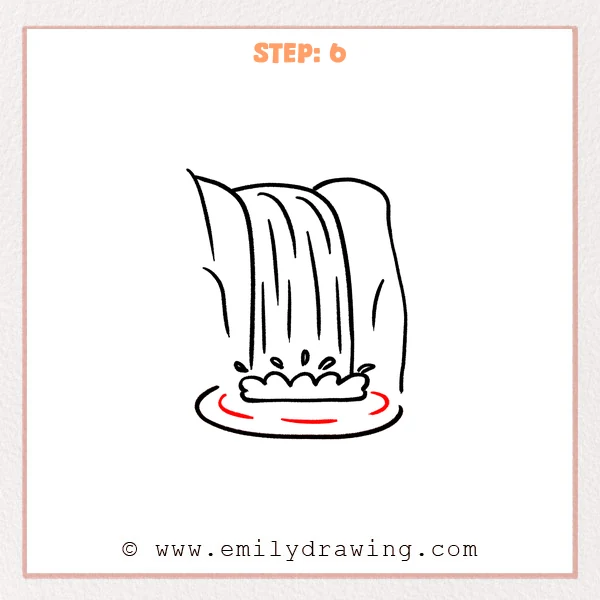
Add a few short curved lines inside the pool to show ripples spreading outward. Keep the side ripples near the pool edge, and make the center line shorter.
Pro Tip: Curve the ripple lines gently and place them in the same direction as the pool.
Step 7: Color in your drawing!
Fun Facts
Waterfalls form when flowing water drops from a higher place to a lower place. Some waterfalls are tall and narrow, while others are wide and powerful. In drawings, curved lines help water look soft, moving, and natural.
Pin it now, Draw later!
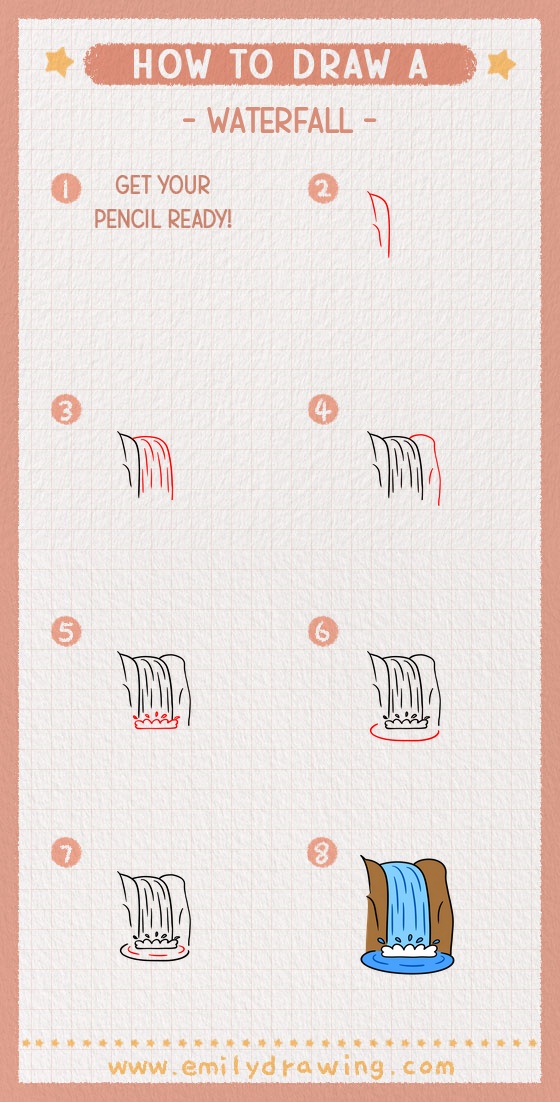
Now you have finished a clear step by step drawing of a waterfall. Trace your best lines with a marker, then erase any extra pencil marks. You can color the water light blue and add gray or brown tones to the rocks.
Keep practicing this drawing for beginners, and try adding trees, clouds, or stones around your waterfall next time.
Get the FREE Printable Drawing Guide
FREE Download Printable Waterfall Drawing Tutorial
Frequently Asked Questions
Is this waterfall drawing good for beginners?
Yes, this tutorial is designed as an easy drawing tutorial with simple curves and small details.
How can I make my waterfall look more realistic?
Add more thin water lines, soft ripples, and uneven rock edges around the waterfall.
What colors should I use for a waterfall?
Use light blue, white, and pale gray for the water, with darker colors for the rocks.



