
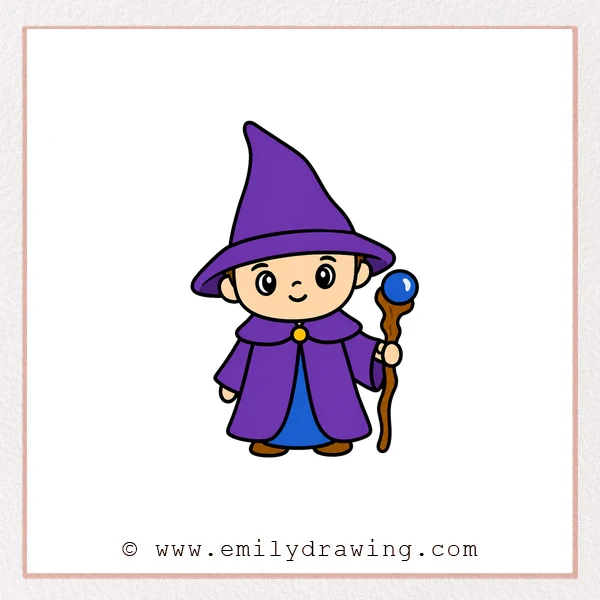
In this tutorial, you will learn how to draw wizard step by step. This easy drawing tutorial is calm and beginner-friendly, using simple curves and rounded shapes. Take your time, and build the wizard from the hat down to the magic staff.
What You Will Need
- A pencil
- An eraser
- Drawing paper
- A black marker or pen
- Coloring tools, such as crayons or colored pencils
Here are my RECOMMENDED Art Supplies!
- Crayola Coloring Set (140 Pieces – Mega Value!)
- 24 Colored Crayon Set
- A4 Printer Paper
- Crayola Coloring Pencils
- HP Home Printer with Instant Ink!
Time needed:
16 minutes.
Step-by-Step Drawing Guide
Step 1: Draw the Wizard Hat Outline
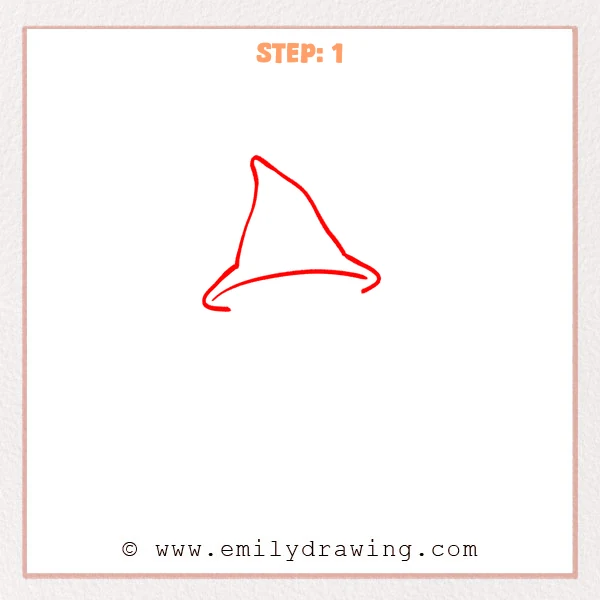
Start with a tall, bent triangle shape for the wizard hat. Add a wide curved brim underneath, keeping both ends softly pointed.
Pro Tip: Let the hat tip bend slightly to one side to make the wizard hat feel more lively.
Step 2: Add the Face and Ears
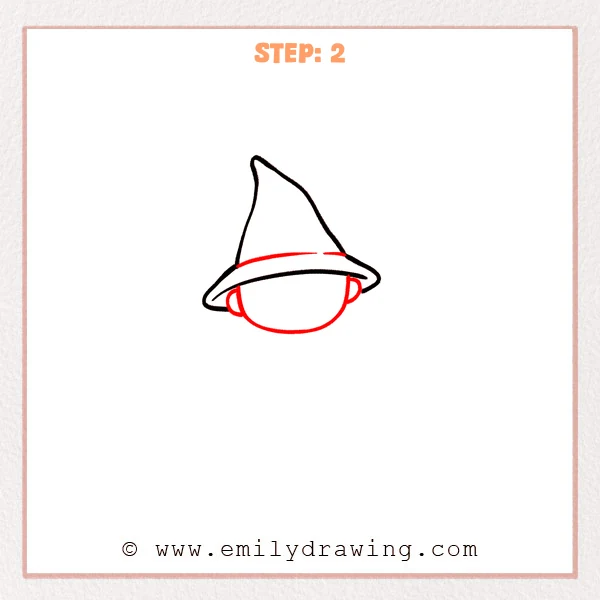
Draw a large curved arc under the brim to form the wizard’s face. Add small curved ears on both sides, letting them peek out below the brim.
Pro Tip: Keep the face curve tucked behind the brim so the layers look clear.
Step 3: Draw the Cute Expression
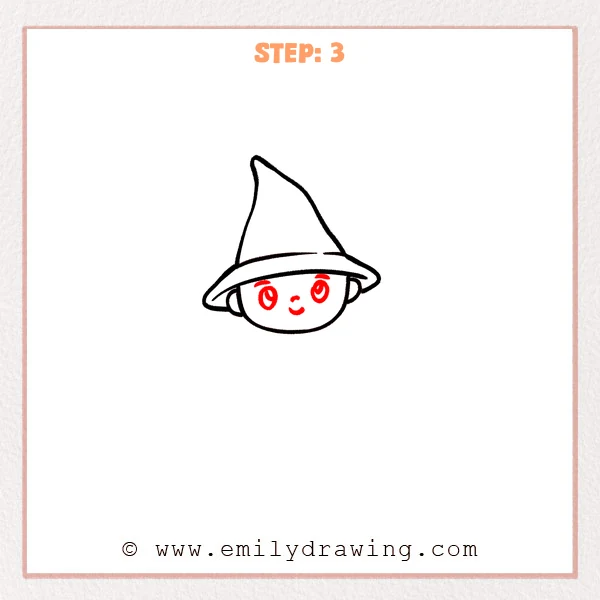
Add two round eyes on the face, with small circles inside for highlights. Then draw short eyebrows, a tiny nose, and a smiling mouth to make the wizard look friendly.
Pro Tip: Keep both eyes a similar size so the expression feels balanced.
Step 4: Add the Collar and Body Outline
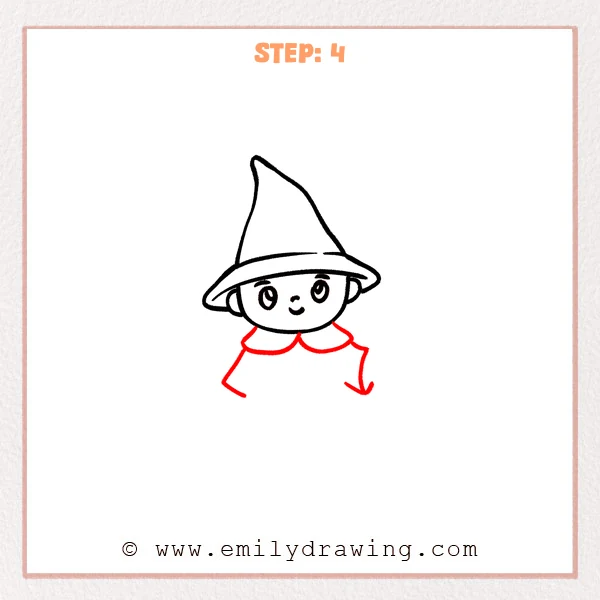
Draw two curved collar shapes under the face, spreading like soft petals. Then bring the robe lines down from both sides of the collar, keeping the bottom open for now.
Pro Tip: Let the two collar curves meet near the center to help the body stay balanced.
Step 5: Complete the Robe and Small Hands
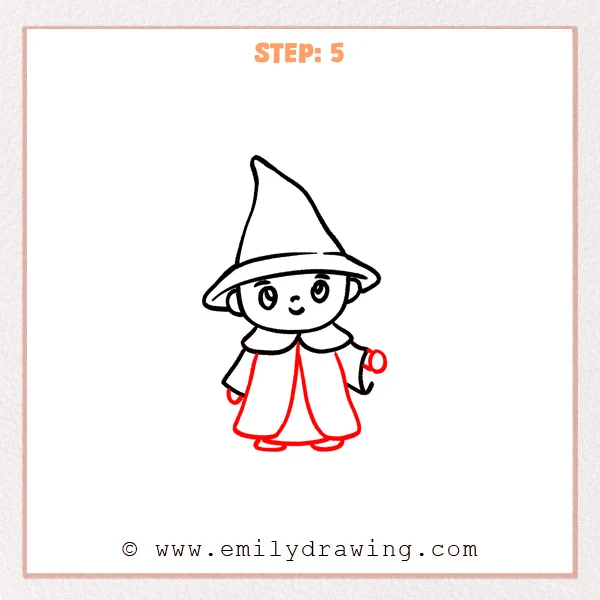
Extend the robe lines downward and connect them with a curved bottom edge to form a wide hem. Add two small hands and visible feet to make the wizard’s body feel complete.
Pro Tip: Make the robe hem a little wider than the shoulders so the wizard looks steady.
Step 6: Draw the Magic Staff
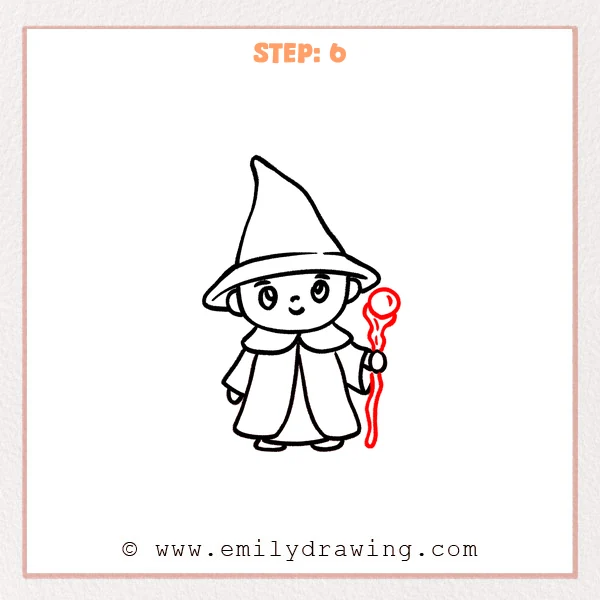
Add a curved staff beside the wizard’s right hand, letting it stretch upward from the hand. Draw a curled decorative shape at the top to give it a magical feeling.
Pro Tip: Keep the staff close to the hand so it looks like the wizard is really holding it.
Step 7: Color in your drawing!
Fun Facts
- Wizards in stories often wear tall hats to make their silhouette easy to recognize.
- A staff is a common wizard accessory because it helps show magic and wisdom.
- Robes are useful in character drawing because their simple shapes are easy for beginners.
Pin it now, Draw later!
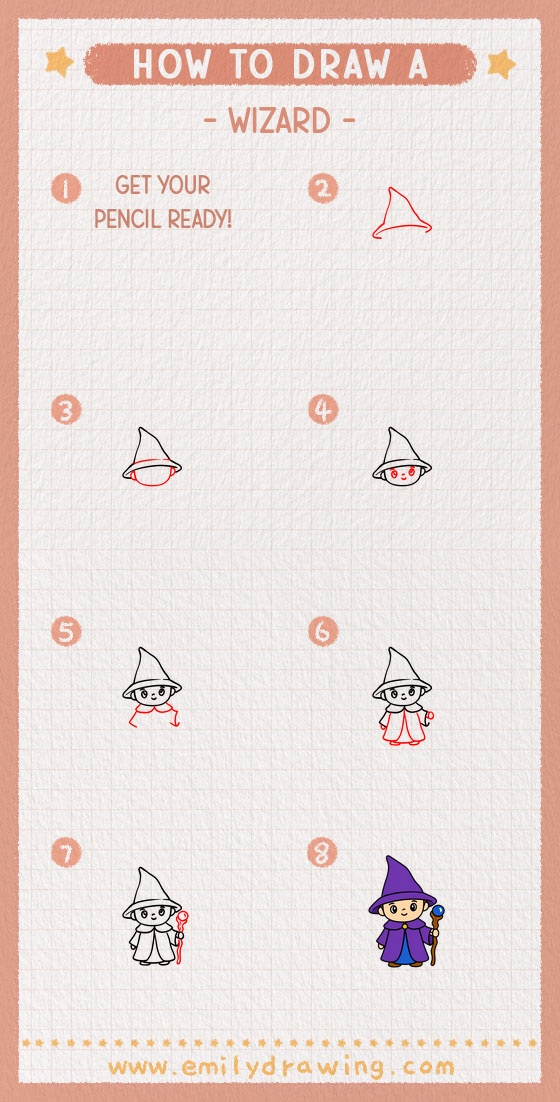
Now you know how to draw wizard using simple shapes and clear steps. Trace your favorite lines with a marker, then erase any extra pencil marks. You can color the hat and robe in deep blue, purple, gray, or any magical color you like.
Try drawing another wizard with a different hat shape or staff design.
Get the FREE Printable Drawing Guide
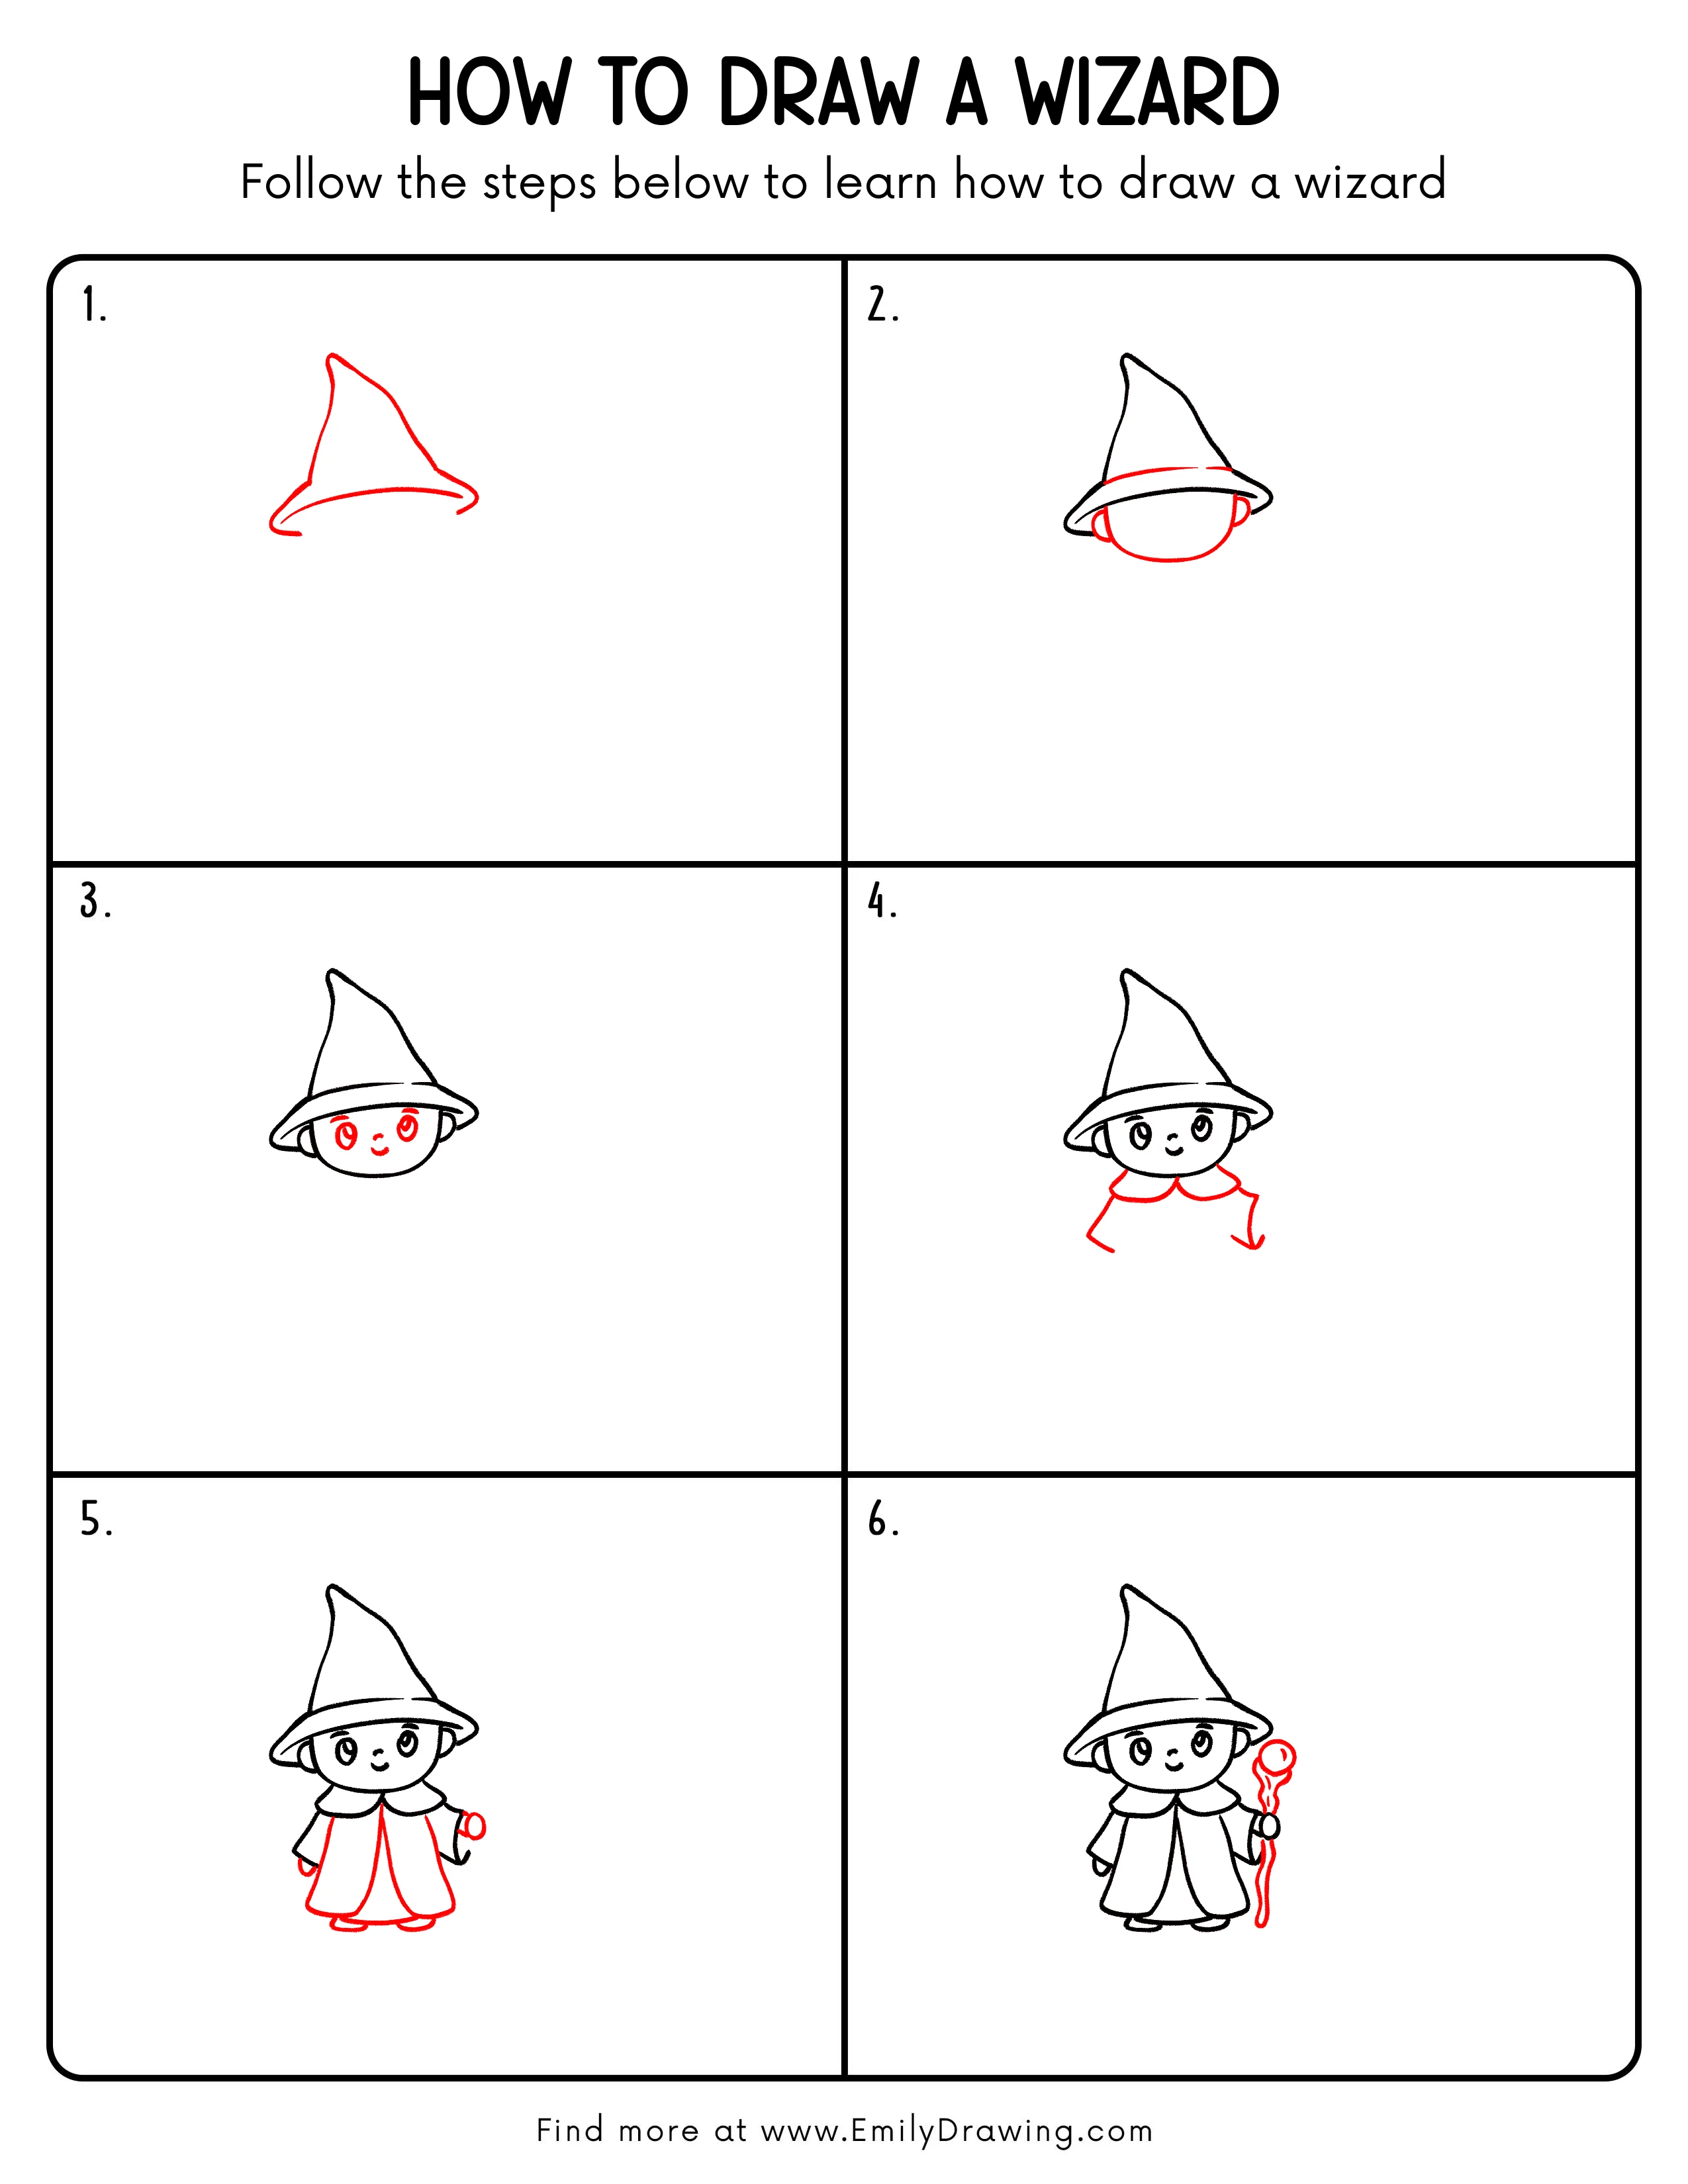
FREE Download Printable Wizard Drawing Tutorial
Frequently Asked Questions
Is this wizard drawing for beginners?
Yes, this step by step drawing uses simple curves, circles, and robe shapes, making it good for beginners.
How can I make my wizard look more magical?
You can add stars, sparkles, moons, or small patterns on the hat and robe.
What colors work best for a wizard?
Purple, blue, gray, and gold are classic choices, but any bright or dark color can work well.



