
Learning how to draw shamrock is simple with clear shapes.
This easy drawing tutorial uses heart-shaped leaves and a curved stem.
Take your time, follow each step, and enjoy this drawing for beginners.
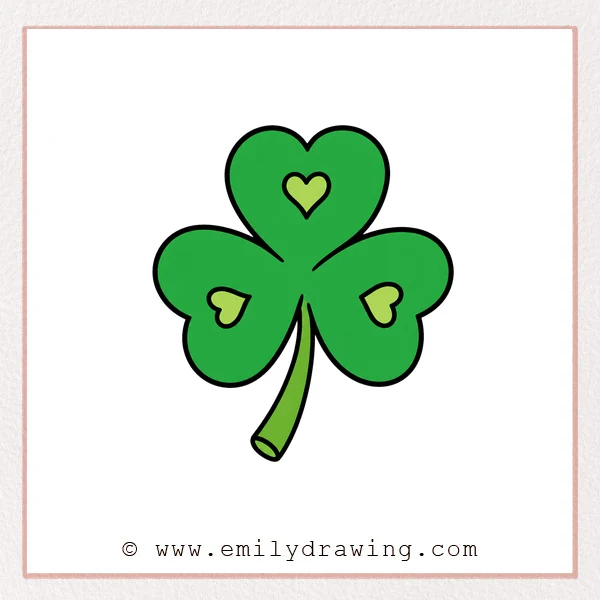
What You Will Need
- Pencil
- Eraser
- Black marker or pen
- Green coloring tools
- Drawing paper
Here are my RECOMMENDED Art Supplies!
- Crayola Coloring Set (140 Pieces – Mega Value!)
- 24 Colored Crayon Set
- A4 Printer Paper
- Crayola Coloring Pencils
- HP Home Printer with Instant Ink!
Time needed:
15 minutes.
Step-by-Step Drawing Guide
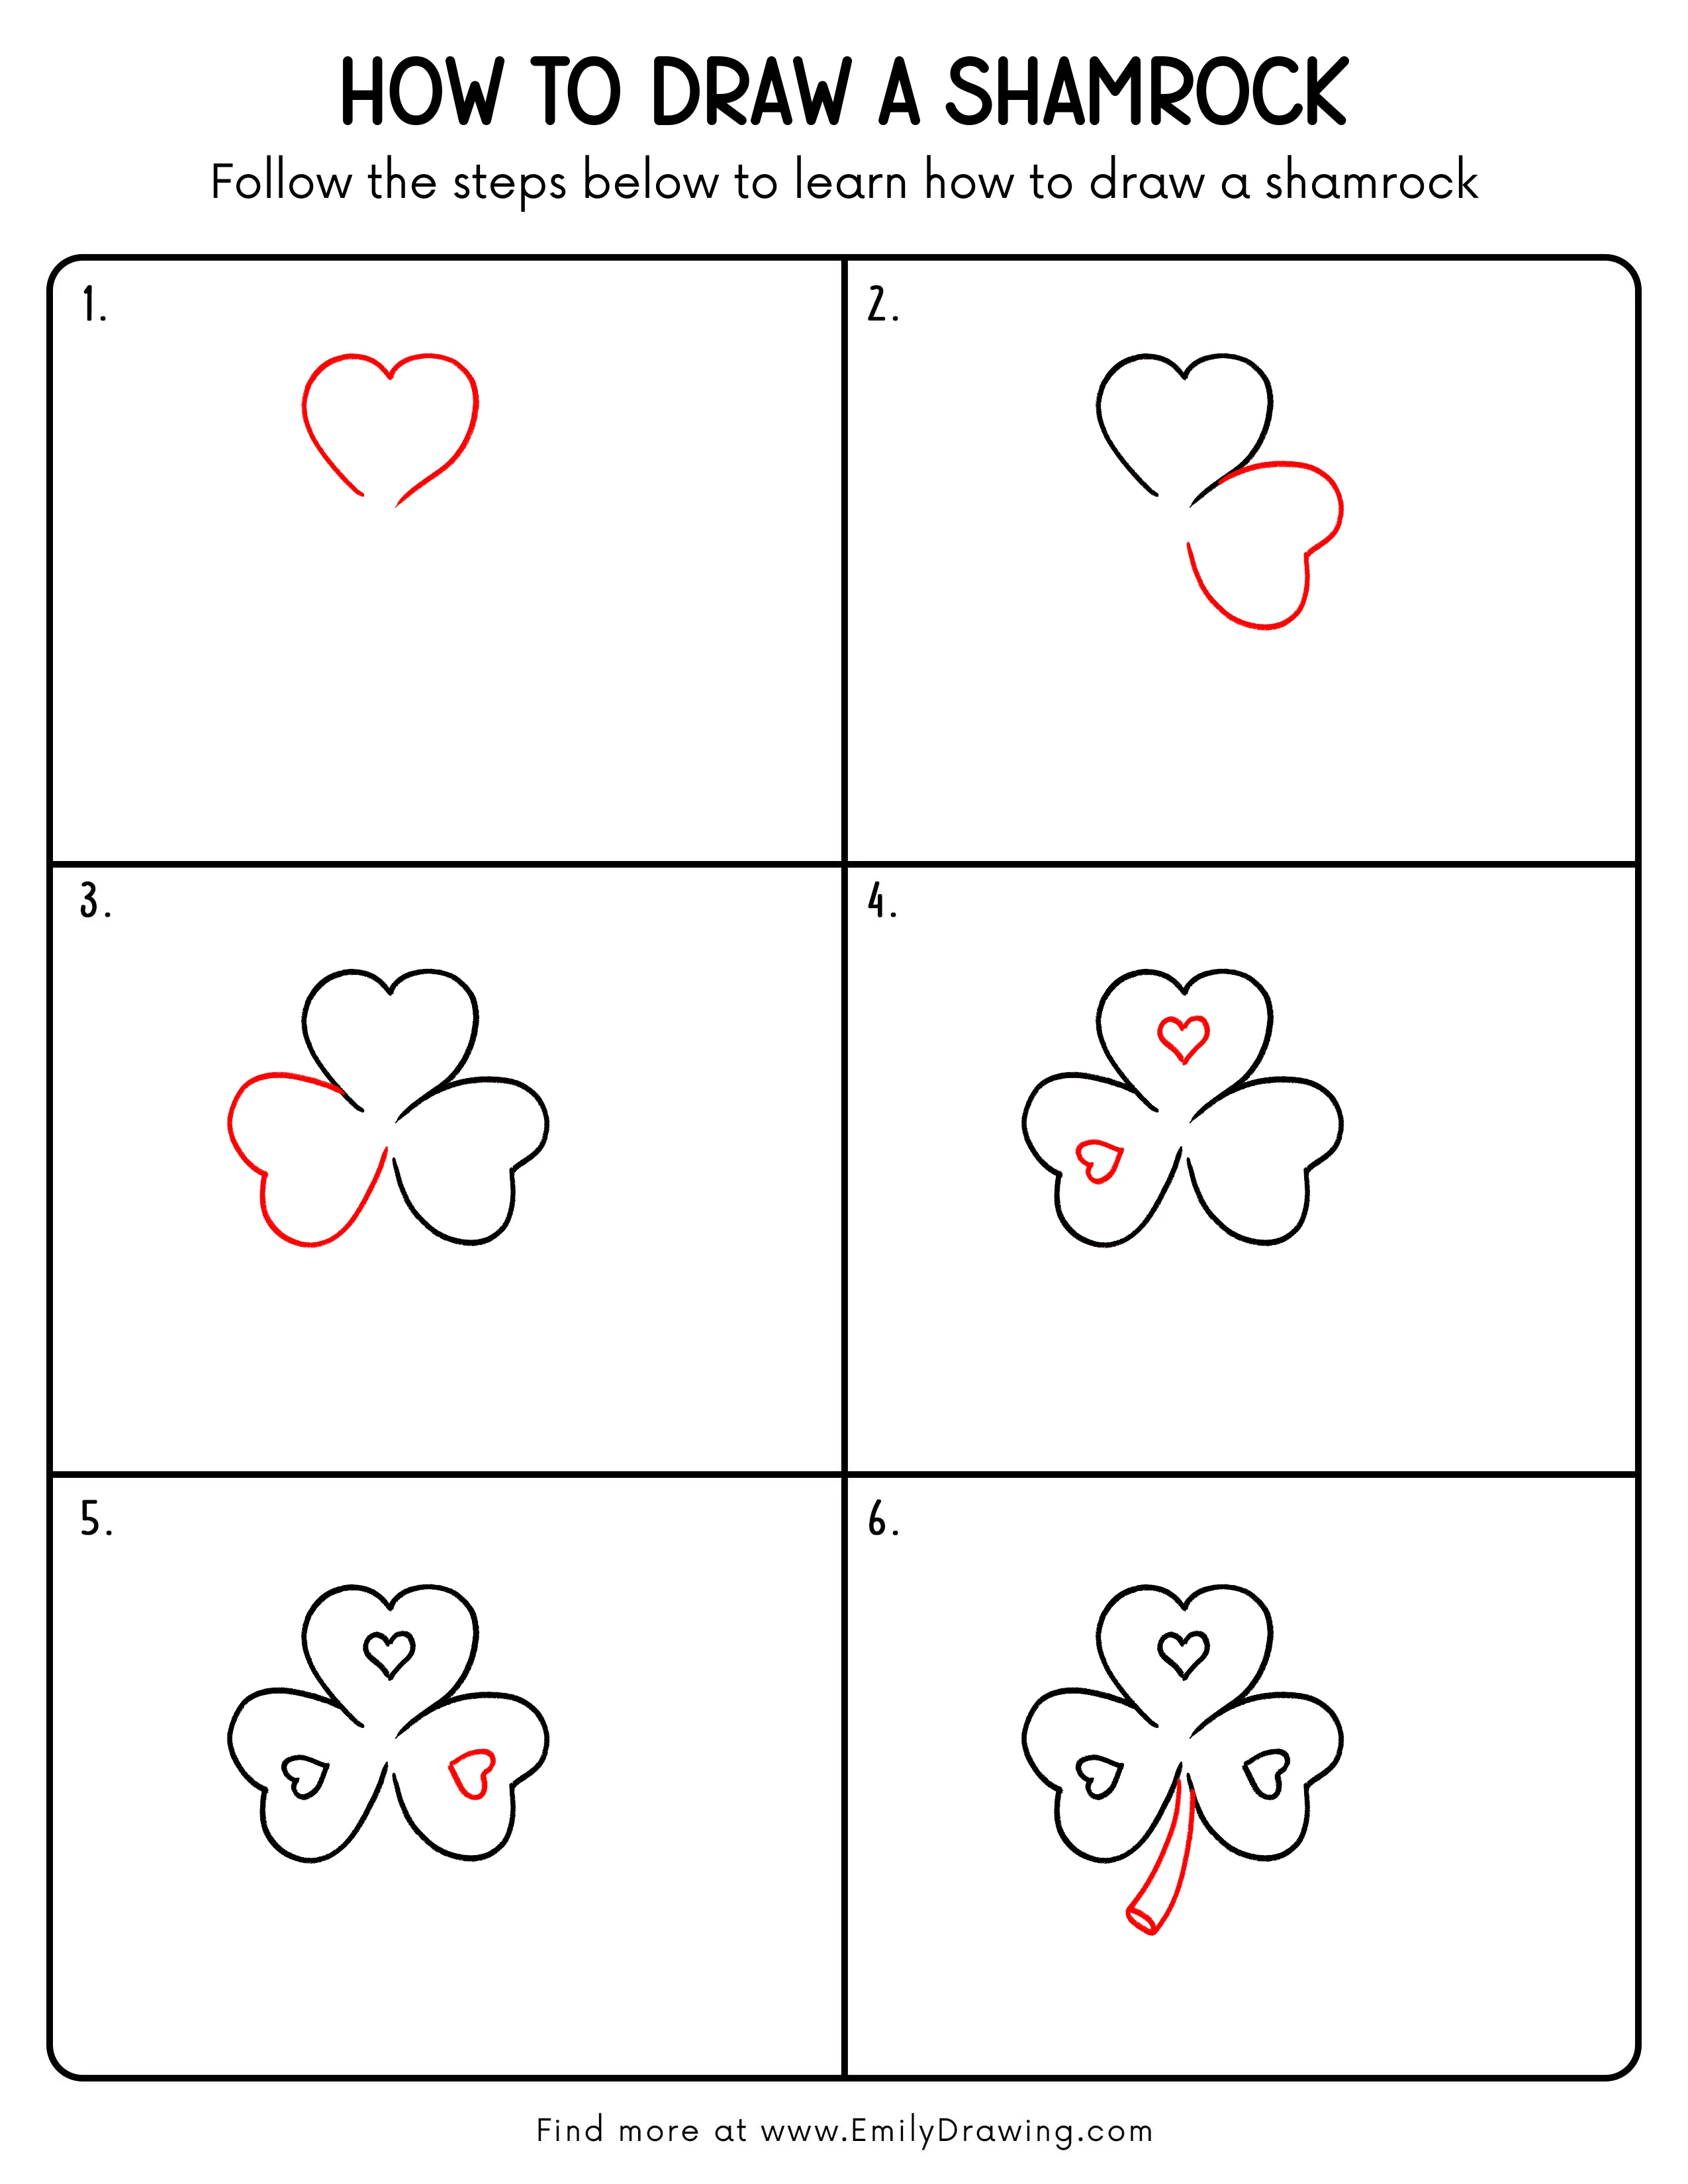
Step 1: Draw the First Heart-Shaped Leaf
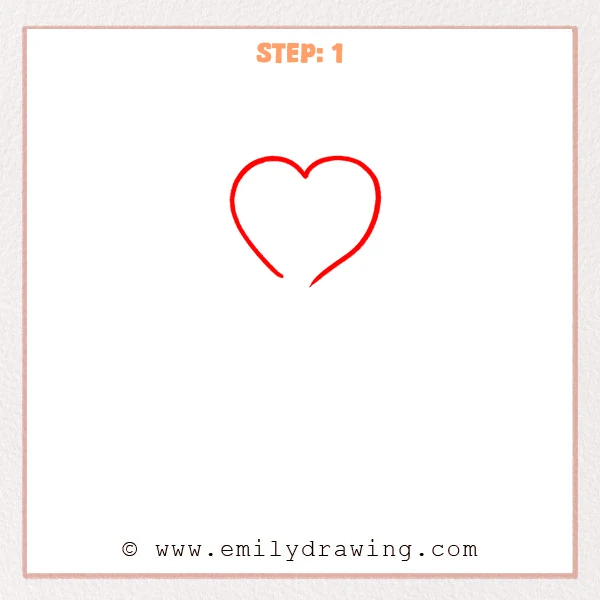
Start near the top center and draw a wide, rounded heart shape.
Keep the bottom open, with both tips pointing down toward the center.
Pro Tip: Keep both sides close in size so the shamrock will look balanced.
Step 2: Add the Lower Right Leaf
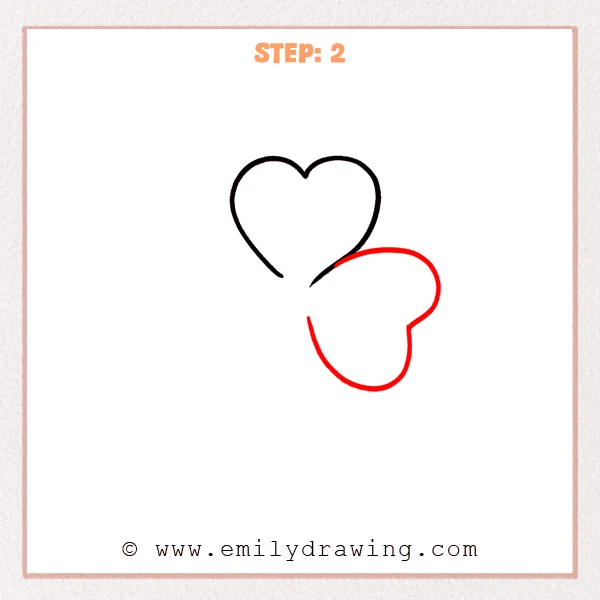
From the right side of the center, add a second heart-shaped leaf spreading downward.
Draw the rounded outer edge and lower curve, leaving a small opening near the middle.
Pro Tip: Let the second leaf tilt slightly so the shamrock looks more natural.
Step 3: Add the Lower Left Leaf
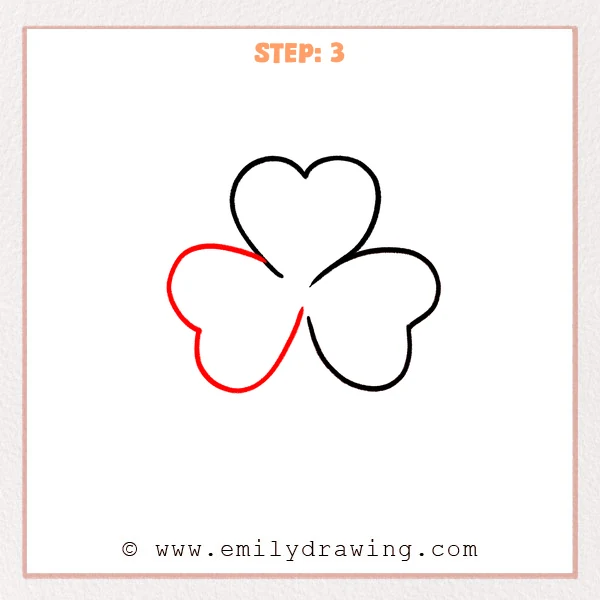
From the left side of the center, add a third heart-shaped leaf spreading downward.
Draw the rounded outer edge, then bring the curve back near the center.
Pro Tip: Keep the two lower leaves similar in size so the shamrock feels steady.
Step 4: Add Small Heart Decorations
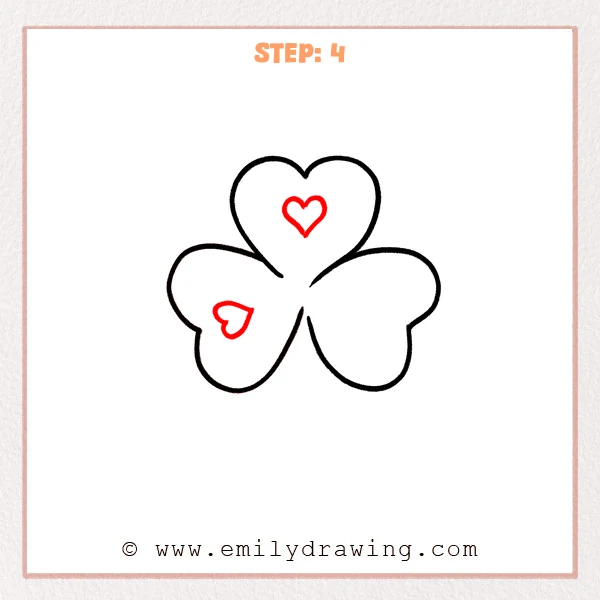
Draw a small heart inside the top leaf, with the point facing downward.
Add another tilted small heart inside the lower left leaf to enrich the leaf details.
Pro Tip: Keep each small heart inside the leaf and away from the outer outline.
Step 5: Add the Small Heart on the Right
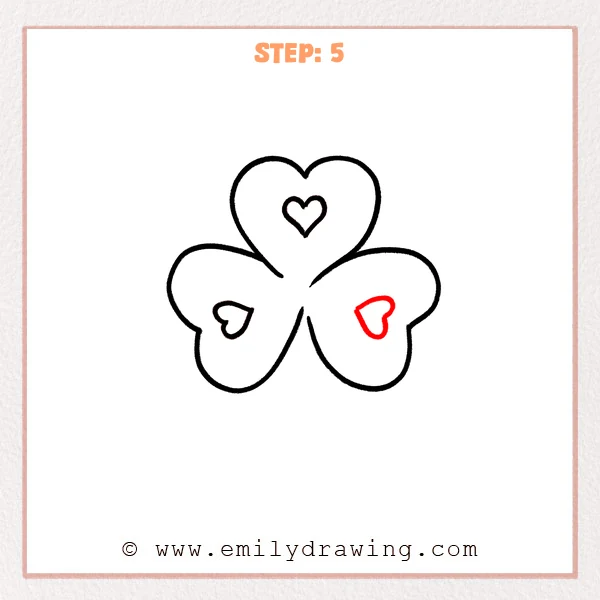
Draw a third small heart inside the lower right leaf, tilted slightly.
Keep this heart close in size to the other decorations for a unified look.
Pro Tip: Keep similar spacing among the three small hearts so the drawing looks neat.
Step 6: Draw the Curved Stem
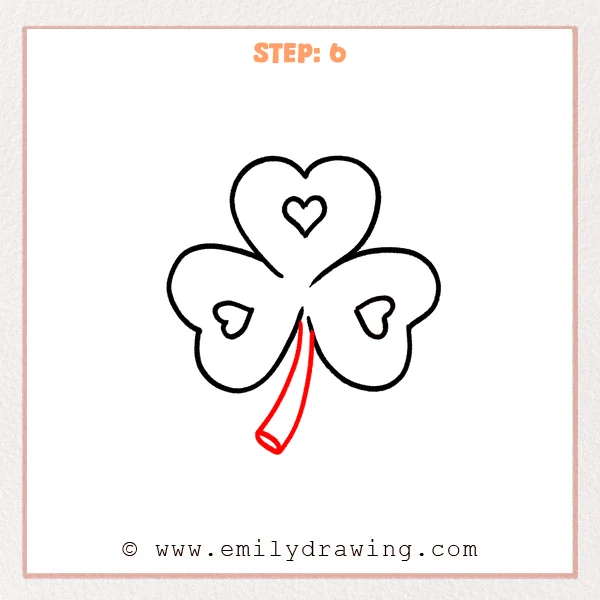
From the center of the three leaves, draw a long curved stem downward.
Let both sides of the stem narrow gradually, then connect them with a small curve at the end.
Pro Tip: Let the stem bend gently to one side so the shamrock looks softer.
Step 7: Color in your drawing!
Fun Facts
- A shamrock usually has three leaves and is often linked with Ireland.
- The heart-shaped leaves make it a friendly subject for young artists.
- Many artists use simple rounded shapes to make plant drawings easier.
Pin it now, Draw later!
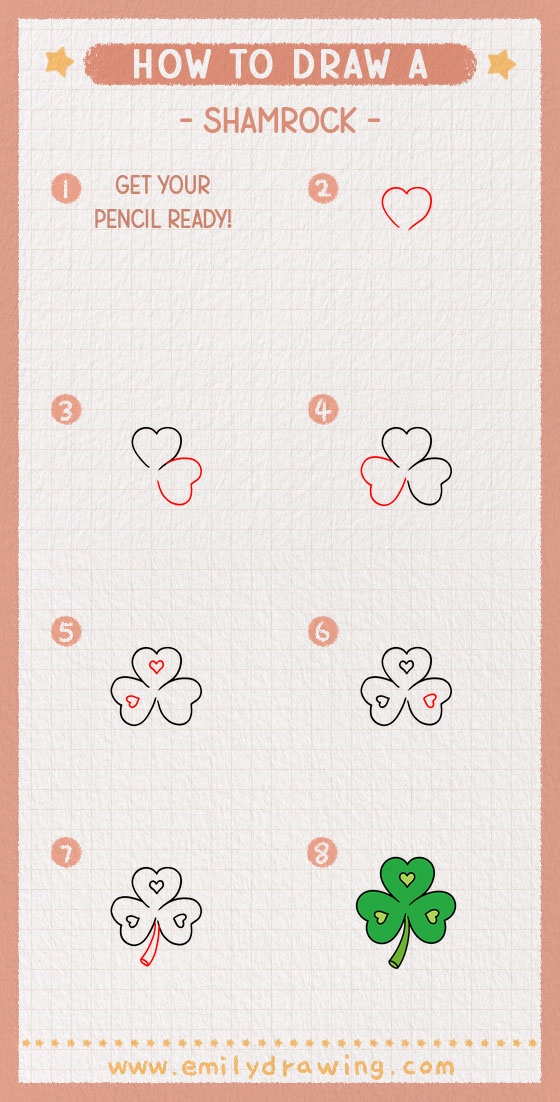
Trace the final lines with a black marker when you are happy with the shape.
Erase extra pencil marks, then color the shamrock with bright or soft green.
You have completed a step by step drawing with simple leaves and a curved stem.
Keep practicing this easy drawing tutorial, and try drawing a smaller shamrock next.
Get the FREE Printable Drawing Guide
FREE Download Printable Shamrock Drawing Tutorial
Frequently Asked Questions
Is this shamrock drawing good for beginners?
Yes, this shamrock is a great drawing for beginners because it uses simple heart shapes.
Can I color the shamrock different shades of green?
Yes, you can use light green, dark green, or both to add gentle variety.
How can I make the shamrock look cleaner?
Draw slowly, keep the leaves balanced, and trace the best lines at the end.



