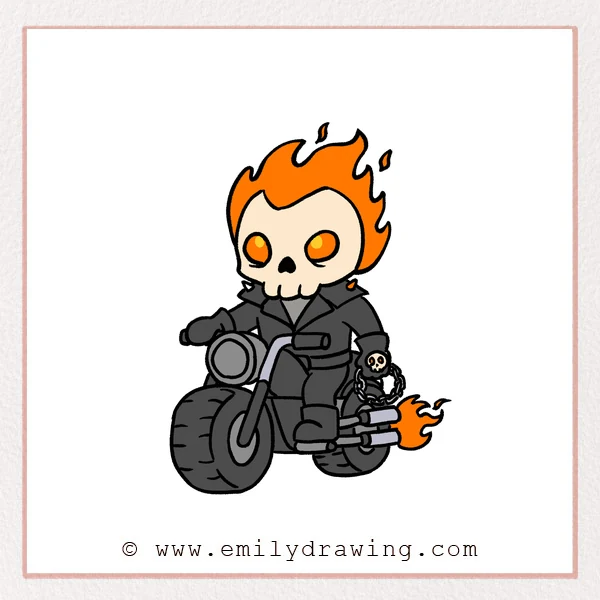
Learn how to draw Ghost Rider riding a chunky cartoon motorcycle. This step by step drawing combines pointed flames, a simple skull, and rounded mechanical shapes.
What You Will Need
- Drawing paper
- A pencil
- An eraser
Here are my RECOMMENDED Art Supplies!
- Crayola Coloring Set (140 Pieces – Mega Value!)
- 24 Colored Crayon Set
- A4 Printer Paper
- Crayola Coloring Pencils
- HP Home Printer with Instant Ink!
Time needed:
26 minutes.
Step-by-Step Drawing Guide
Step 1: Outline the Head Flames
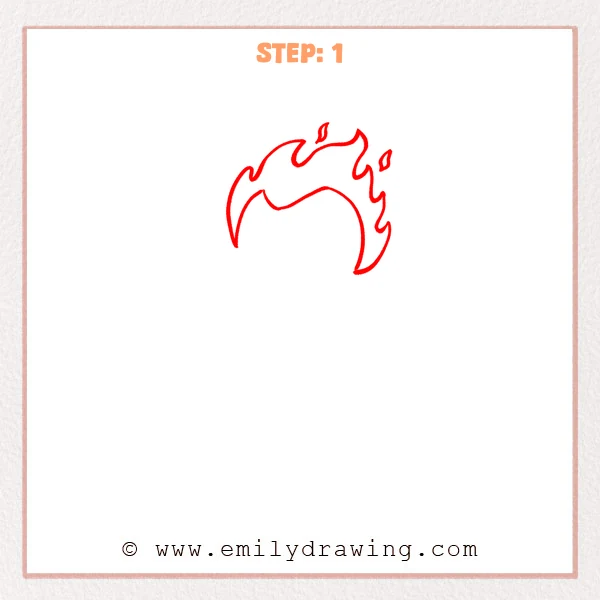
Draw a tall flame outline with several curved, pointed tips. Add a curved inner edge and two small floating flame shapes above.
Pro Tip: Leave a wide opening below the flames for the skull.
Step 2: Build the Skull
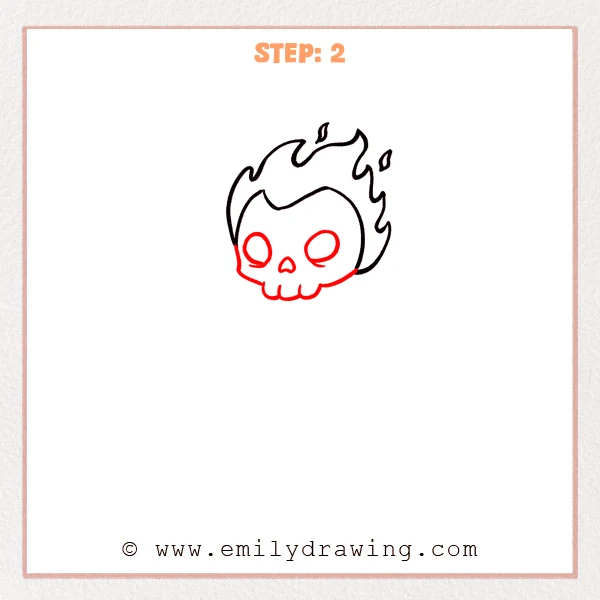
Curve the skull’s cheeks inward beneath the flame opening. Add two large eye sockets, a small triangular nose, and three rounded teeth.
Pro Tip: Keep both eye sockets above the narrow tooth section.
Step 3: Add the Jacket and Arms
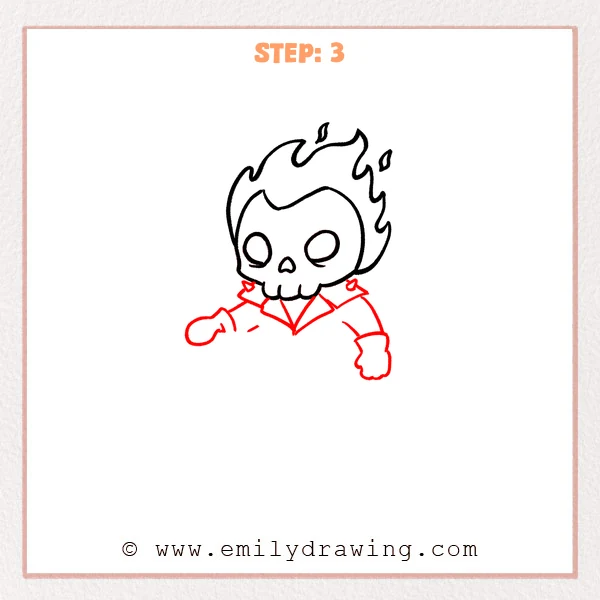
Draw pointed jacket lapels, spiked shoulder tabs, and two curved sleeves. Finish each sleeve with a cuff and a rounded glove.
Pro Tip: Make the shoulders narrower than the flame crown.
Step 4: Place the Headlight and Rider’s Leg
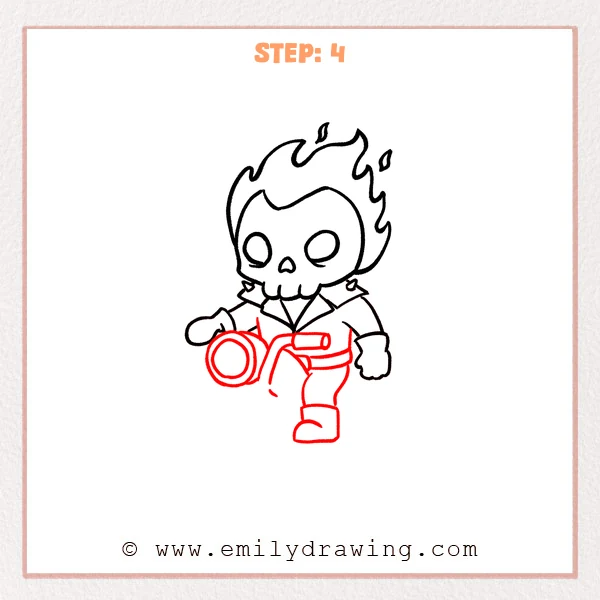
Draw a double-ring headlight and bent handlebar with a short grip. Add the jacket hem, a bent trouser leg, and a rounded boot.
Pro Tip: Leave open space below the headlight for the front wheel.
Step 5: Draw the Front Wheel
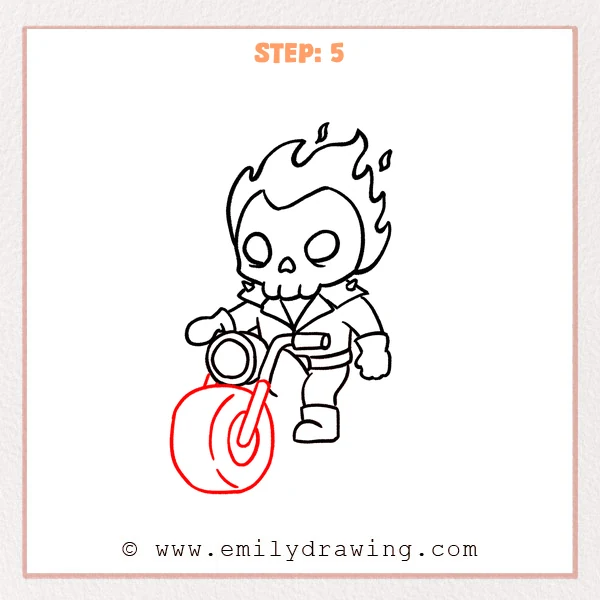
Sketch a large rounded tire beneath the headlight with curved interior lines. Add the narrow slanted fork and its small connection behind the light.
Pro Tip: Let the fork overlap the wheel’s inner oval.
Step 6: Extend the Motorcycle Body
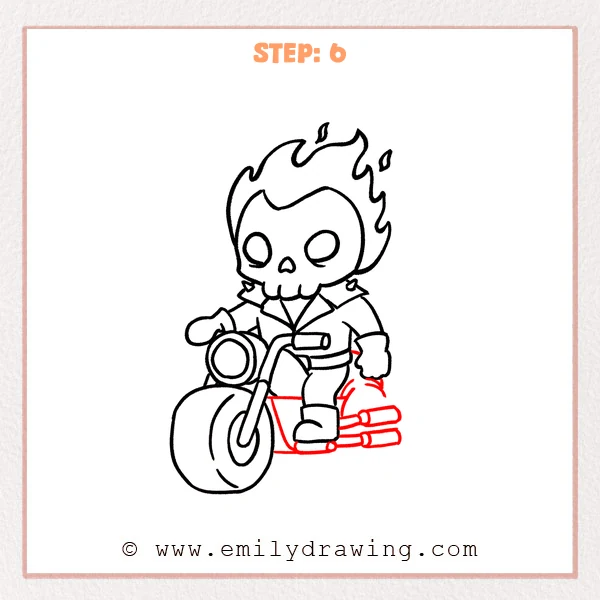
Outline the angular frame behind the fork and under the boot. Add the rear fender, footrest, and two long exhaust pipes extending right.
Pro Tip: Keep a small gap between the two exhaust pipes.
Step 7: Add the Rear Wheel and Treads
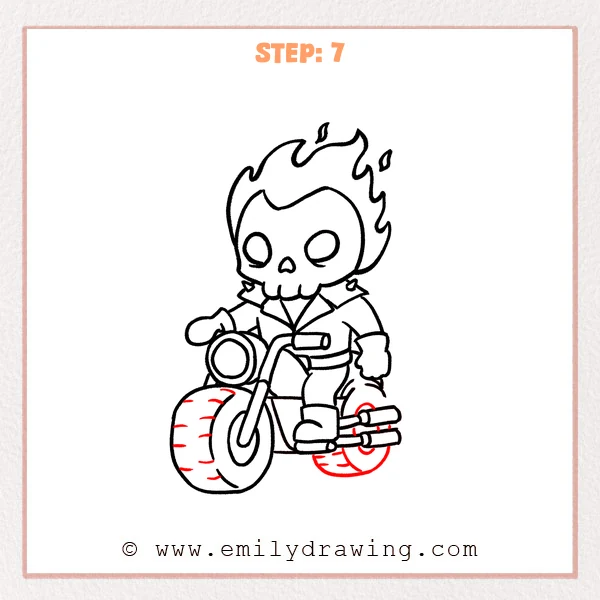
Draw the rear wheel behind the exhaust pipes and fender. Add its inner curve and short tread marks on both tires.
Pro Tip: Stop rear wheel lines wherever the exhaust pipes cross them.
Step 8: Detail the Gloves and Chain
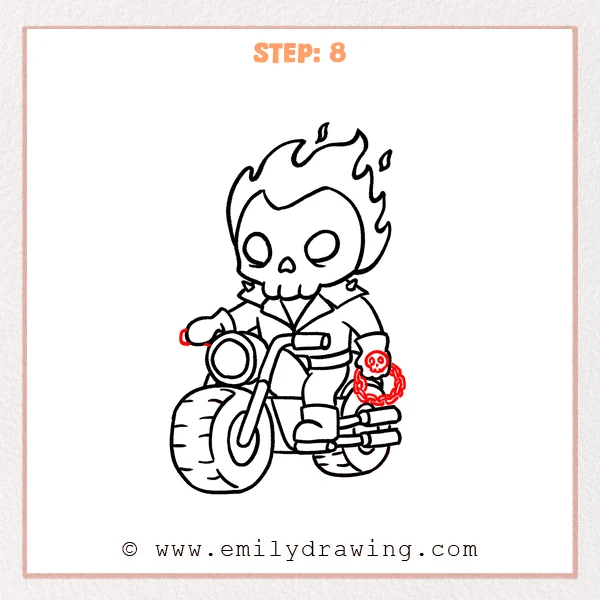
Add a tiny skull emblem to the glove on the right. Hang a loop of linked ovals below it, and finish the left handlebar end.
Pro Tip: Draw the chain links slowly, allowing each oval to overlap its neighbor.
Step 9: Finish with Exhaust Flames
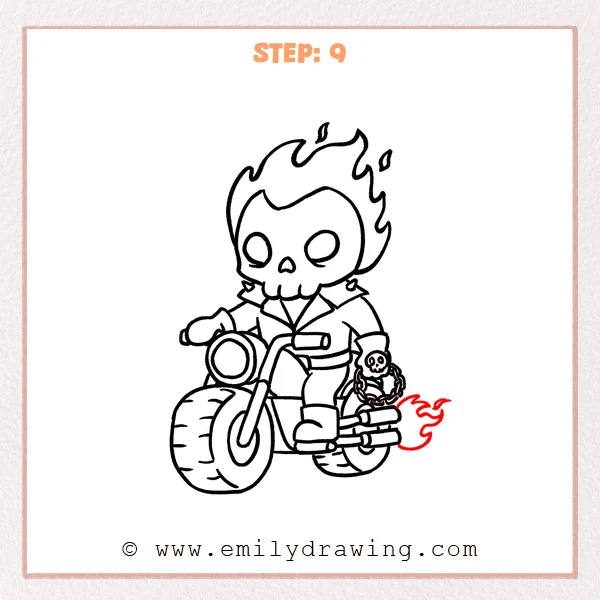
Draw curling flame tongues extending from the exhaust outlets. Add a small detached flame tip above the larger plume.
Pro Tip: Use flowing curves that narrow sharply at each flame tip.
Step 10: Color in your drawing!
Fun Facts
- Ghost Rider’s flame crown creates a taller silhouette than the skull alone.
- The large front tire makes this Ghost Rider motorcycle appear closer to the viewer.
Pin it now, Draw later!
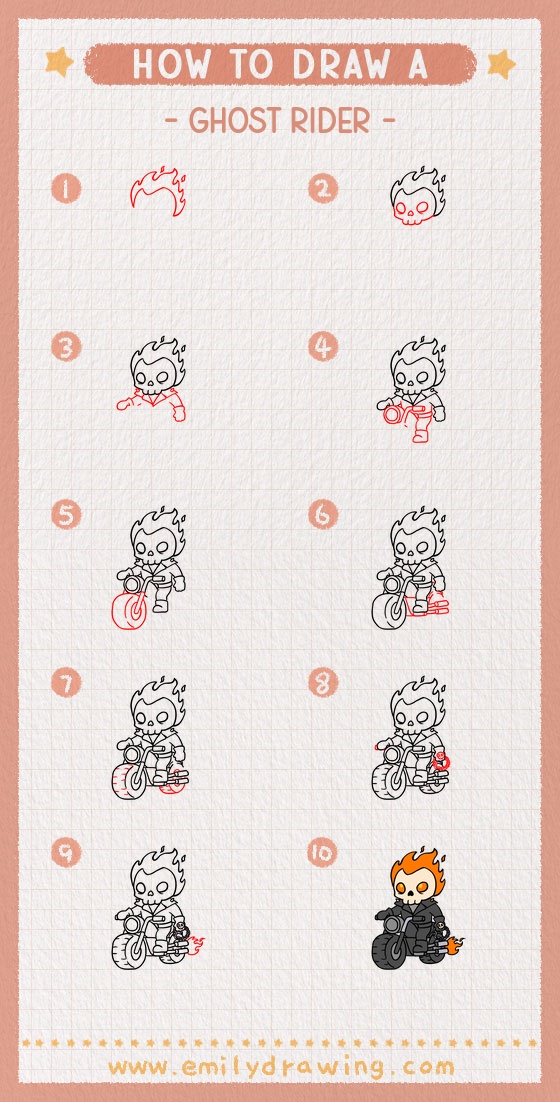
Your Ghost Rider drawing now combines a flaming skull, riding clothes, and a detailed motorcycle. This easy drawing tutorial offers practice with both organic curves and mechanical shapes. Try another sketch with extra room around the flames.
Get the FREE Printable Drawing Guide
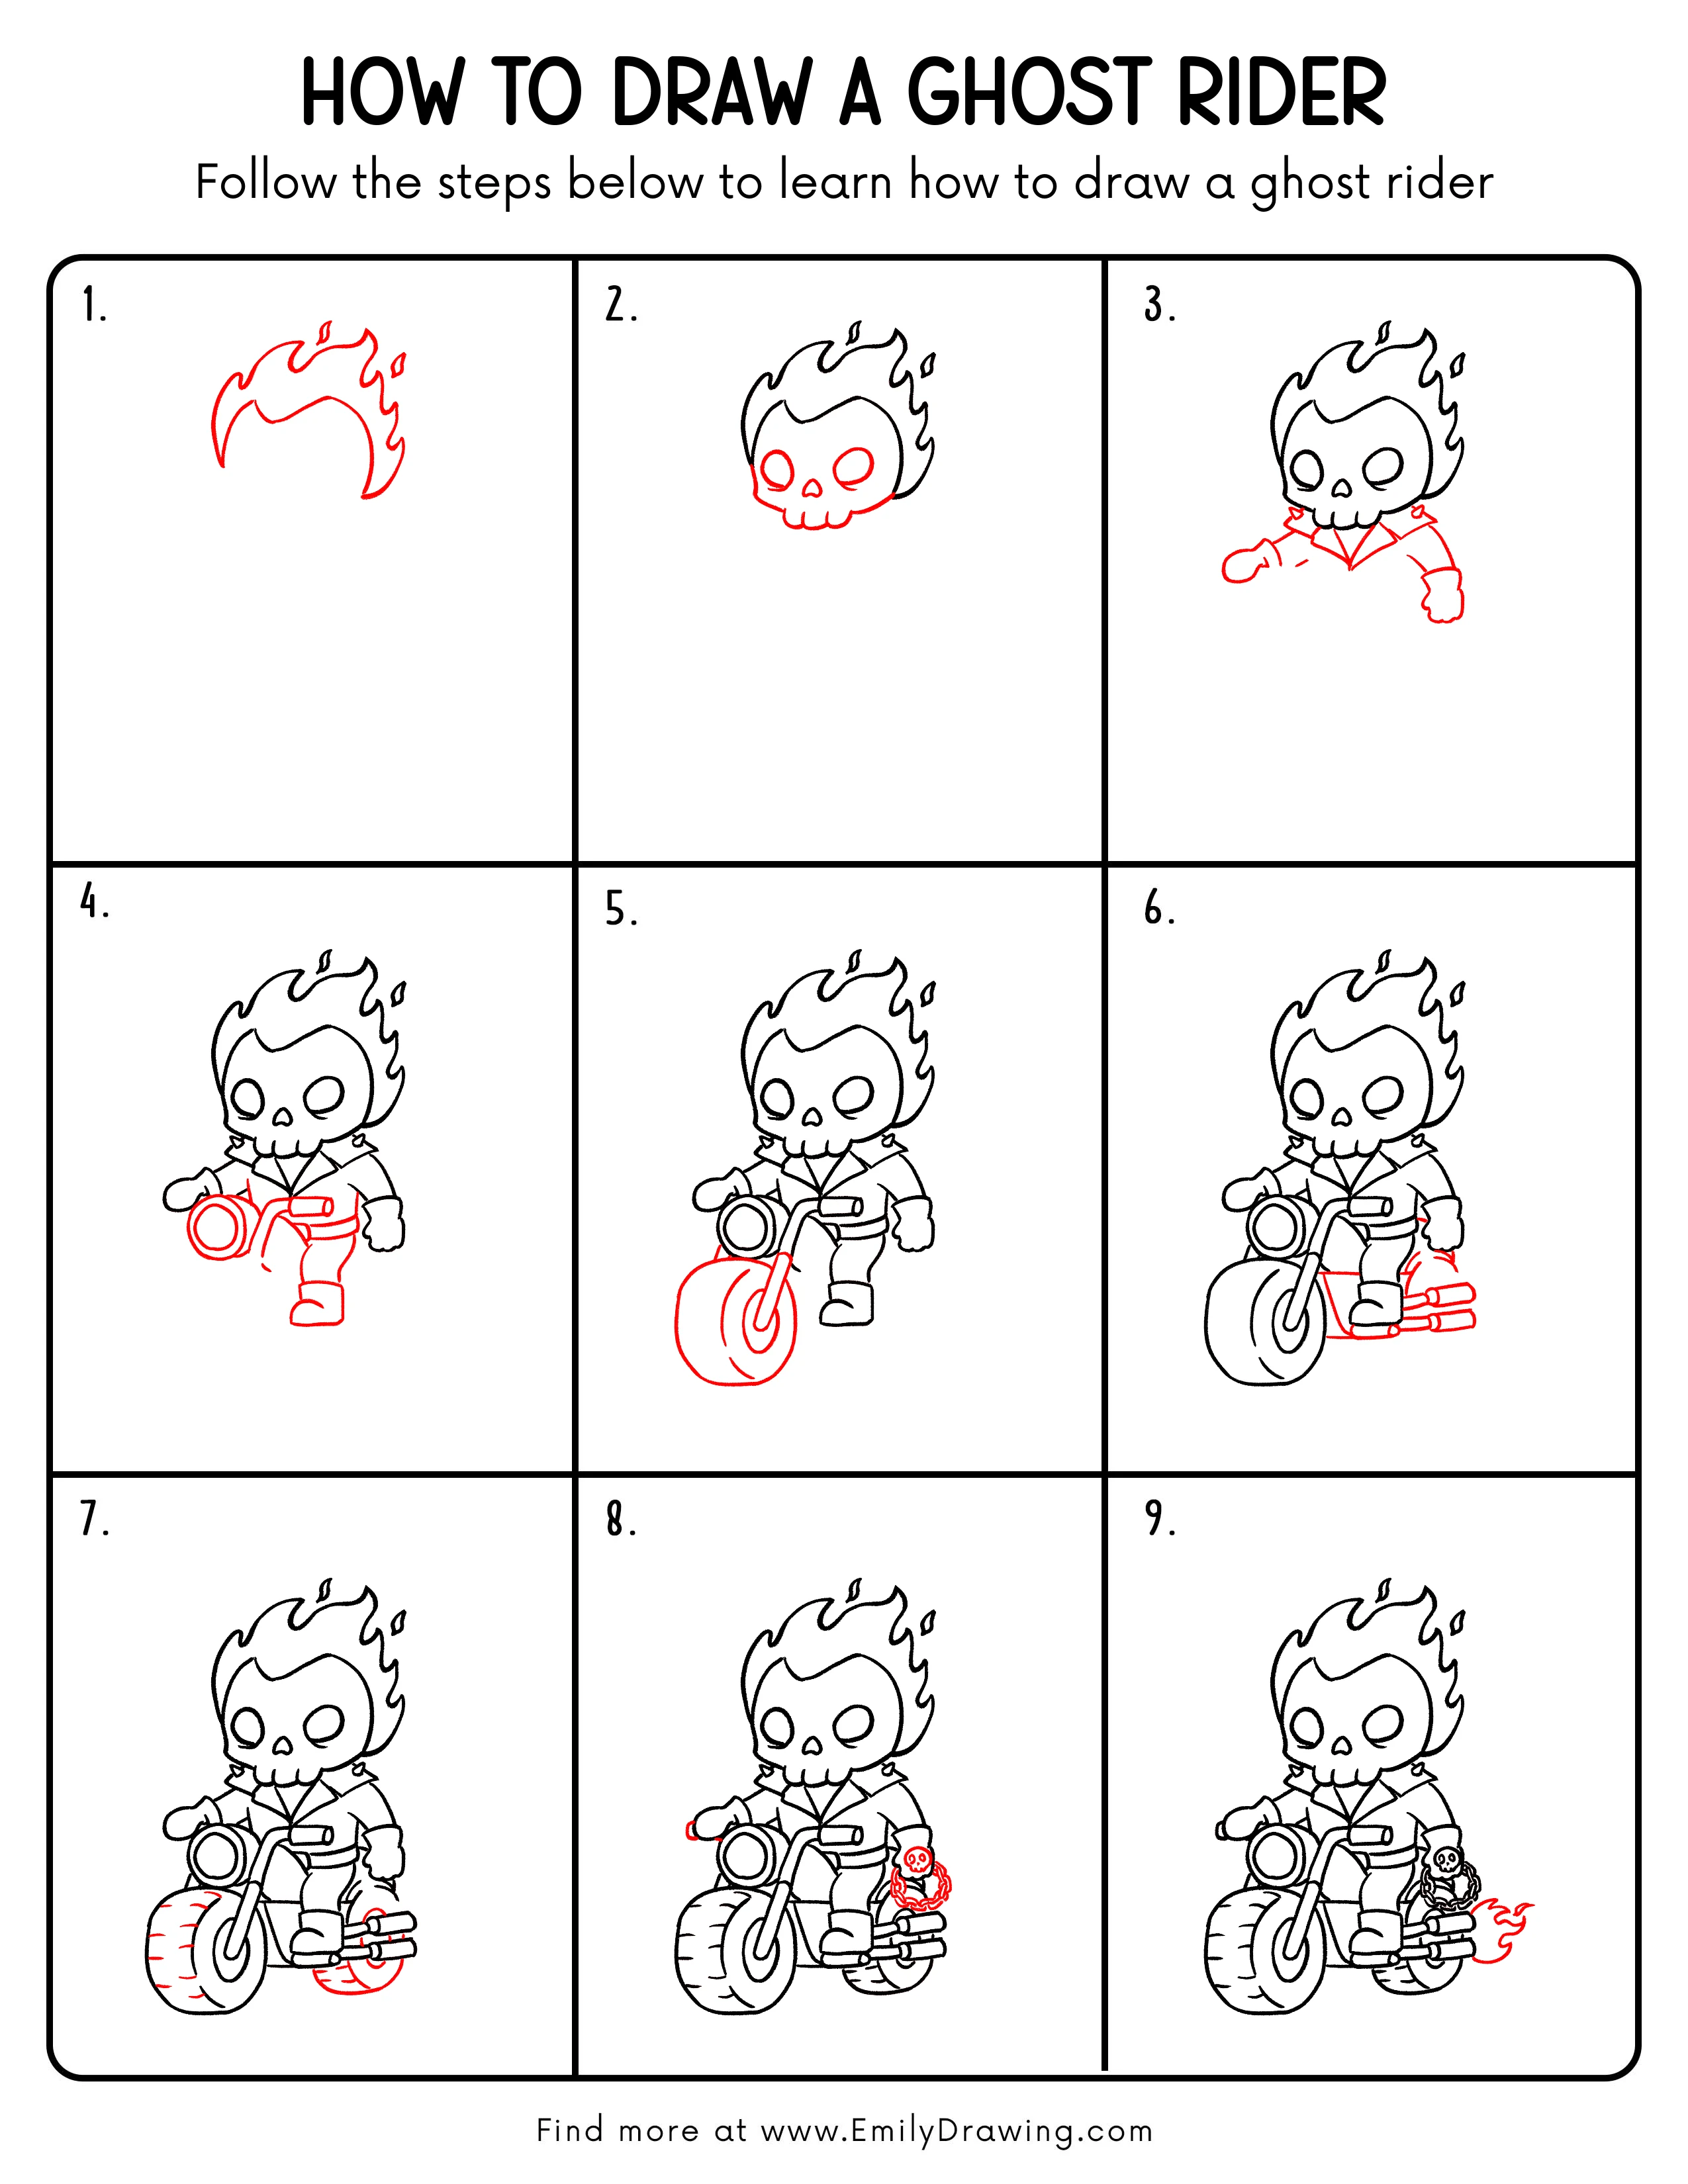
FREE Download Printable Ghost Rider Drawing Tutorial
Frequently Asked Questions
How can I simplify Ghost Rider’s chain?
Use fewer, larger oval links while keeping the same hanging loop shape.
What makes this Ghost Rider drawing manageable for beginners?
Work on one group of shapes at a time, leaving the tiny glove details until later.