Learn how to draw a hand with an open palm and spread fingers. This drawing for beginners builds the outline one finger at a time.
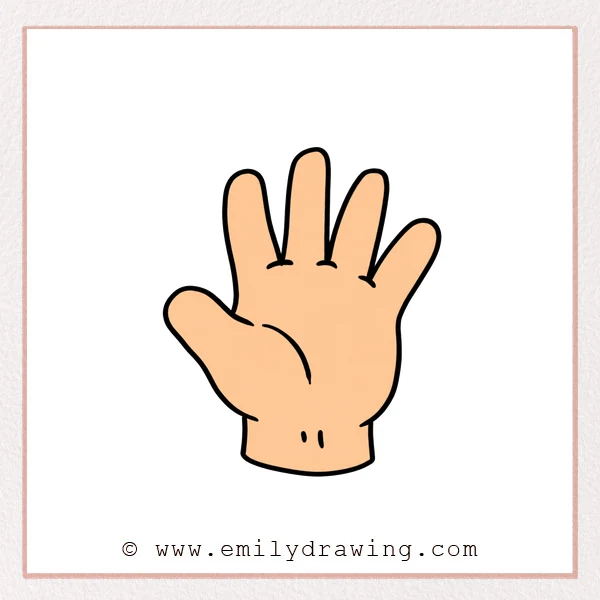
This easy drawing tutorial breaks the shapes into six manageable stages. Follow the step by step drawing at your own pace.
What You Will Need
- Drawing paper
- A pencil and eraser
- Colored pencils or crayons, if desired
Here are my RECOMMENDED Art Supplies!
- Crayola Coloring Set (140 Pieces – Mega Value!)
- 24 Colored Crayon Set
- A4 Printer Paper
- Crayola Coloring Pencils
- HP Home Printer with Instant Ink!
Time needed:
11 minutes.
Step-by-Step Drawing Guide
Step 1: Outline the Thumb
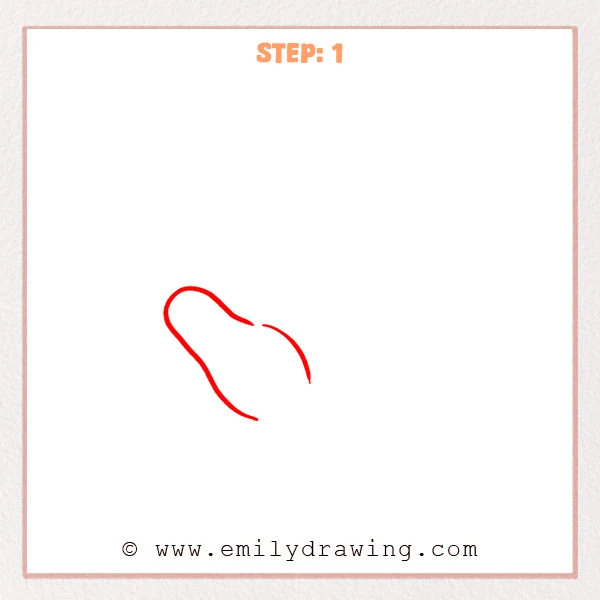
Draw a rounded thumb pointing toward the upper left. Continue its lower edge toward the wrist, then add a separate curved palm crease.
Pro Tip: Leave the upper and lower palm areas open for later additions.
Step 2: Add the Index Finger
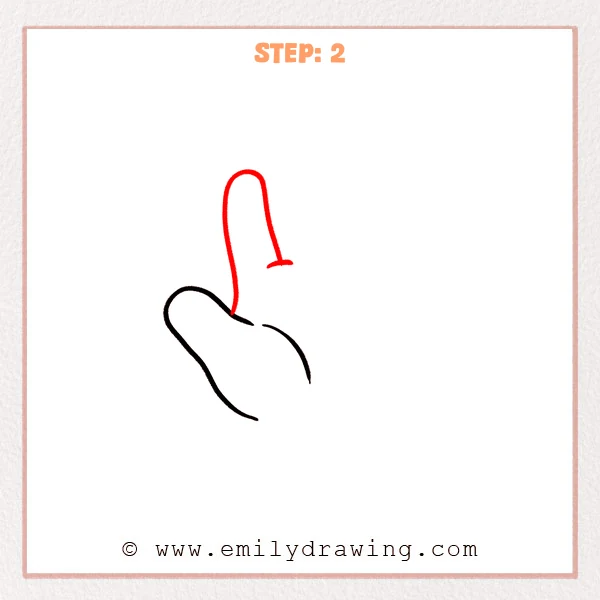
Draw a tall rounded index finger rising beside the thumb. Add a short curved crease across its base on the right.
Pro Tip: Make the index finger noticeably longer than the thumb.
Step 3: Draw the Middle Finger
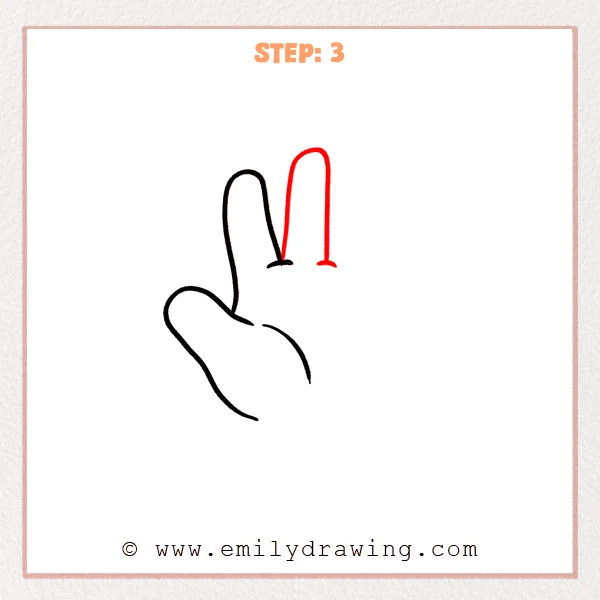
Add a longer rounded finger immediately right of the index finger. Bring its right edge down to a short curved base crease.
Pro Tip: Let the middle fingertip reach highest in the hand.
Step 4: Add the Ring Finger
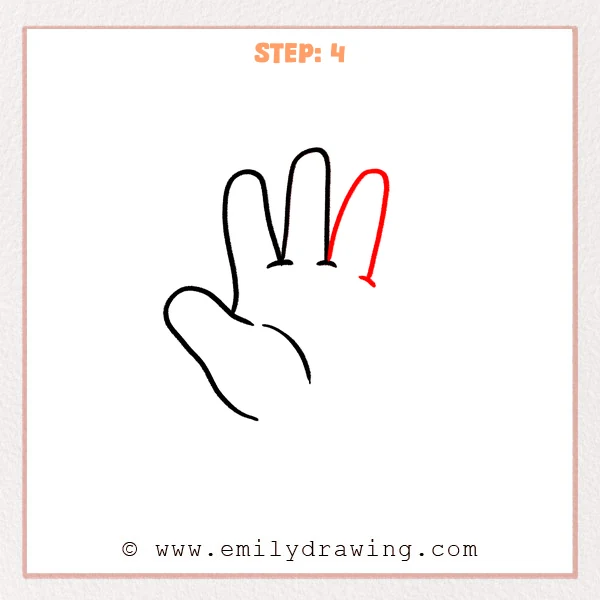
Draw another rounded finger leaning slightly toward the right. Finish its lower right edge with a small curved crease.
Pro Tip: Keep the ring finger shorter than the middle finger.
Step 5: Complete the Little Finger and Palm
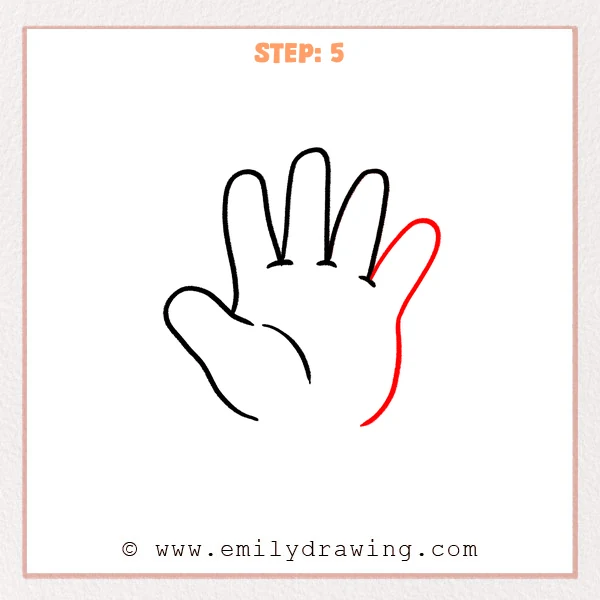
Add the shortest upright finger on the far right. Extend its outside edge downward in a long curve to form the palm side.
Pro Tip: Curve the palm inward slightly below the little finger.
Step 6: Finish the Wrist
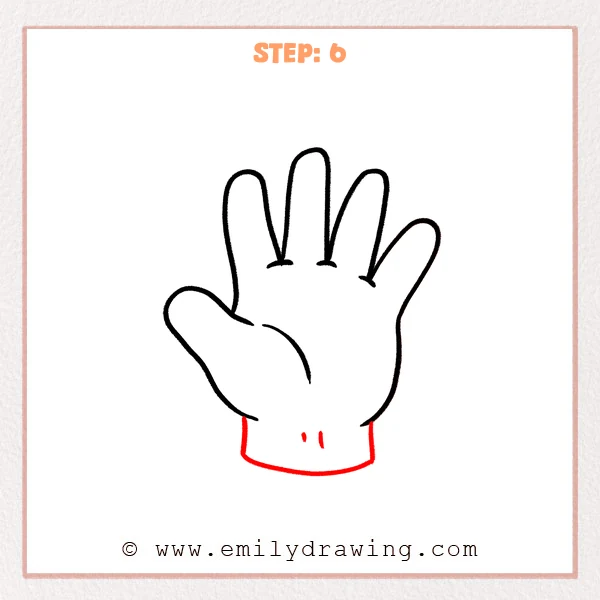
Extend two short wrist edges down from the palm openings. Join them with a curved base and add two short interior crease marks.
Pro Tip: Keep the wrist narrower than the widest part of the palm.
Step 7: Color in your drawing!
Fun Facts
- The tallest fingertip creates a clear high point in this hand outline.
- Small creases help distinguish the hand’s palm from its long finger shapes.
Pin it now, Draw later!
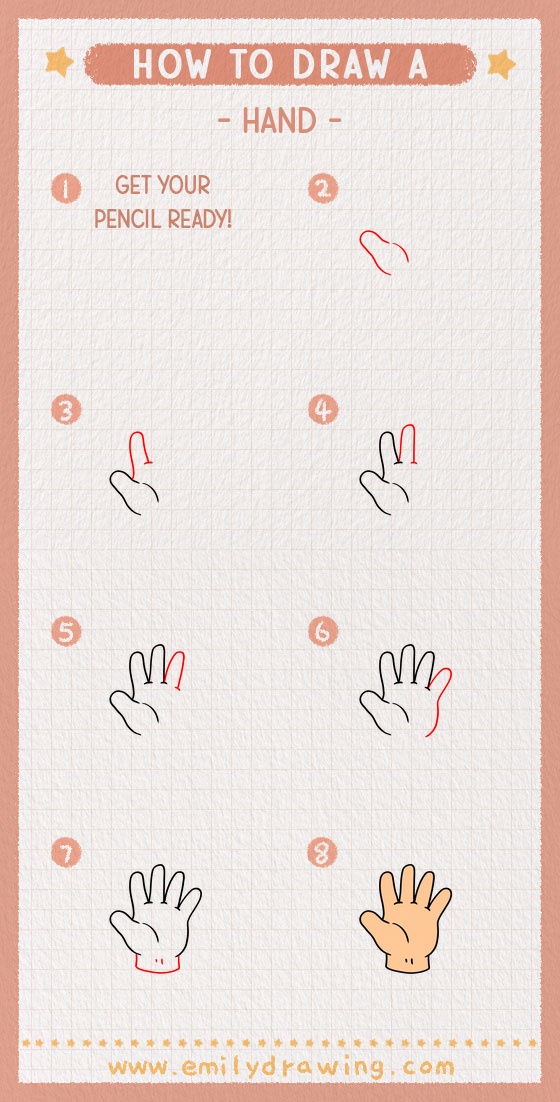
Your hand drawing now includes five spread digits, a palm, and a wrist. Review the changing finger lengths and gently smooth any uneven curves. Try drawing another hand while looking at your own open palm.
Get the FREE Printable Drawing Guide
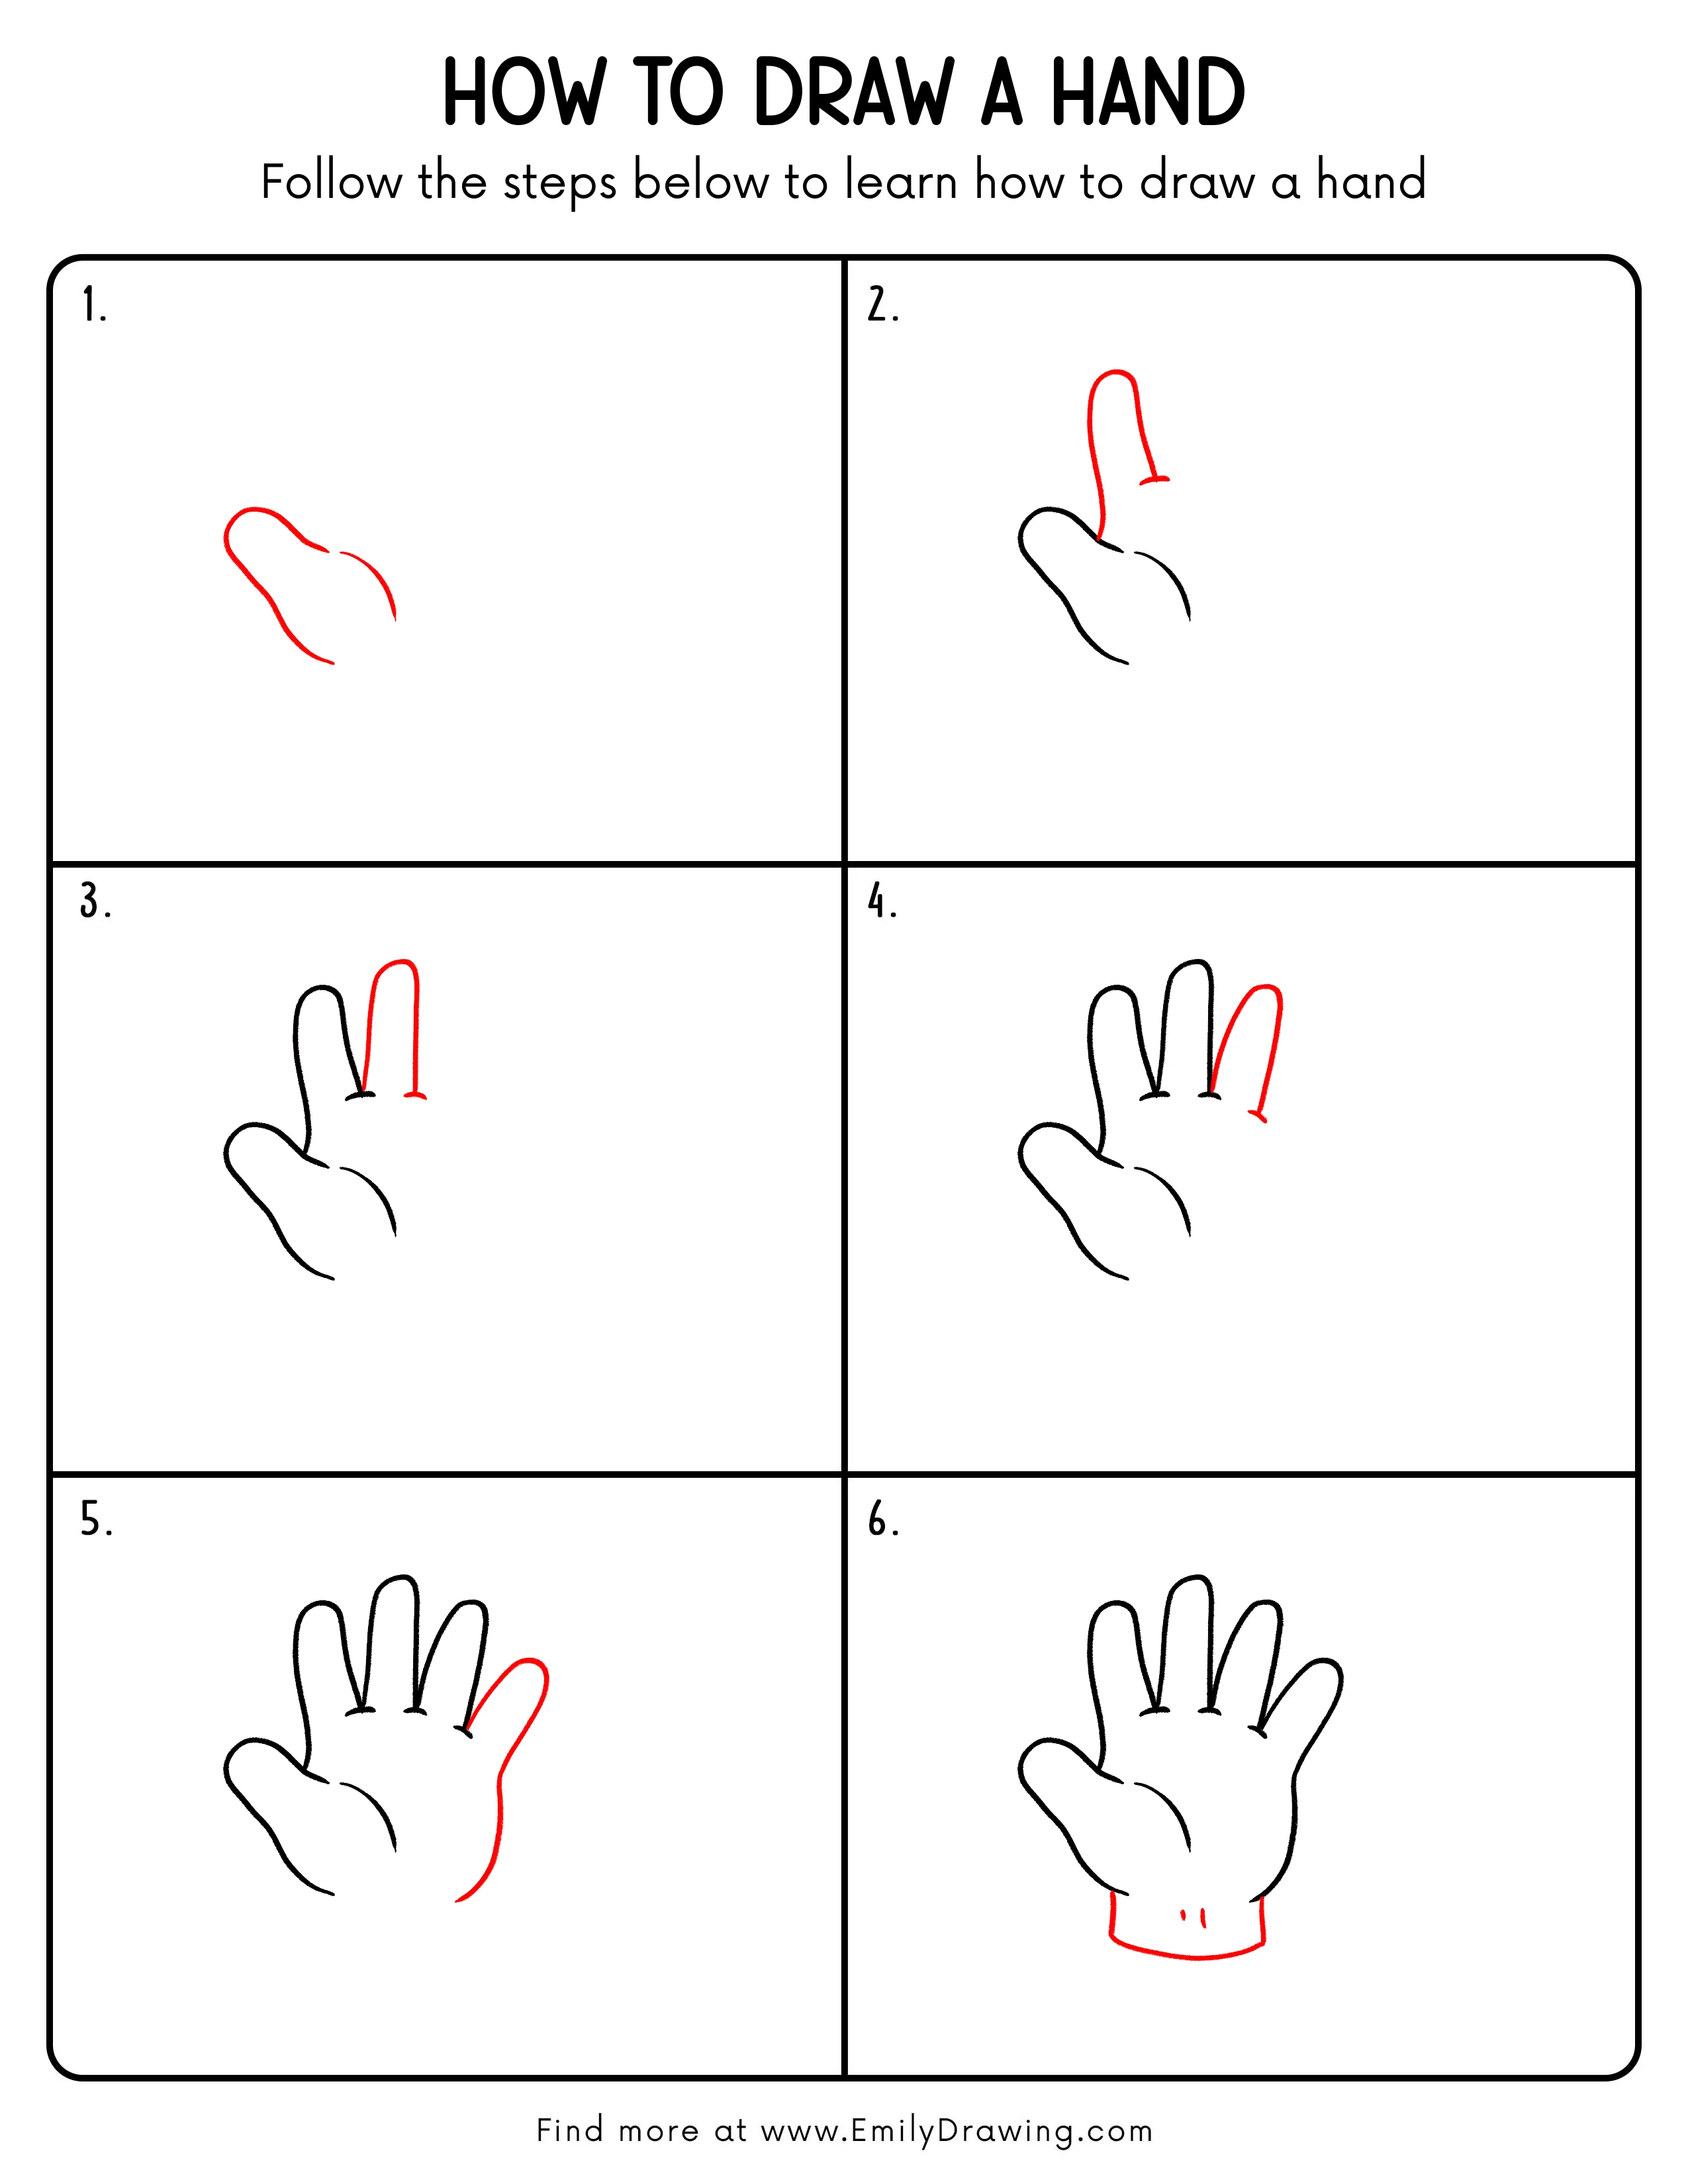
FREE Download Printable Hand Drawing Tutorial
Frequently Asked Questions
Why does my hand drawing look too stiff?
Soften the fingertip curves and allow the fingers to lean slightly outward.
Do I need fingernails on this hand?
This palm-facing hand does not need fingernails; the visible creases provide enough detail.