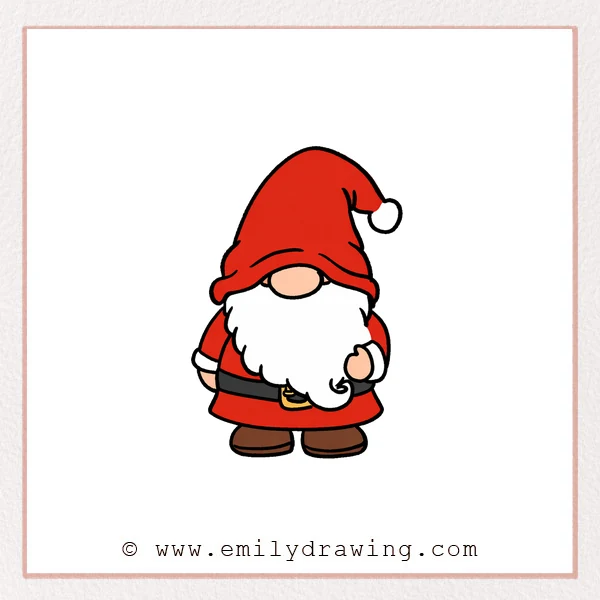
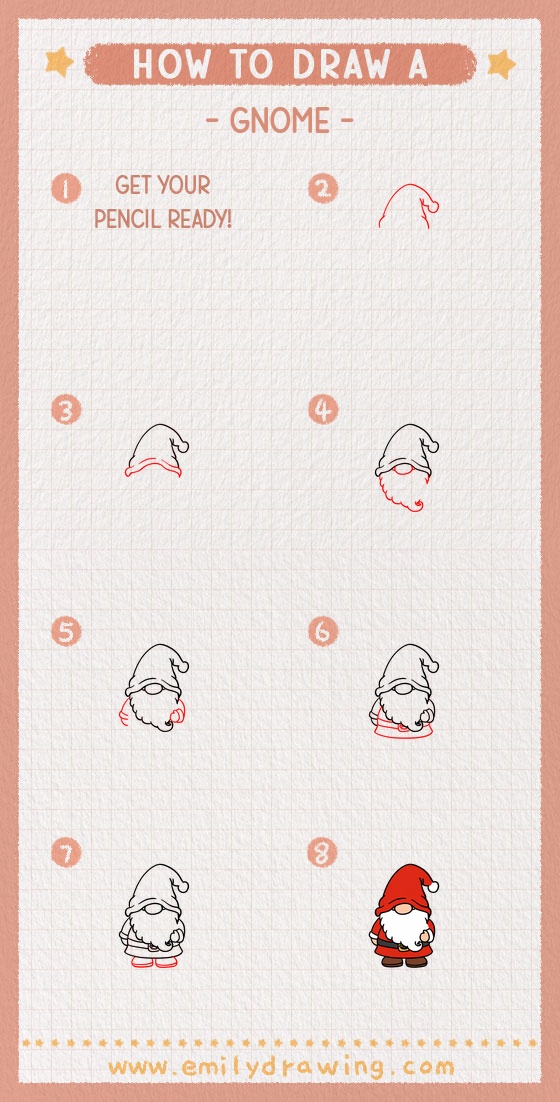
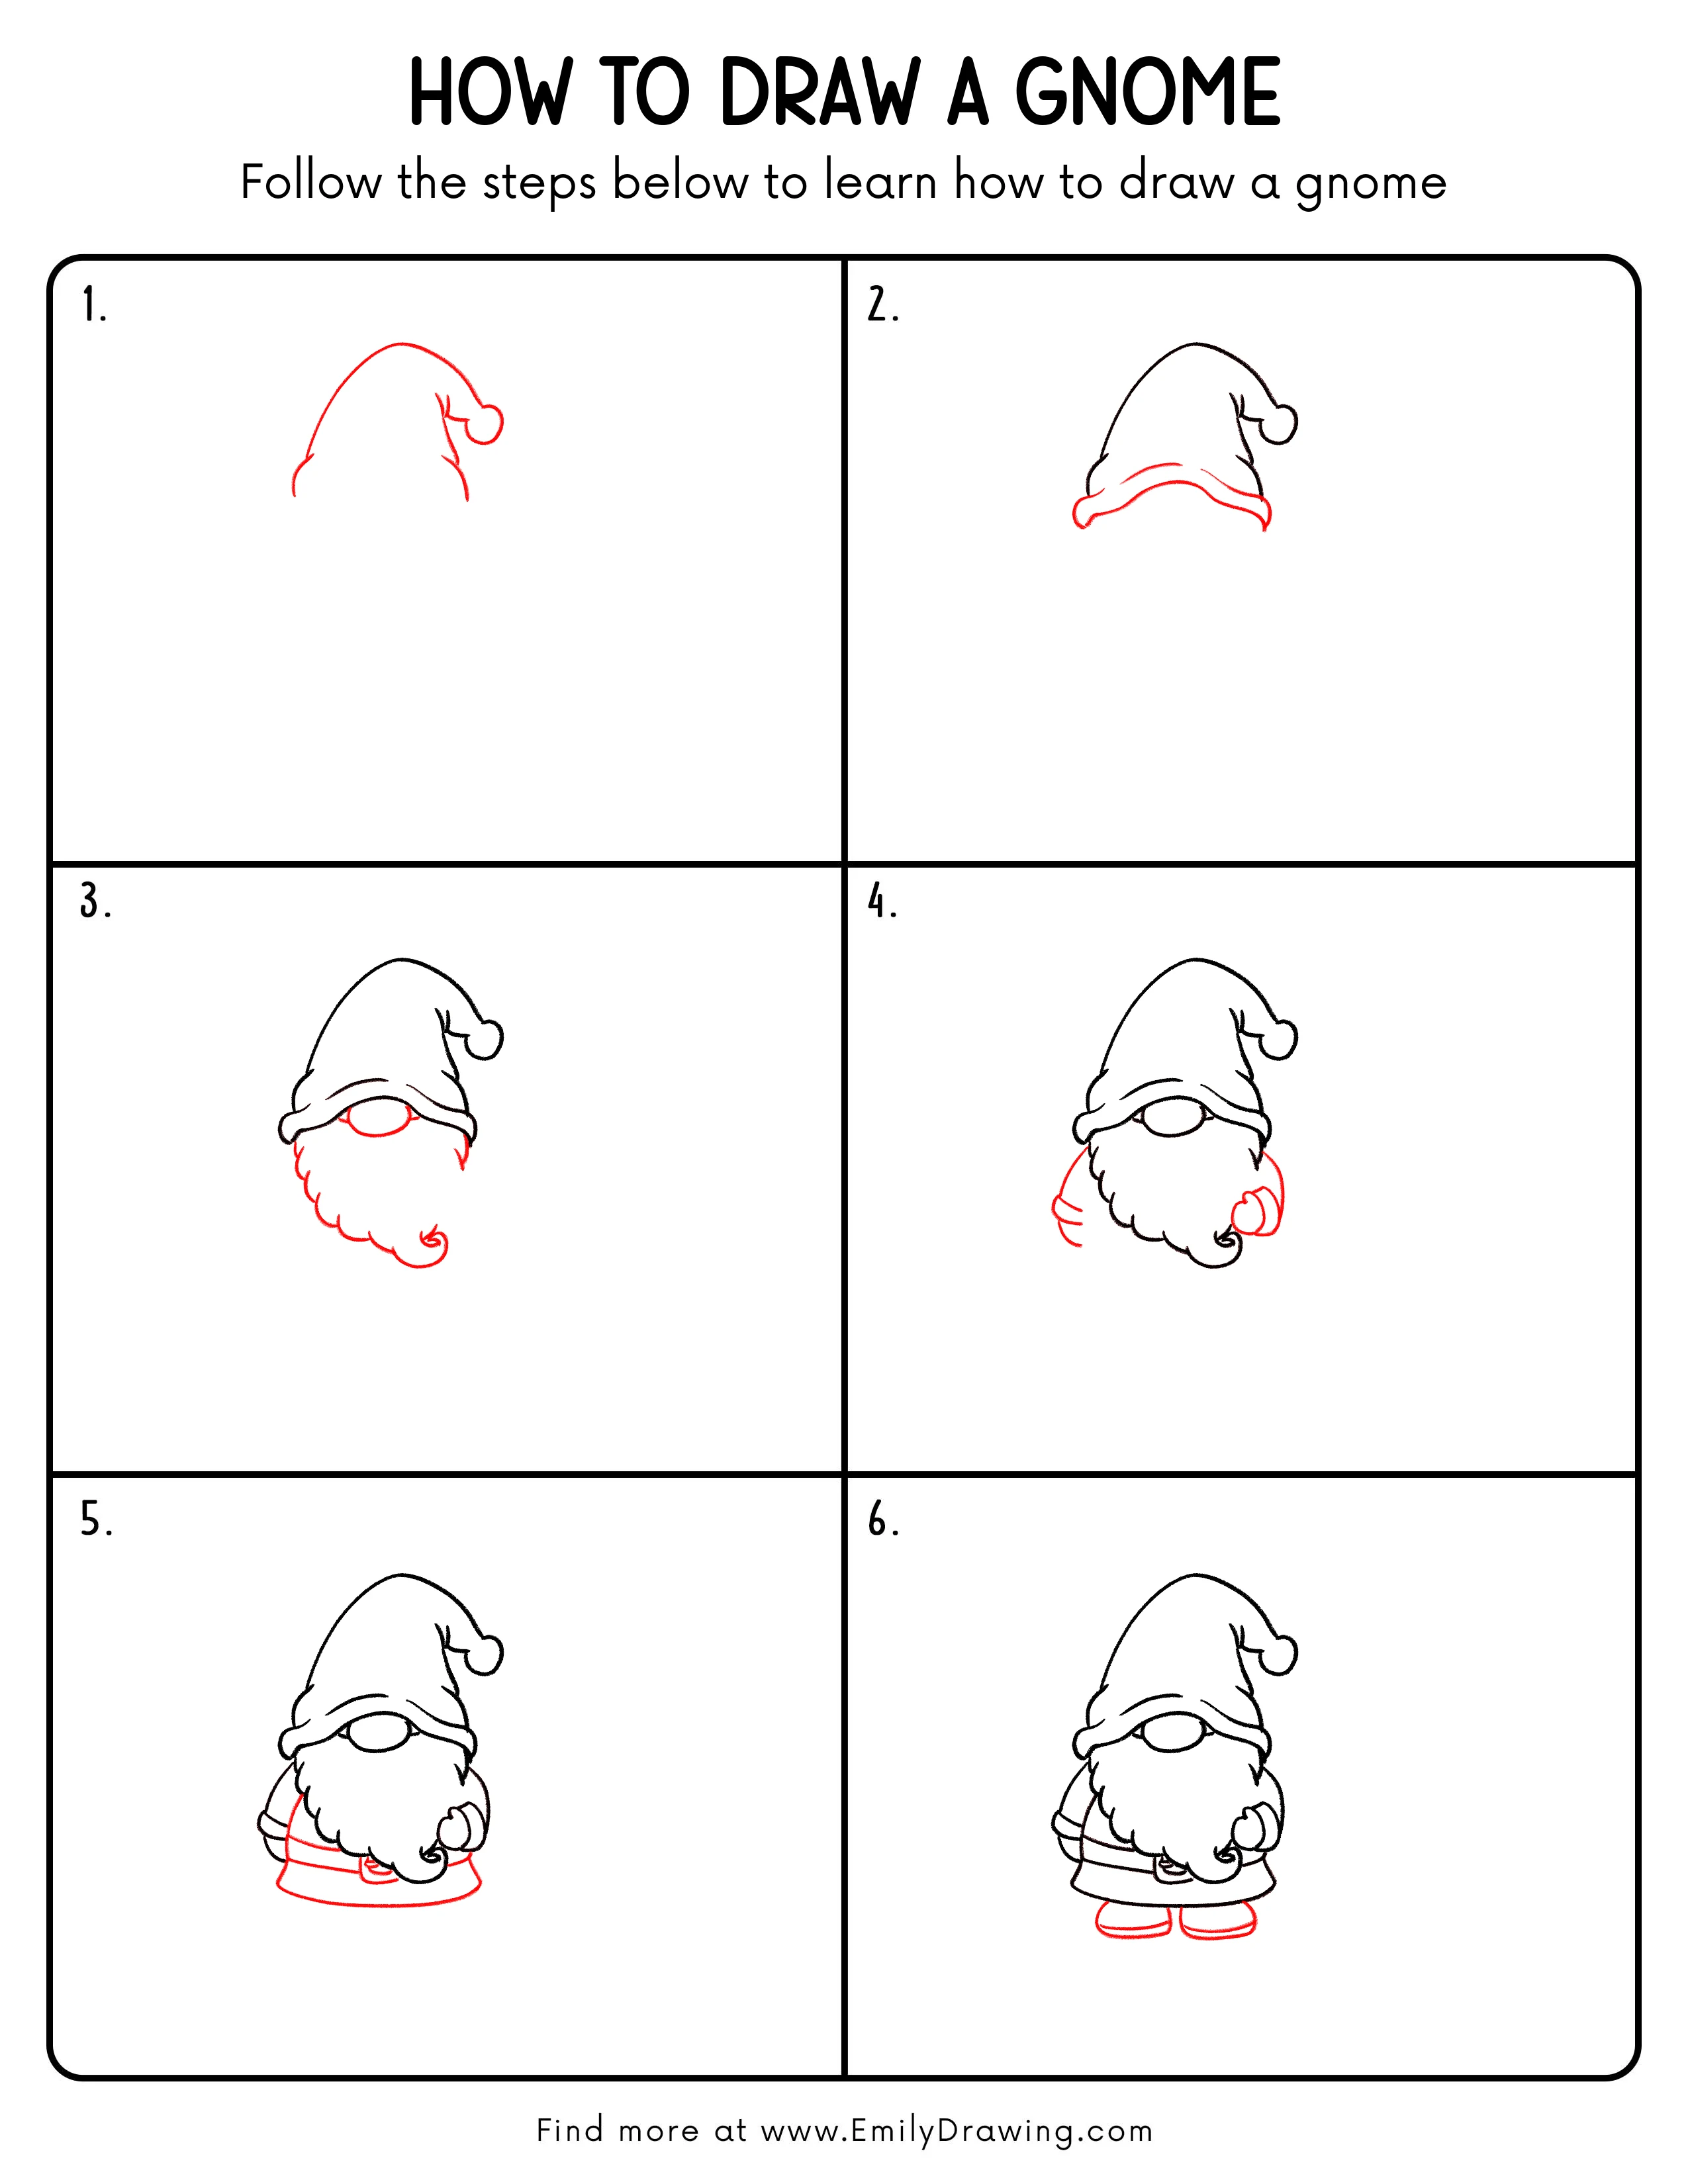
In this easy drawing tutorial, you will learn how to draw a cute gnome step by step.
We will build the hat, face, beard, and outfit using simple shapes.
What You Will Need
- Pencil
- Eraser
- Black marker or pen (optional, for outlining)
- Paper
- Colored pencils or markers (optional)
Here are my RECOMMENDED Art Supplies!
- Crayola Coloring Set (140 Pieces – Mega Value!)
- 24 Colored Crayon Set
- A4 Printer Paper
- Crayola Coloring Pencils
- HP Home Printer with Instant Ink!
Time needed:
23 minutes.
Step-by-Step Drawing Guide
Step 1: Outline the Gnome Hat
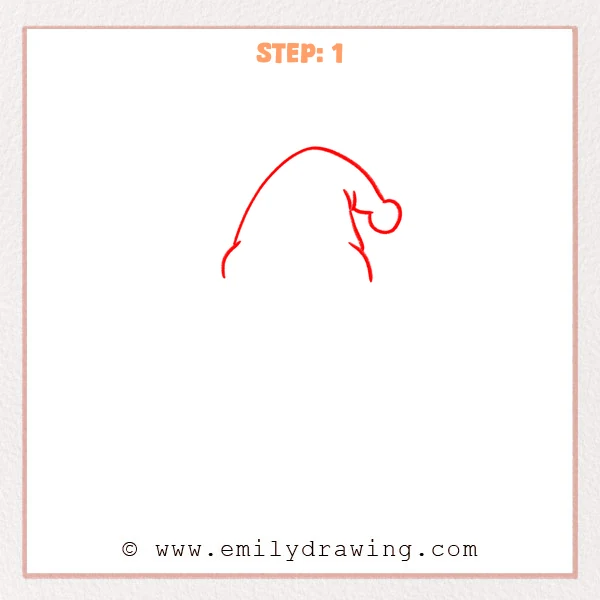
Start with a long curved arc to form a soft, drooping hat shape.
Add a small circle on the right for the pom-pom, then connect it to the hat with two short curved lines.
Pro Tip: Keep the hat arc long and smooth so the hat feels soft and floppy.
Step 2: Add the Hat Brim Fold
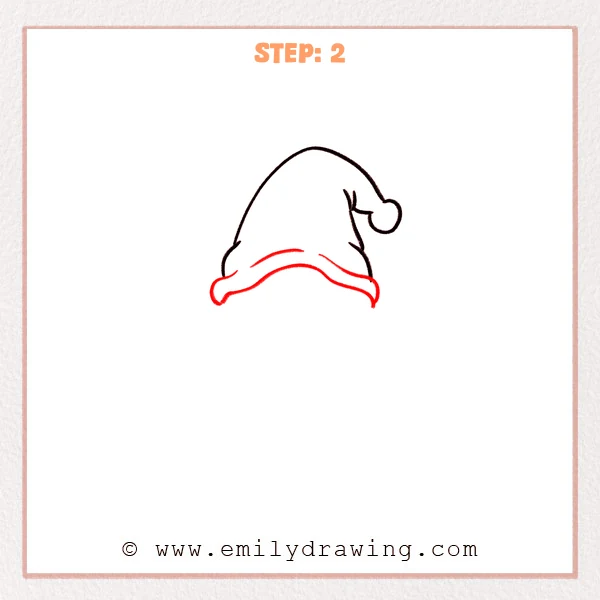
Draw a long wavy curved line along the bottom to form a soft hat brim.
Add a shorter curved line inside it to show the fold and thickness.
Pro Tip: Lift the brim ends slightly to make the fold feel fluffy and soft.
Step 3: Draw the Nose and Beard Outline
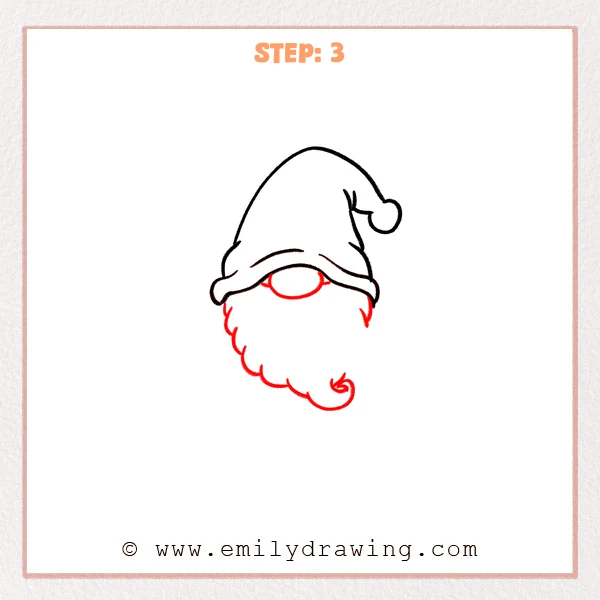
Add a sideways oval under the brim to make the gnome’s nose.
Then draw a scalloped, wavy outline down from both sides to form a fluffy beard, and finish with a small curl at the bottom.
Pro Tip: Make the nose slightly flattened and centered so it sits nicely above the beard.
Step 4: Add the Arms and Mittens
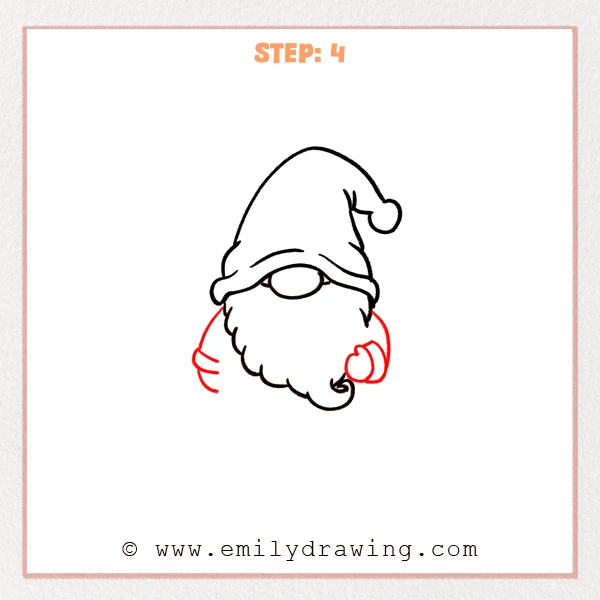
Draw a curved line on each side of the beard to create two short arms.
On the right side, add a rounded mitten shape and use an inner curved line to separate the thumb area.
Pro Tip: Keep the arms simple and smooth, and make the mitten extra round for a cute look.
Step 5: Add the Body and Outfit Details

Draw a wide rounded trapezoid under the beard to create the shirt body and hem.
Add two horizontal bands across it, then place a small rounded square in the center as a simple belt buckle or badge.
Pro Tip: Make the bottom of the body a bit wider so the gnome feels sturdy and balanced.
Step 6: Draw the Feet and Boots
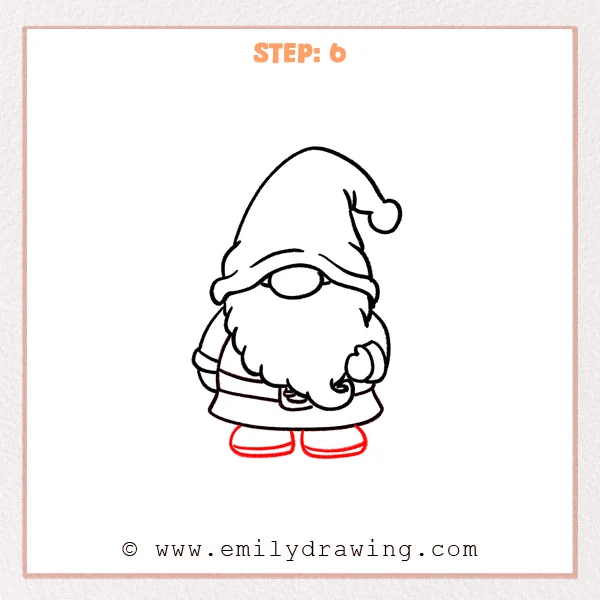
Under the shirt hem, add two short feet using two flattened rounded rectangles for the boot soles.
Inside each boot, draw a short curved line to show the top layer sitting on the sole.
Pro Tip: Leave a small gap between the boots so the gnome’s stance looks natural.
Step 7: Color in your drawing!
Fun Facts
- In Scandinavian folklore, gnomes are often described as small guardians of homes and farms.
- Gnome hats are usually tall and soft, which makes them fun to exaggerate in cartoons.
- Big beards are a classic gnome feature because they add shape and personality fast.
Pin it now, Draw later!
Trace your favorite lines with a pen, then erase extra pencil marks.
Color the hat brightly, keep the beard light, and add simple patterns to the shirt if you like.
You now know how to draw a gnome step by step—try drawing a whole gnome family next!
Get the FREE Printable Drawing Guide
FREE Download Printable Gnome Drawing Tutorial
Frequently Asked Questions
1) Why can’t I see the gnome’s eyes?
Many cute gnome drawings hide the eyes under the hat brim for a simple, cozy look.
2) How do I make the beard look fluffier?
Use bigger, rounder scallops and vary their sizes slightly for a soft texture.
3) How can I change the gnome’s style?
Try a longer hat, a shorter beard, or different mitten shapes to create new characters.