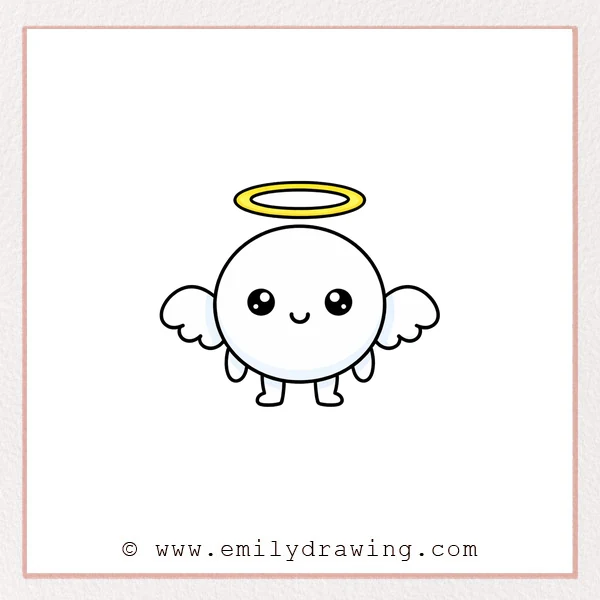
This easy drawing tutorial shows how to draw a cute halo character.
We will build the shapes first, then add wings, legs, and a sweet face.
Take your time, and keep lines light until you are happy.
What You Will Need
- Pencil
- Eraser
- Black pen or marker (optional)
- Red pen or colored pencil (optional)
- Plain paper
Here are my RECOMMENDED Art Supplies!
- Crayola Coloring Set (140 Pieces – Mega Value!)
- 24 Colored Crayon Set
- A4 Printer Paper
- Crayola Coloring Pencils
- HP Home Printer with Instant Ink!
Time needed:
17 minutes.
Step-by-Step Drawing Guide
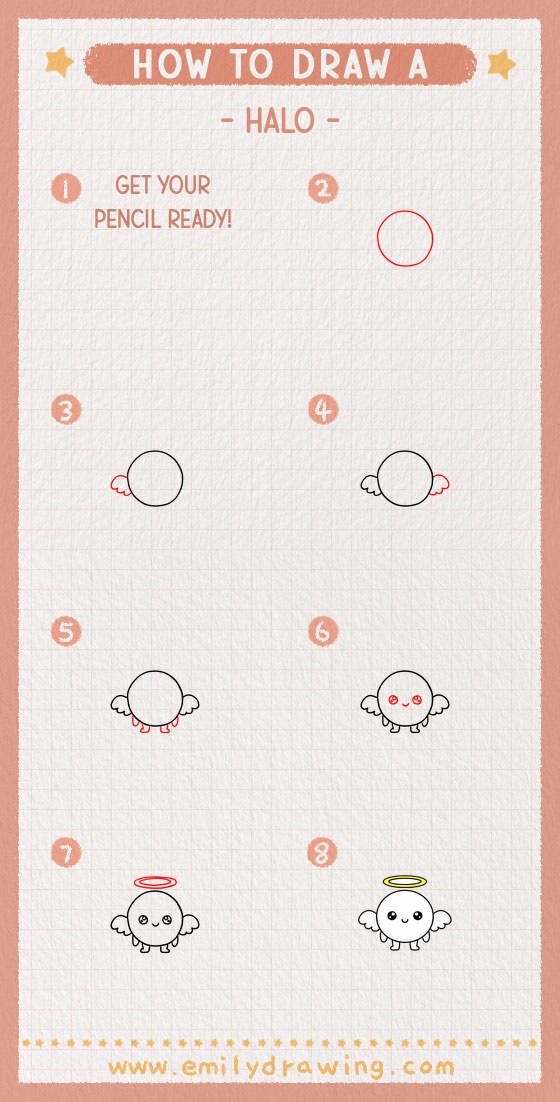
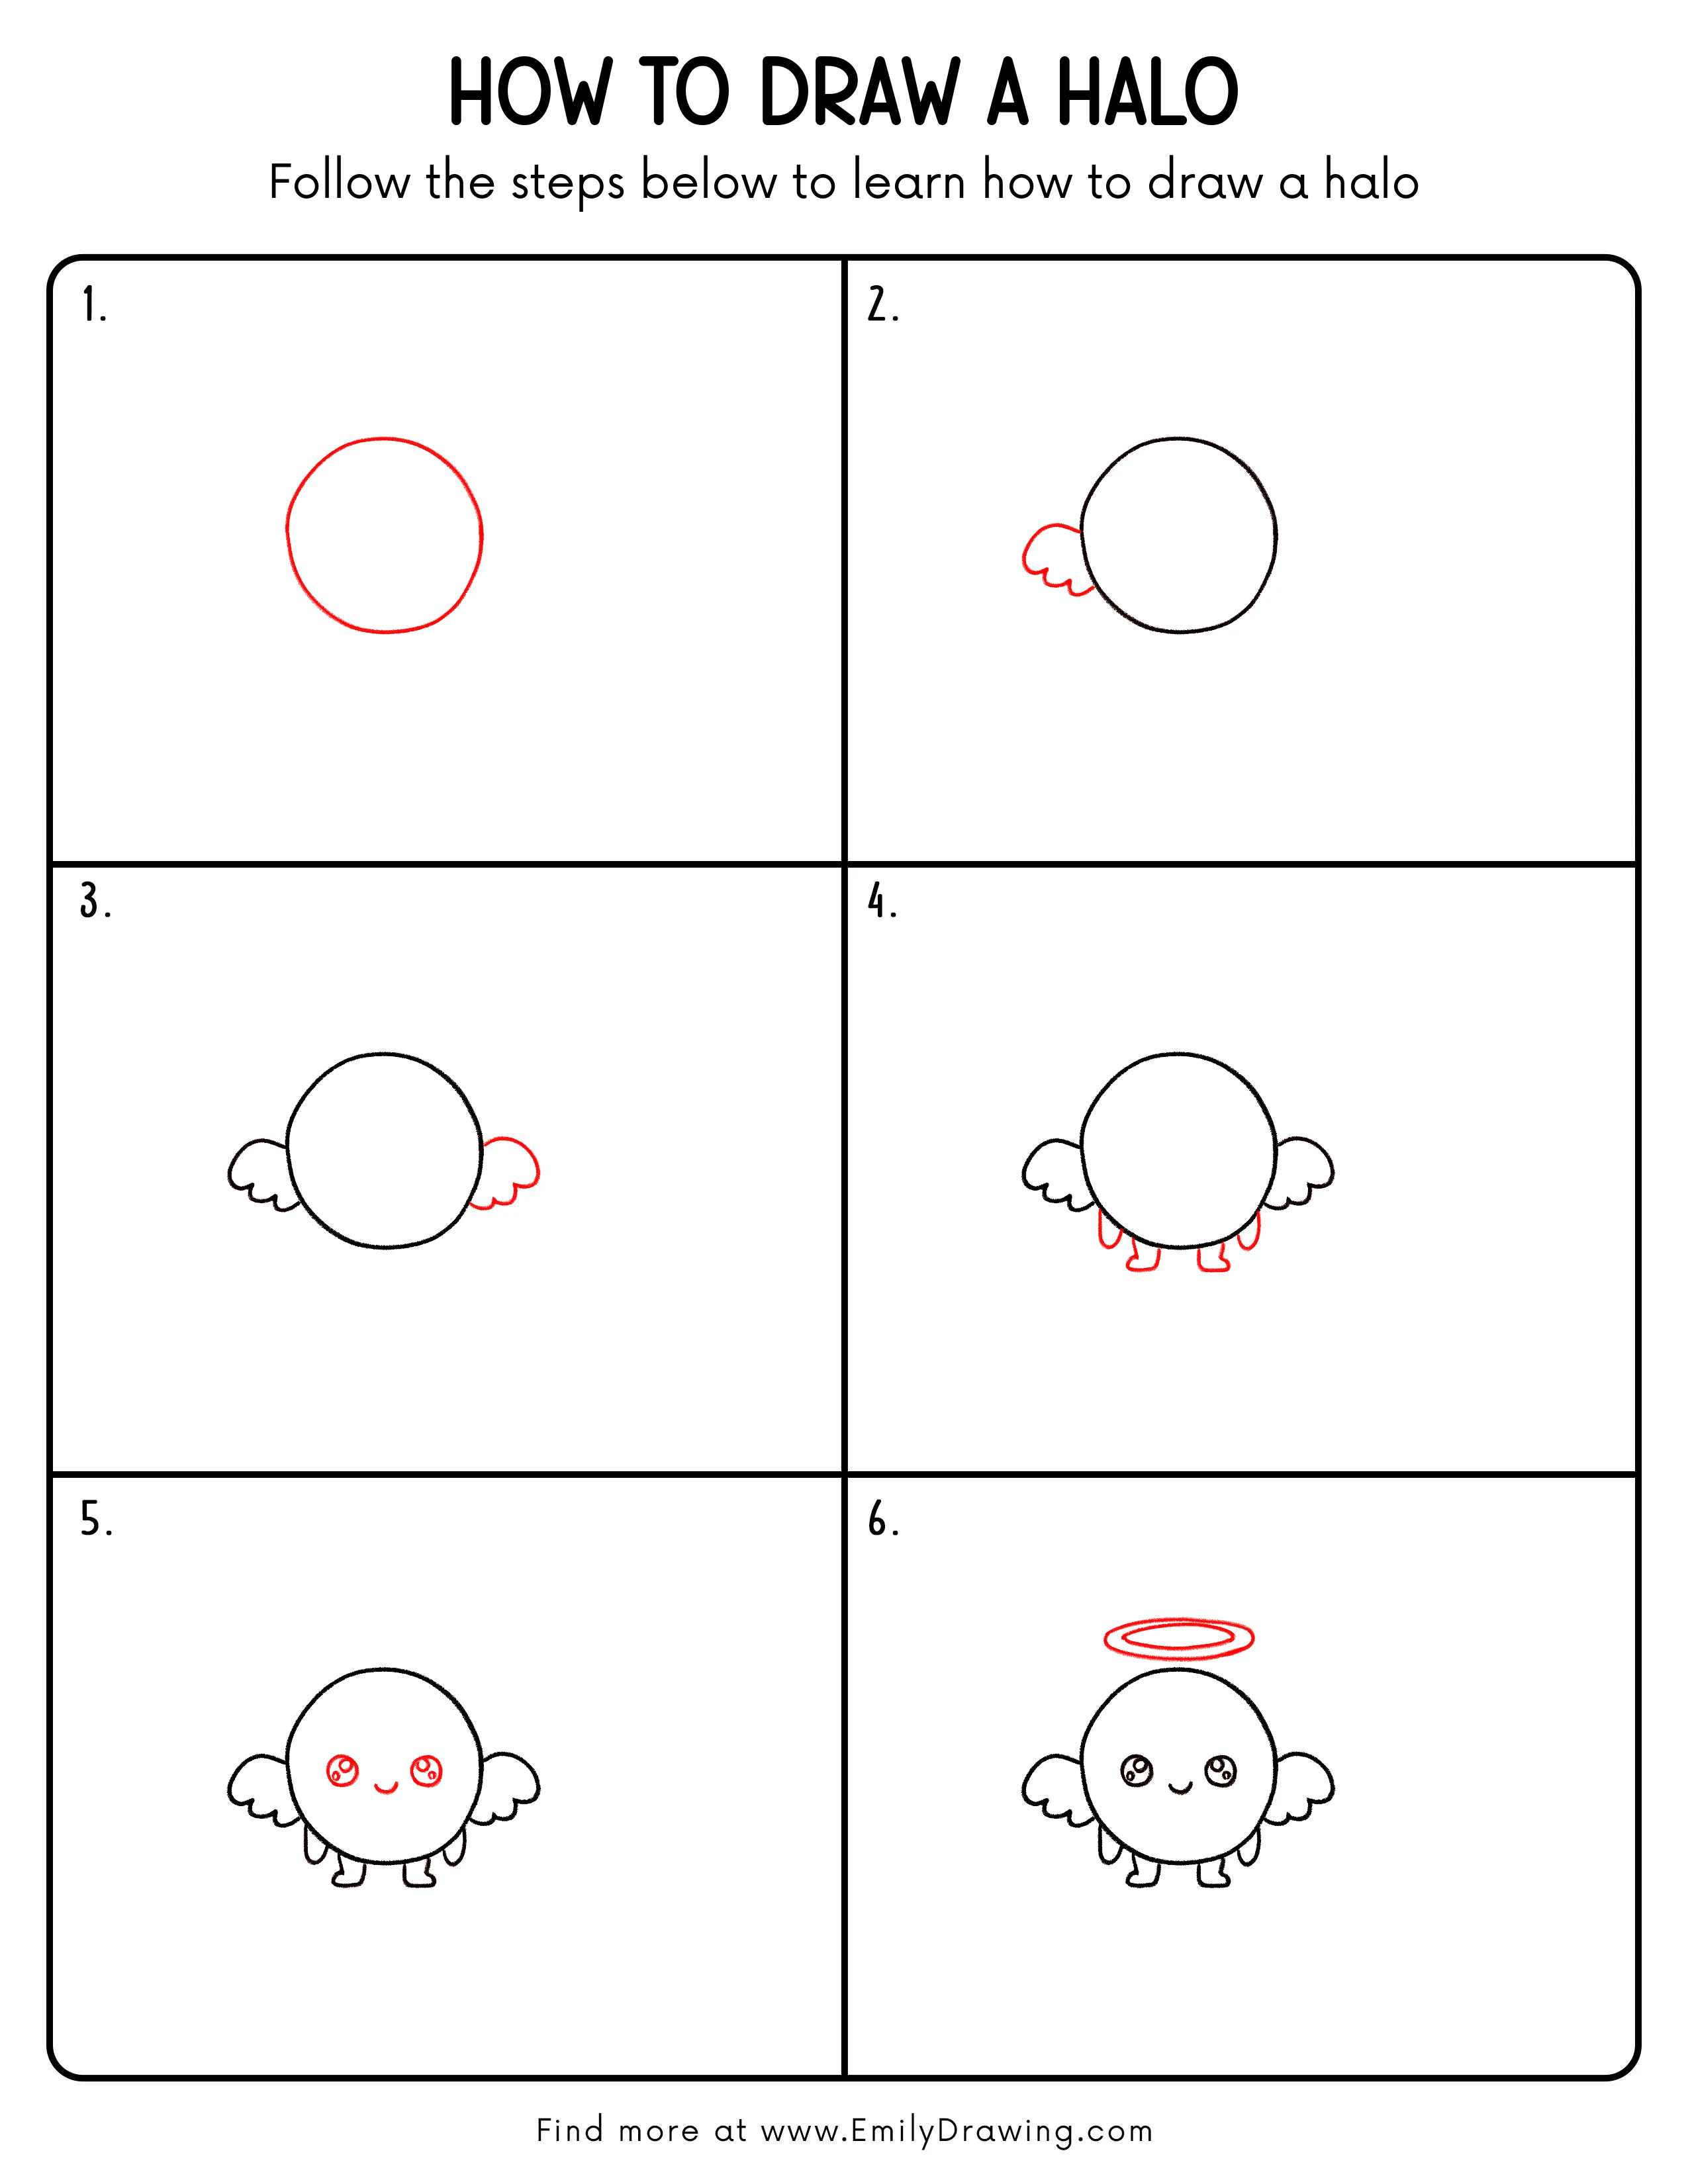
Step 1: Block In the Halo Shape
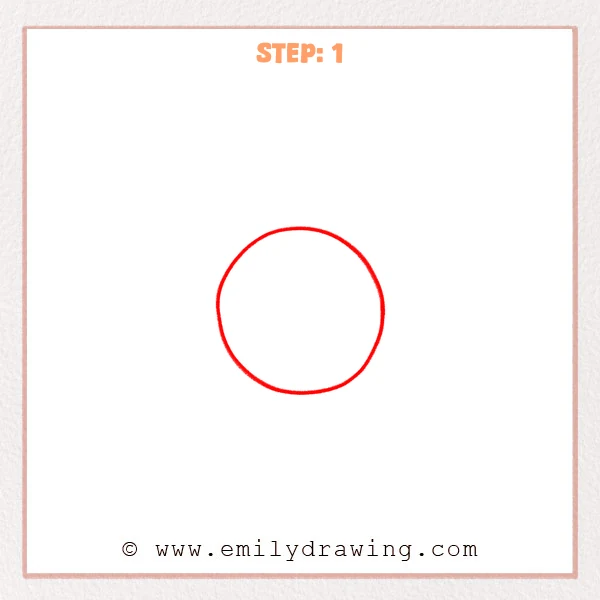
Draw a large circle in the center, keeping the line as smooth as you can.
Use a light hand so you can adjust the shape easily.
Pro Tip: Keep your wrist relaxed, and rotate the paper to help the circle stay round.
Step 2: Add a Small Wing
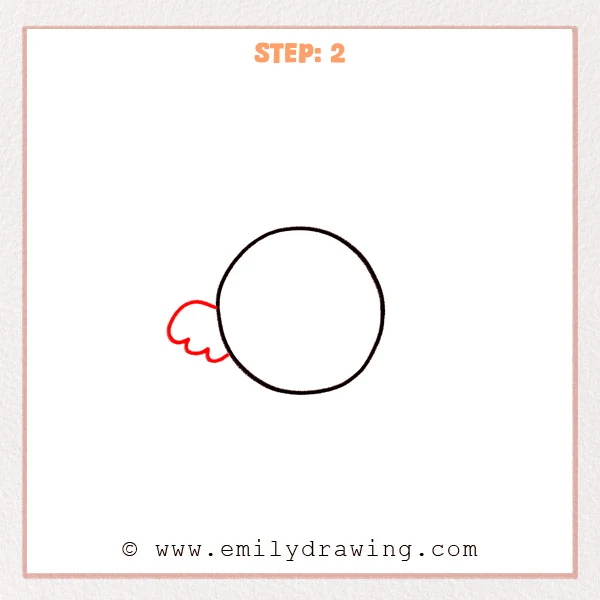
On the left outside edge of the circle, draw a small rounded bump for the wing base.
Extend it with two or three smooth scallops underneath to suggest feather layers.
Pro Tip: Keep the wing attached to the circle edge, but don’t cut too far into the circle.
Step 3: Add the Second Wing
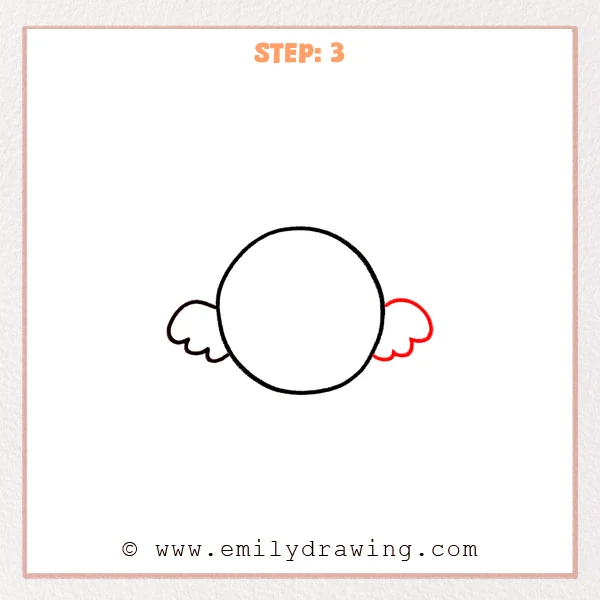
On the right outer edge of the circle, draw a matching second small wing.
Use two or three smooth scallops to show feather layers, mirroring the left side.
Pro Tip: Compare the height and length of both wings, then adjust until they feel balanced.
Step 4: Draw the Little Legs and Feet
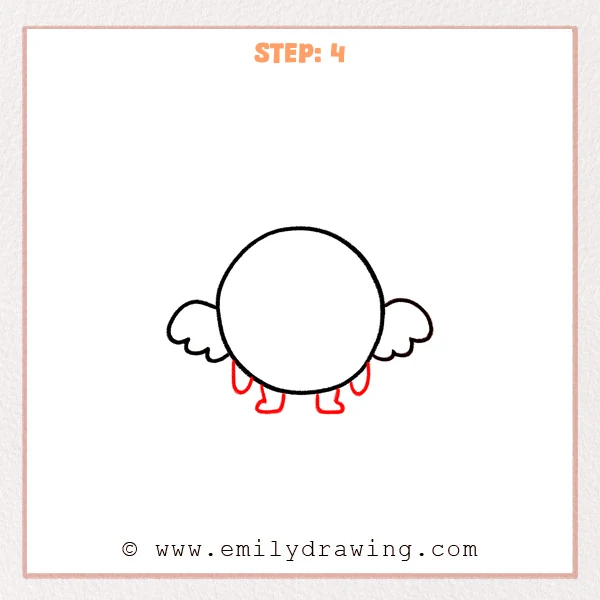
Under the circle, draw two short legs using slim “U” shapes hanging down.
Add a small shoe shape at each bottom, with the toes curving slightly outward.
Pro Tip: Leave a small gap between the legs, and keep both feet at the same height.
Step 5: Draw the Eyes and Smile
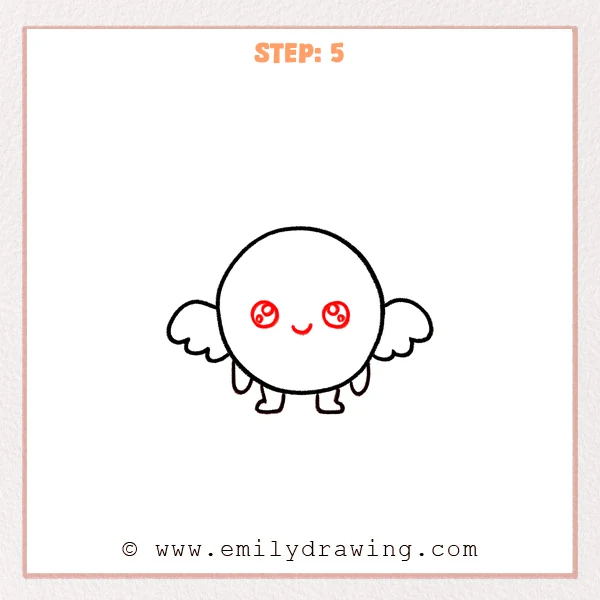
In the upper middle of the circle, draw two big eyes: start with small circles, then add tiny highlight dots inside.
Below and between the eyes, draw a short curved line for a gentle smile.
Pro Tip: Lightly mark both eye spots first, so the spacing stays even.
Step 6: Draw the Halo Above the Head
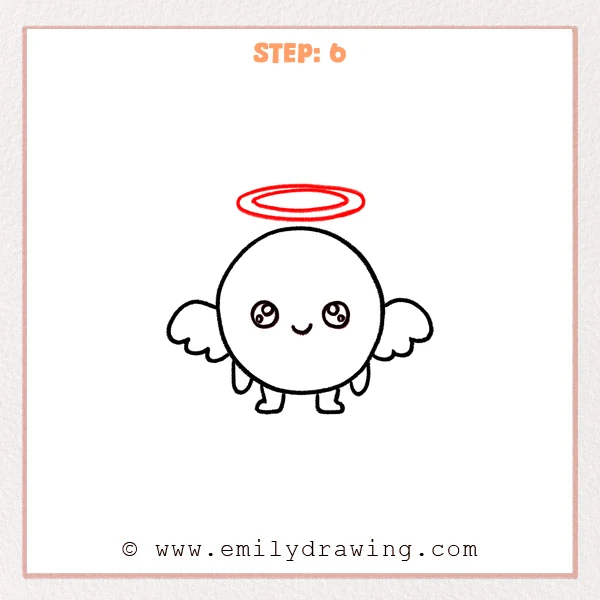
Leave a small gap above the round head, then draw a flat oval for the halo’s outer ring.
Inside it, draw a smaller oval to show the halo’s thickness.
Pro Tip: Lightly guide the oval’s long axis first, so the halo stays even and centered.
Step 7: Color in your drawing!
Fun Facts
- A halo is often drawn as a glowing ring to show something angelic or magical.
- Small scalloped wing shapes are a classic way to suggest feathers in cartoons.
- Big eyes with highlights are a simple trick for a friendly expression.
Pin it now, Draw later!
Trace your final lines with a pen, then erase extra sketch marks gently.
You can color the halo gold, add blush cheeks, or draw tiny sparkles nearby.
Now you know how to draw a halo character—try drawing another with different wing shapes.
Get the FREE Printable Drawing Guide
FREE Download Printable Halo Drawing Tutorial
Frequently Asked Questions
How do I make the halo look more 3D?
Keep the inner oval centered and slightly smaller, and add a second thin outline.
What if my wings look uneven?
Check both wings against the head circle, then redraw one side a little at a time.
Can I turn this into an easy drawing tutorial for beginners with color?
Yes, use flat colors first, then add one simple highlight if you want.