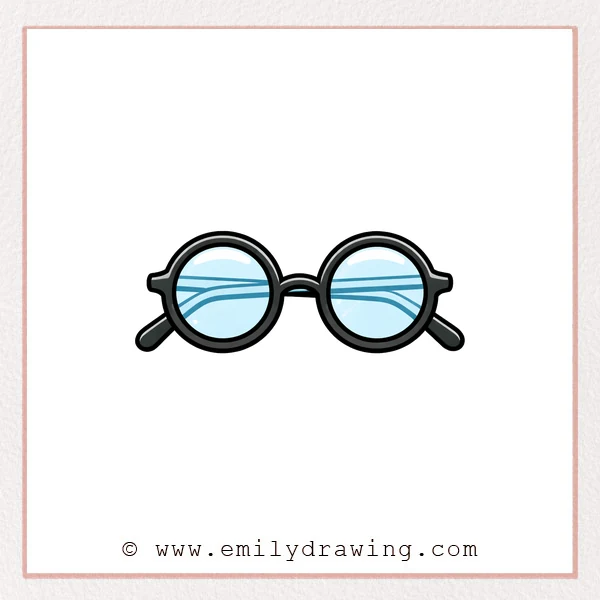
Drawing glasses is a great way to practice smooth curves and simple symmetry. In this easy drawing tutorial, you will build the frames first, then add the details. Take your time, and keep your lines light until you are happy.
What You Will Need
- Pencil
- Eraser
- Black pen or marker (optional, for final lines)
- Paper
Here are my RECOMMENDED Art Supplies!
- Crayola Coloring Set (140 Pieces – Mega Value!)
- 24 Colored Crayon Set
- A4 Printer Paper
- Crayola Coloring Pencils
- HP Home Printer with Instant Ink!
Time needed:
29 minutes.
Step-by-Step Drawing Guide
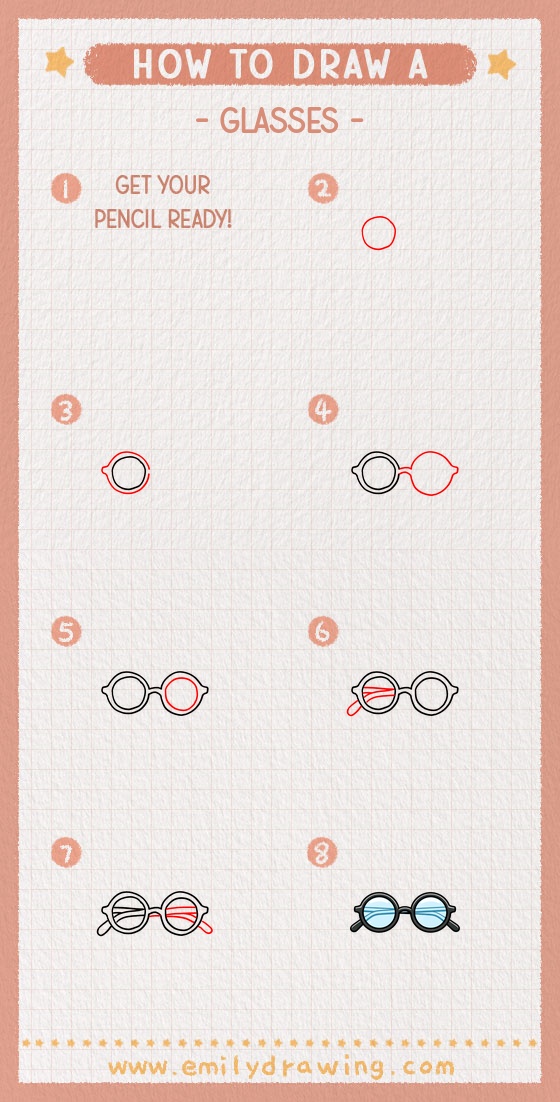
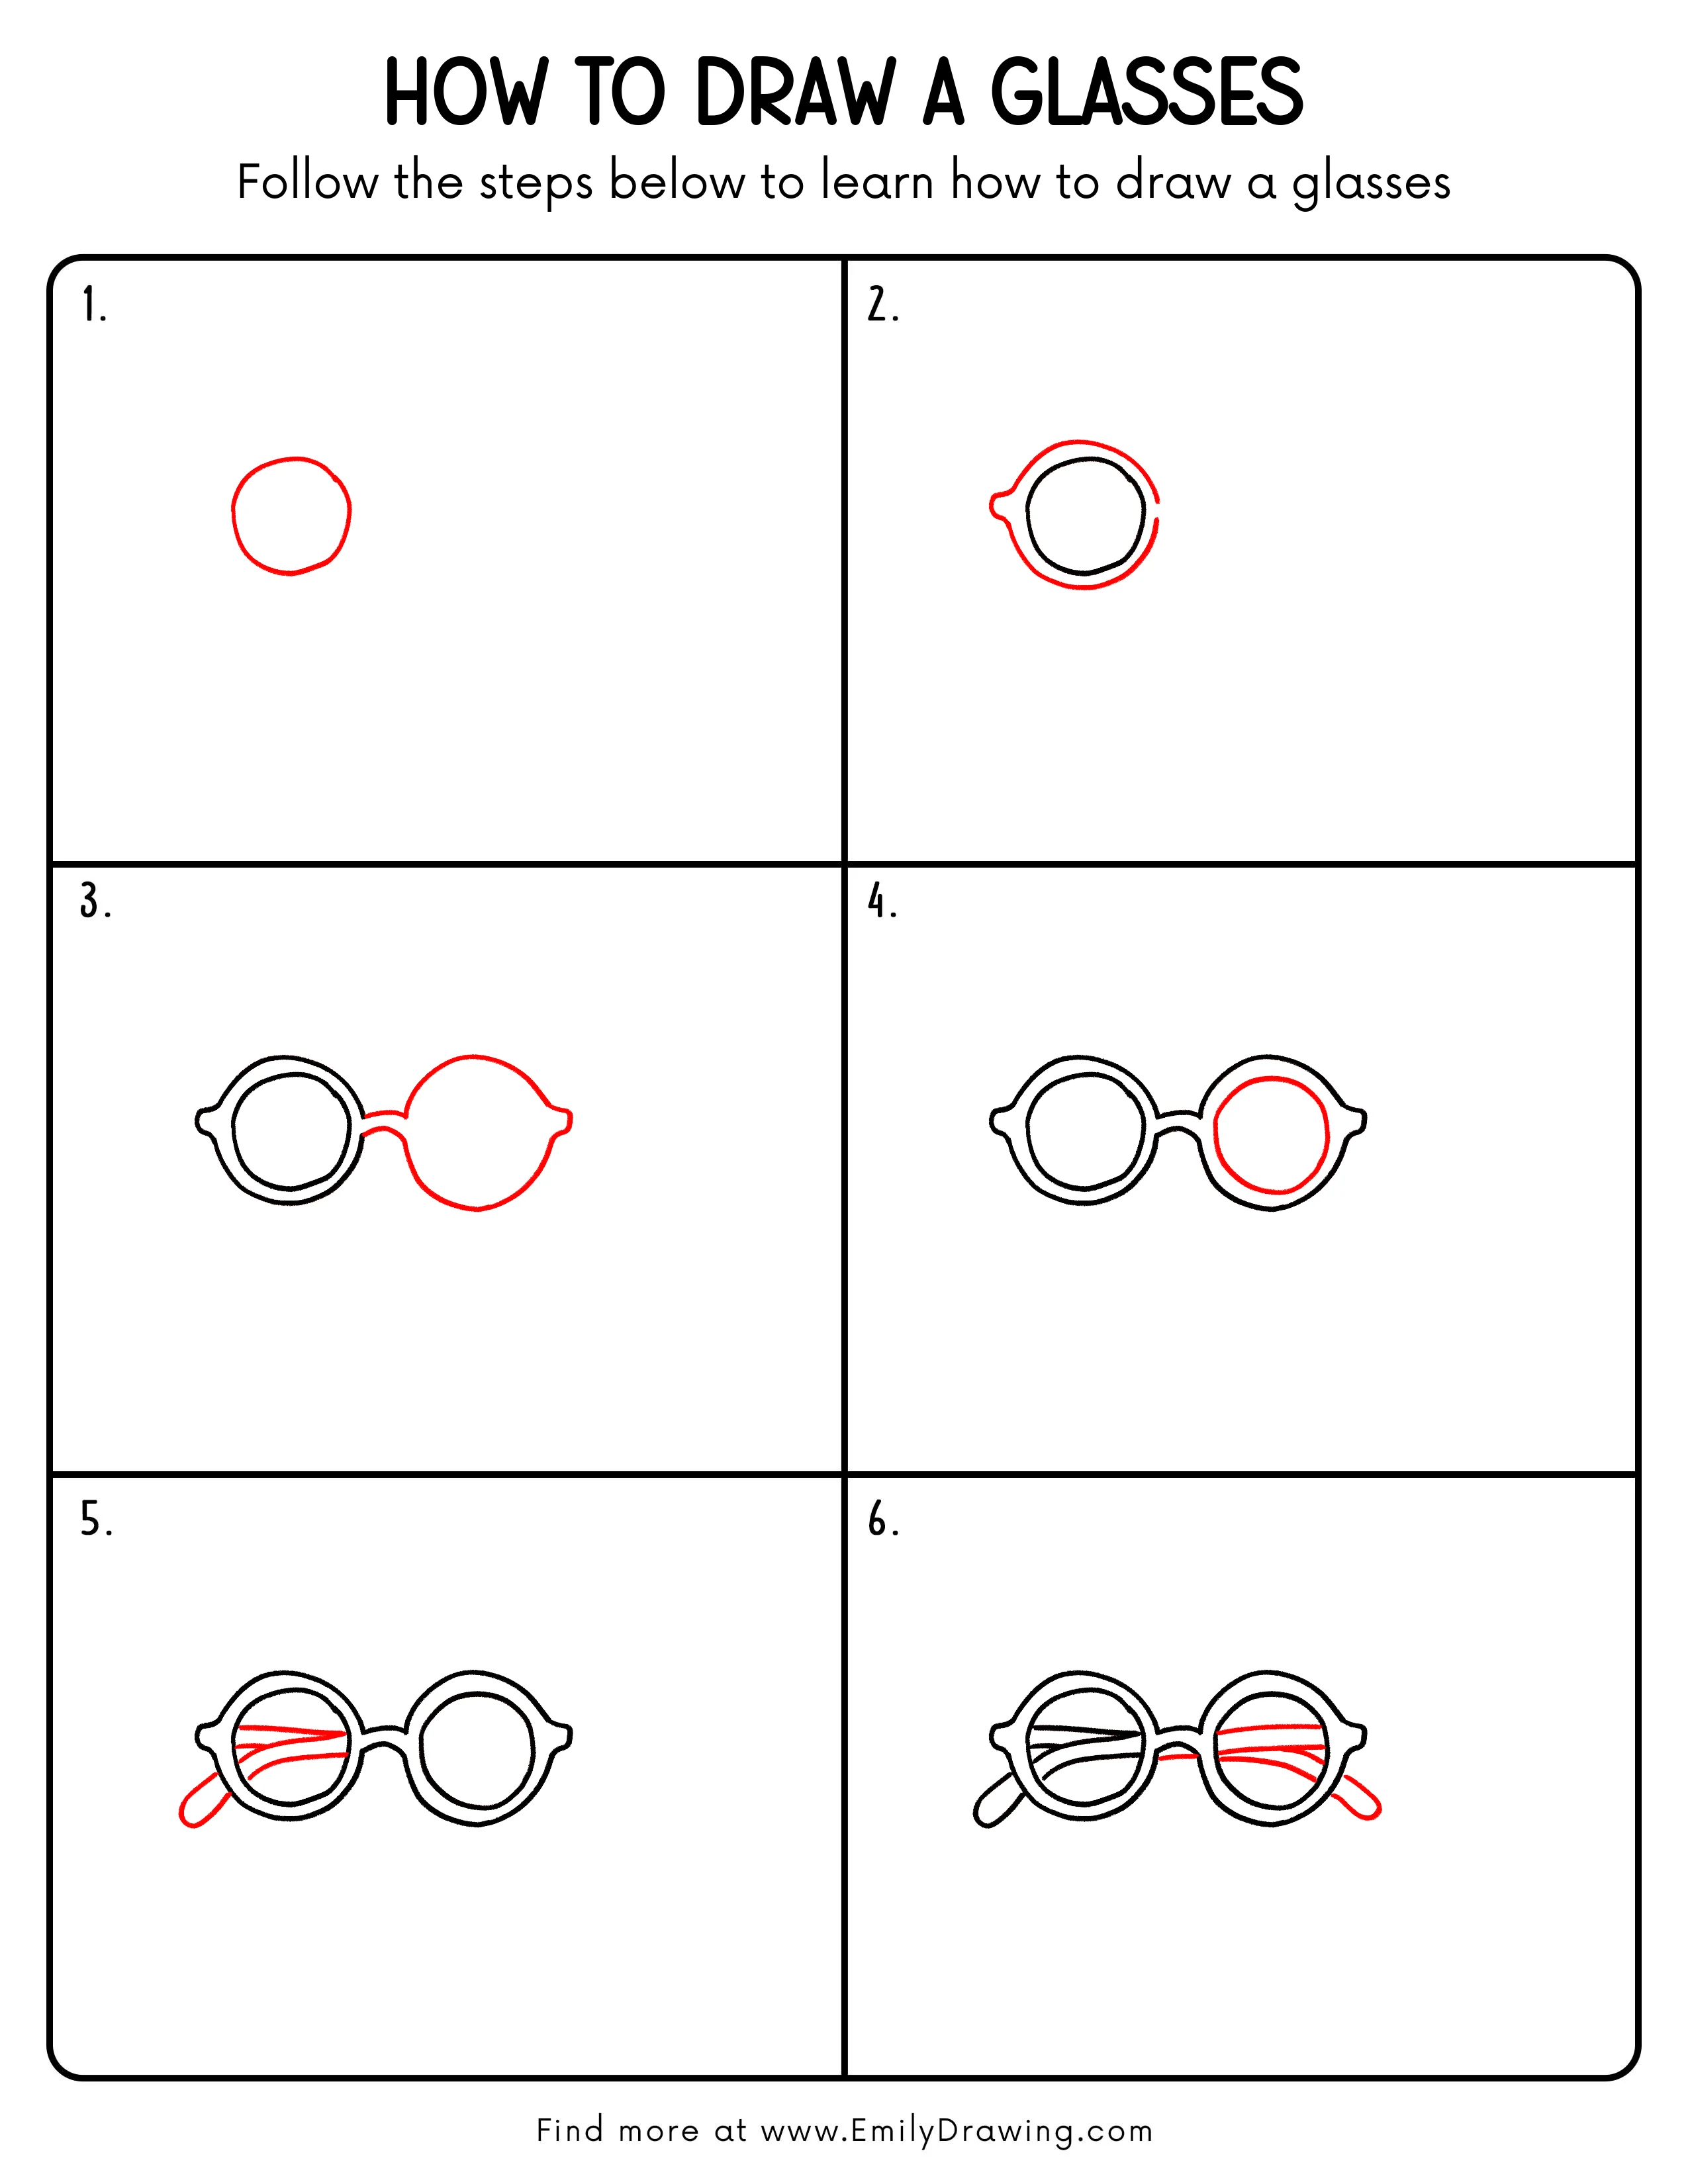
Step 1: Draw the Basic Lens Shape
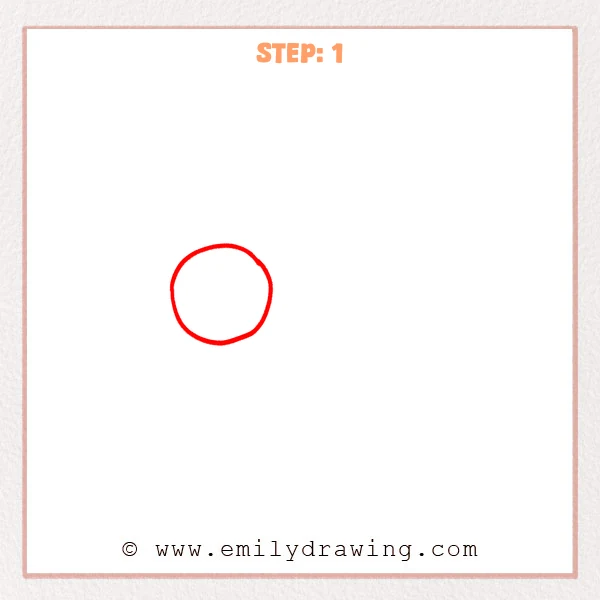
Start with a slightly flattened circle for the first lens outline. Keep the line light, closed, and as smooth as you can.
Pro Tip: Use your wrist to guide one smooth loop instead of many tiny strokes.
Step 2: Thicken the Frame and Add the Inner Rim
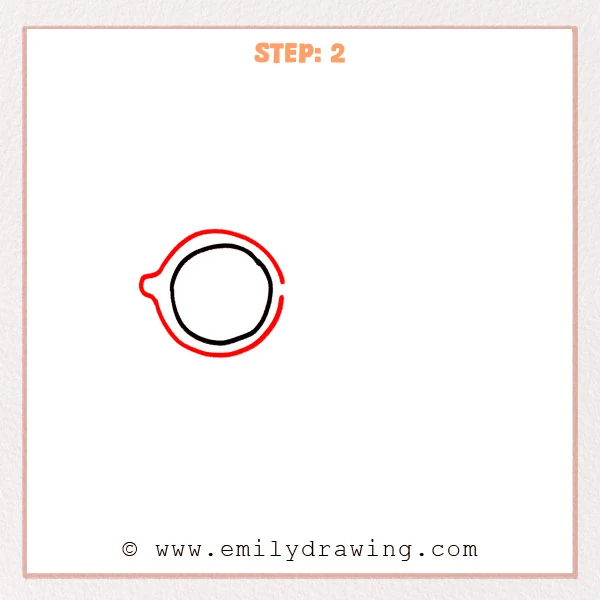
Draw a larger circle around the first one to create the frame thickness. Add a thinner inner rim line for the lens edge, and place a small bump on the left as the connector area.
Pro Tip: Keep the spacing between the outer frame and inner rim even for a clean look.
Step 3: Draw the Second Frame and Connect the Bridge
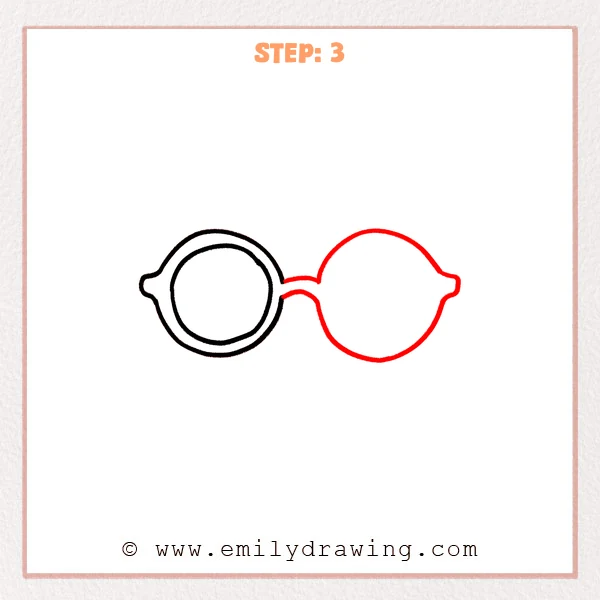
Add a second circular frame on the right, about the same size as the first, and include a small bump on its outer side. Then draw two short curved lines between the frames to form the bridge.
Pro Tip: Line up the two circles first, then add the bridge curves for a natural fit.
Step 4: Thicken the Right Frame and Add the Inner Rim

Draw a larger outer outline around the right circle to give it frame thickness too. Then add a smaller inner rim line inside for the lens edge, and smooth the bridge area so it flows neatly.
Pro Tip: Match the ring width on the right side so both lenses look the same.
Step 5: Add the Temple Arm and Lens Shine Lines
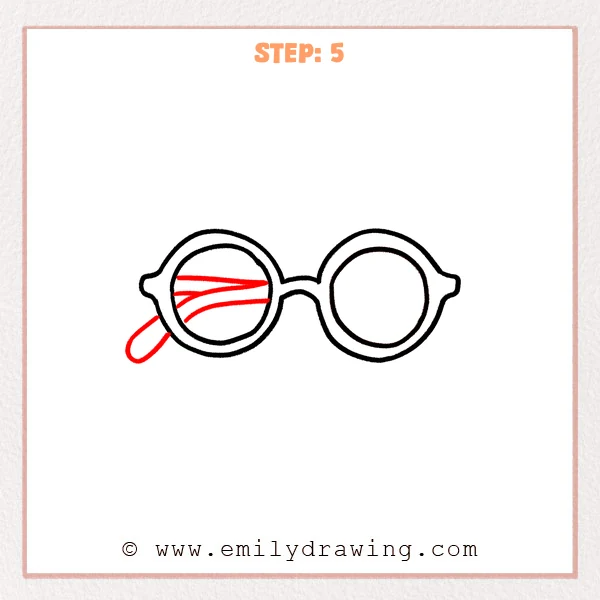
Draw a short temple arm extending left from the frame bump, and finish it with a small oval tip. Then add two or three curved shine lines inside the left lens that taper toward the right.
Pro Tip: Keep the shine lines thin and leave white space so the lens feels clear.
Step 6: Finish the Right Temple Arm and Add Right Lens Shine
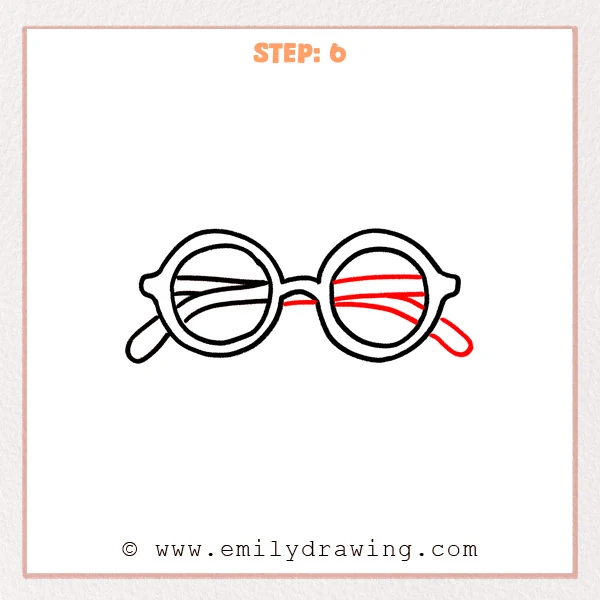
Draw the right temple arm extending from the outer bump, and end it with a small oval tip. Then add two or three curved shine lines inside the right lens that taper toward the outer edge, and smooth the bridge line a bit more.
Pro Tip: Keep the number and curve of shine lines similar on both lenses for balance.
Step 7: Color in your drawing!
Fun Facts
- The first eyeglasses in Europe appeared around the late 1200s.
- Round frames are one of the simplest shapes to draw because they use steady curves.
- Lens highlights help show “glass” without shading, which is great for beginners.
Pin it now, Draw later!
Go over the final frame lines with a darker pen if you like, then erase any extra sketch marks. You can also add tiny screws near the outer bumps for more realism. Keep practicing this step by step drawing, and try different frame shapes next time.
Get the FREE Printable Drawing Guide
FREE Download Printable Glasses Drawing Tutorial
Frequently Asked Questions
1) How do I make both lenses the same size?
Lightly mark the top and bottom height of the first lens, then match those points on the second.
2) How can I draw thicker frames?
Increase the distance between the outer frame line and the inner rim line evenly all the way around.
3) What if my circles look uneven?
Sketch with light strokes first, then refine the curve with one smoother line.