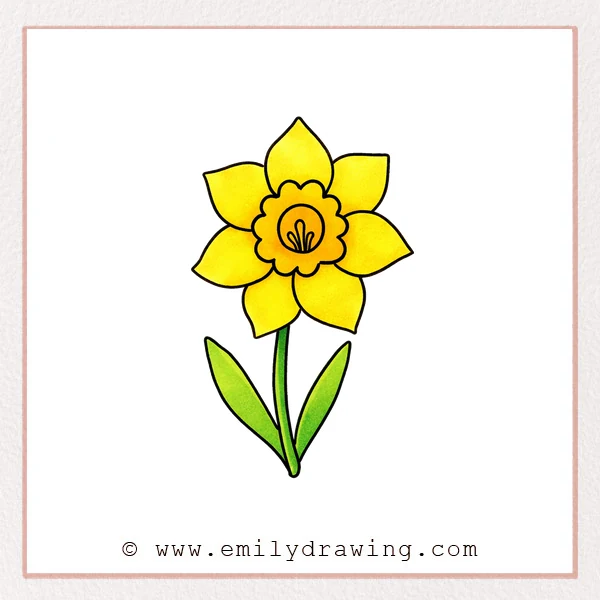
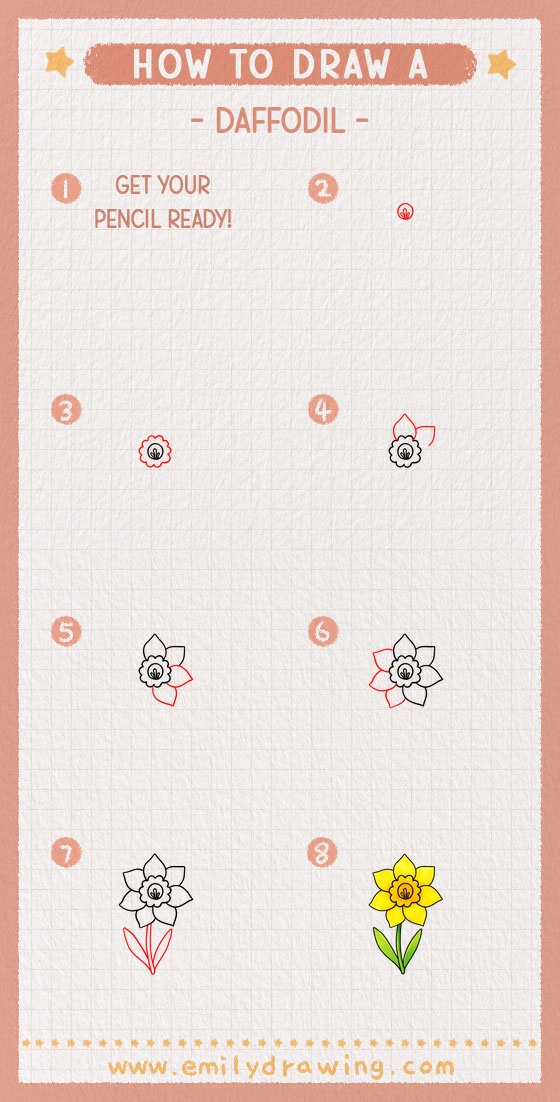
This easy drawing tutorial shows how to draw a daffodil step by step.
It is a calm, beginner-friendly way to practice simple flower shapes and clean lines.
Take your time, and enjoy watching your daffodil bloom on the page.
What You Will Need
- Pencil
- Eraser
- Black marker or pen (optional, for outlining)
- Colored pencils, crayons, or markers (optional)
Here are my RECOMMENDED Art Supplies!
- Crayola Coloring Set (140 Pieces – Mega Value!)
- 24 Colored Crayon Set
- A4 Printer Paper
- Crayola Coloring Pencils
- HP Home Printer with Instant Ink!
Time needed:
24 minutes.
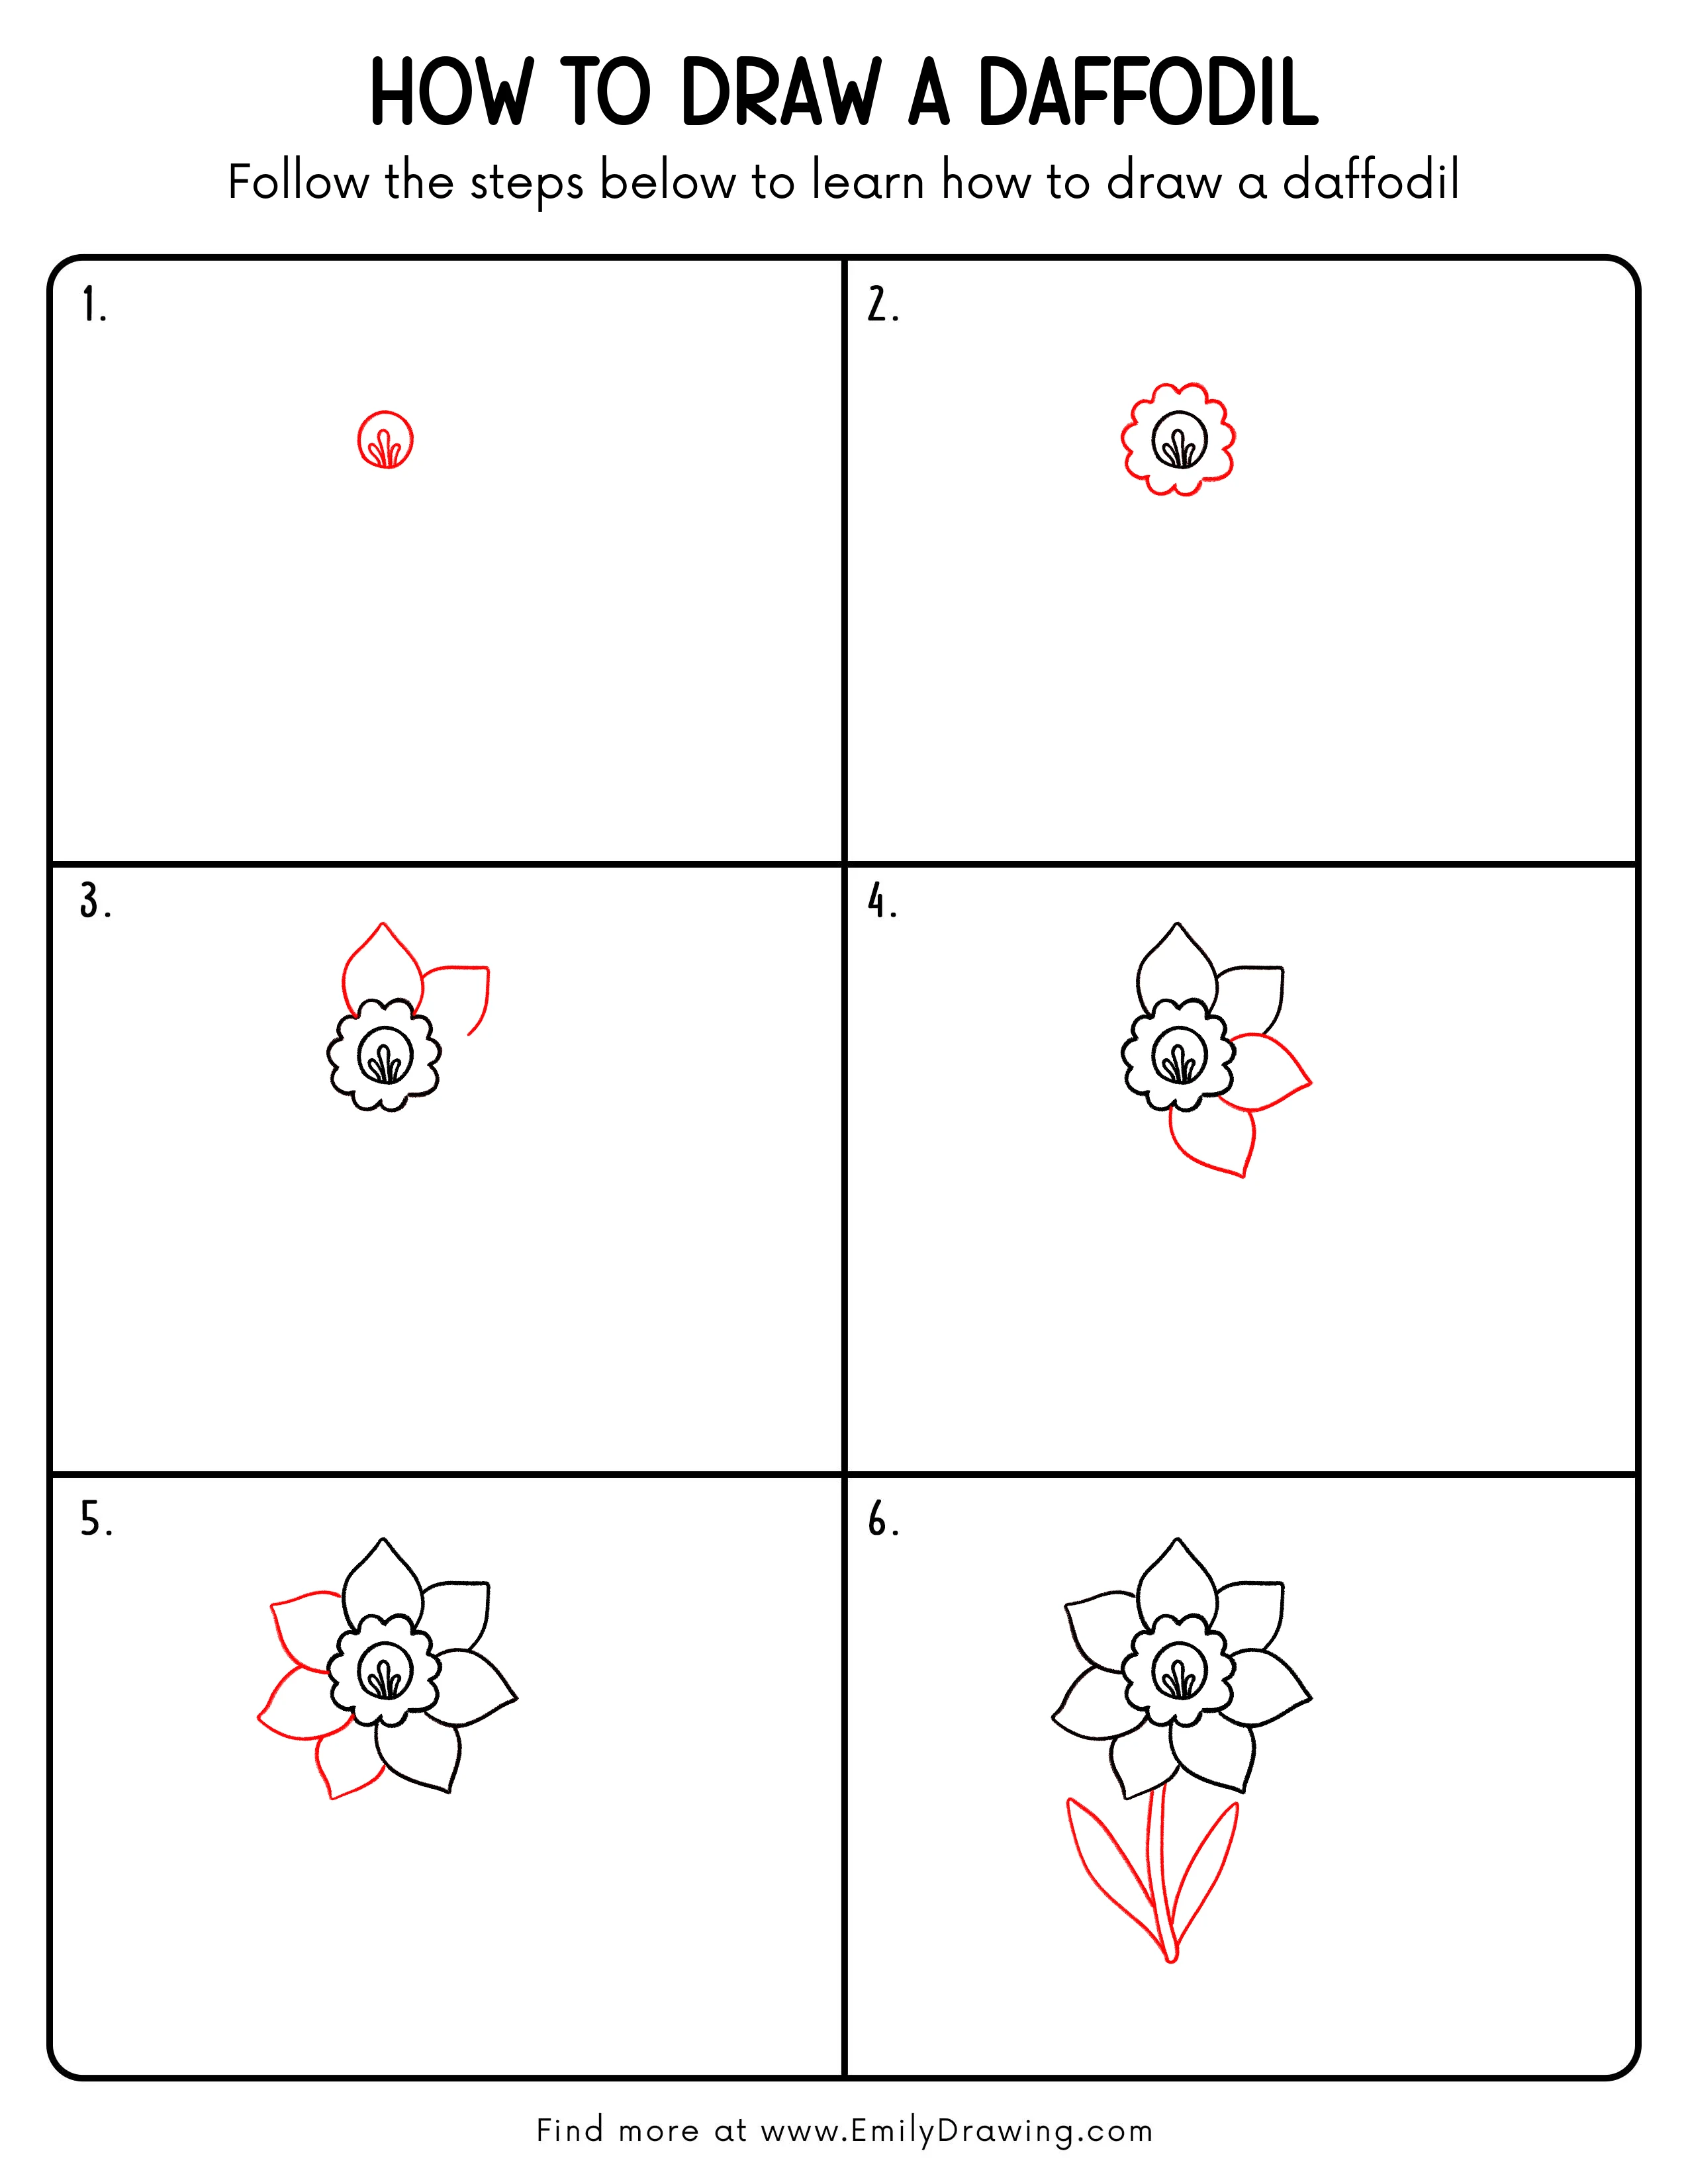
Step-by-Step Drawing Guide
Step 1: Draw the Cup and Inner Petals
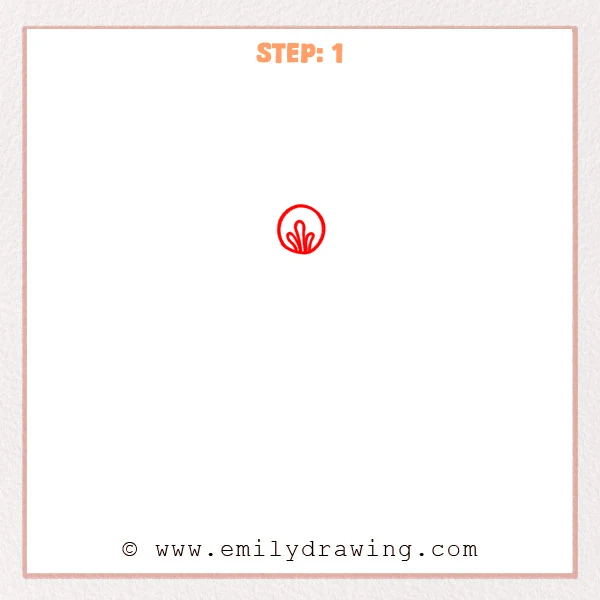
Start with a small circle to form the daffodil’s central cup.
Inside the lower half of the circle, add three upward teardrop-shaped curves that rise from near the same base point.
Let the shapes feel soft, like small petals tucked inside the cup.
Pro Tip: Make the middle inner petal tallest and the side ones slightly shorter.
Step 2: Add the Outer Petal Outline
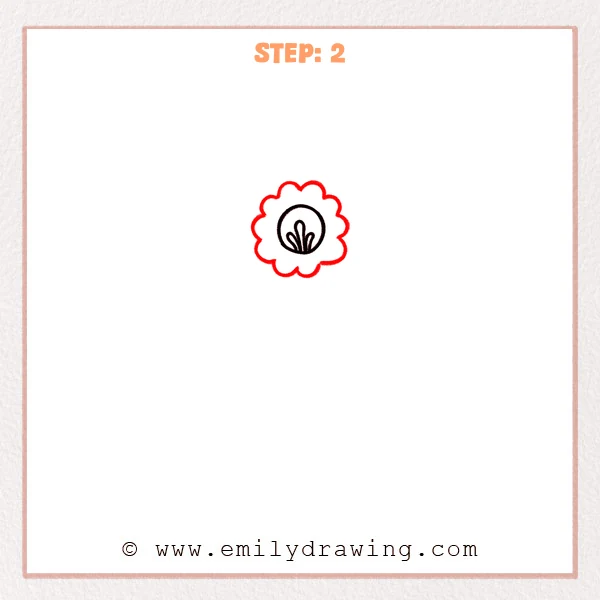
Around the central cup, draw a ring of gentle bumpy curves to suggest the ruffled edge.
Keep the bumps evenly spaced so the flower looks balanced and tidy.
This scalloped ring helps the center stand out clearly.
Pro Tip: Keep the curves rounded, not pointy, for a softer daffodil look.
Step 3: Add Two Large Petals
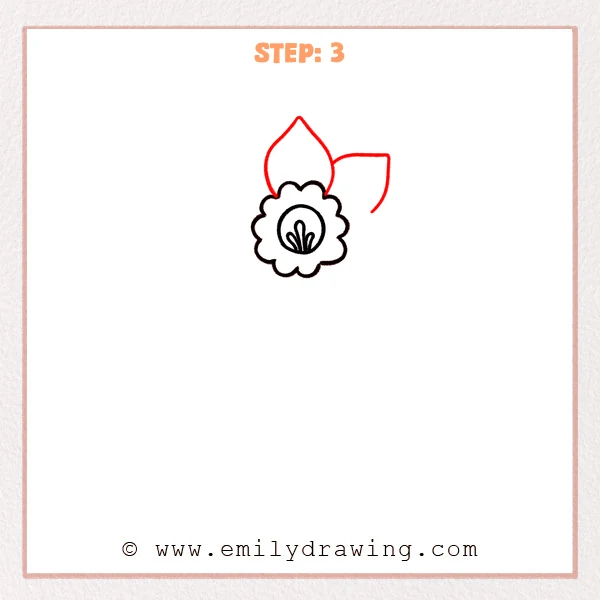
Add a large teardrop-shaped petal above the flower, with the point facing up.
Then draw a second petal on the right side, opening outward with a smooth curved edge.
Let both petals connect neatly behind the ruffled ring.
Pro Tip: Keep the right petal a bit smaller so the flower feels more natural.
Step 4: Add the Lower-Right and Bottom Petals
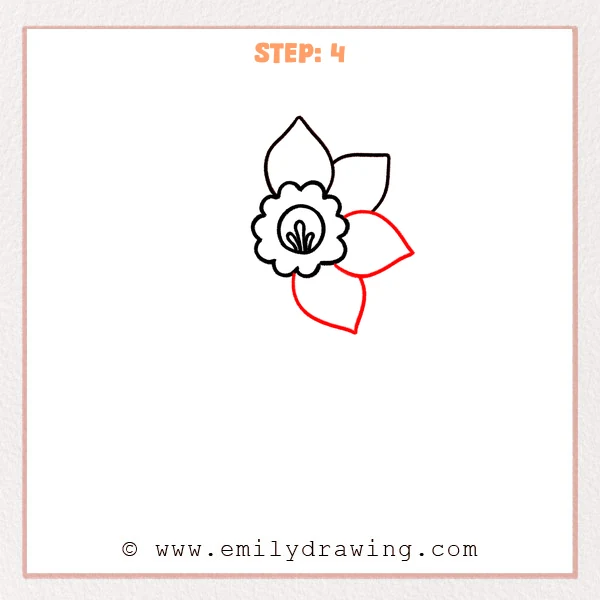
Draw a larger petal on the lower-right, aiming its tip down and right as if it is unfolding.
Then add a bottom petal that drops downward and ends in a soft point.
Allow the bottom petal to slightly overlap the lower-right petal for depth.
Pro Tip: Let the bottom petal’s point lean a little right for a natural flow.
Step 5: Add the Two Left-Side Petals
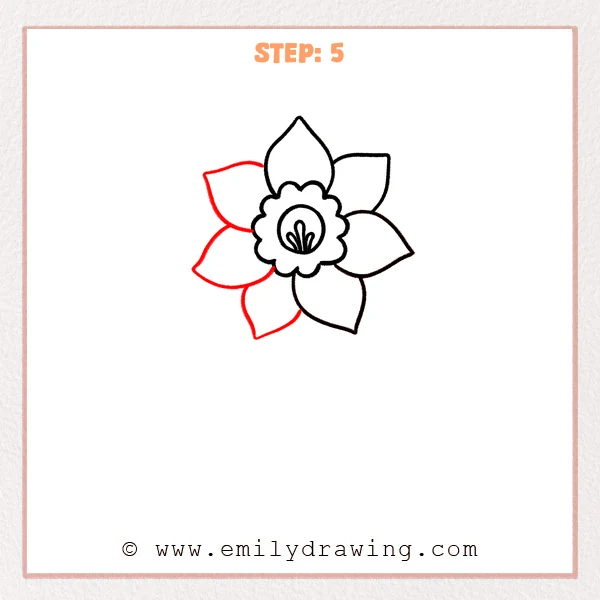
Add a petal on the upper-left, peeking out beside the top petal with a rounded outer edge.
Then draw a lower-left petal that points down-left and sits close to the bottom petal.
Now the daffodil has a full set of outer petals around the center.
Pro Tip: Keep the left petals slightly rounder so the bloom looks soft.
Step 6: Add the Stem and Two Long Leaves
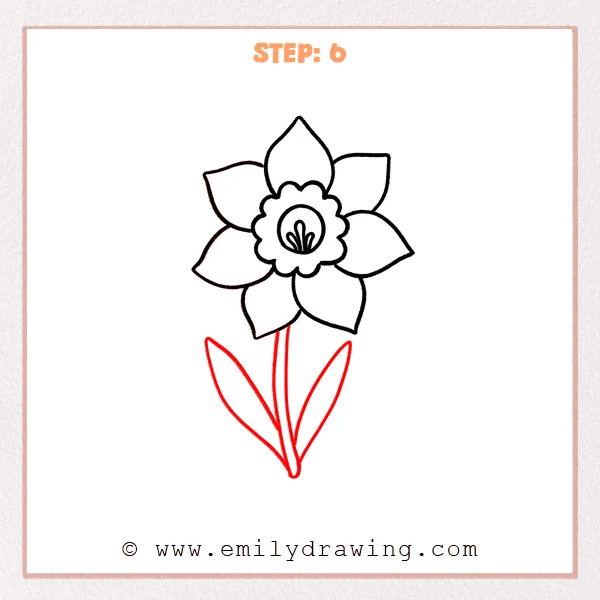
Draw two long, almost-parallel lines dropping from the flower to form a slender stem.
On each side, add a long leaf shaped like a narrow teardrop, with tips pointing upward.
Let the leaf bases meet near the bottom of the stem to keep the plant looking connected.
Pro Tip: Keep each leaf much longer than it is wide for a true daffodil look.
Step 7: Color in your drawing!
Fun Facts
- Daffodils are often one of the first flowers to bloom in spring.
- The trumpet-like center is called a “corona,” and it helps attract pollinators.
- Daffodils can grow in clumps and return year after year.
Pin it now, Draw later!
You have drawn a daffodil step by step, starting with the cup and finishing with leaves.
For coloring, try yellow petals with a deeper orange center, or use pale white petals for a different look.
Add gentle shading by darkening the petal bases and leaving the tips lighter.
A common beginner mistake is making all petals the same size, so keep small differences for a natural bloom.
Practice this easy drawing tutorial a few times, and try drawing a whole bunch of daffodils next.
Get the FREE Printable Drawing Guide
FREE Download Printable Daffodil Drawing Tutorial
Frequently Asked Questions
How can I make my daffodil look more 3D?
Add light shading where petals overlap and darken the inside of the cup slightly.
Keep one side a bit lighter to suggest a light source.
What if my petals look uneven?
That is normal in drawing for beginners.
You can lightly erase and redraw the petal edge using smooth, rounded curves.
Can I draw the daffodil from the side instead?
Yes. Start with an oval cup and draw fewer visible petals behind it.
A side view is a great next step once you feel comfortable.