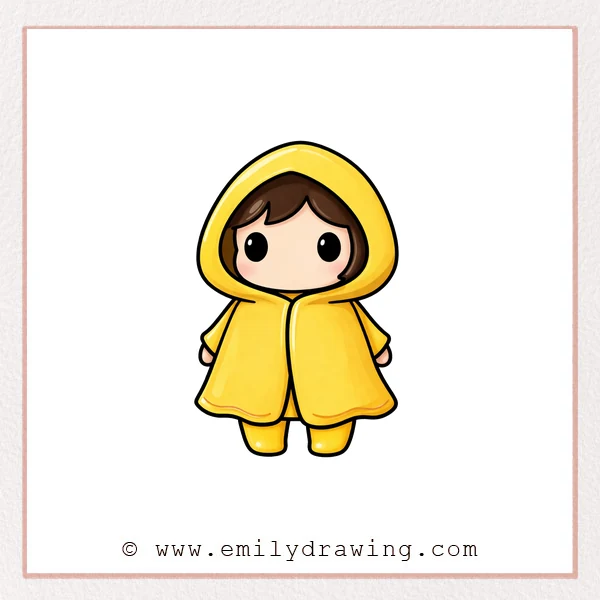
A hood can make a character feel cozy, mysterious, or adventurous.
In this easy drawing tutorial, you will build a cute hooded figure using simple shapes.
Take your time, and keep your lines light until you are ready to clean them up.
What You Will Need
- Pencil
- Eraser
- Black pen or marker (optional, for final lines)
- Paper
Here are my RECOMMENDED Art Supplies!
- Crayola Coloring Set (140 Pieces – Mega Value!)
- 24 Colored Crayon Set
- A4 Printer Paper
- Crayola Coloring Pencils
- HP Home Printer with Instant Ink!
Time needed:
19 minutes.
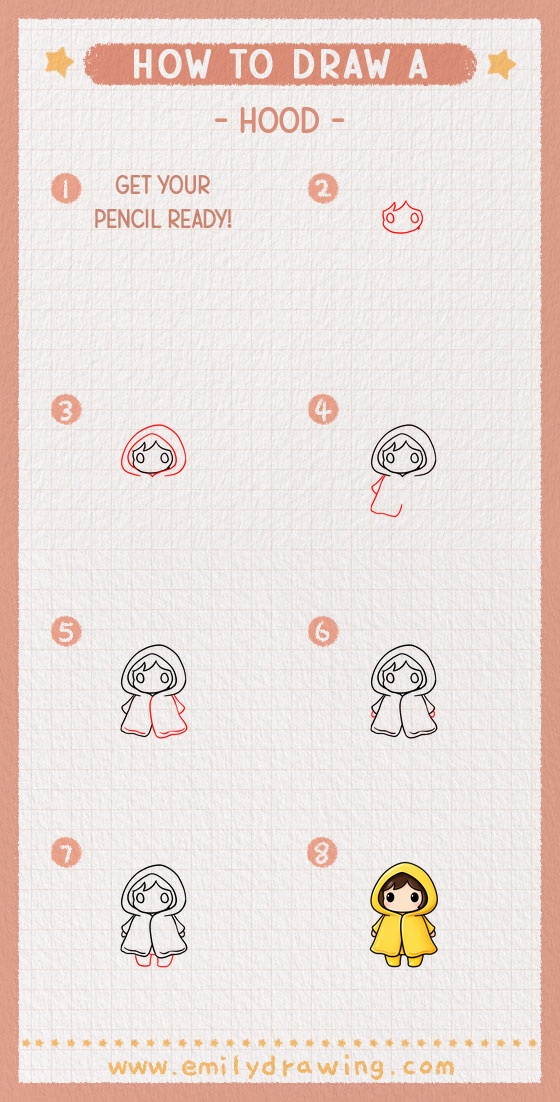
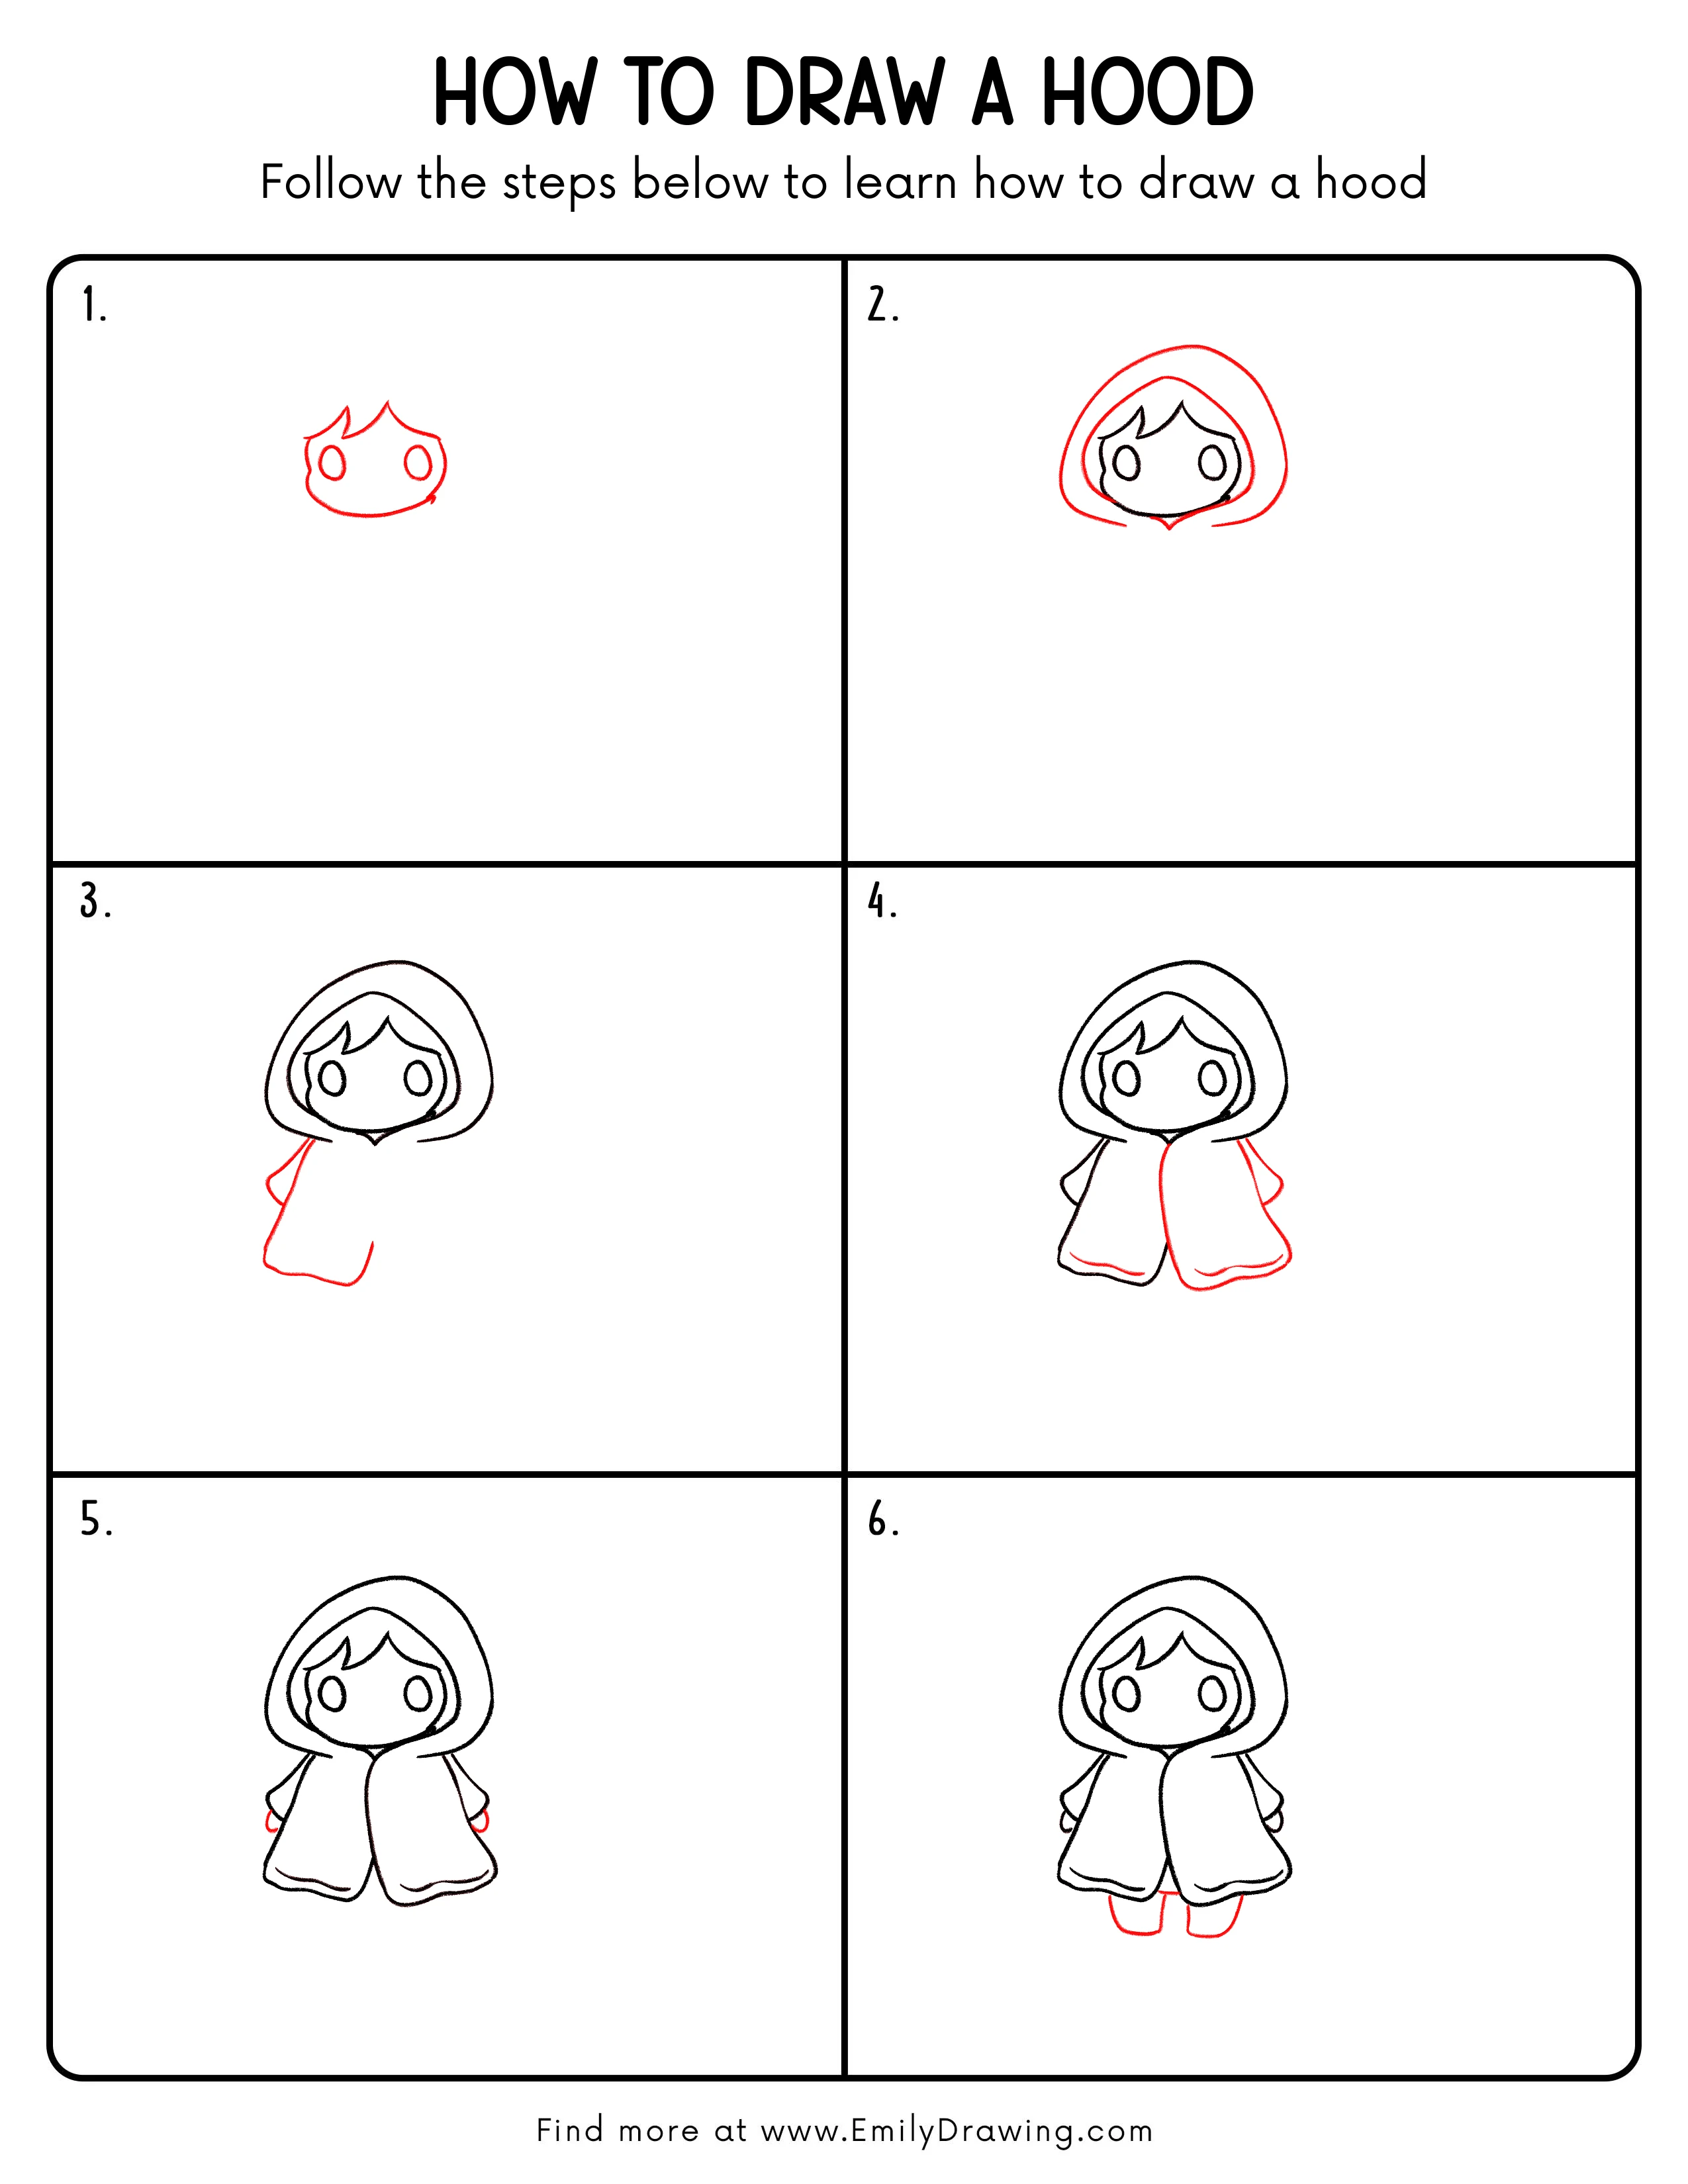
Step-by-Step Drawing Guide
Step 1: Draw the Basic Hood Shape
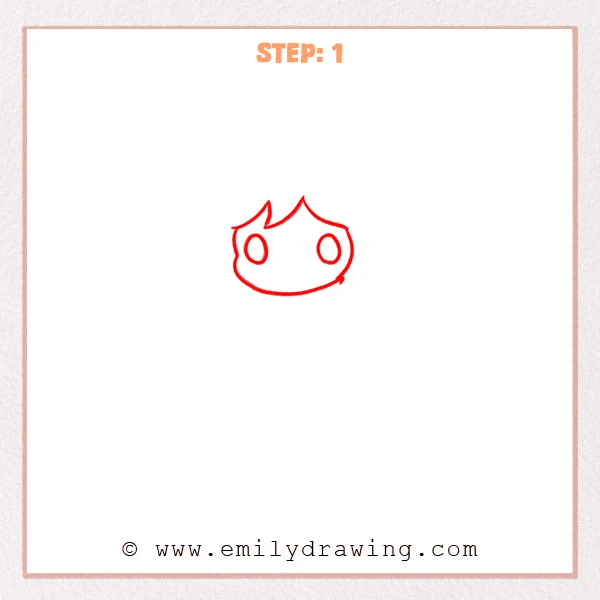
Start with a smooth curved line for the rounded bottom edge.
Add two pointed bumps on top to make a flame-like hood silhouette.
Draw one circle on each side for the eye spots.
Pro Tip: Keep both eye circles the same size and level, then adjust gently.
Step 2: Add the Hood Outer Shape and Opening Edge
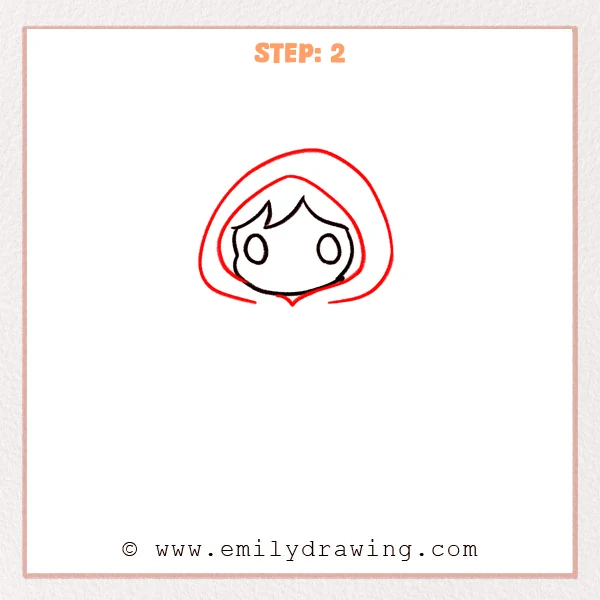
Draw a larger curved outline around the head to form the hood’s outer shape.
Add a second, parallel curve inside it to create the hood opening border.
Place a small point at the bottom center to suggest the hood gathers there.
Pro Tip: Keep the inner and outer hood lines evenly spaced for a clean look.
Step 3: Draw the Cloak Body Outline
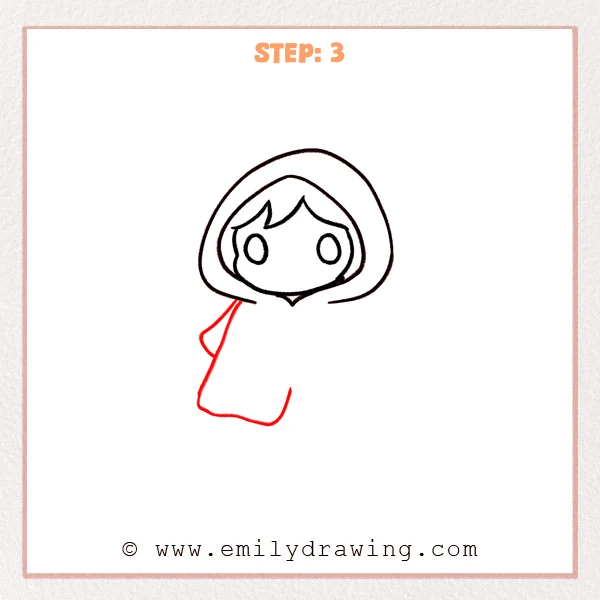
From the lower left of the hood, pull a long curve down for the outer cloak edge.
Add a small triangular bump on the left to suggest a sleeve or arm.
Use a rounded bend at the bottom to bring the cloak back toward the center.
Pro Tip: Use long, smooth curves for the cloak so it feels soft and flowing.
Step 4: Complete the Other Side of the Cloak and the Front Opening
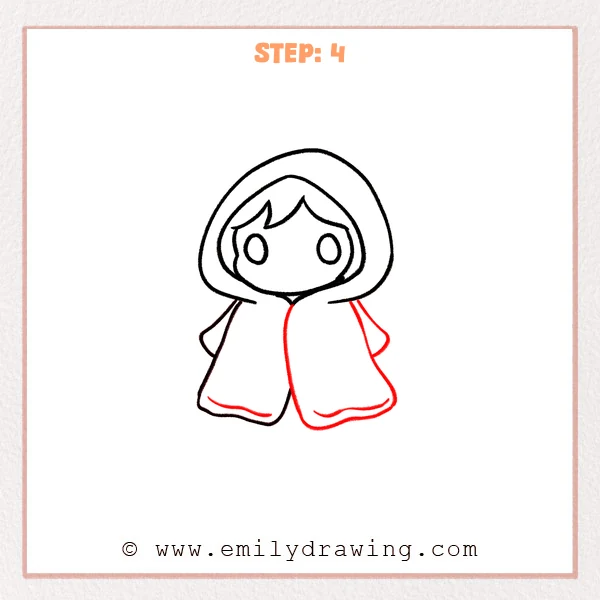
Draw the right cloak outline from under the hood to balance the shape.
Add a vertical inner line in the center to show the cloak opening.
Sketch a small sleeve bump on the right, then add wavy hems for folds.
Pro Tip: Match the hem height on both sides before tweaking the fold waves.
Step 5: Add Small Hands and Clean Up the Lines
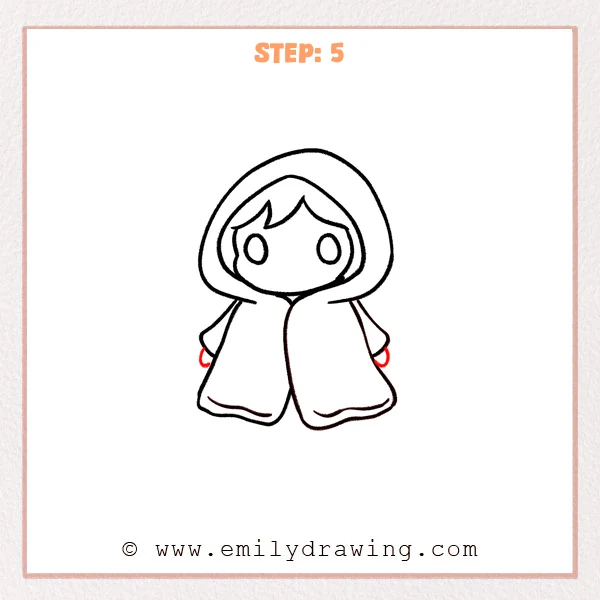
Draw a small curved shape under each sleeve to show tiny hands.
Trace over the sketch with cleaner final lines, smoothing the cloak edges.
Keep the center opening meeting softly instead of becoming too sharp.
Pro Tip: Make each hand slightly narrower than the sleeve opening for a cute fit.
Step 6: Add the Feet and Set the Stance
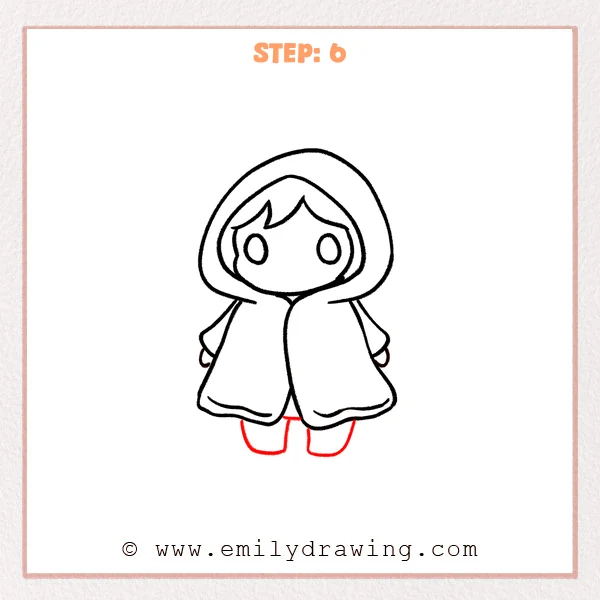
Draw two short rounded rectangles under the cloak for the feet.
Leave a small gap between them so the character feels balanced.
Let the top of each foot tuck slightly under the cloak for a natural overlap.
Pro Tip: Keep both feet the same height and align the bottoms for a tidy look.
Step 7: Color in your drawing!
Fun Facts
- Hoods have been used for warmth and rain protection for centuries.
- In character design, a hood often suggests mystery or adventure.
- Simple cloak shapes look expressive with just a few gentle folds.
Pin it now, Draw later!
You can add a tiny mouth, a clasp, or a simple emblem on the cloak for extra personality.
Try coloring the hood darker than the face so the eyes stand out.
Now you know how to draw a hood step by step—keep practicing, and make a whole set of hooded characters.
Get the FREE Printable Drawing Guide
FREE Download Printable Hood Drawing Tutorial
Frequently Asked Questions
How do I make the hood look deeper?
Make the inner opening line slightly thicker, and add one small fold line near the cheek.
What if my cloak looks uneven?
Check the hem height on both sides, then redraw the curves with one smooth stroke.
Can I change the style and still use these steps?
Yes—keep the same big shapes, then adjust the eyes, folds, and proportions to match your style.