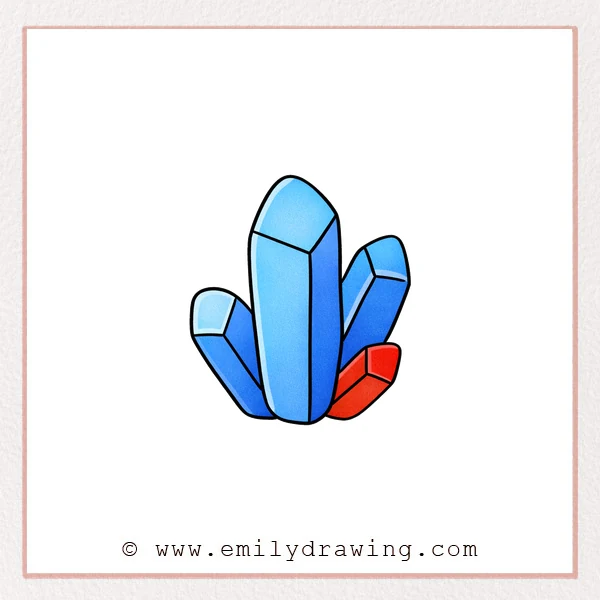
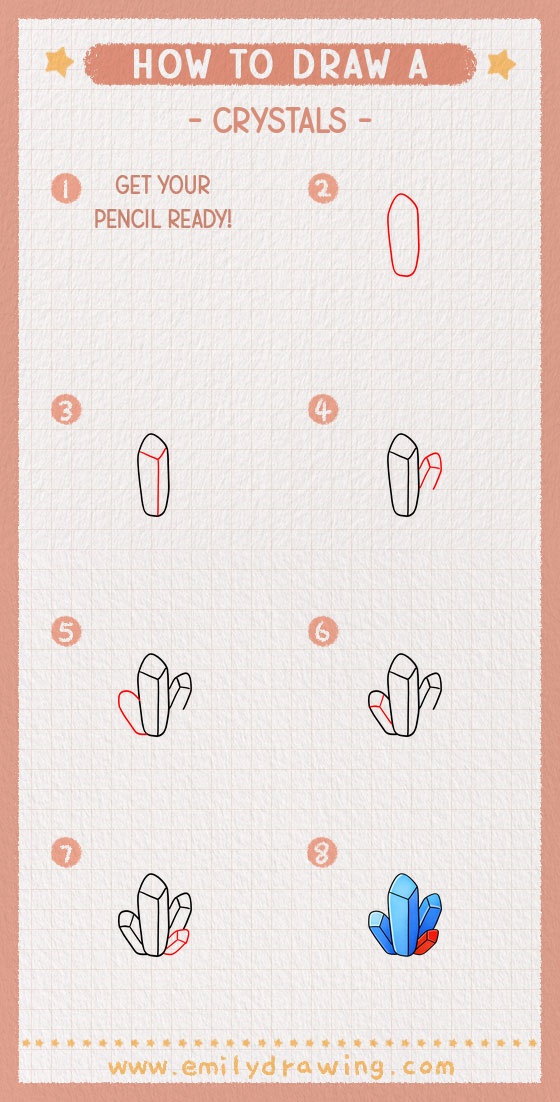
This easy drawing tutorial shows how to draw crystals step by step using simple shapes. You will build a small crystal cluster that feels solid and three-dimensional. Take your time, and let each line stay calm and clear.
What You Will Need
- Pencil
- Eraser
- Black pen or marker (optional for outlining)
- Coloring tools (colored pencils, crayons, or markers)
- Paper
Here are my RECOMMENDED Art Supplies!
- Crayola Coloring Set (140 Pieces – Mega Value!)
- 24 Colored Crayon Set
- A4 Printer Paper
- Crayola Coloring Pencils
- HP Home Printer with Instant Ink!
Time needed:
25 minutes.
Step-by-Step Drawing Guide
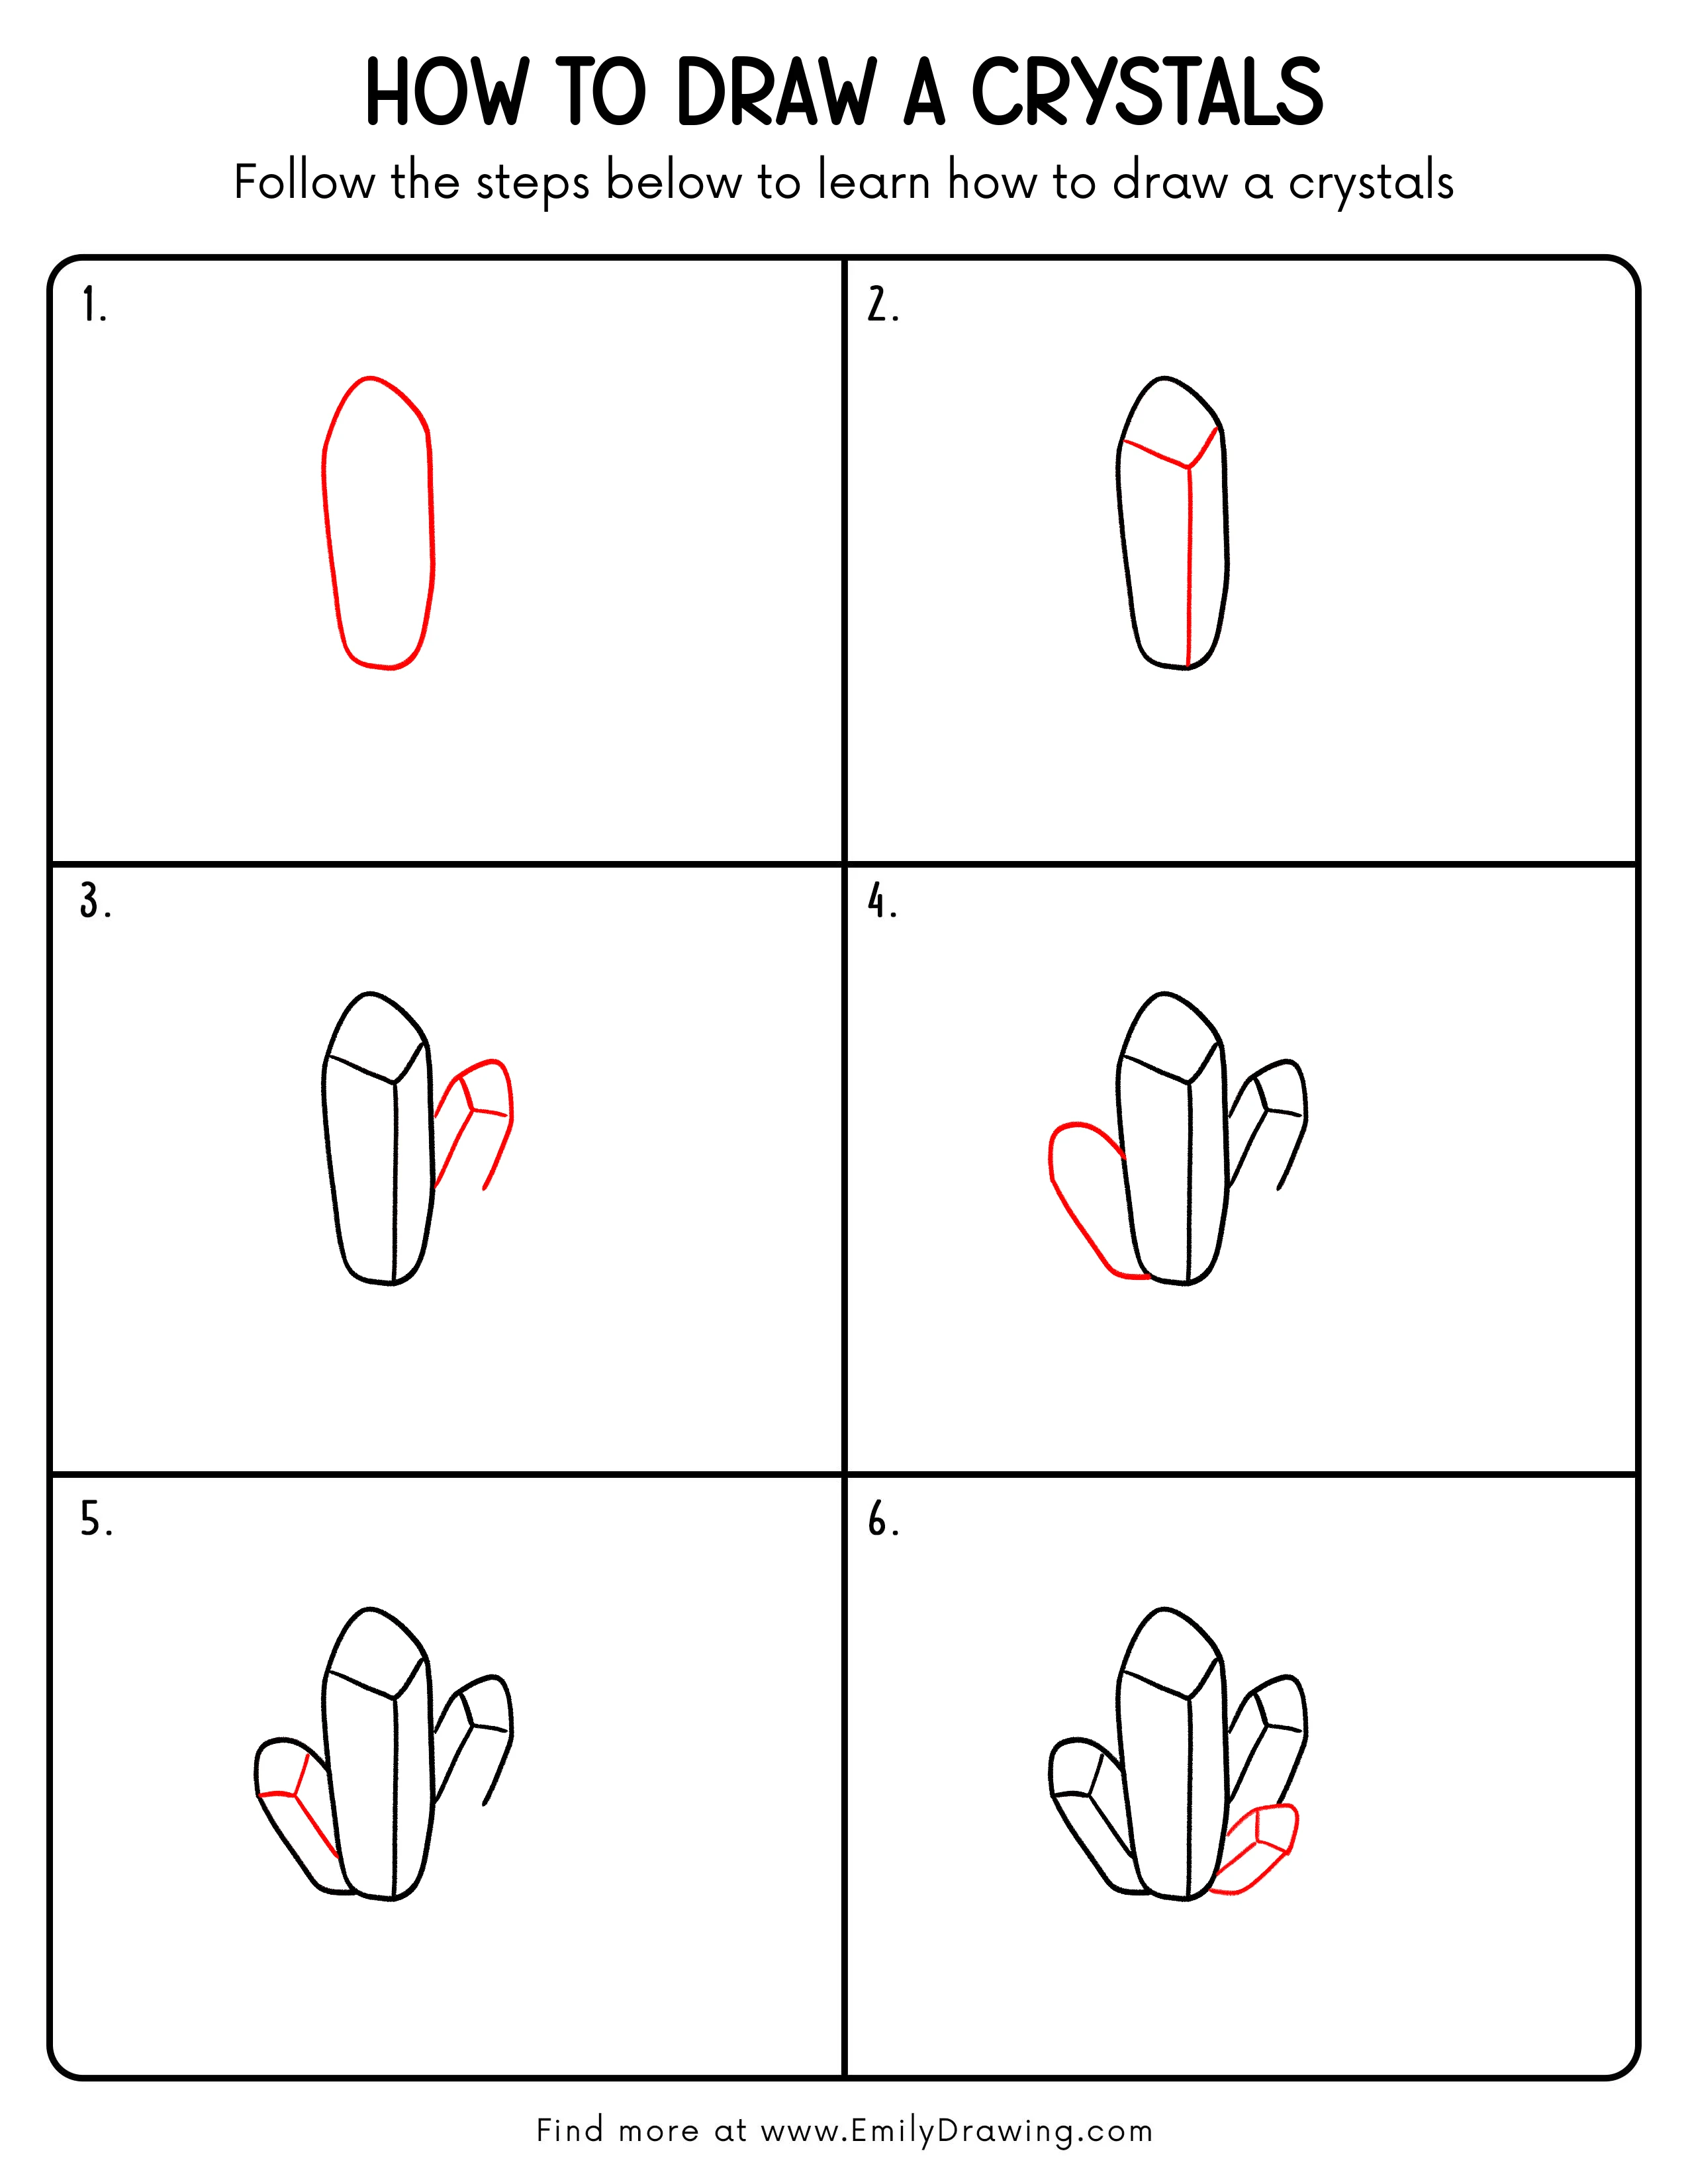
Step 1: Draw the Main Crystal Shape
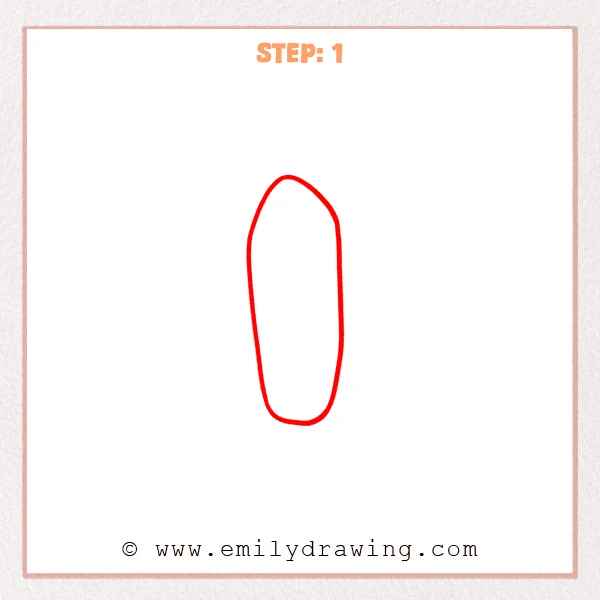
Start with a tall capsule-like outline in the center of the page, with a softer, rounded top. Let the sides curve in slightly, then round the bottom to form a standing crystal column.
Pro Tip: Keep the sides slightly uneven to make it look more natural.
Step 2: Add the Crystal Facet Lines
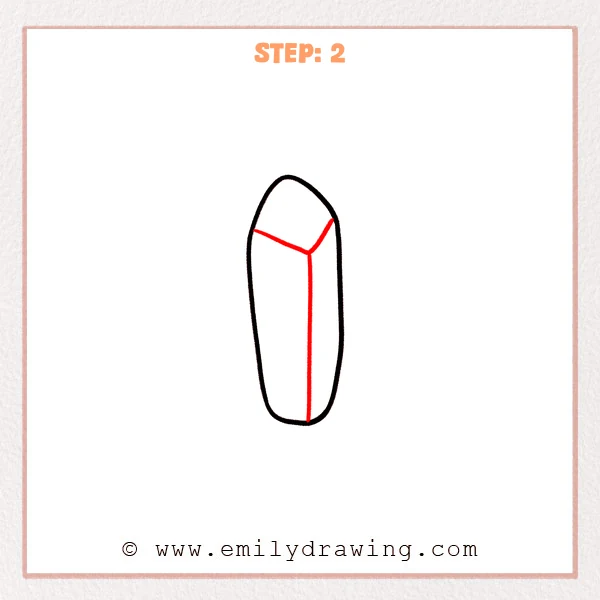
Draw a small “Y”-shaped set of lines near the top to show the crystal’s cut faces. From that meeting point, pull one straight line down toward the bottom to create a strong edge.
Pro Tip: Place the top “Y” slightly off-center to make the crystal feel more three-dimensional.
Step 3: Add a Second Small Crystal
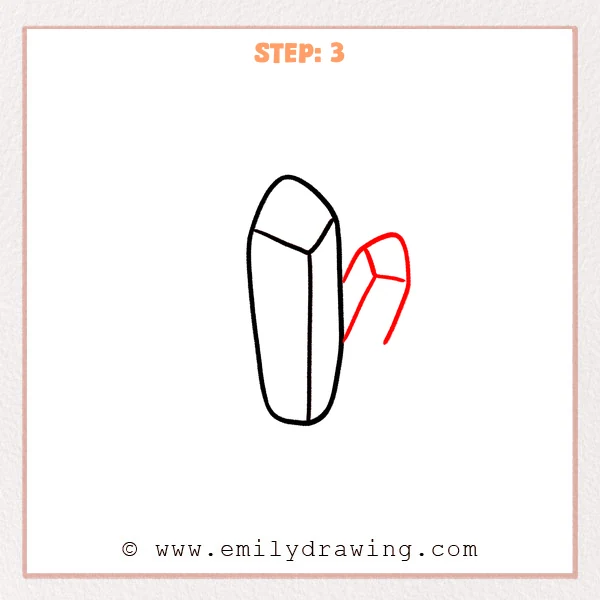
Add a shorter crystal on the right side of the main one, with a slightly open base as if it is growing out. Give it the same small facet lines on top, then pull one edge line downward to match the main crystal.
Pro Tip: Tilt the small crystal slightly so the cluster feels more natural.
Step 4: Add the Third Crystal Outline on the Left
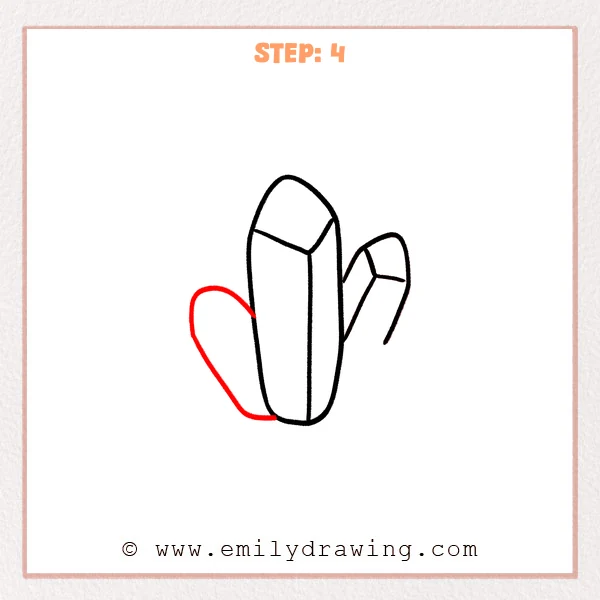
Sketch a large curved outline behind the left side of the main crystal, starting around the middle. Bring the line down and back toward the base, leaving a small part hidden so it feels tucked behind.
Pro Tip: Keep the base close to the main crystal so the cluster feels connected.
Step 5: Add Facets and an Edge Line to the Left Crystal
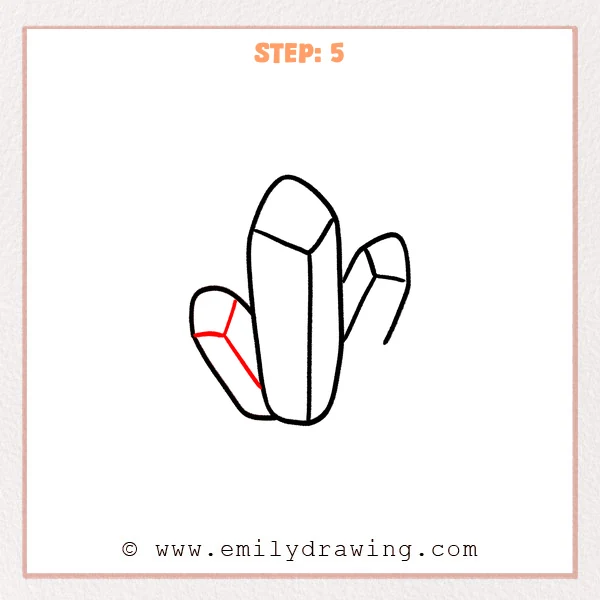
Draw a small “Y” shape on the top of the left crystal to show its cut faces. From the meeting point, pull one slanted edge line downward toward the lower half, following the crystal’s tilt for a 3D look.
Pro Tip: Keep the edge line slightly inside the outline so the face reads clearly.
Step 6: Add a Small Crystal at the Bottom Right
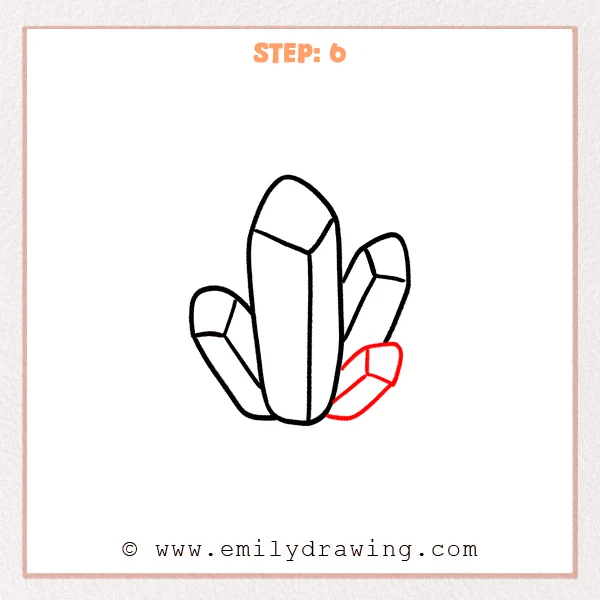
Add a shorter crystal near the bottom right of the main one, stretching sideways as if it sits at the base. Sketch a small top facet, then add one short edge line so this crystal also feels three-dimensional.
Pro Tip: Let this small crystal overlap the main base a little so the cluster feels connected.
Step 7: Color in your drawing!
Fun Facts
- Many crystals grow in repeating patterns, which is why they often look faceted and geometric.
- Quartz is one of the most common minerals on Earth, and it can form clear, colorful crystals.
- A crystal cluster can grow when several crystals form close together in the same space.
Pin it now, Draw later!
Now you have a complete crystal cluster with clear faces and edges. For coloring, choose one light color for the main faces and a darker shade along one side to suggest shadow. You can also leave a thin white strip on one face to look like a shiny highlight.
A common beginner mistake is making every edge line the same strength, which can flatten the drawing. Try thickening only a few outer edges and keeping inside facet lines a bit lighter.
Practice drawing a few more clusters with different heights and angles, and you will get faster each time. If you enjoyed this drawing for beginners, try another easy drawing tutorial with rocks, gems, or simple landscapes.
Get the FREE Printable Drawing Guide
FREE Download Printable Crystals Drawing Tutorial
Frequently Asked Questions
How do I make my crystals look more 3D?
Keep one “main edge” line strong, and shade one side a little darker than the other.
What if my facet lines look crooked?
That is okay. Gently erase and redraw with shorter strokes, aiming for clean angles.
Can I draw more crystals in the cluster?
Yes. Add one new crystal at a time, overlap the bases slightly, and repeat the same top facets.