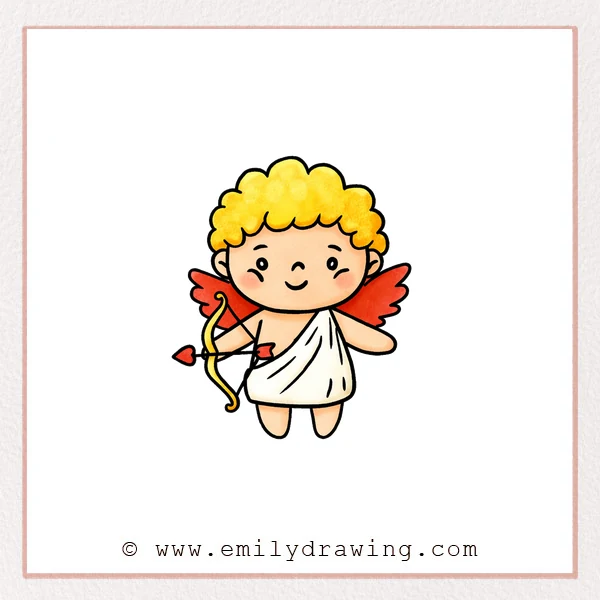
This easy drawing tutorial shows how to draw Cupid step by step in a calm, simple way. We will build a cute Cupid with curly hair, a happy face, and a bow and arrow. Take your time, and let each step feel small and doable.
What You Will Need
- Pencil and eraser
- Black pen or marker (optional for outlining)
- Colored pencils or markers (optional)
- Paper
Here are my RECOMMENDED Art Supplies!
- Crayola Coloring Set (140 Pieces – Mega Value!)
- 24 Colored Crayon Set
- A4 Printer Paper
- Crayola Coloring Pencils
- HP Home Printer with Instant Ink!
Time needed:
30 minutes.
Step-by-Step Drawing Guide
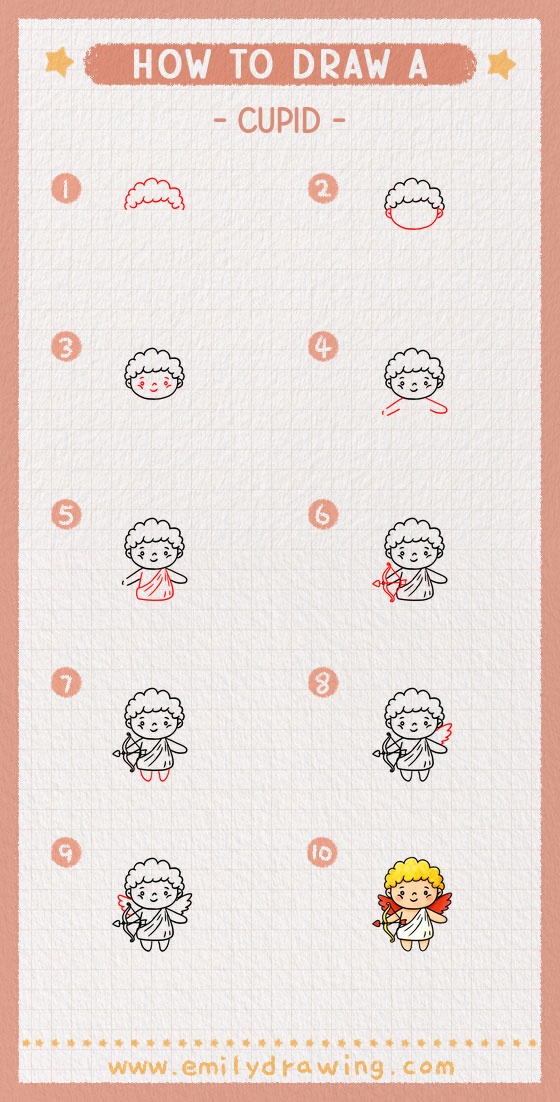
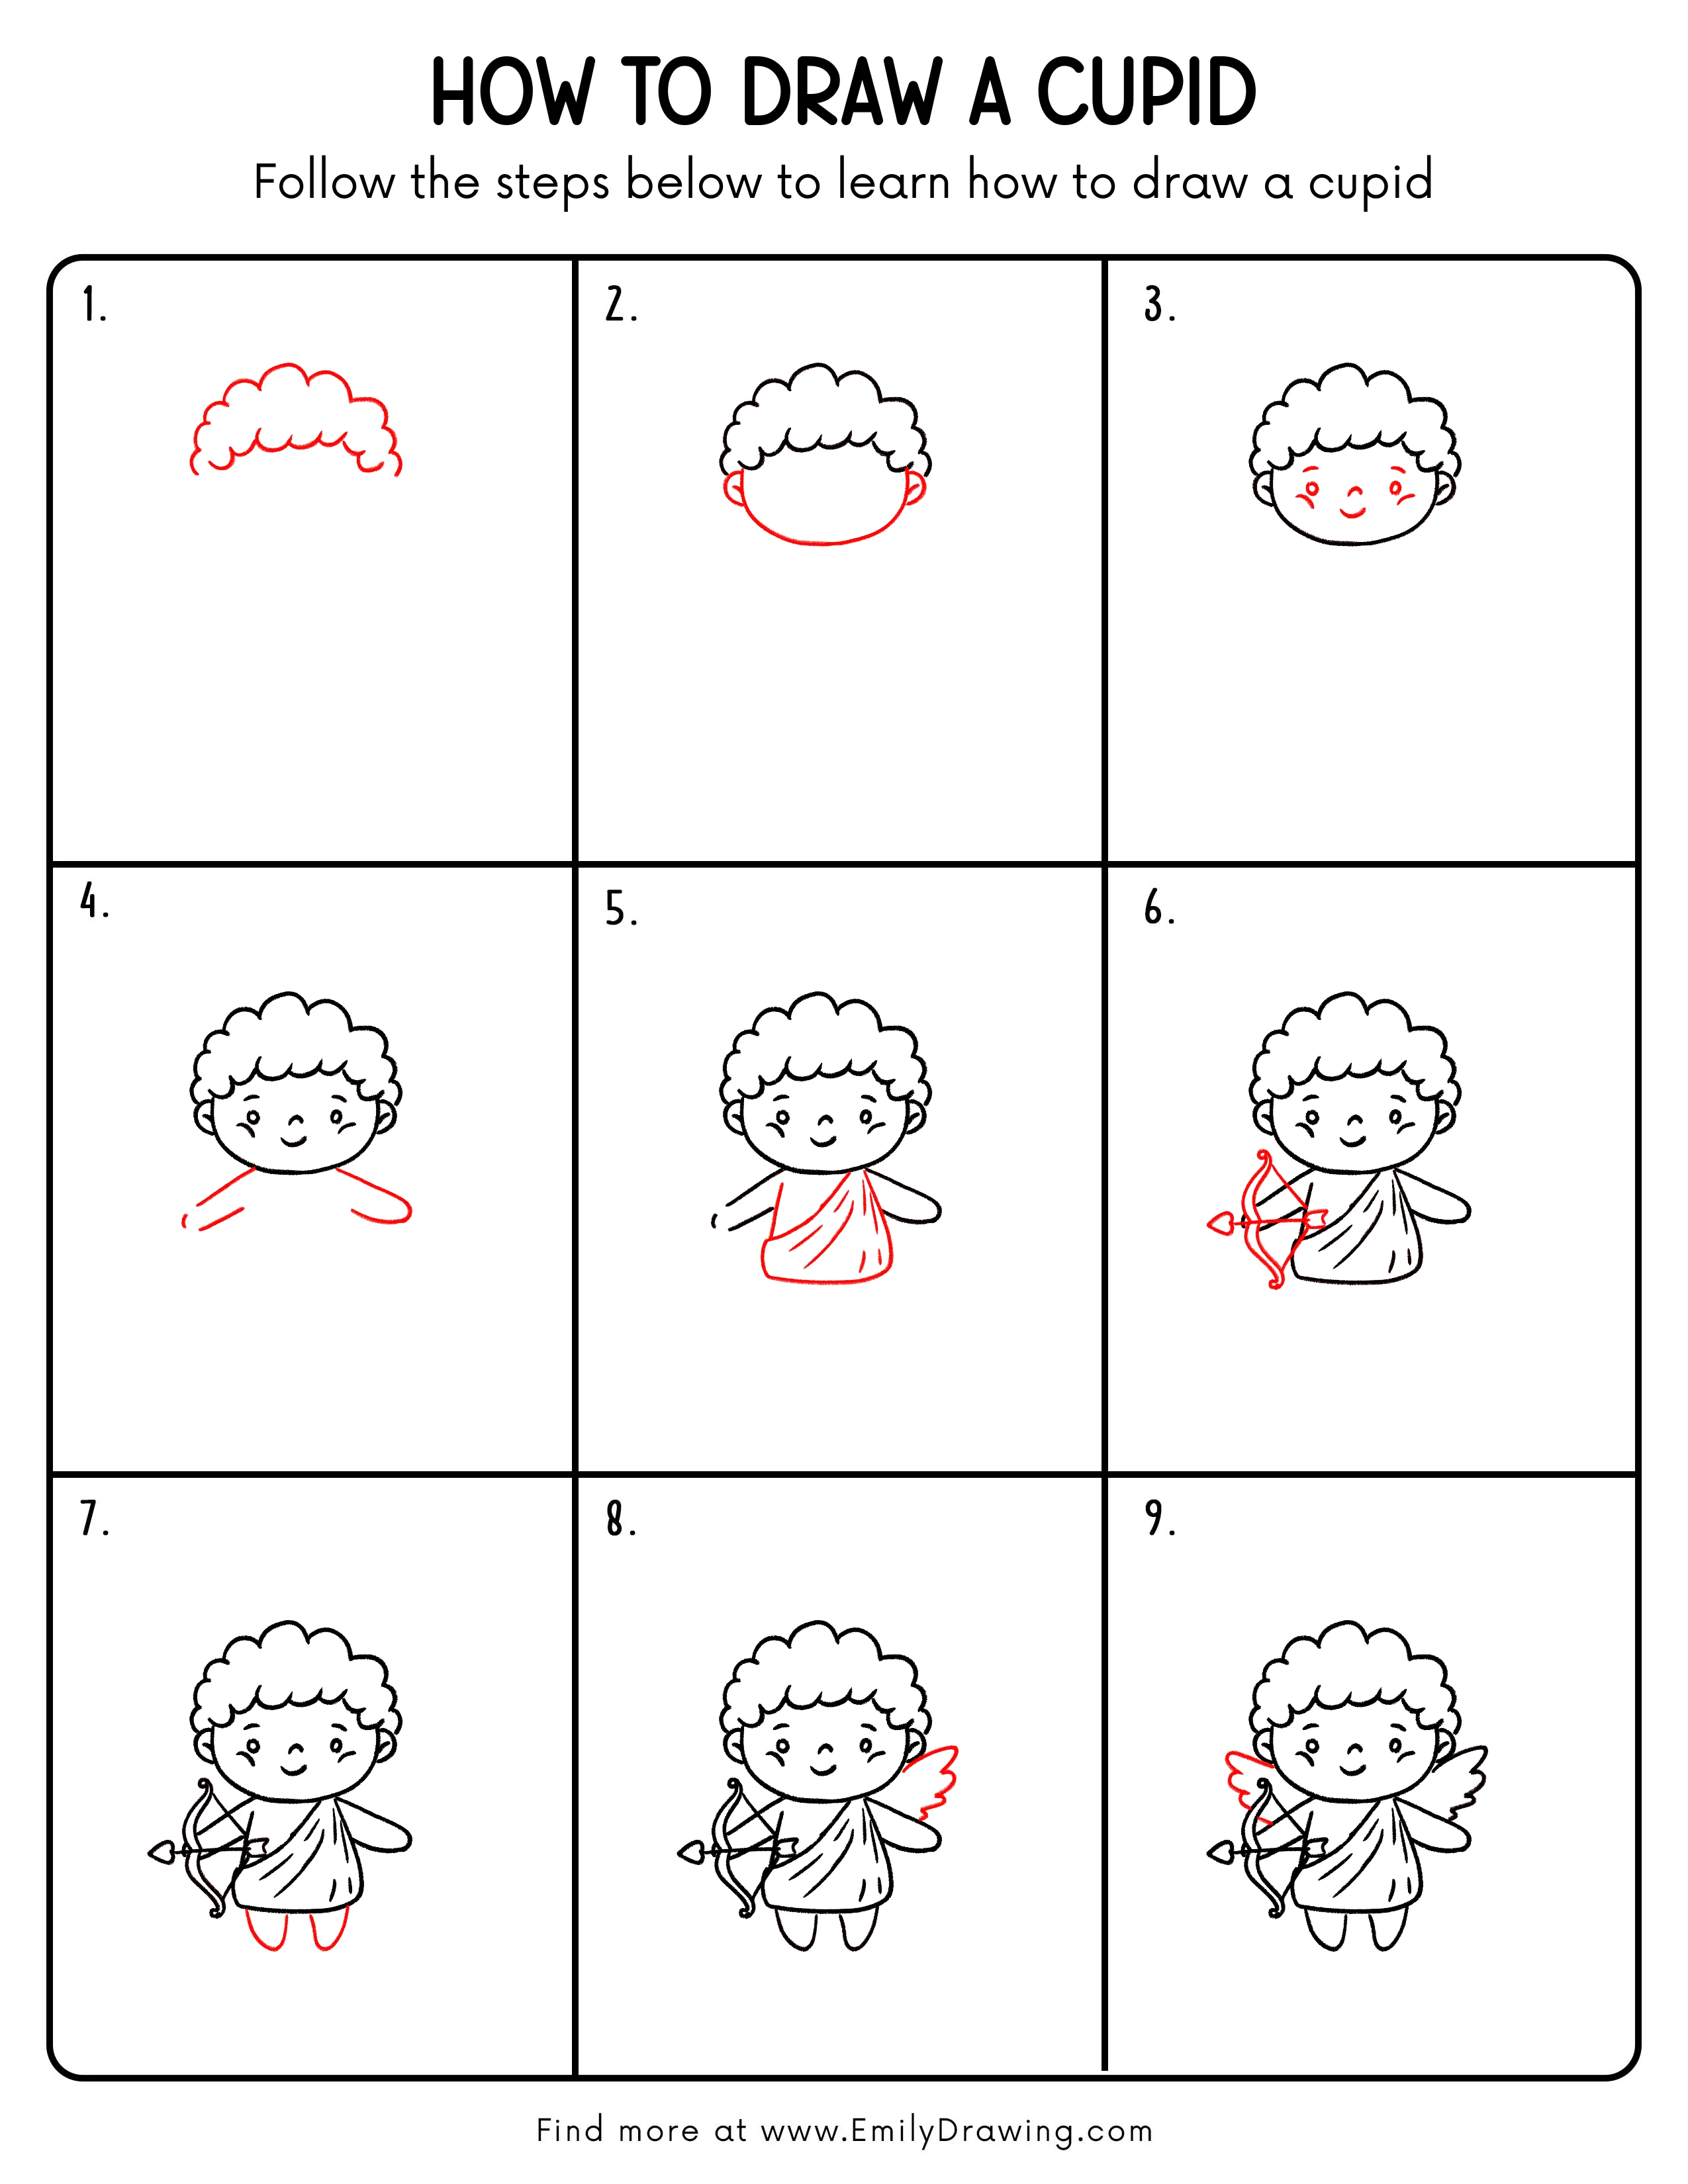
Step 1: Outline Cupid’s Curly Hair
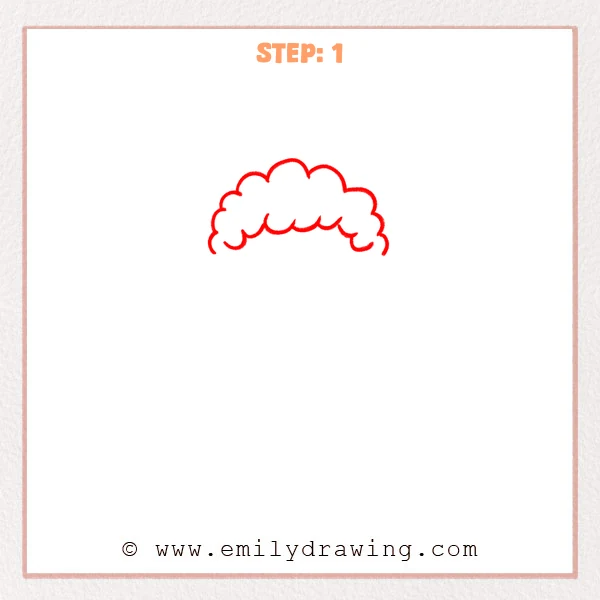
Start near the top of the page and sketch a cloud-like arc for Cupid’s curly hair. Add a few small curved bumps along the lower edge to make the hair feel soft and fluffy.
Pro Tip: Keep the curls a similar size so the hair looks neat and balanced.
Step 2: Add the Cheeks and Small Ears
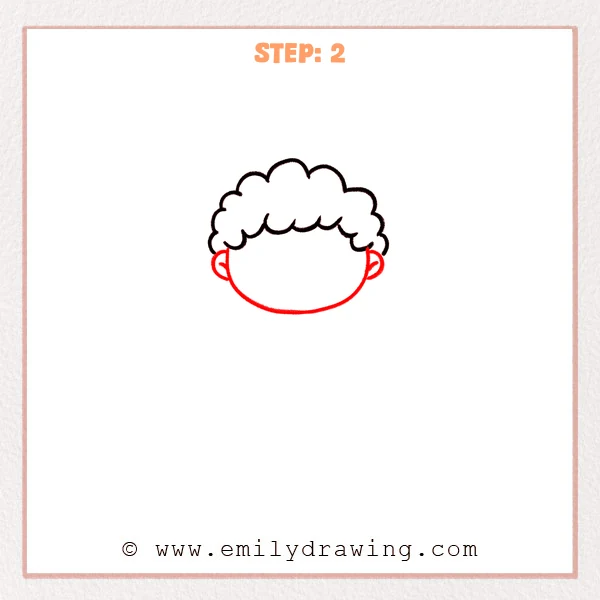
Under the curls, sketch a wide U-shaped curve to form Cupid’s round chin and cheeks. Add a small half-circle ear on each side, then place one short inner-ear line inside each ear.
Pro Tip: Keep the chin curve smooth, and line up both ears at the same height.
Step 3: Add Cupid’s Eyes and Happy Expression
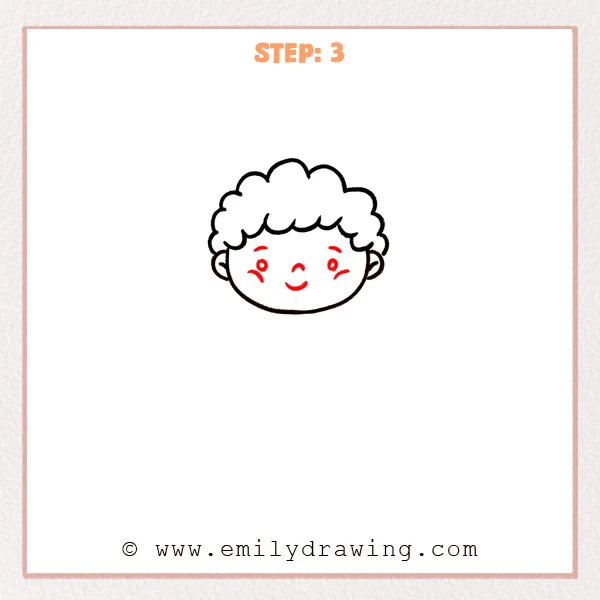
Place two small round eyes in the middle of the face, keeping them level. Add short curved lines for the eyebrows, a tiny nose, and a gentle smile, then sketch two small cheek marks to show blush.
Pro Tip: Start with light lines to place features, and keep both sides balanced.
Step 4: Add the Shoulders and Outstretched Arms

From both sides under the face, sketch two slanted lines to set Cupid’s shoulders. On the right, continue into a long rounded arm that ends softly; on the left, use two short lines to suggest the other arm’s direction for now.
Pro Tip: Start both shoulder lines at the same height so the arms don’t look tilted.
Step 5: Add Cupid’s Draped Tunic and Folds
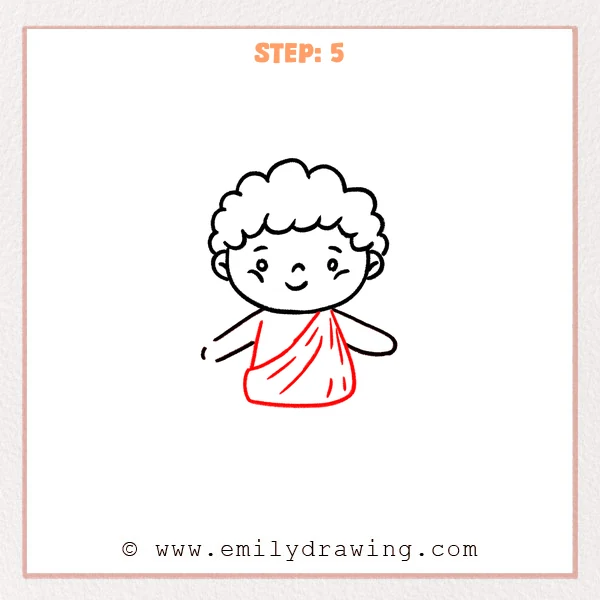
Under the neck, add a slanted drape line so the cloth sits over one shoulder and crosses the chest. Round out the lower edge into a soft belly shape, then sketch a few curved fold lines that flow downward like hanging fabric.
Pro Tip: Let the fold lines “fan out” from the shoulder area for natural fabric.
Step 6: Add Cupid’s Bow and Arrow
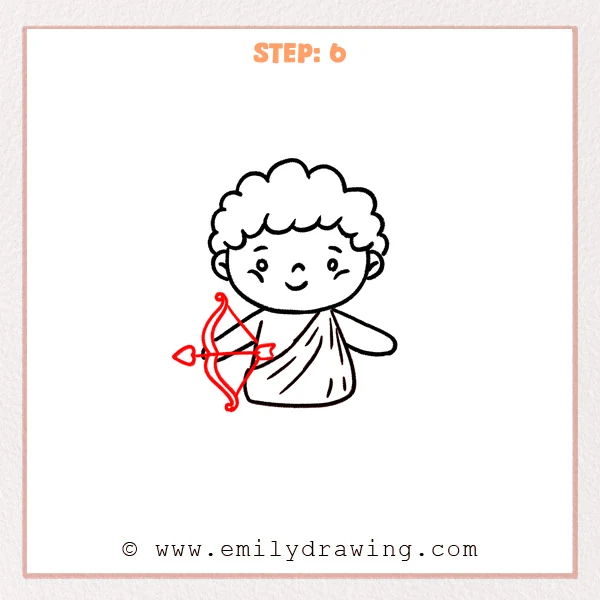
In front of the left arm, draw a slim bow with two matching curved lines to show its bend. Then sketch a straight arrow across the middle, add a small triangle tip, and finish with two tiny feather shapes at the back.
Pro Tip: Draw the arrow straight first, then mirror the bow curves for balance.
Step 7: Add the Two Short Legs
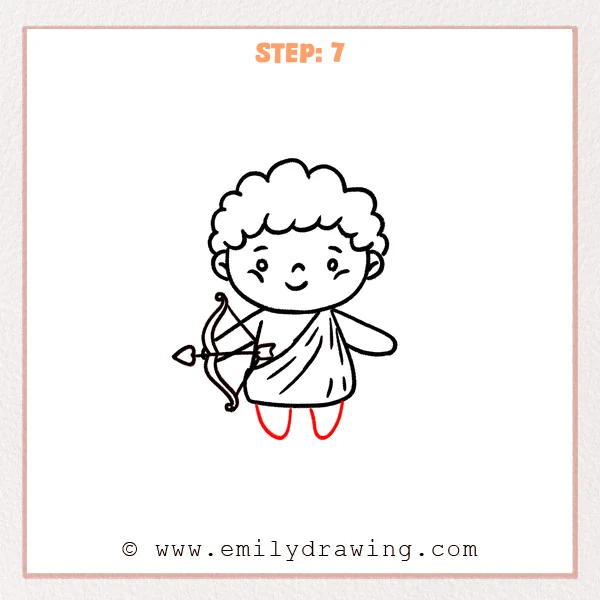
Under the bottom edge of the tunic, sketch two upside-down U shapes for Cupid’s little legs. Leave a small gap between them, and round the ends so the legs feel soft and cute.
Pro Tip: Keep both legs about the same length for a steady look.
Step 8: Add One Small Wing Behind the Back
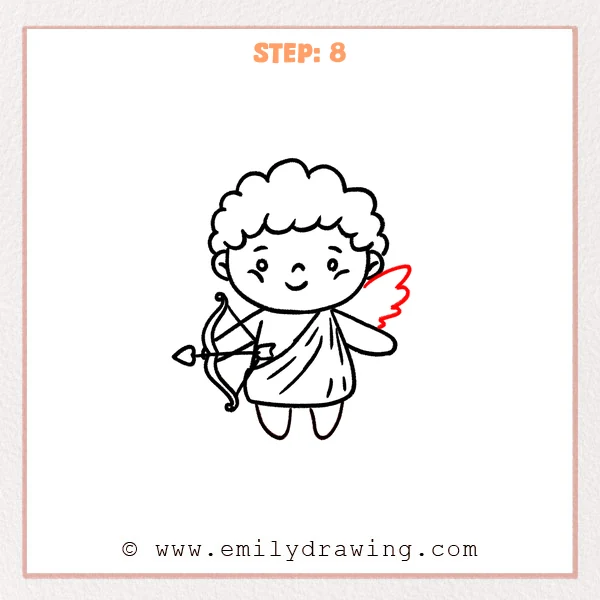
Behind the right shoulder, sketch a leaf-like wing shape that curves outward, with a rounded top and a gentle return at the bottom. Add two or three small wavy bumps along the outer edge to suggest soft feather layers.
Pro Tip: Start the wing right behind the shoulder so it feels attached to the body.
Step 9: Add the Second Small Wing
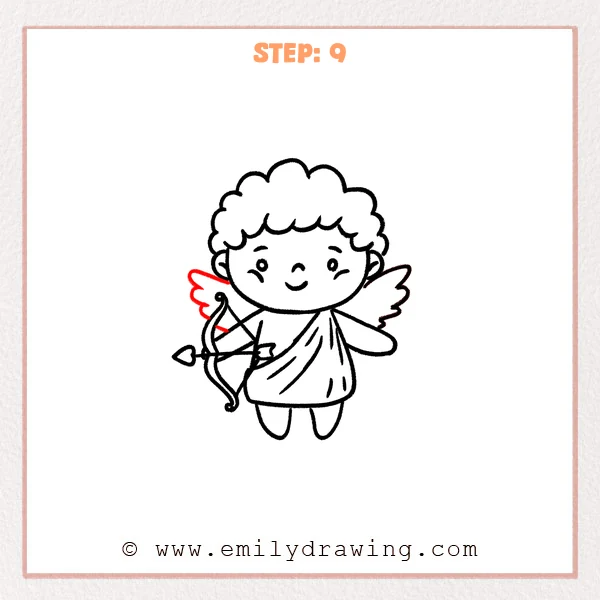
Behind the left shoulder, and tucked behind the bow, draw a second wing with a similar leaf-like shape. Add a few small wavy bumps on the outside edge so both wings look like a matching pair.
Pro Tip: Make the left wing slightly smaller to show it sits farther back.
Step 10: Color in your drawing!
Fun Facts
- Cupid is often shown as a small winged figure with a bow and arrow.
- In many stories, Cupid’s arrows can make characters fall in love.
- Artists often draw Cupid with soft curls and round cheeks to look gentle and sweet.
Pin it now, Draw later!
You now have a complete Cupid drawing, with curls, a friendly face, wings, and a bow and arrow. If you want to color, try light pink on the cheeks and a warm cream tone for the tunic. Add a little shadow under the chin and along the tunic folds for a soft, round look. A common beginner mistake is making one wing much larger than the other, so pause and compare both sides before you darken your lines. Keep practicing this step by step drawing, and try drawing Cupid in a new pose next time.
Get the FREE Printable Drawing Guide
FREE Download Printable Cupid Drawing Tutorial
Frequently Asked Questions
How do I make Cupid look cuter?
Make the eyes slightly bigger and keep the smile small and gentle.
What if my bow looks uneven?
Draw the arrow first, then match the bow curves on both sides of it.
How can I add more detail without making it messy?
Add just a few extra fold lines and small feather bumps, then stop before it feels crowded.