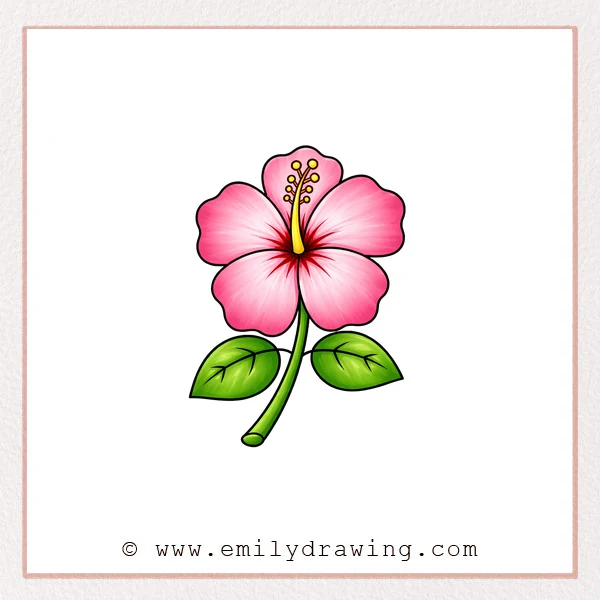
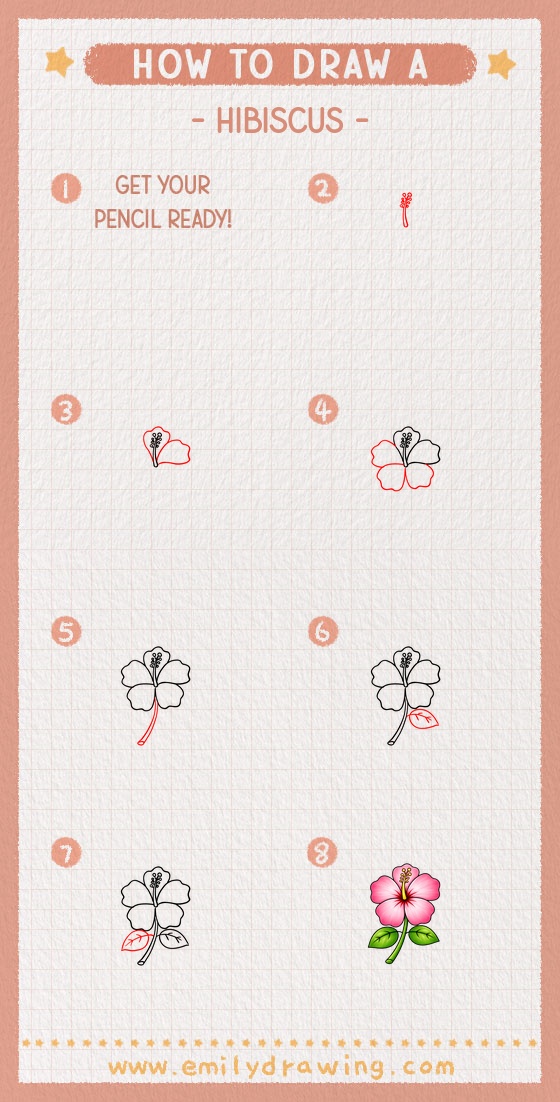
This easy drawing tutorial shows how to draw a hibiscus with simple shapes.
You will build the flower one clear step at a time.
Take your time, and keep your lines light until the end.
What You Will Need
- Pencil
- Eraser
- Black marker or pen (optional for final lines)
- Paper
Here are my RECOMMENDED Art Supplies!
- Crayola Coloring Set (140 Pieces – Mega Value!)
- 24 Colored Crayon Set
- A4 Printer Paper
- Crayola Coloring Pencils
- HP Home Printer with Instant Ink!
Time needed:
14 minutes.
Step-by-Step Drawing Guide
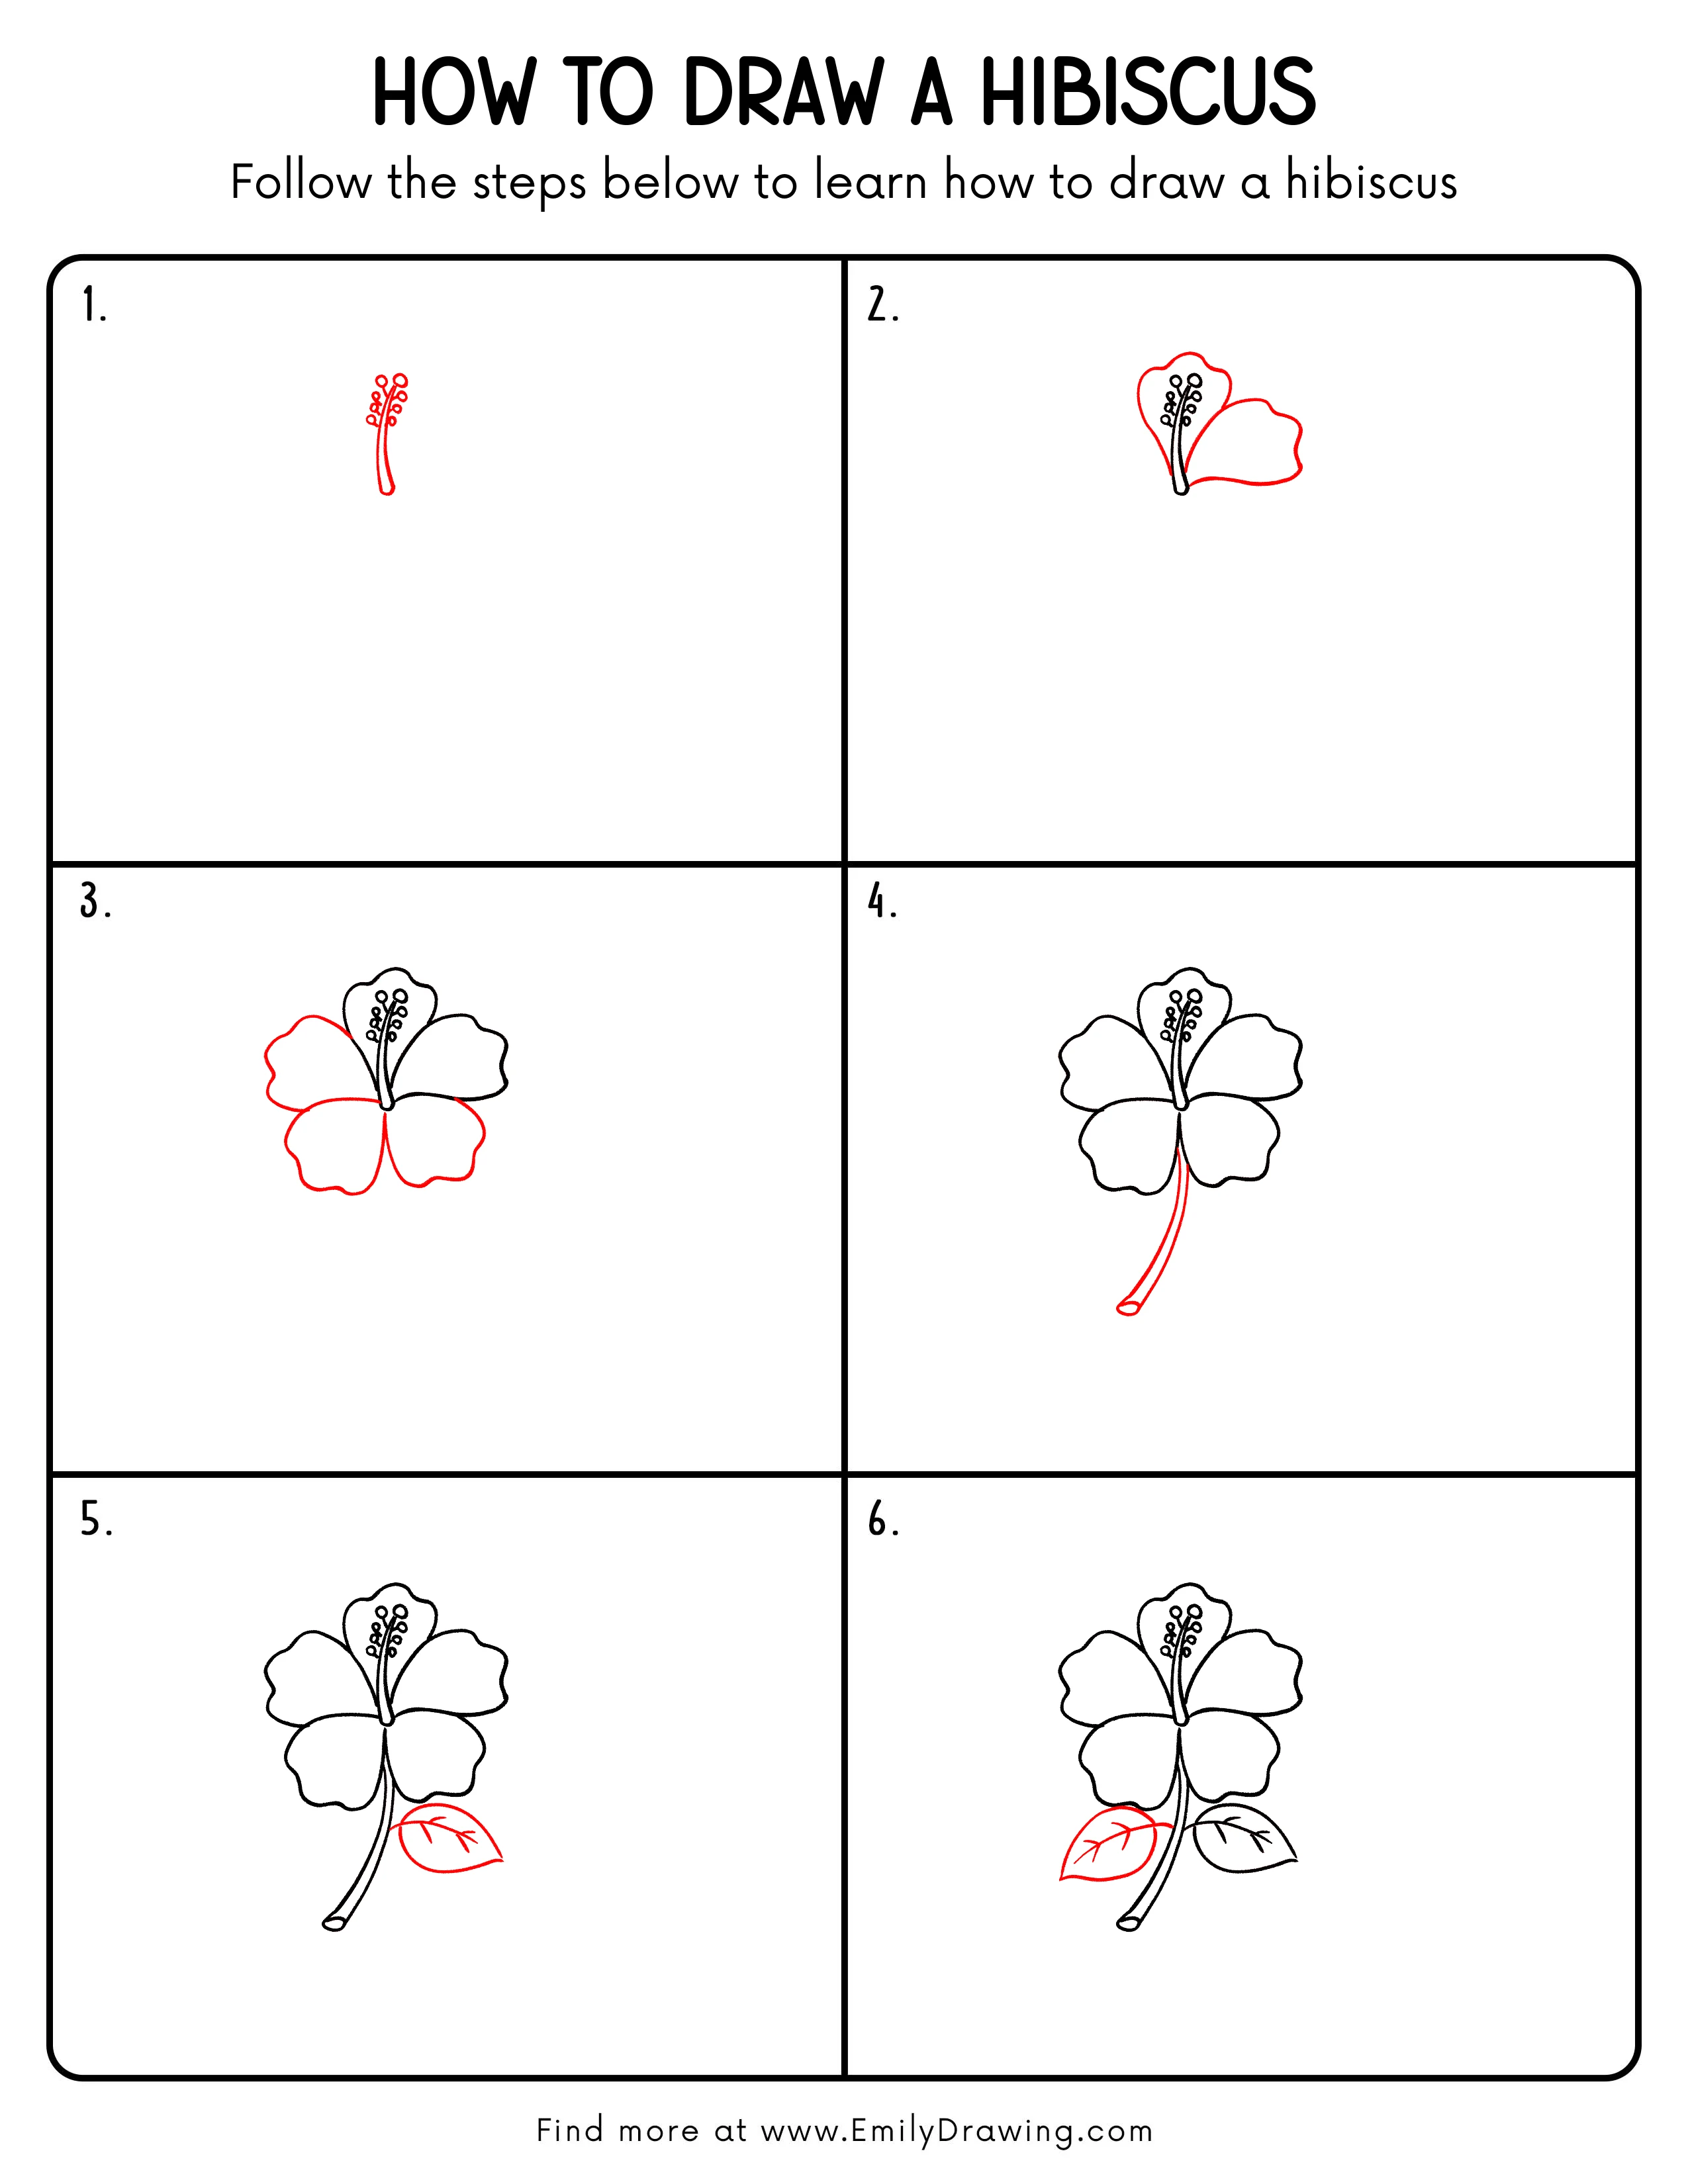
Step 1: Sketch the Stamen Stalks and Anther Dots
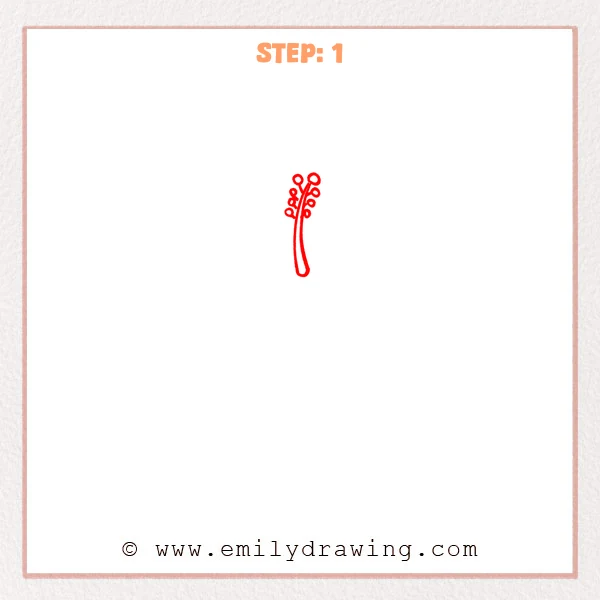
Draw two slim, curved lines for the hibiscus stamen stalks, and connect them with a rounded base shape.
Add small circles near the top as anthers, placing them on both sides of the stalks.
Pro Tip: Keep the two stalks slightly uneven to make it look more natural.
Step 2: Add Two Large Petal Outlines
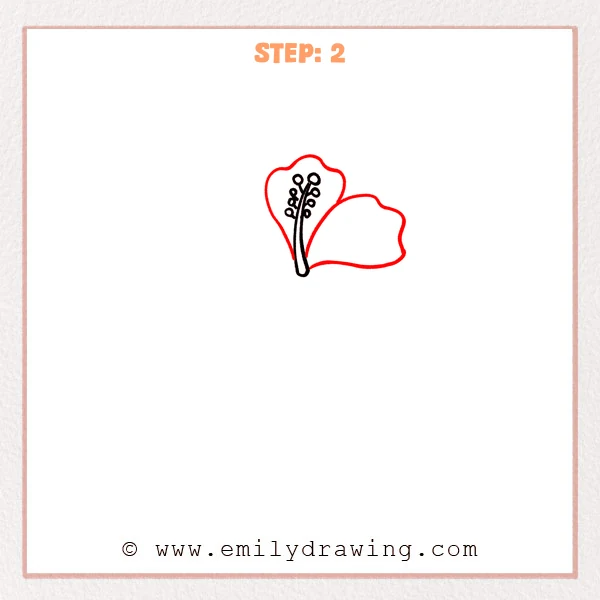
Draw the first petal behind the stamen, using a rounded shape with a softly wavy edge around the top.
Add a wider second petal to the right, extending outward with the same gentle scalloped edge.
Pro Tip: Keep the petal waves broad and simple so it reads like a hibiscus.
Step 3: Add the Remaining Petals to Complete the Flower
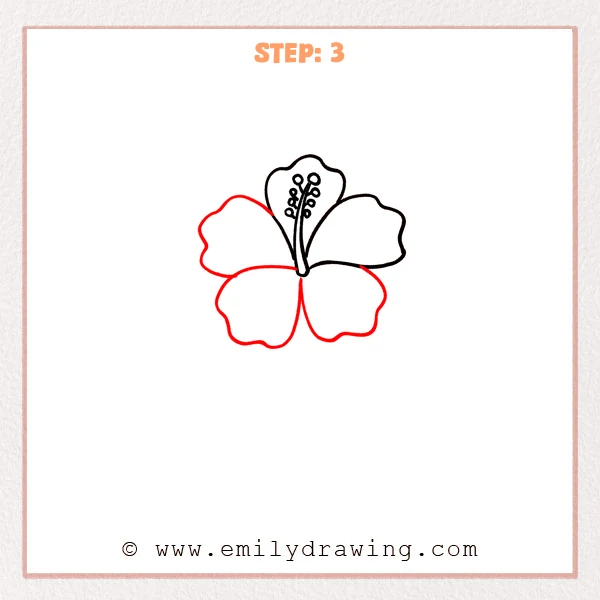
Add a petal on the left, letting it peek out from behind the stamen with a soft wavy edge.
Draw two larger petals at the bottom, filling the base and letting them meet gently in the center.
Pro Tip: Make the two bottom petals slightly larger for a fuller hibiscus bloom.
Step 4: Draw the Long Flower Stem
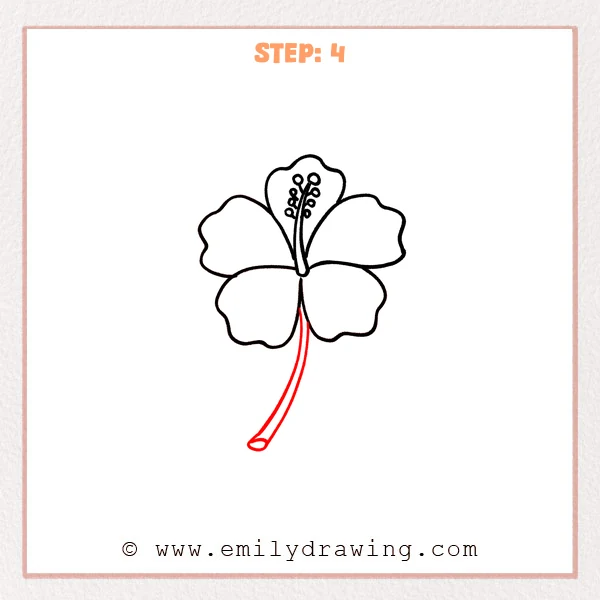
Extend two parallel, gently curved lines downward from the center of the flower to form a long stem.
Add a small oval opening at the end so the stem reads like a tube.
Pro Tip: Keep the spacing between the two stem lines even for a clean look.
Step 5: Add a Leaf and Simple Veins

Draw a teardrop-shaped leaf on the right side of the stem, with the tip pointing down-right and the base touching the stem.
Add one main vein from the base, then branch a few short diagonal side veins.
Pro Tip: Keep the veins light and stop them before the edge for a tidy look.
Step 6: Add a Second Leaf for Balance
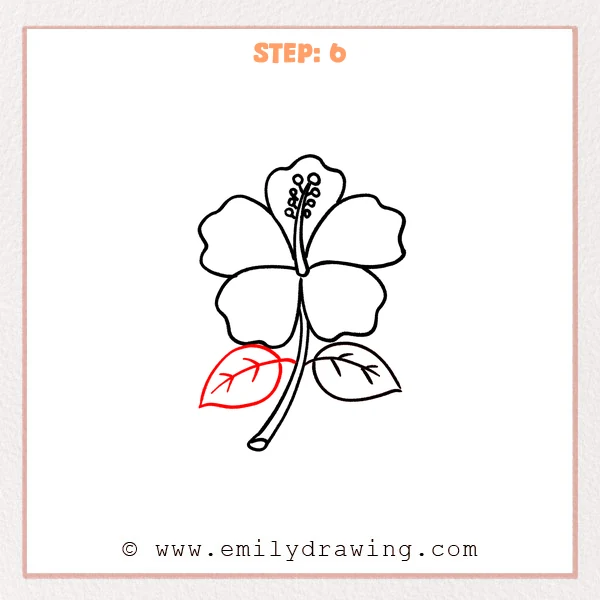
Draw a second leaf on the left side of the stem, pointing down-left and similar in size to the right leaf.
Add a main vein and a few branching side veins, following the leaf’s curve.
Pro Tip: Don’t make both leaves identical; a slight angle change looks more natural.
Step 7: Color in your drawing!
Fun Facts
- Hibiscus flowers often open for just one day, then close again.
- Many hibiscus types are pollinator-friendly and attract butterflies.
- The long center part is called a stamen column, holding pollen for pollination.
Pin it now, Draw later!
Trace your favorite lines with a darker pencil or pen, then erase extra sketch marks.
You can add tiny inner lines on petals if you want more texture.
Now you know how to draw a hibiscus step by step—try drawing a second flower at a new angle.
Get the FREE Printable Drawing Guide
FREE Download Printable Hibiscus Drawing Tutorial
Frequently Asked Questions
How can I make my hibiscus petals look more natural?
Keep the edges wavy but not too busy, and vary the petal sizes slightly.
What if my flower looks flat?
Overlap petals a little and let the stamen sit clearly in front of the center.
Can I color this hibiscus drawing?
Yes, start with a flat base color and add a darker shade near the center for depth.