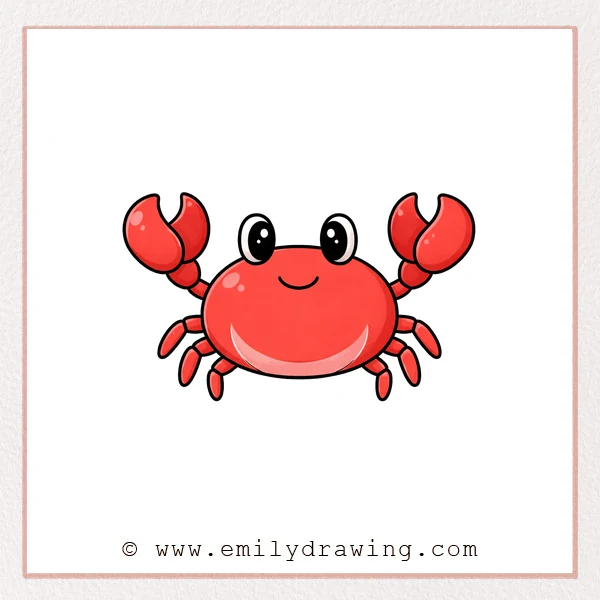
This easy drawing tutorial shows how to draw a crab with simple shapes.
Take your time and build each part one step at a time.
What You Will Need
- Paper
- Pencil
- Eraser
- Black marker (optional)
- Colored pencils or crayons (optional)
Here are my RECOMMENDED Art Supplies!
- Crayola Coloring Set (140 Pieces – Mega Value!)
- 24 Colored Crayon Set
- A4 Printer Paper
- Crayola Coloring Pencils
- HP Home Printer with Instant Ink!
Time needed:
28 minutes.
Step-by-Step Drawing Guide
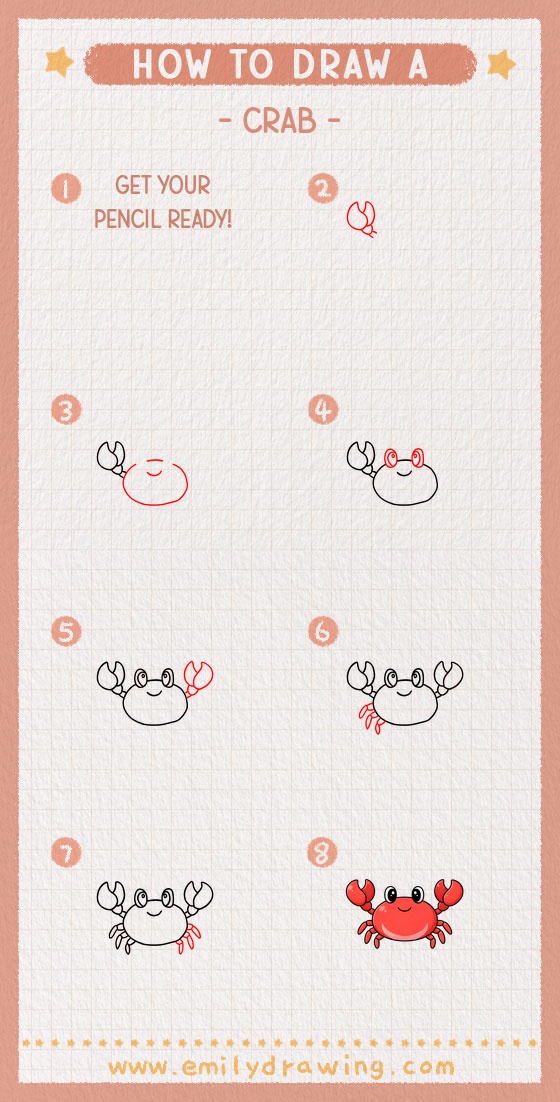
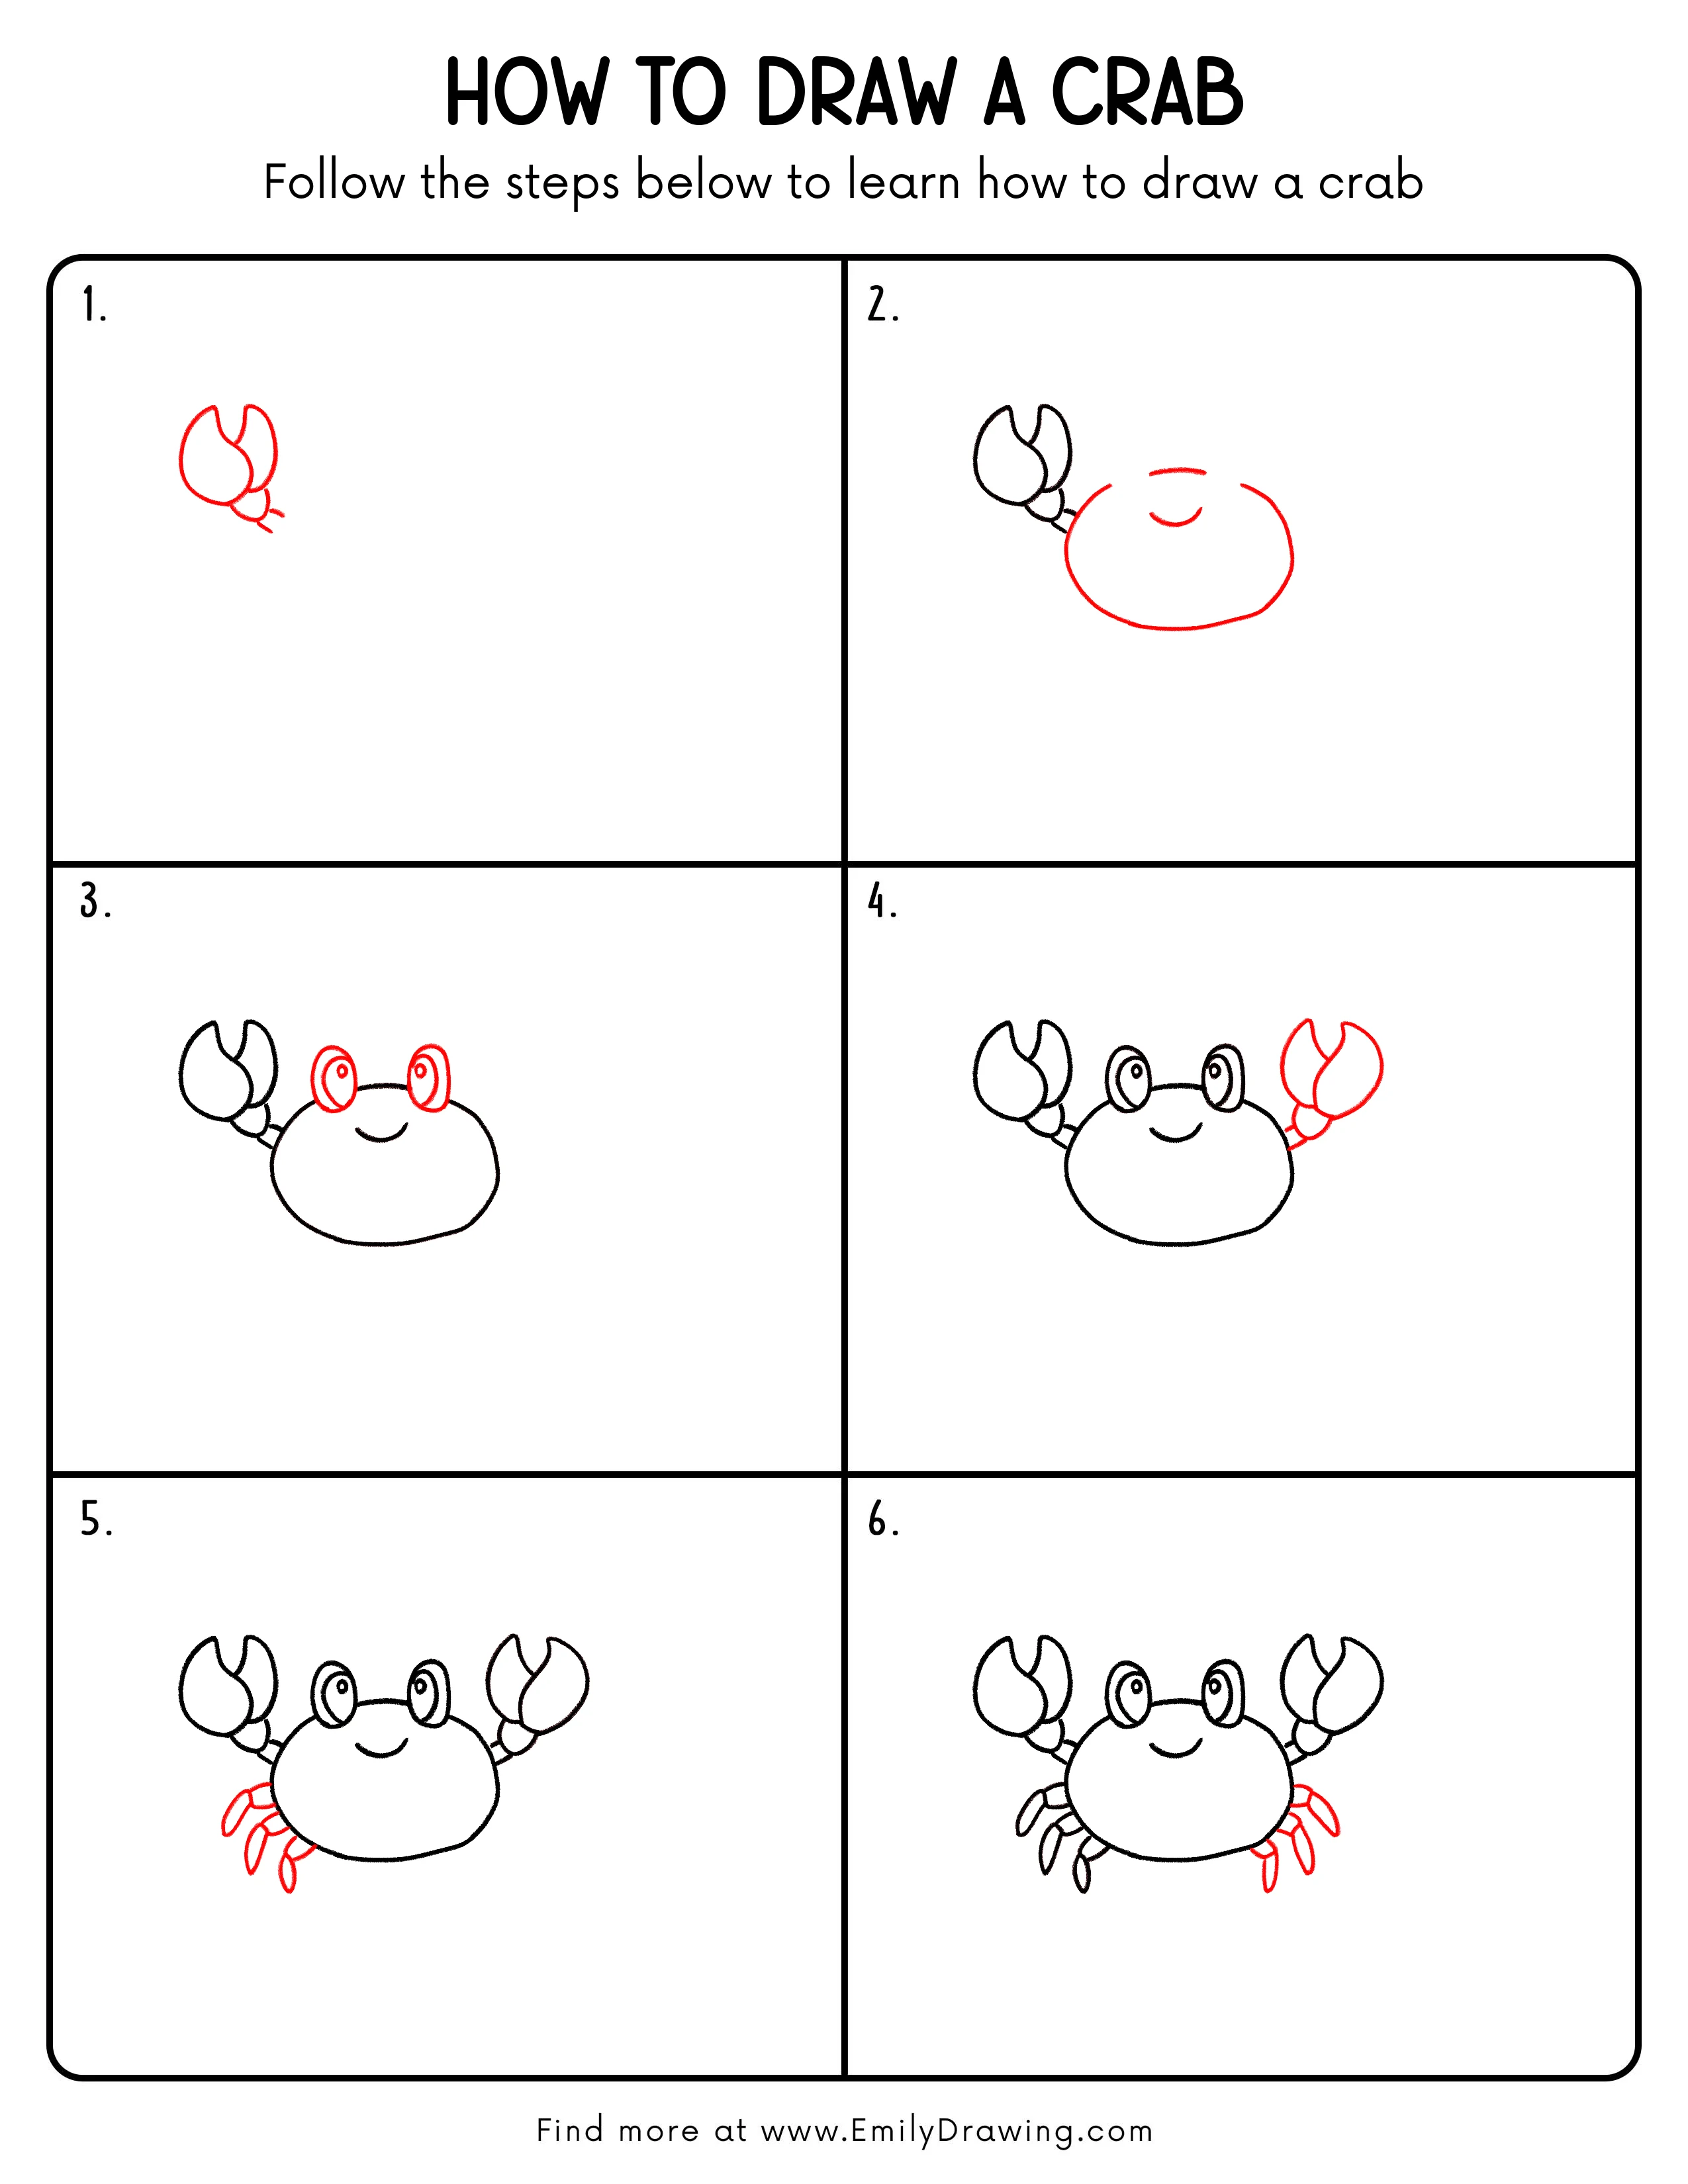
Step 1: Start with One Big Claw
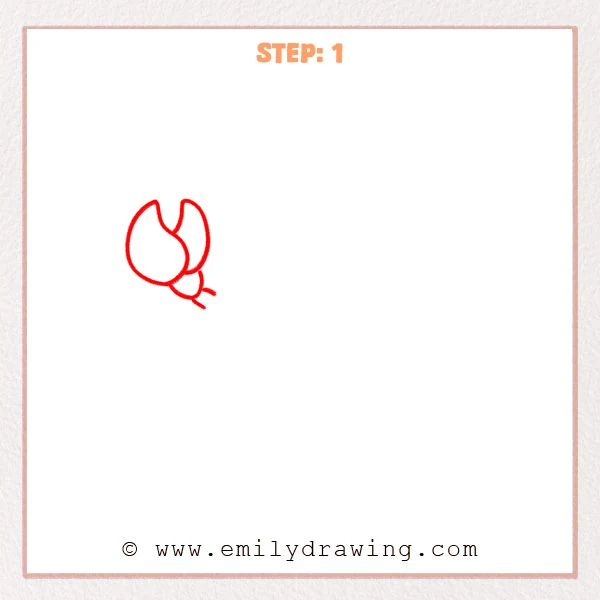
Draw a large open-oval shape for the claw, leaving a notch for the pinch gap.
Add a curved inner line to separate the claw halves.
Attach a small oval below for the wrist, then add two short lines for the arm connection.
Pro Tip: Keep the claw outline rounded, and make the pinch gap clearly visible.
Step 2: Add the Big Body and a Smile
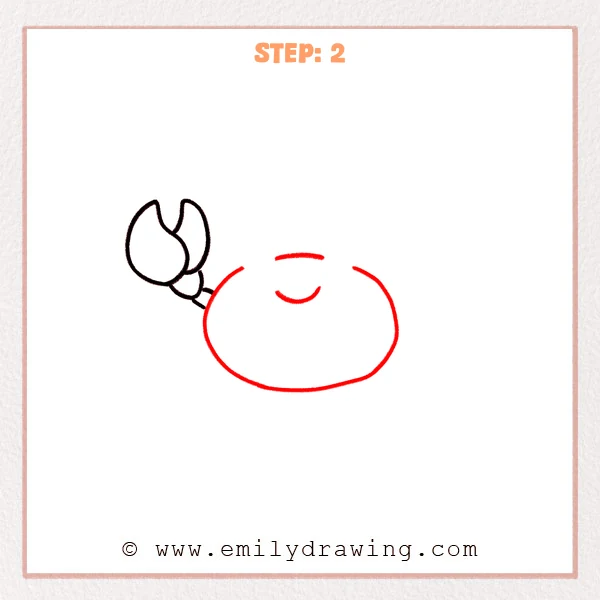
Draw a large rounded oval for the crab’s body, with a slightly flatter bottom.
Add two curved lines near the top center to form a simple smiling face.
Connect the first claw to the body edge with two short arm lines.
Pro Tip: Make the body clearly larger than the claw so the crab’s proportions feel right.
Step 3: Add Big Eyes and Pupils
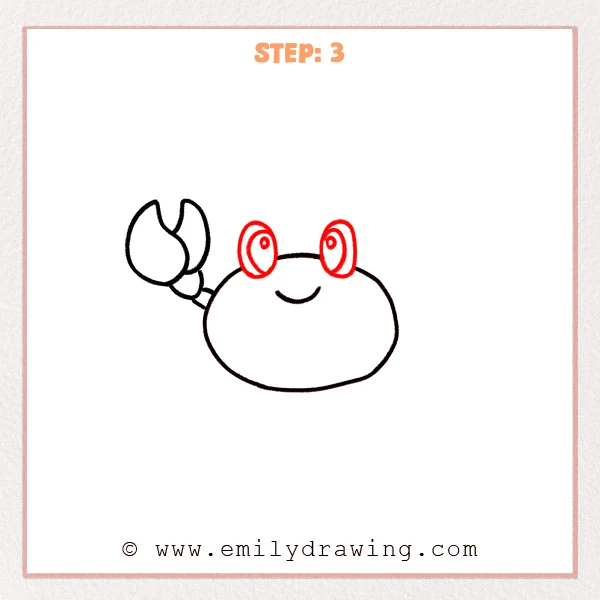
Draw a tall oval on each side near the top of the body for raised eye stalks.
Inside each one, add a smaller oval and a tiny circle to create the eye and pupil.
Keep the eyes slightly above the body edge for a playful look.
Pro Tip: Make both eyes the same size, and point the pupils the same way for a cute look.
Step 4: Add the Other Claw
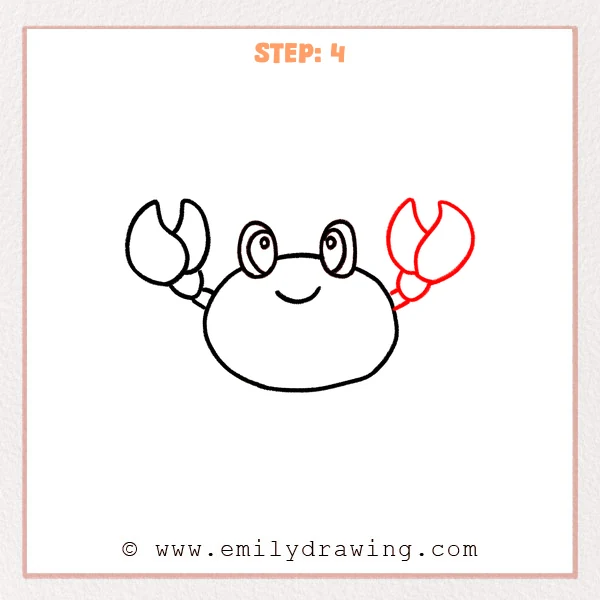
Draw the second large claw on the opposite side of the body, matching the first.
Connect it to the body edge with two short arm lines.
Place it slightly higher so the crab looks lively and balanced.
Pro Tip: Compare the width and height of both claws, then adjust until they match.
Step 5: Add Three Small Legs on the Left
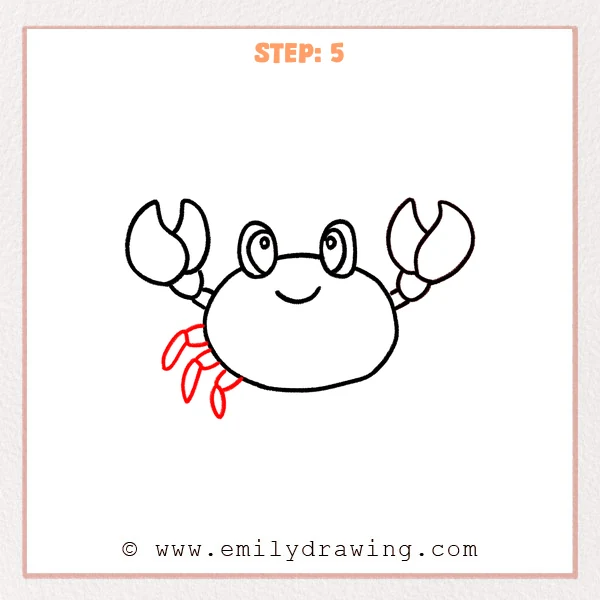
Draw three small legs coming out from the lower-left side of the body with curved lines.
End each leg with a small oval or teardrop shape for the foot.
Vary the leg lengths slightly so they look more natural.
Pro Tip: Start each leg right on the body outline so they feel attached.
Step 6: Add Three Small Legs on the Right
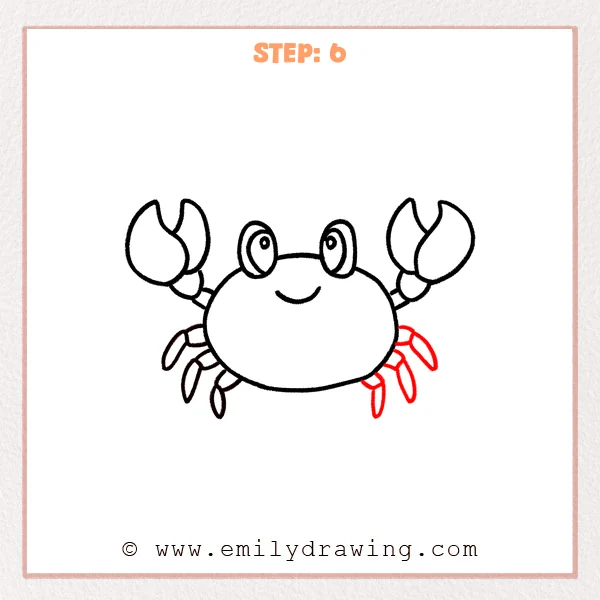
Draw three small legs on the lower-right side of the body to match the left side.
Use short curved lines for each leg, then add small oval feet at the ends.
Spread the angles slightly so the legs don’t overlap.
Pro Tip: Place the three leg bases first, then add the feet for a cleaner look.
Step 7: Color in your drawing!
Fun Facts
- Many crabs can walk sideways because of how their legs are jointed.
- Crabs have a hard outer shell called an exoskeleton.
- Some crabs can regrow a lost leg or claw over time.
Pin it now, Draw later!
Trace your final lines with a marker if you want a bold cartoon look.
Erase extra sketch lines, then color your crab in bright reds or warm oranges.
You just finished a step by step drawing of a crab—try drawing a sandy beach next!
Get the FREE Printable Drawing Guide
FREE Download Printable Crab Drawing Tutorial
Frequently Asked Questions
How do I make my crab look cuter?
Make the eyes bigger, keep the smile simple, and point the pupils the same direction.
What if my claws do not match?
Choose one claw as your reference and adjust the other to match its size and shape.
Can I add more details without making it hard?
Yes, add small dots on the shell or tiny lines on the claws, but keep them simple.