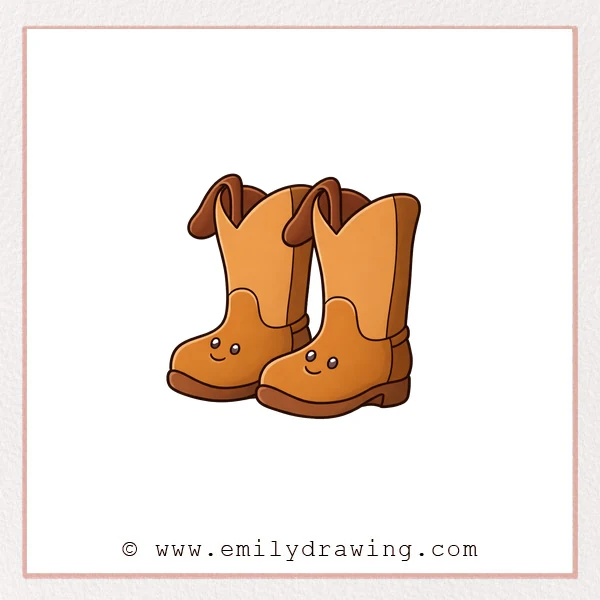
Cowboy boots are full of bold shapes, smooth curves, and fun details.
This easy drawing tutorial breaks them into simple lines you can control.
Take your time, and keep your sketch light until the end.
What You Will Need
- Pencil
- Eraser
- Black pen or marker (optional)
- Paper
- Colored pencils or markers (optional)
Here are my RECOMMENDED Art Supplies!
- Crayola Coloring Set (140 Pieces – Mega Value!)
- 24 Colored Crayon Set
- A4 Printer Paper
- Crayola Coloring Pencils
- HP Home Printer with Instant Ink!
Time needed:
23 minutes.
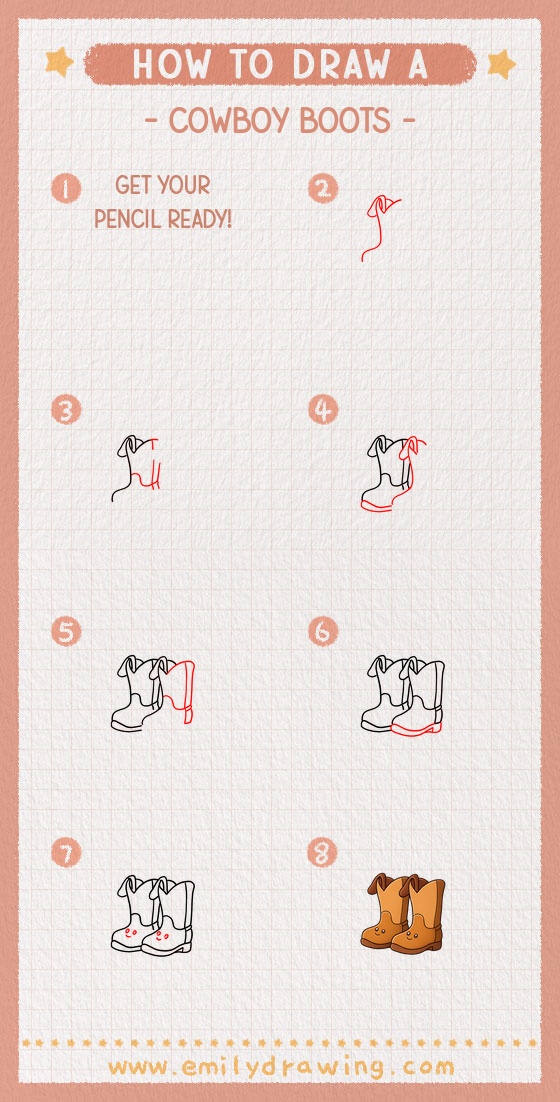
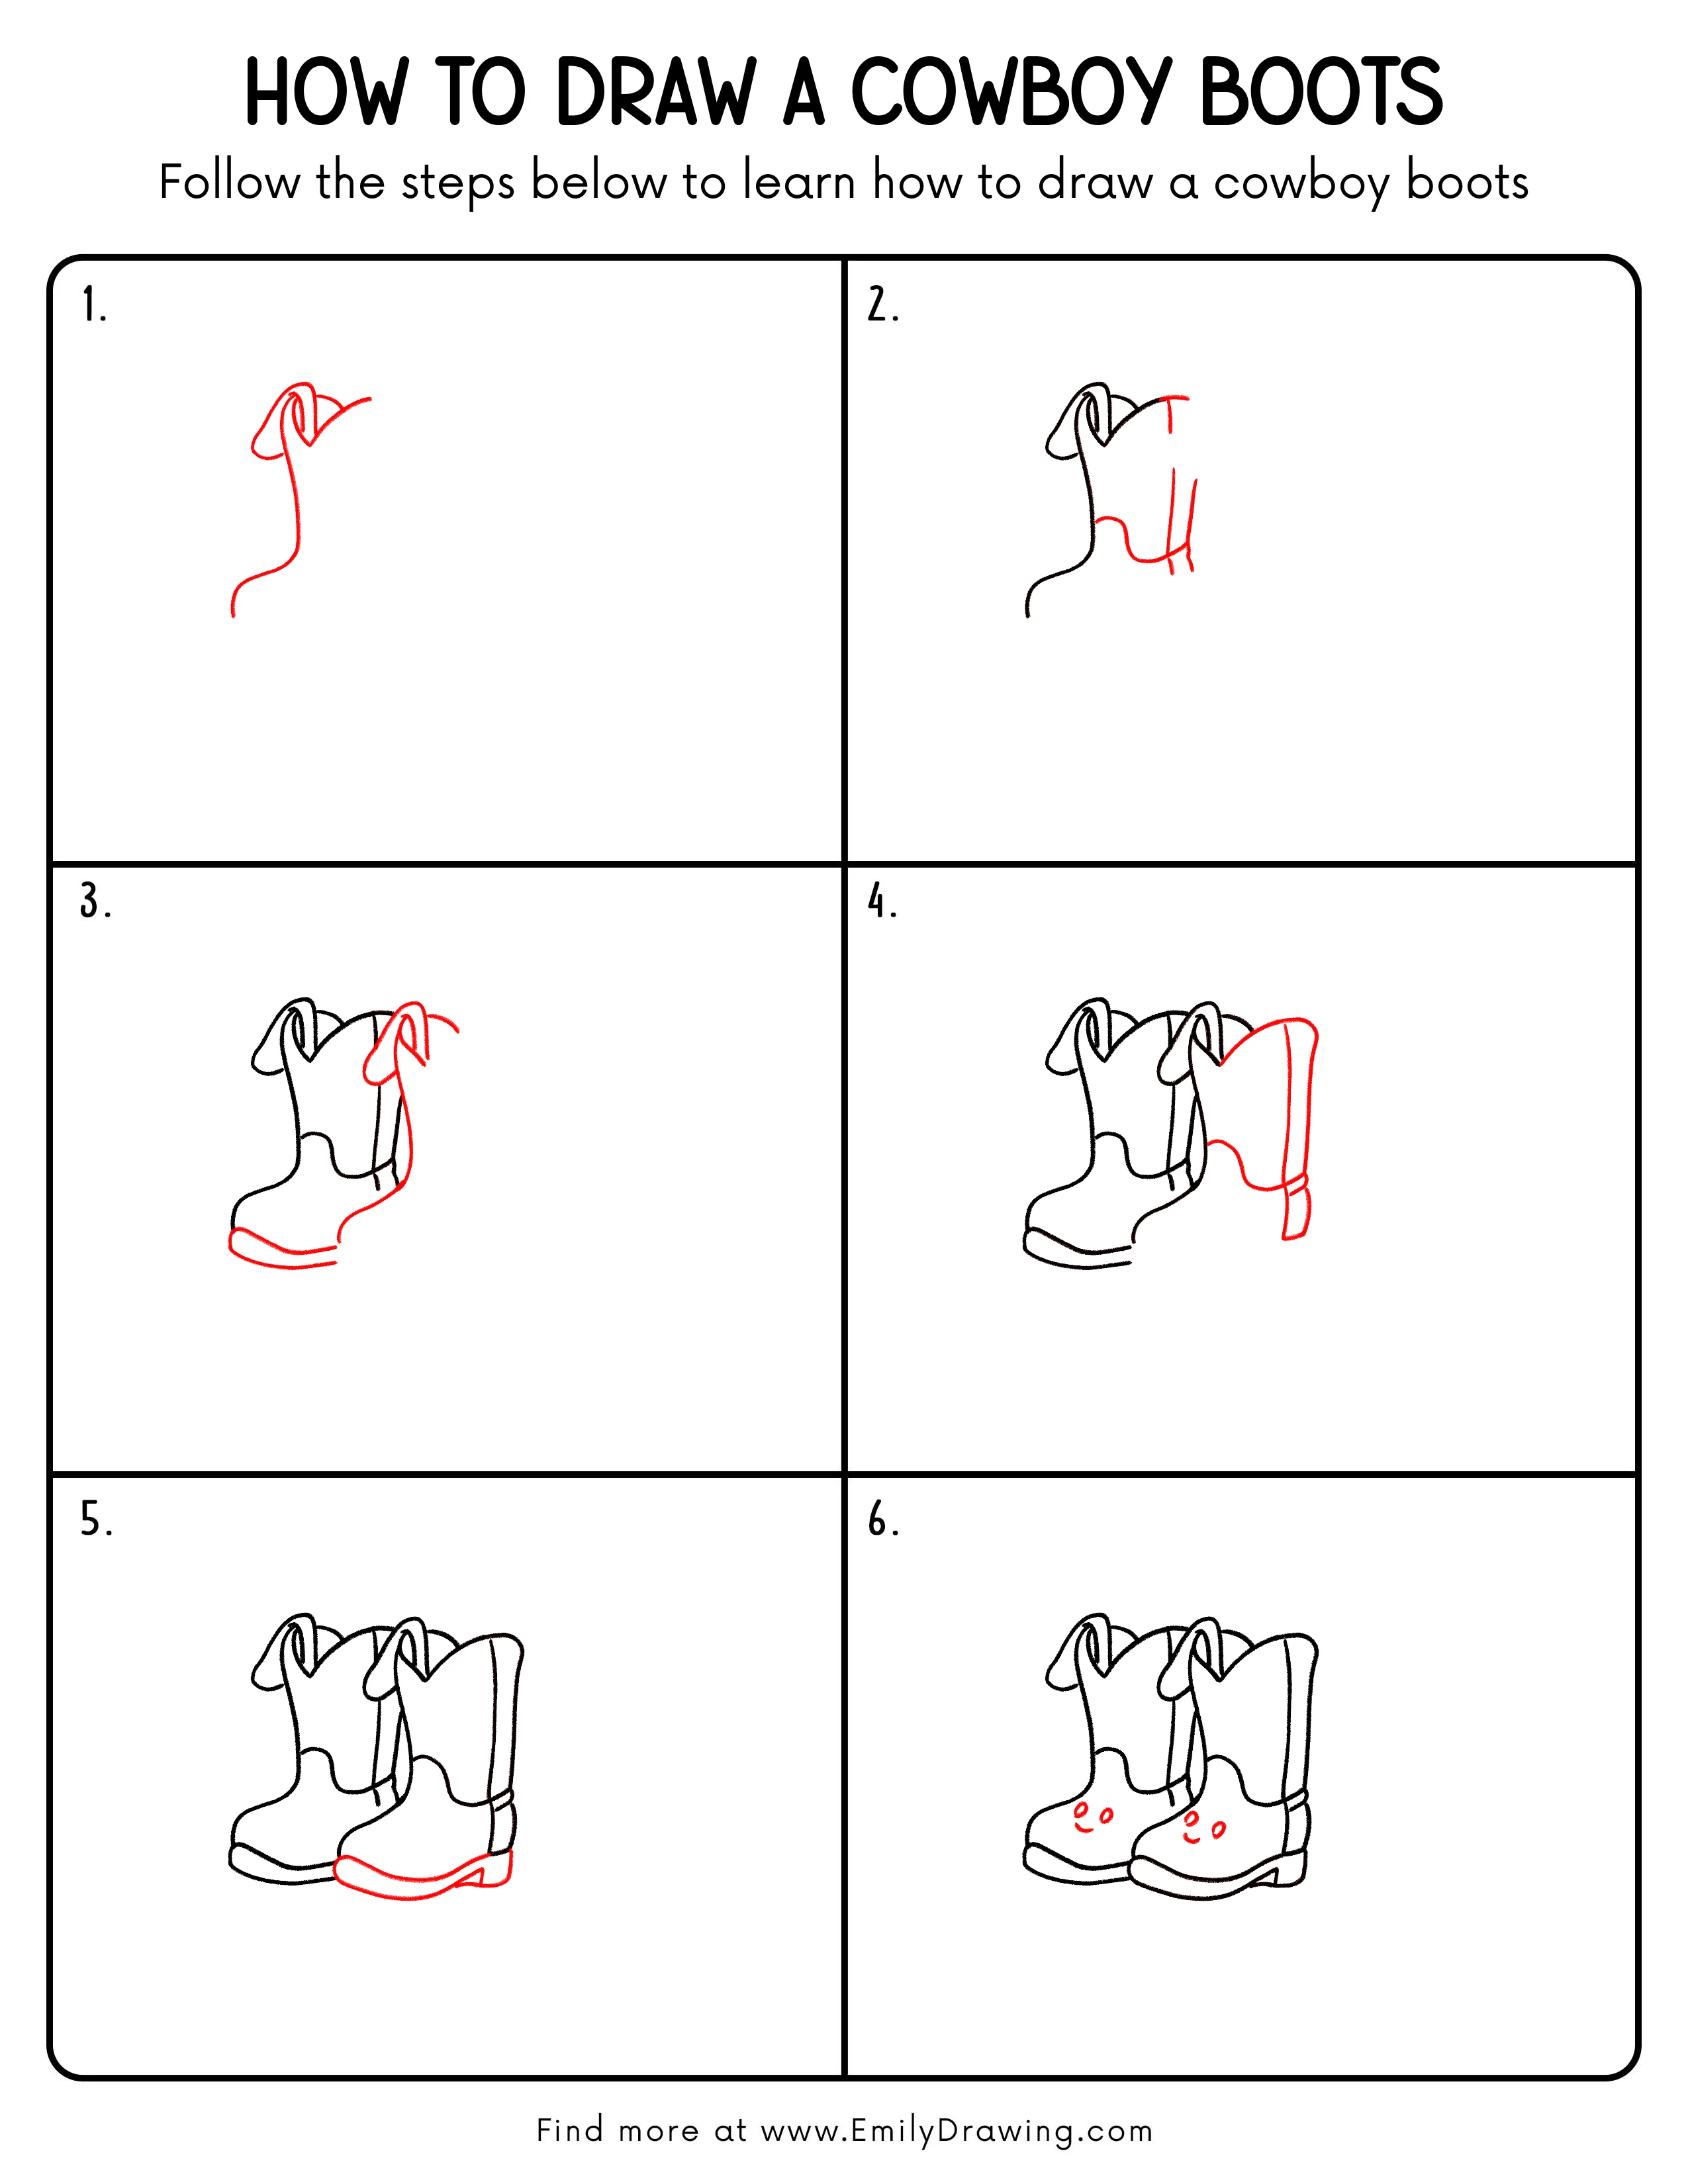
Step-by-Step Drawing Guide
Step 1: Block In the Boot Shaft
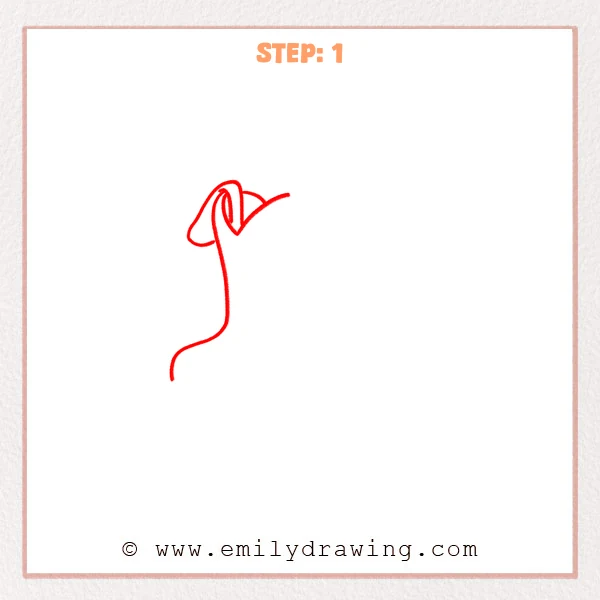
Start with one long, gently curved line to form the outer side of the boot shaft.
Add a curved opening at the top, then a folded line to suggest the rim thickness.
Pro Tip: Keep the shaft slightly slim at first, then widen it later to keep proportions clean.
Step 2: Add the Front Edge and Ankle Curve
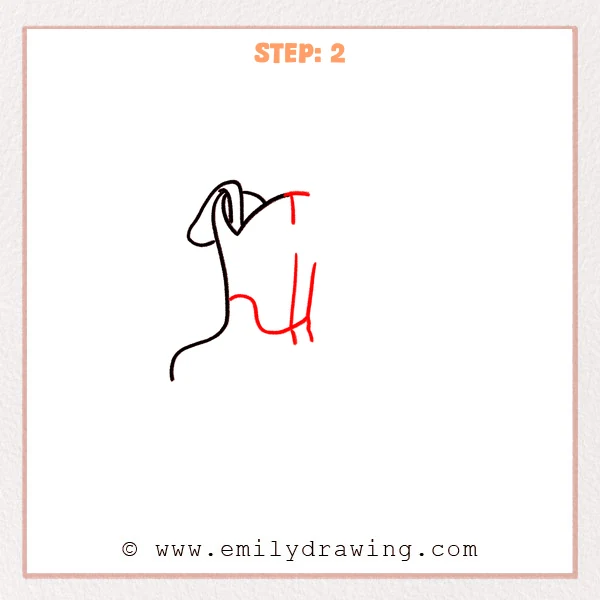
Draw a straighter vertical line on the right to set the boot’s front edge, and add a short top stroke to define the opening.
From the lower shaft, sketch an inward dip then a smooth outward curve for the ankle-to-instep transition, and place two short lines at the lower right to mark the heel area.
Pro Tip: Keep the ankle dip gentle so there’s room later for boot thickness.
Step 3: Draw the Toe, Sole, and Back Outline
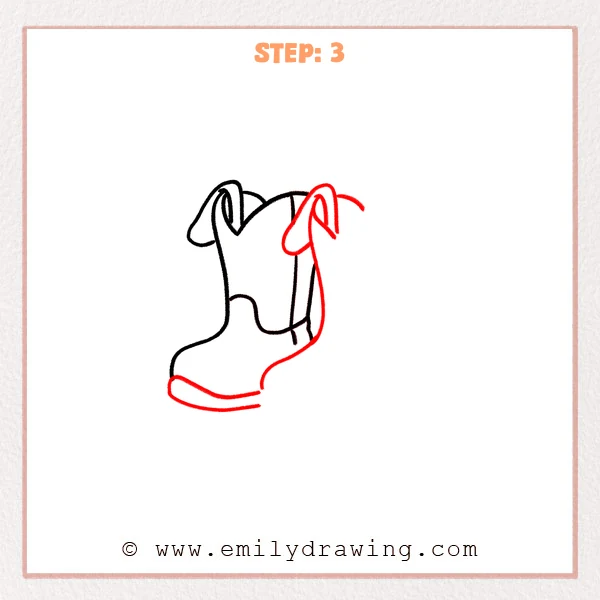
Round out the toe shape at the front, then add a second, parallel curve underneath to show the sole thickness.
Pull a clean back outline down from the top opening and connect it into the heel area to complete the boot silhouette.
Pro Tip: Keep the gap between the sole lines even to make the thickness look believable.
Step 4: Add the Outline of the Second Boot
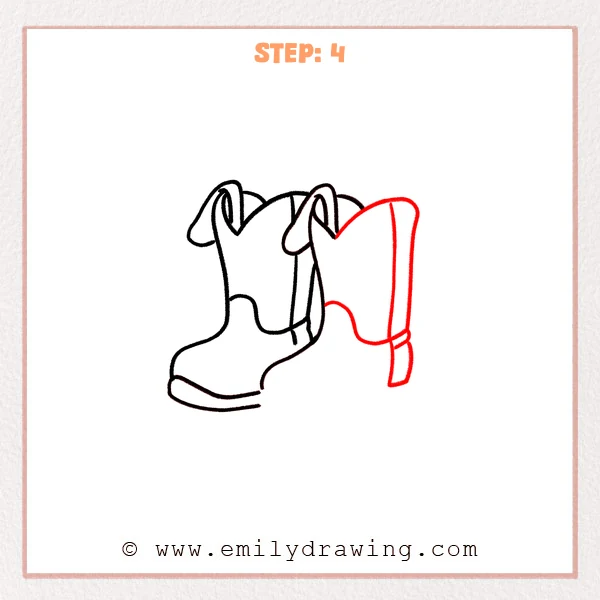
On the right, draw a taller shaft outline with a wavy top opening, then add a vertical line to show the shaft’s front edge.
Sketch the ankle-to-instep curve below, and block in a rectangular heel so the second boot sits behind the first.
Pro Tip: Make the second boot slightly taller, and match its tilt to the front boot.
Step 5: Add the Second Boot’s Sole and Heel Shape
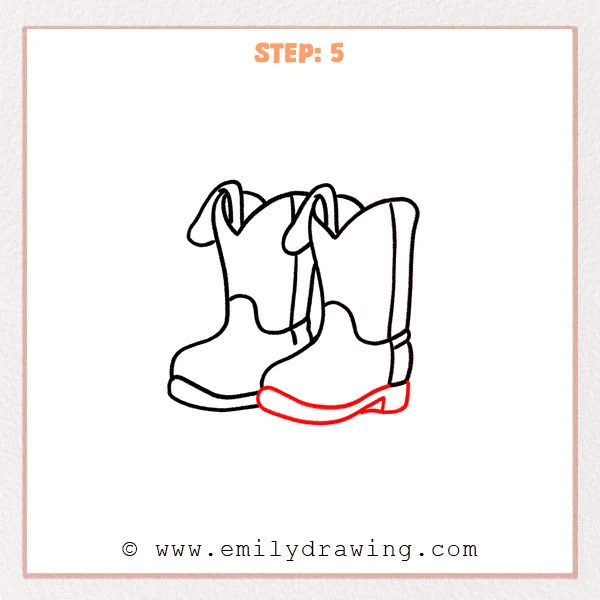
Draw a long curved line under the second boot to form the outer sole from toe to heel.
Build up the heel thickness, then add a small triangular notch to suggest the classic cowboy-boot heel cut.
Pro Tip: Let the sole curve slightly upward at the toe for a sturdier look.
Step 6: Add Cute Faces to the Boots
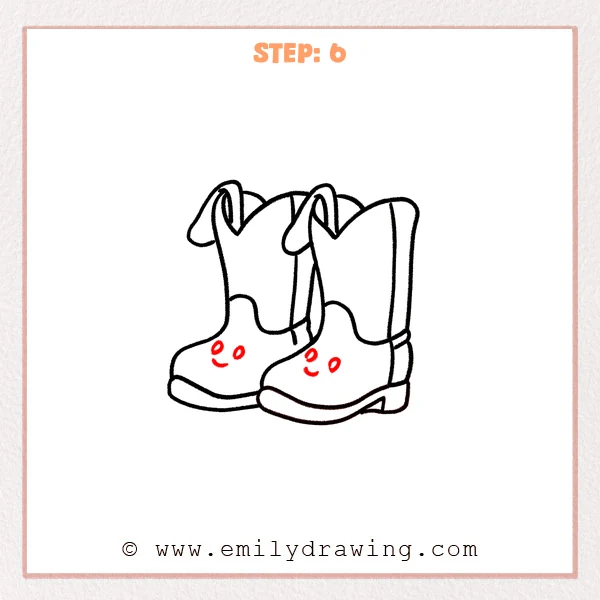
On the front of each boot, draw two small circles for eyes near the toe area.
Add a short curved smile under the eyes to give both cowboy boots a friendly look.
Pro Tip: Keep the eyes at a similar height on both boots for a consistent expression.
Step 7: Color in your drawing!
Fun Facts
- Cowboy boots often have tall shafts to help protect a rider’s legs.
- The angled heel helps keep a boot from slipping through a stirrup.
- Many designs include decorative stitching to show off style and craftsmanship.
Pin it now, Draw later!
Trace your final lines with a darker pen if you want a clean outline.
You can add simple stitching shapes, small scuffs, or a few crease lines for texture.
Now you know how to draw cowboy boots step by step—try drawing a new pair with different patterns!
Get the FREE Printable Drawing Guide
FREE Download Printable Cowboy Boots Drawing Tutorial
Frequently Asked Questions
How do I make the boots look like a matched pair?
Keep the shaft heights similar and make the toe shapes match in roundness.
Small differences are fine, but align key edges like the soles.
What if my soles look uneven?
Erase and redraw the lower line so it stays parallel to the upper sole line.
Checking the spacing at the toe and heel helps a lot.
Can I color my cowboy boots drawing?
Yes—try brown leather, black boots, or bright colors with simple patterns.
Leave the soles a darker shade to help them stand out.