
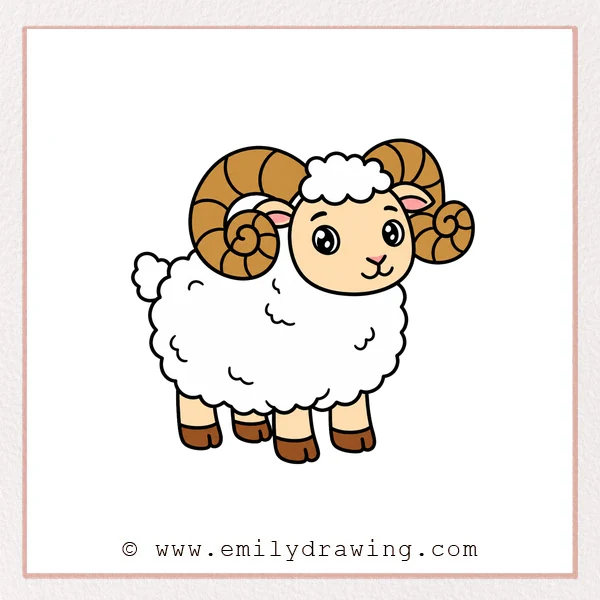
Learning how to draw ram can be calm and enjoyable with simple shapes.
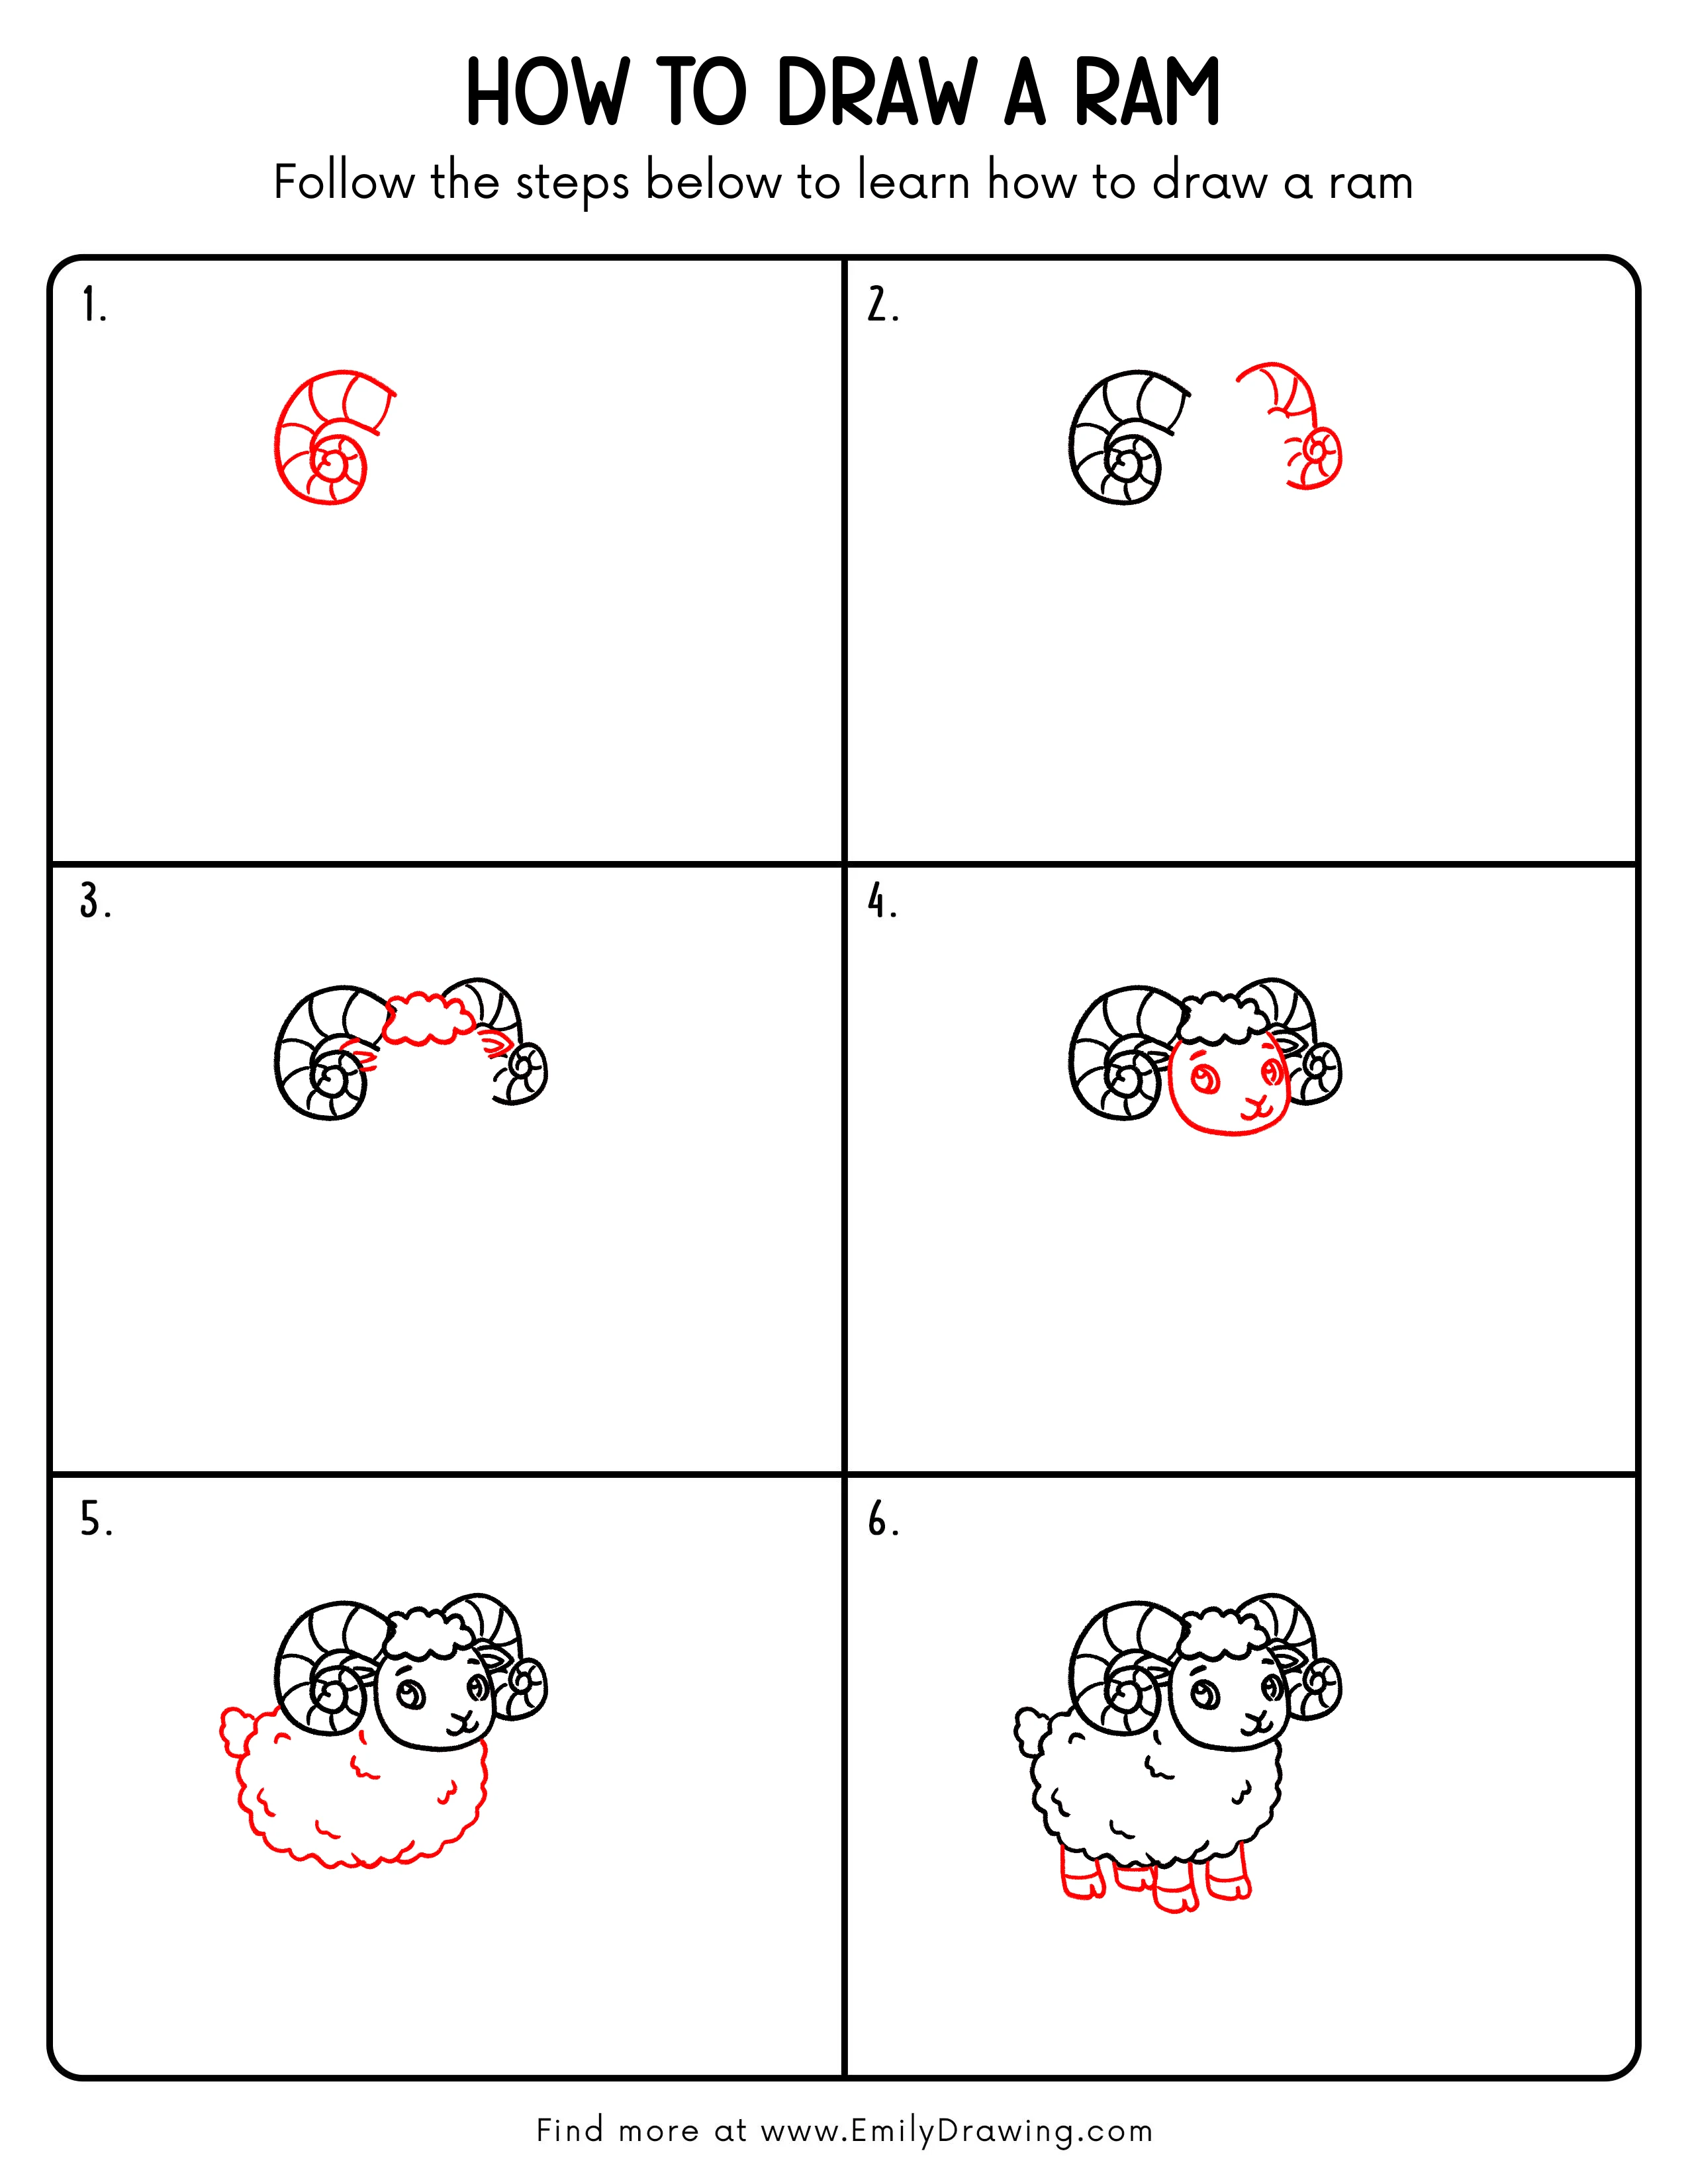
This easy drawing tutorial breaks the ram into horns, wool, face, and legs.
Take your time with each step, and let the soft curves guide your drawing.
What You Will Need
- Pencil
- Eraser
- Black marker or pen
- Drawing paper
- Crayons, colored pencils, or markers
Here are my RECOMMENDED Art Supplies!
- Crayola Coloring Set (140 Pieces – Mega Value!)
- 24 Colored Crayon Set
- A4 Printer Paper
- Crayola Coloring Pencils
- HP Home Printer with Instant Ink!
Time needed:
11 minutes.
Step-by-Step Drawing Guide
Step 1: Draw the Basic Curled Horn Shape
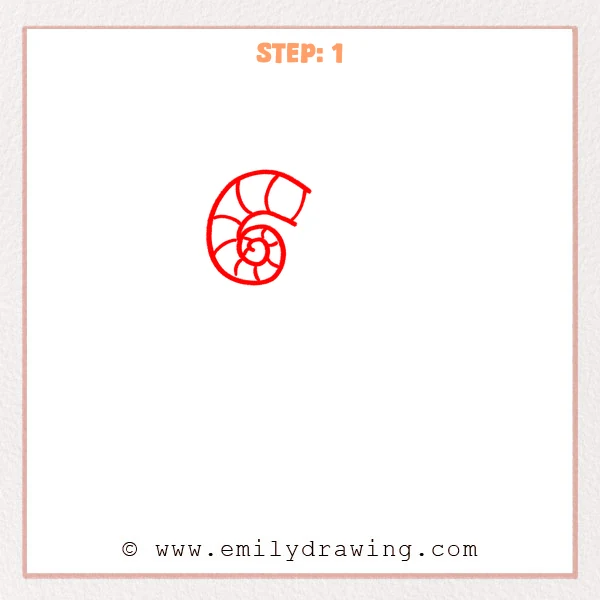
Start with a small inward spiral for the center of the ram horn.
Then draw a larger curved outer outline around it.
Add a few arc lines to divide the horn into clear sections.
Pro Tip: Keep each curved section following the spiral direction so the ram horn looks natural.
Step 2: Add the Other Curled Horn
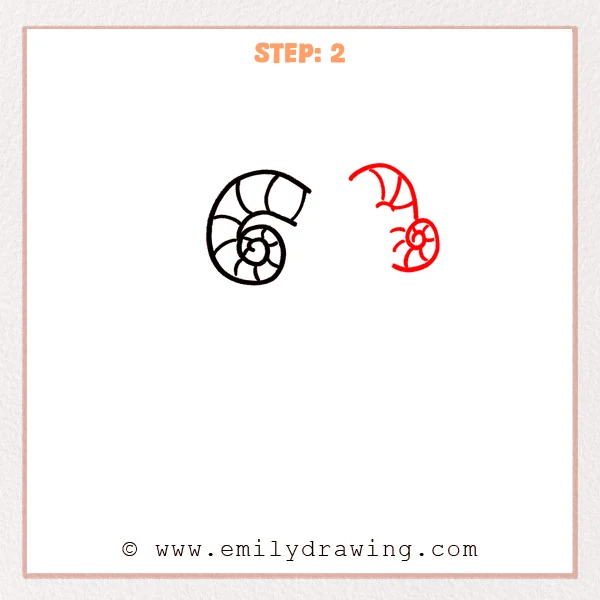
Draw the second ram horn on the right side.
Make it a little smaller than the first horn.
Start with the curved outer outline, then add the inner spiral and section lines.
Pro Tip: Let the two horns face opposite directions while keeping a similar curling rhythm.
Step 3: Connect the Head Wool and Ears
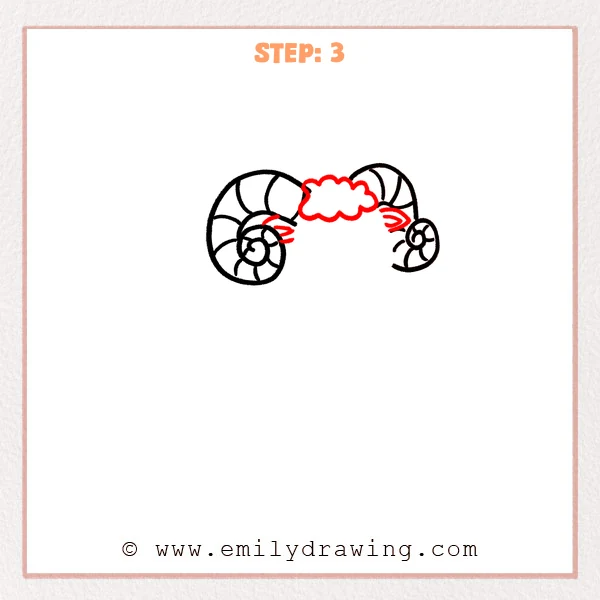
Draw a row of rounded cloud-like wool between the two horns.
This forms the soft top of the ram’s head.
Then add one pointed ear on each side, extending from inside the horns.
Pro Tip: The head wool can rise and dip gently, but keep both ears close in size.
Step 4: Draw the Face Outline and Features
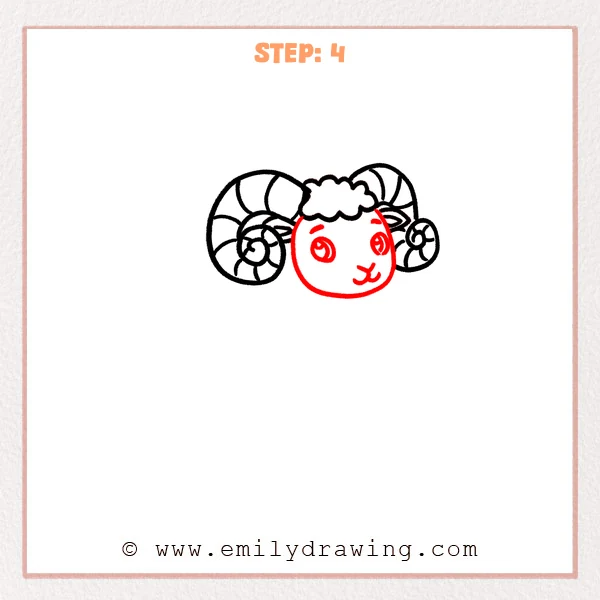
Draw a rounded face shape below the head wool.
Let the chin curve softly inward at the bottom.
Then add two round eyes, short eyebrows, and a small mouth expression.
Pro Tip: Place the eyes slightly above the middle of the face to make the ram look cuter.
Step 5: Draw the Fluffy Body
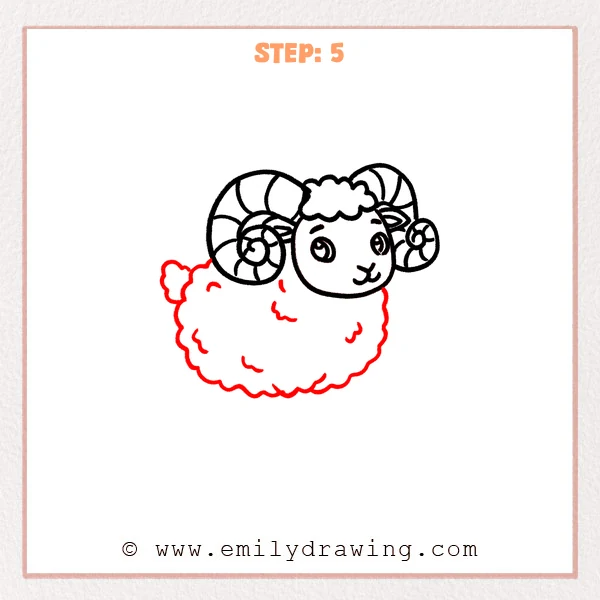
Extend a large wavy outline below the head.
Use rounded bumps to form the ram’s woolly body.
Add a few short curved lines inside to show soft curls in the fleece.
Pro Tip: The body outline does not need perfect symmetry, which makes the wool look more naturally fluffy.
Step 6: Add Four Legs and Hooves
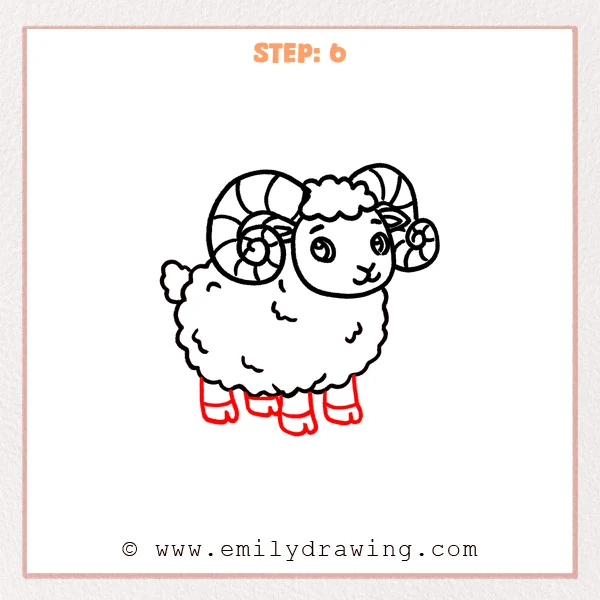
Draw four short legs under the body.
Let them hang down from the lower wool edge.
Add a curved line and small notch at the bottom of each leg to form rounded hooves.
Pro Tip: Keep the four legs close in length so the ram looks steady while standing.
Step 7: Color in your drawing!
Fun Facts
Rams are male sheep, and they are well known for their strong curled horns.
Their horns can grow in spiral shapes, which makes them fun for step by step drawing.
A ram’s woolly body is also a great shape for beginners because soft bumps do not need to be perfect.
Pin it now, Draw later!
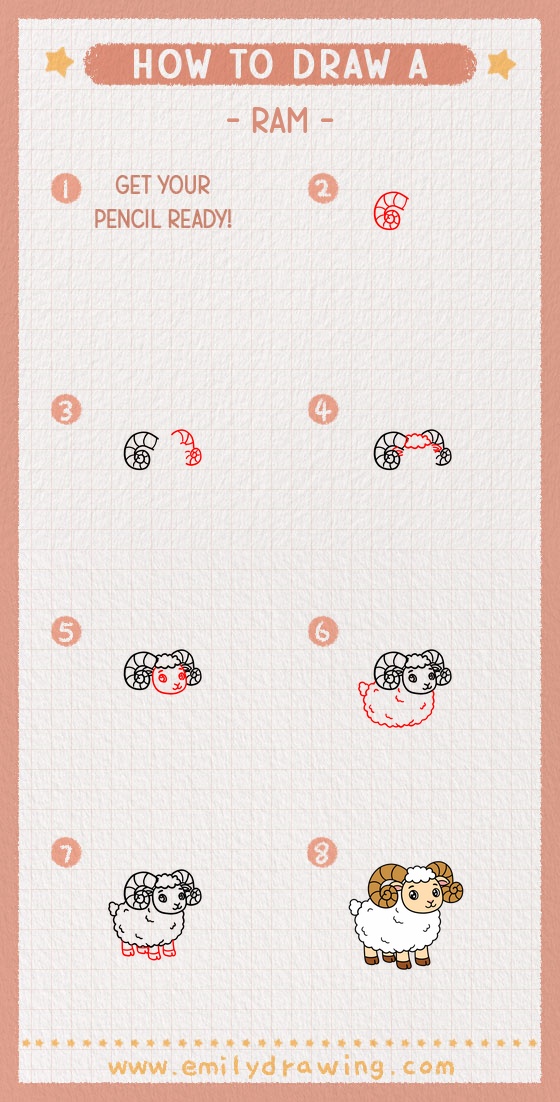
Now you have completed a cute ram drawing for beginners.
You can trace the final lines with a marker and erase extra pencil marks.
Add gentle colors, such as cream wool, tan horns, and soft pink cheeks.
Keep practicing this easy drawing tutorial, and try drawing your ram in different poses next time.
Get the FREE Printable Drawing Guide
FREE Download Printable Ram Drawing Tutorial
Frequently Asked Questions
Is this ram drawing suitable for beginners?
Yes, this tutorial uses simple spirals, curves, and rounded shapes.
It is designed as an easy drawing tutorial for beginners.
How can I make the ram look fluffier?
Use more small rounded bumps around the body outline.
You can also add short curved lines inside the wool.
What should I color first?
Start with the horns and face, then color the woolly body.
Use light colors first so you can adjust the drawing gently.



