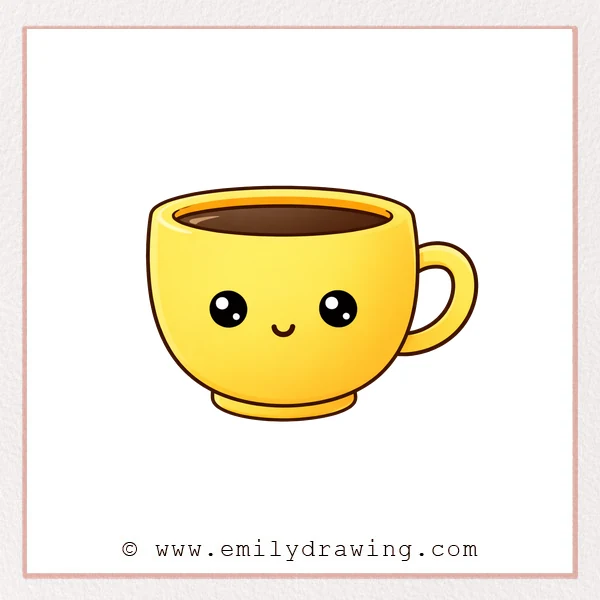
In this easy drawing tutorial, you will learn how to draw a cup with a cute face.
We will build the cup from simple shapes and add details one step at a time.
Take your time and keep your lines light until you like the proportions.
What You Will Need
- Pencil
- Eraser
- Black marker or pen (optional, for final lines)
- Paper
Here are my RECOMMENDED Art Supplies!
- Crayola Coloring Set (140 Pieces – Mega Value!)
- 24 Colored Crayon Set
- A4 Printer Paper
- Crayola Coloring Pencils
- HP Home Printer with Instant Ink!
Time needed:
11 minutes.
Step-by-Step Drawing Guide
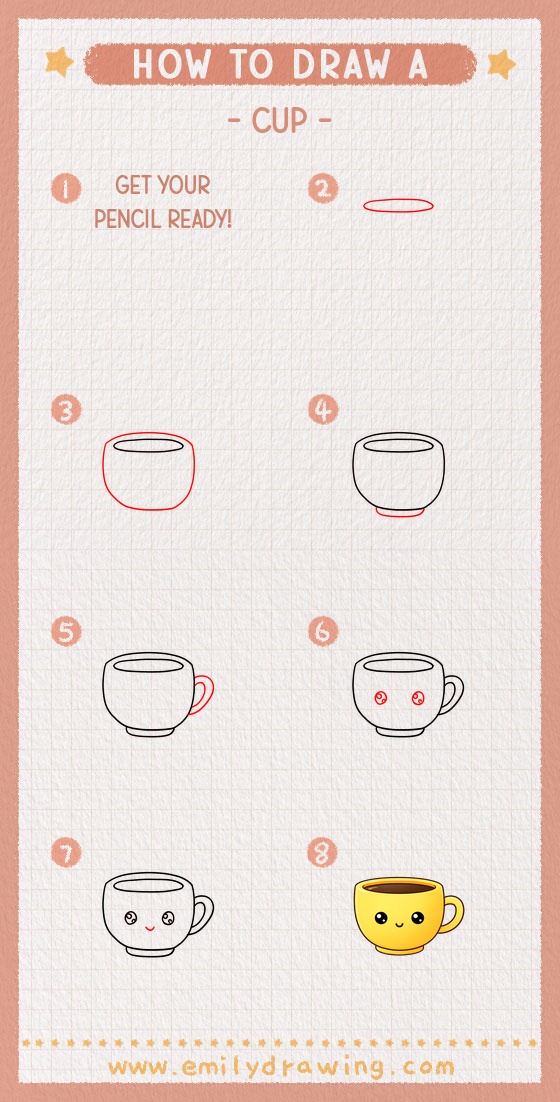
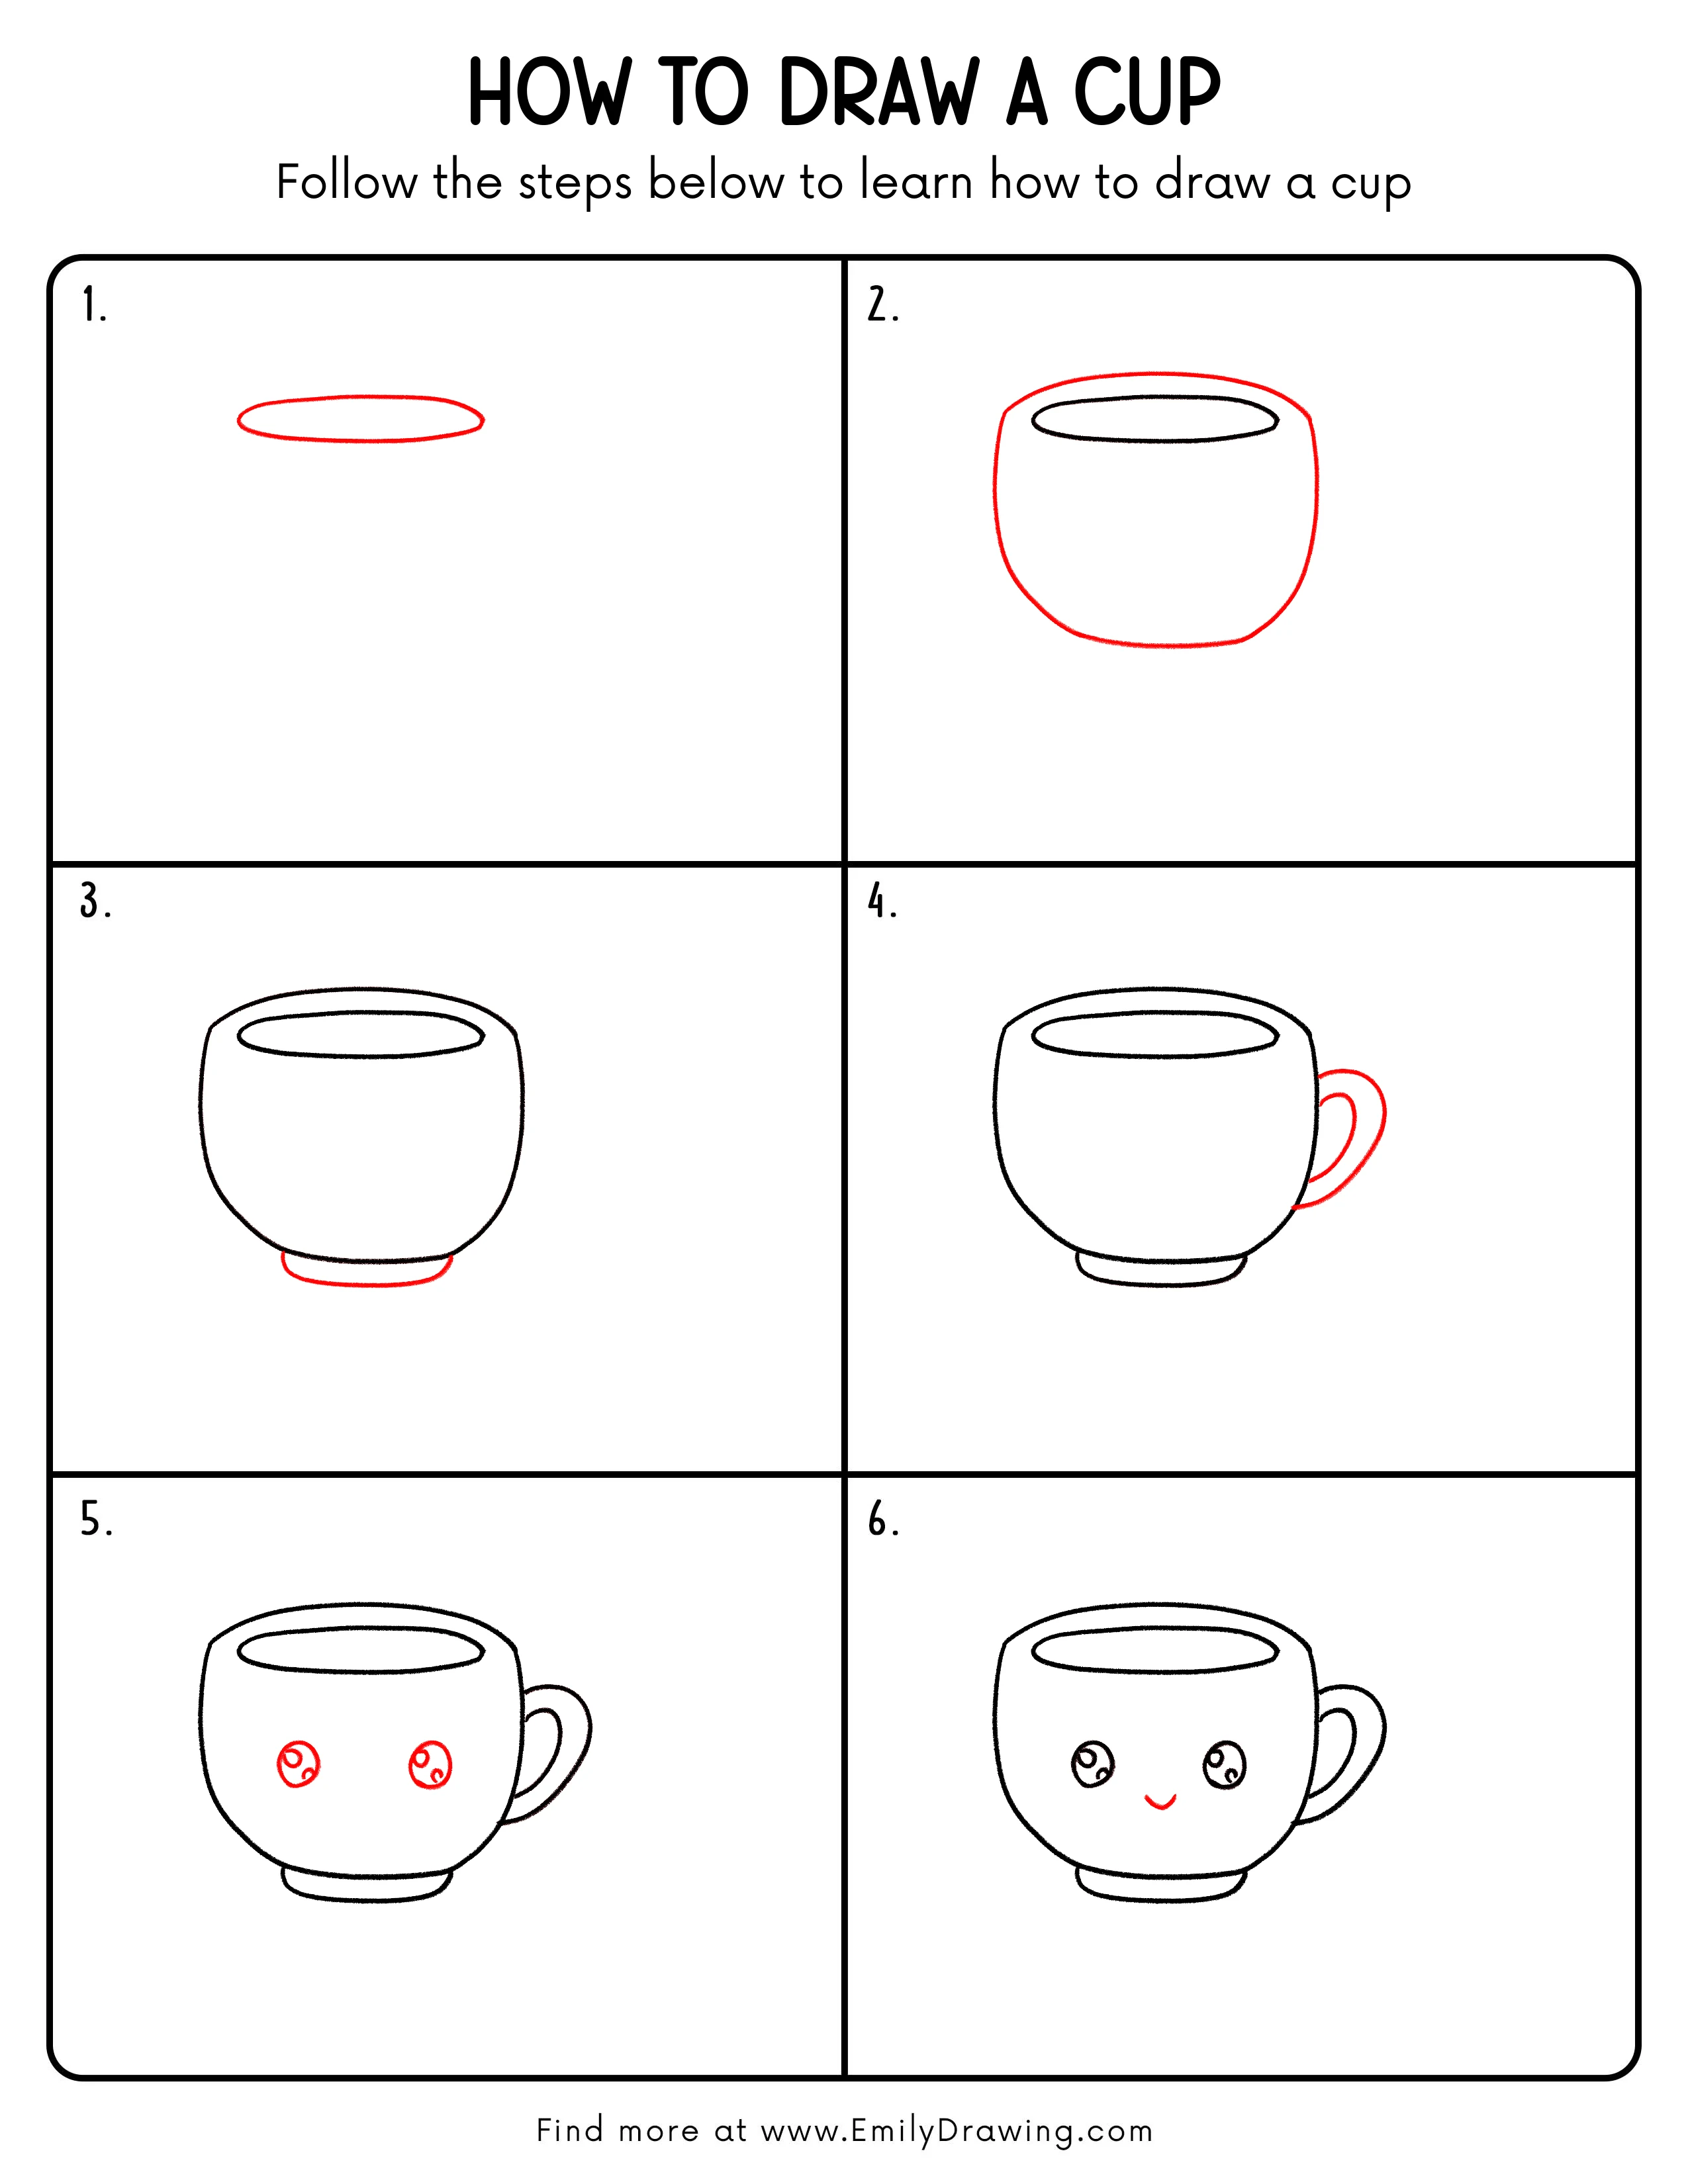
Step 1: Draw the Rim Oval
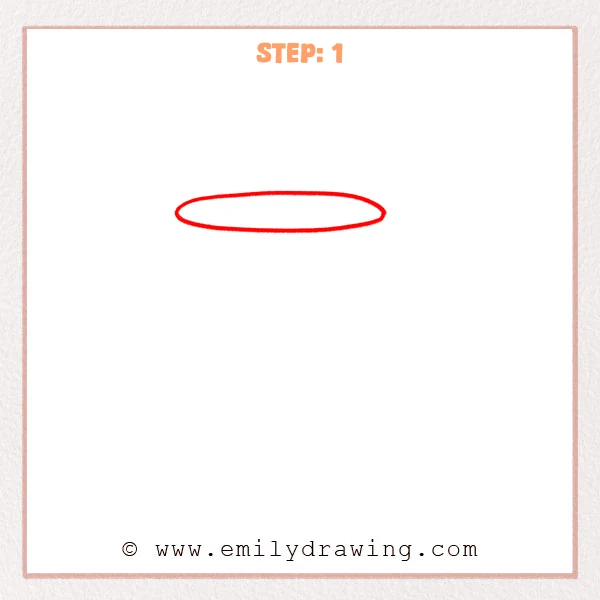
Start with a wide, flat oval near the upper middle to mark the cup opening.
Keep the left and right sides balanced, and draw lightly so you can adjust later.
Pro Tip: The flatter the oval, the more the cup looks viewed from straight on.
Step 2: Draw the Cup Body and Inner Rim
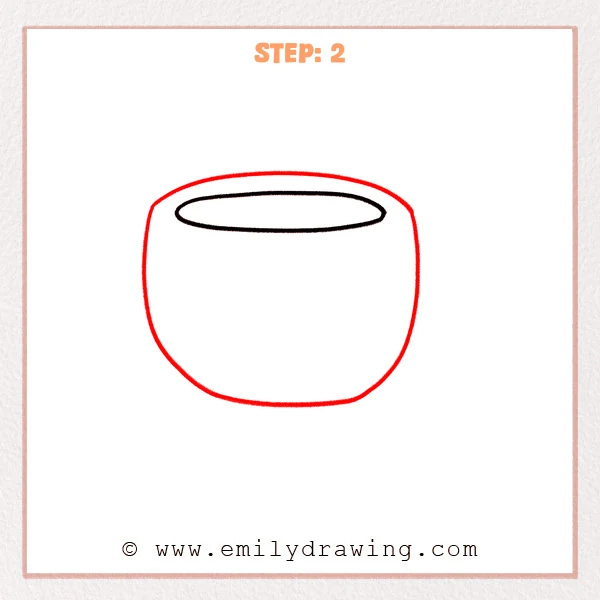
Extend curved lines down from both sides of the oval to form a rounded cup body, then close it with a gentle curved base.
Add a smaller oval inside the first one to show the inner rim thickness.
Pro Tip: Keep both sides symmetrical, and make the bottom curve slightly rounder than the rim.
Step 3: Add a Small Foot/Base
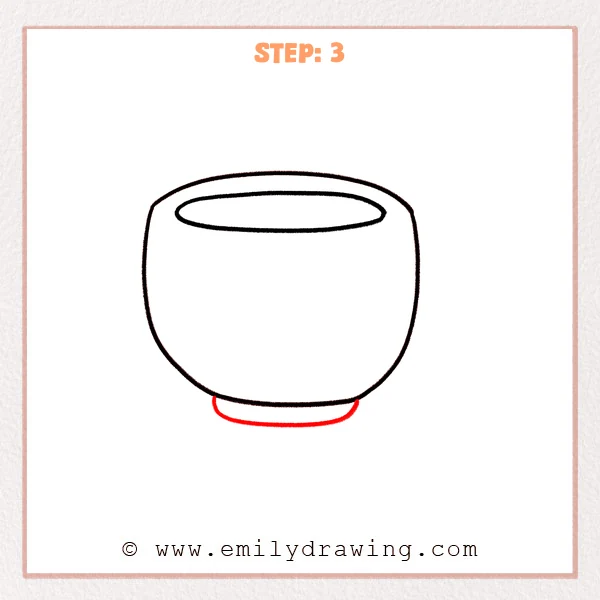
Draw a flat, curved “foot” shape under the cup so it looks supported.
Use short side curves to connect it to the cup bottom, then add a longer curve to close the base.
Pro Tip: Keep the base much narrower than the rim, and center it for stability.
Step 4: Add the Handle
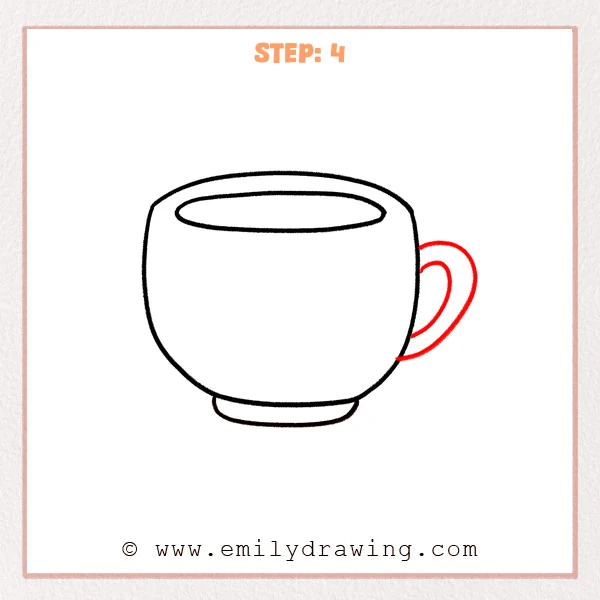
On the right side, draw a long outward curve to form the outer edge of the handle, connecting at the top.
Add a matching inner curve for thickness, then connect it back to the cup near the bottom.
Pro Tip: Keep an even gap inside the handle so it looks sturdy and real.
Step 5: Draw Cute Eyes
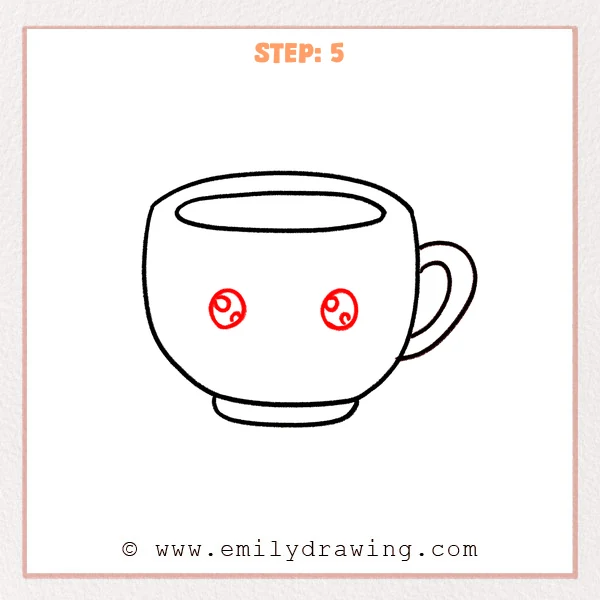
On the front of the cup, draw two small round eyes with even spacing.
Inside each eye, add a couple of tiny circles for highlights to make it look lively.
Pro Tip: Keep both eyes level and similar in size for a cuter look.
Step 6: Add a Smiling Mouth
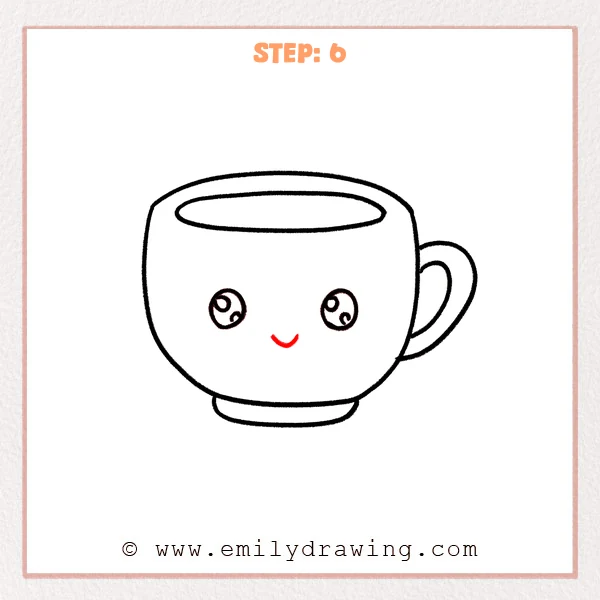
Between the eyes, slightly lower down, draw a small curved line like a soft “U” smile.
Lift both ends a little so the face feels friendly and cute.
Pro Tip: Keep the mouth small so there is plenty of open space under the eyes.
Step 7: Color in your drawing!
Fun Facts
- Many cups are shaped with smooth curves so they feel comfortable to hold.
- The oval rim looks different depending on the viewing angle and height.
- Adding a simple face can turn an everyday object into a cute character.
Pin it now, Draw later!
Trace your favorite lines with a pen, then erase the extra sketch marks.
You can color the cup, add blush cheeks, or draw a drink inside the rim.
Now you know how to draw a cup step by step—try drawing a whole set with different faces!
Get the FREE Printable Drawing Guide
FREE Download Printable Cup Drawing Tutorial
Frequently Asked Questions
How do I make the cup look more 3D?
Keep the inner oval slightly smaller and centered, and make the side curves smooth.
Pro Tip: A consistent rim thickness makes the opening feel more solid.
[Alt Text: FAQ tip for how to draw a cup, focusing on rim thickness and smooth curves for a 3D look.]
What if my cup looks lopsided?
Lightly sketch a center guideline and compare both sides as you draw.
Pro Tip: Fix the outline before darkening any final lines.
[Alt Text: FAQ tip for an easy cup drawing, showing how to correct symmetry before final outlining.]
Can I change the style to make it even cuter?
Yes—try bigger eyes, a smaller mouth, or add tiny cheeks and stickers.
Pro Tip: Keep facial features clustered near the center for a gentle expression.
[Alt Text: FAQ tip for a cute how to draw a cup tutorial, suggesting bigger eyes and small mouth for a kawaii style.]