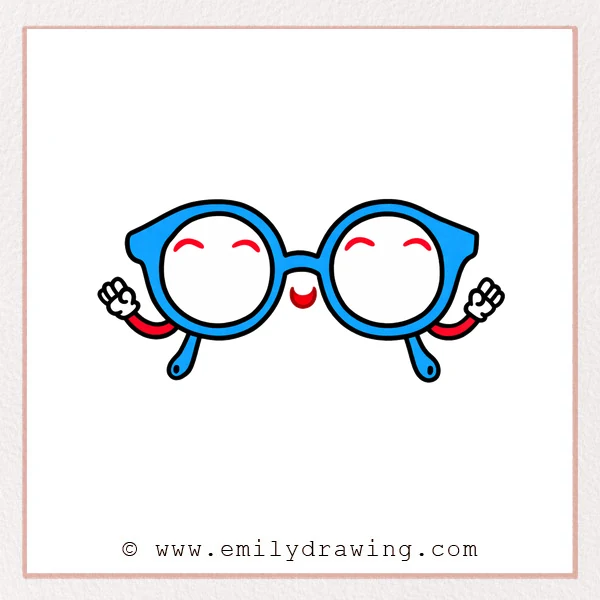
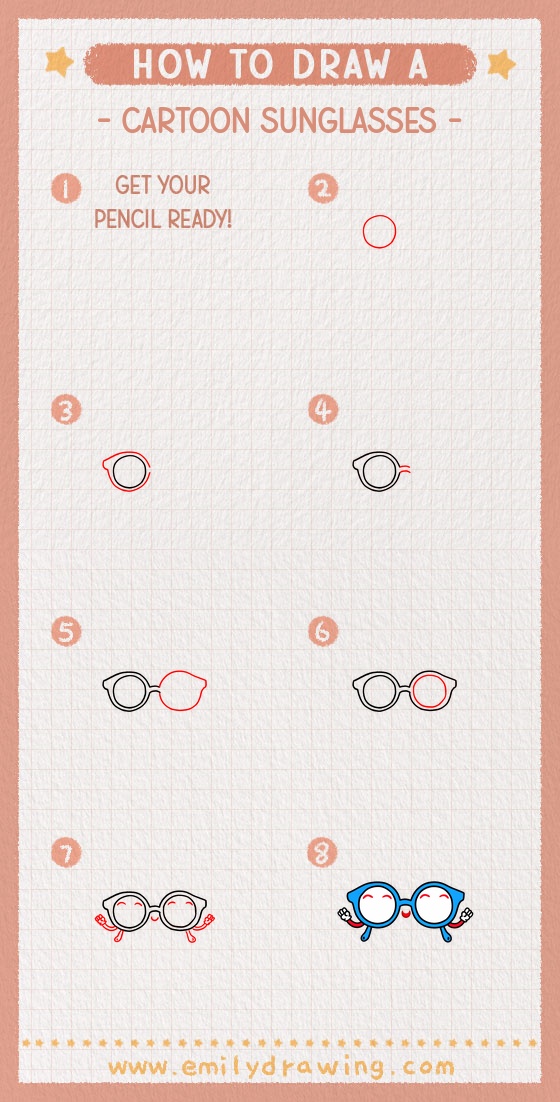
This easy drawing tutorial shows how to draw cartoon sunglasses step by step. You will build one lens first, then add the second lens, and finish with a cute face. It is a calm, simple drawing for beginners.
What You Will Need
- Pencil and eraser
- Black marker or pen
- Colored pencils or markers (optional)
Here are my RECOMMENDED Art Supplies!
- Crayola Coloring Set (140 Pieces – Mega Value!)
- 24 Colored Crayon Set
- A4 Printer Paper
- Crayola Coloring Pencils
- HP Home Printer with Instant Ink!
Time needed:
26 minutes.
Step-by-Step Drawing Guide
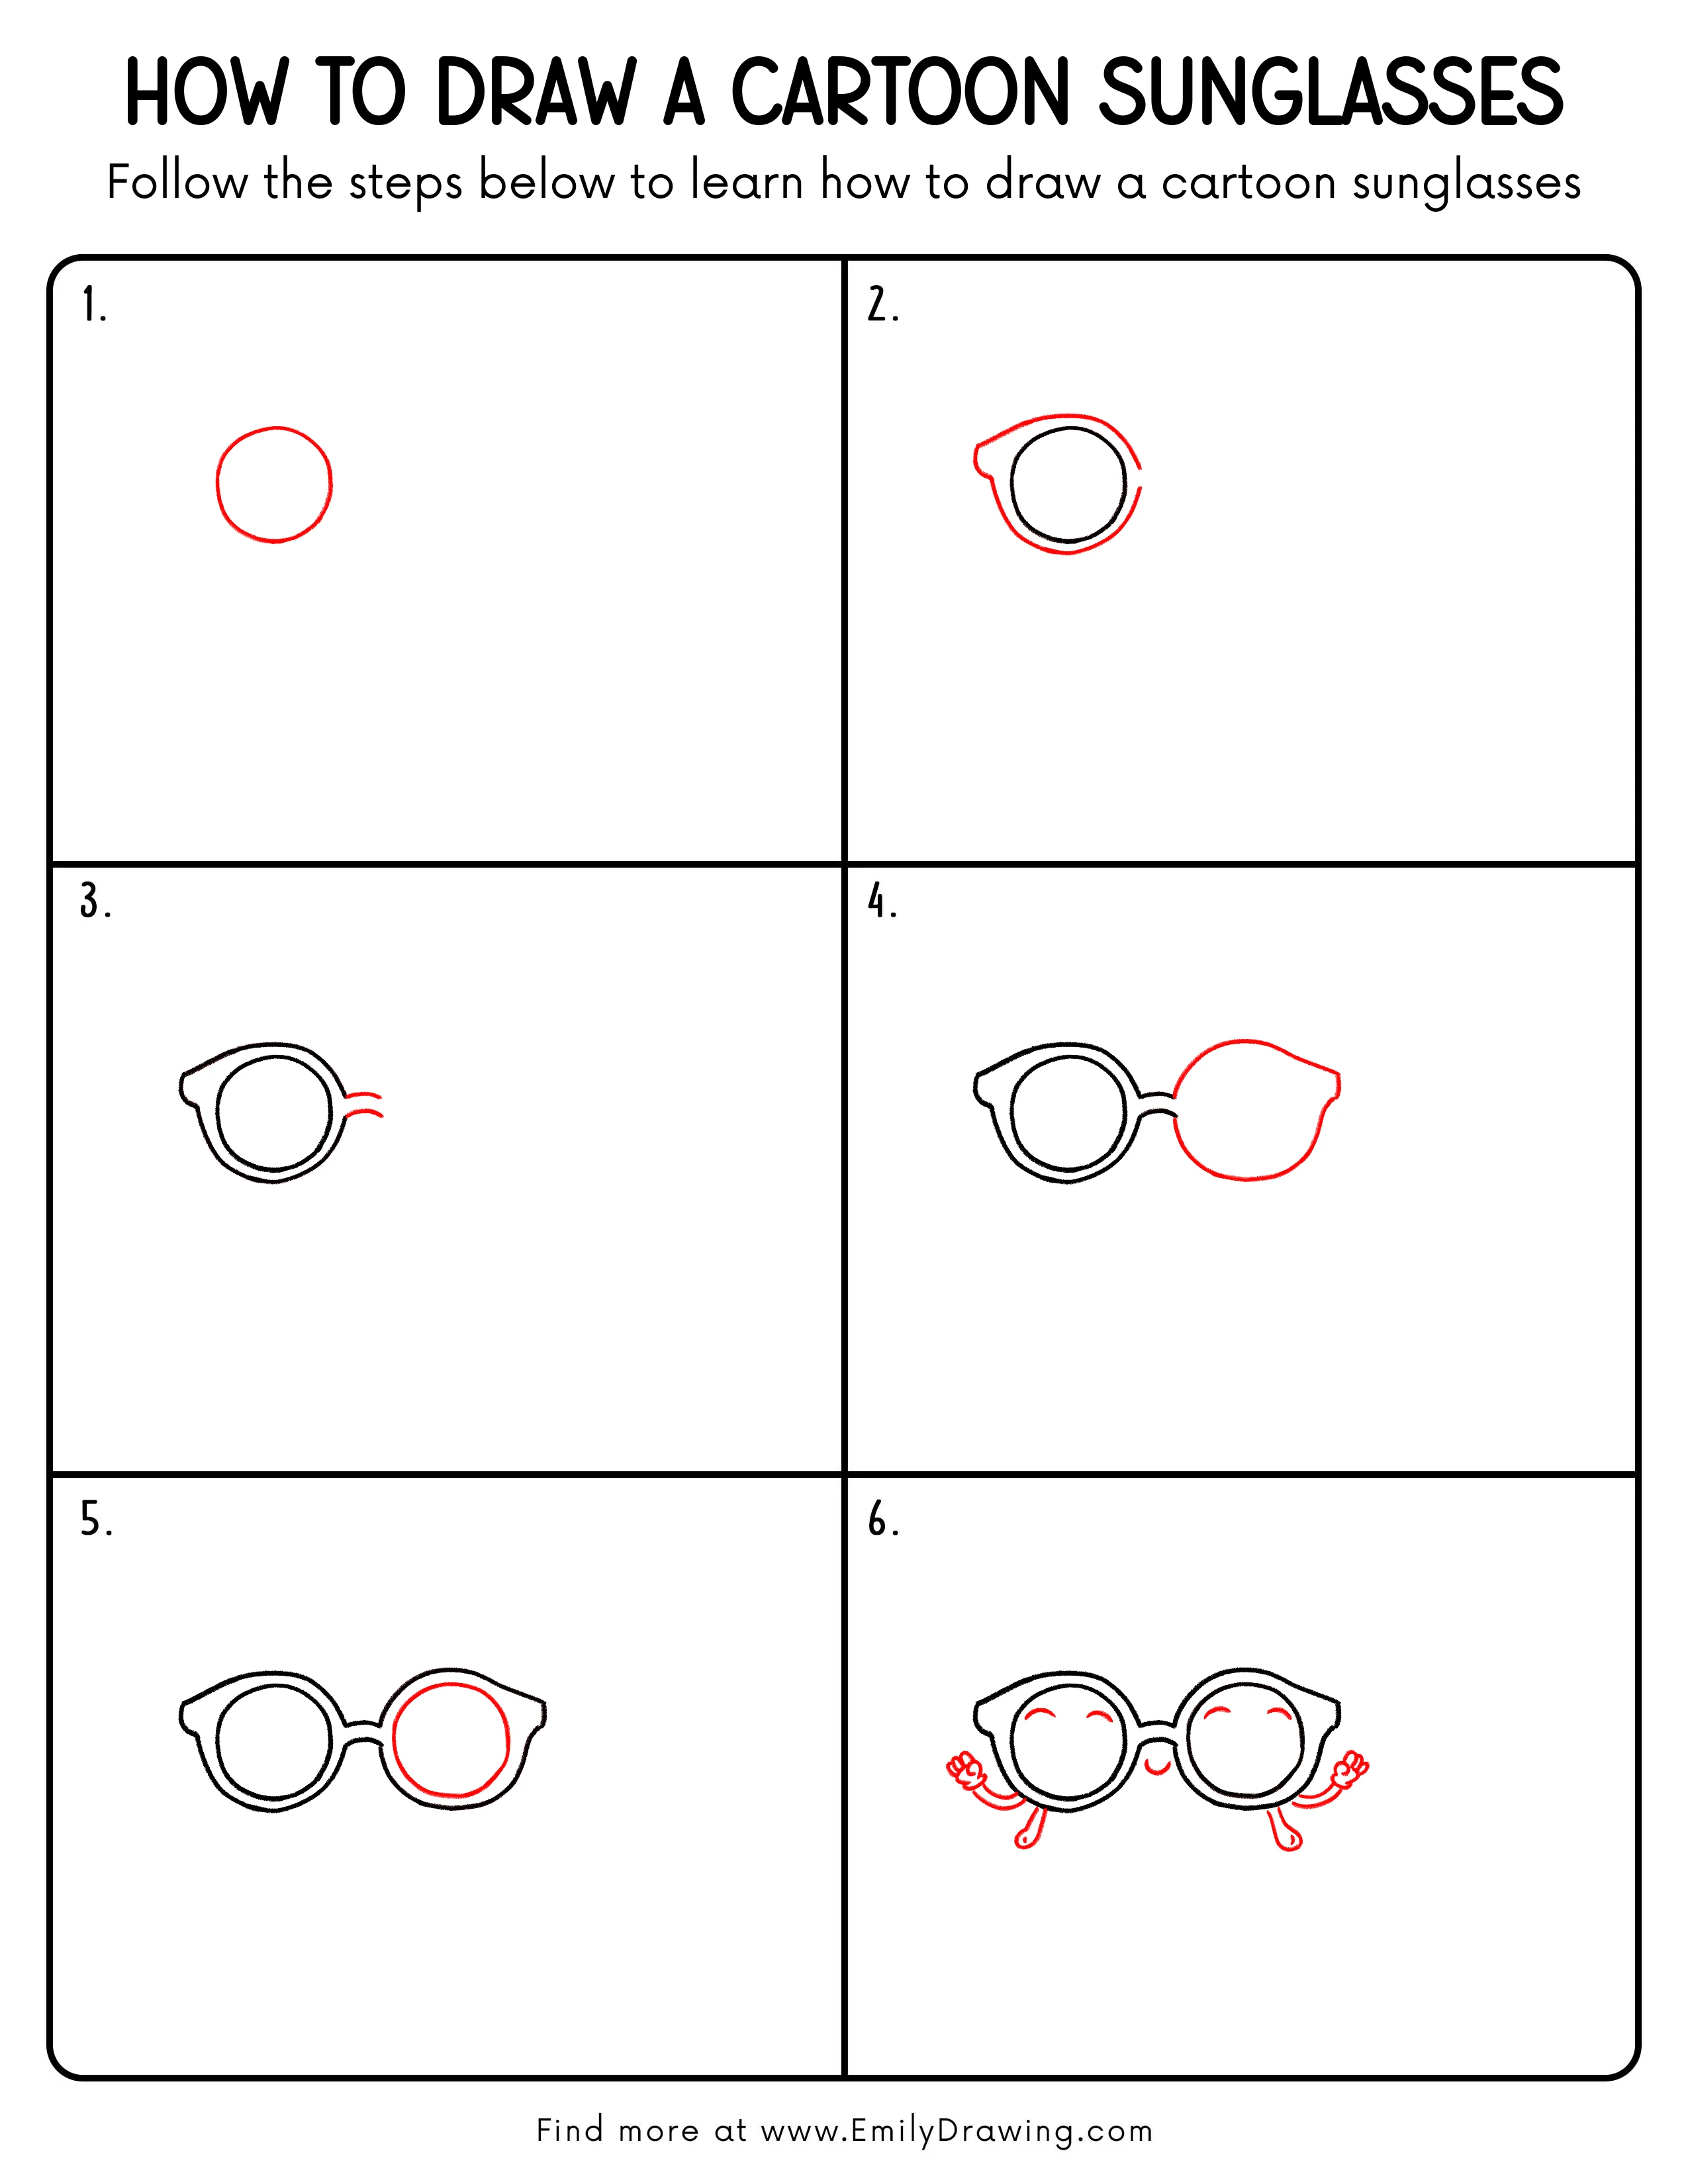
Step 1: Draw the First Lens Circle
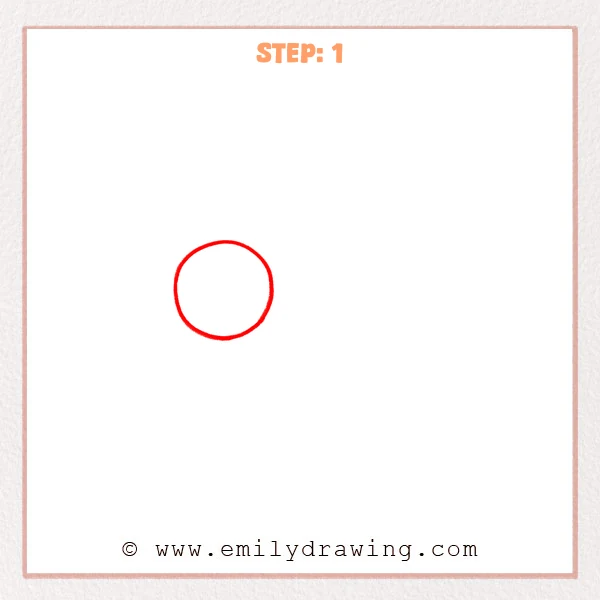
Start with one large circle slightly left of center for the first sunglasses lens. Keep your line a little loose so it feels friendly and cartoon-like.
Pro Tip: Make the circle slightly larger so the frame fits easily later.
Step 2: Add the Outer Frame and Inner Rim

Sketch a larger outline around the circle to form the frame, with a small bump on the upper-left. Add a darker inner ring to show the lens edge, and leave a small opening on the right side of the frame.
Pro Tip: Keep the outer and inner rings centered so the frame feels balanced.
Step 3: Draw the Bridge Connection Curves

At the opening on the right side of the first frame, add two short curved lines reaching to the right like a tiny bridge. Place the top curve slightly higher than the bottom one to give the bridge thickness.
Pro Tip: Keep the bridge short so it aligns easily with the next lens.
Step 4: Outline the Second Lens Frame
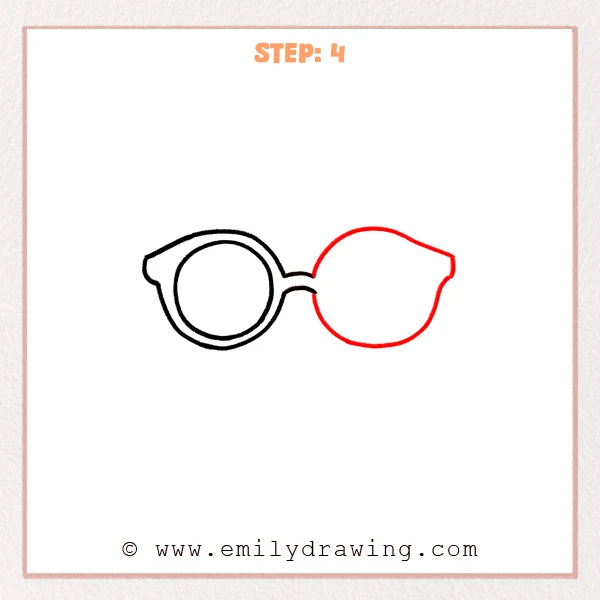
On the right side, draw the second lens frame as a smooth, rounded shape that meets the bridge. Let the top curve gently rise, and add a small bump on the outer-right edge to match the cartoon style.
Pro Tip: Keep the second lens close in size to the first for a neat, even look.
Step 5: Add the Inner Rim on the Right Lens
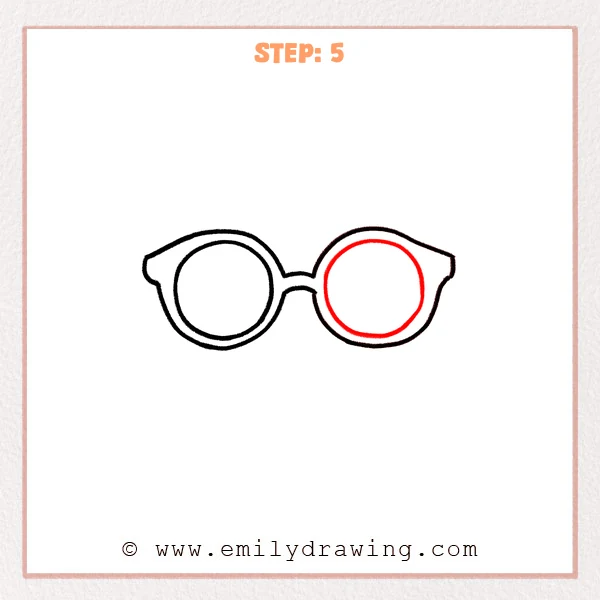
Inside the right frame, sketch a smaller centered circle to create a clear frame thickness. Darken this inner ring slightly so both lenses match in structure.
Pro Tip: Leave an even gap between the inner and outer lines to show the frame thickness.
Step 6: Add a Face and Tiny Arms and Legs
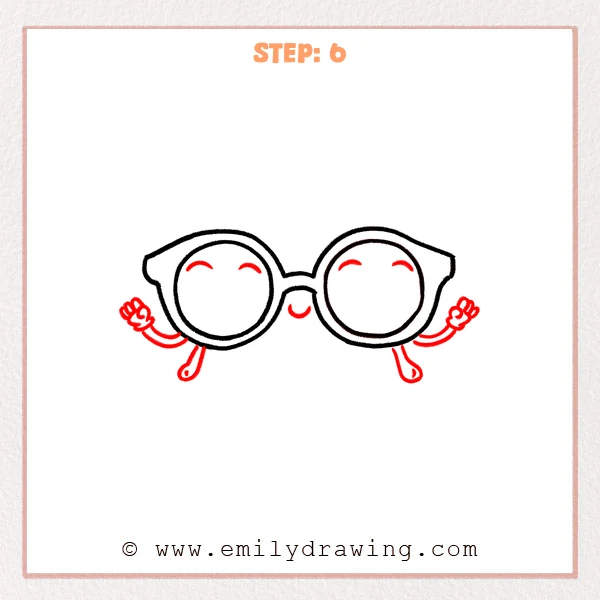
Draw a small curved eyelid line inside each lens to show happy, closed eyes. Add a little crescent smile under the bridge, then sketch simple arms with tiny fists and two short legs below.
Pro Tip: Keep the facial lines light so the character looks gentle and easy to read.
Step 7: Color in your drawing!
Fun Facts
- Sunglasses can protect eyes by reducing bright light and glare.
- Many sunglasses use tinted lenses to make sunny days feel more comfortable.
- Cartoon sunglasses often have thicker frames because they are easier to read.
Pin it now, Draw later!
You have drawn cartoon sunglasses step by step, from two frames to a cute face. Try coloring the frames bright, and shade the lenses with a soft gradient for a shiny look. A common beginner mistake is making one lens much larger than the other, so compare sizes before you darken lines. Keep practicing this easy drawing tutorial, and try new frame shapes to create your own style.
Get the FREE Printable Drawing Guide
FREE Download Printable Cartoon Sunglasses Drawing Tutorial
Frequently Asked Questions
How do I make both lenses the same size?
Lightly measure the width of the first lens, then match it on the second lens.
What if my circles look uneven?
Draw with light strokes first, then smooth the shape with a second pass.
How can I make the lenses look shiny?
Leave a small white highlight area, and shade around it gently.