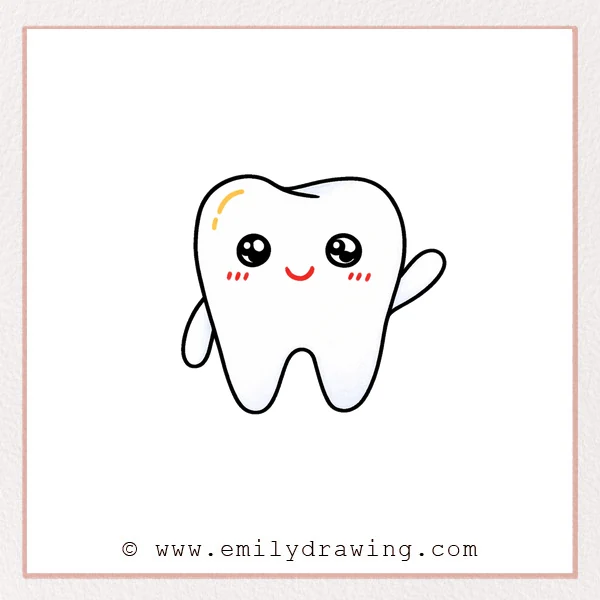
This easy drawing tutorial shows how to draw a cartoon tooth step by step. We will build a friendly tooth character using simple curved lines and a few cute face details. Take your time, and let each line stay smooth and gentle.
What You Will Need
- Pencil and eraser
- Black marker or pen (for outlining)
- Red pencil or colored pencil (optional for cheeks and highlights)
- Coloring tools (crayons, markers, or colored pencils)
Here are my RECOMMENDED Art Supplies!
- Crayola Coloring Set (140 Pieces – Mega Value!)
- 24 Colored Crayon Set
- A4 Printer Paper
- Crayola Coloring Pencils
- HP Home Printer with Instant Ink!
Time needed:
20 minutes.
Step-by-Step Drawing Guide
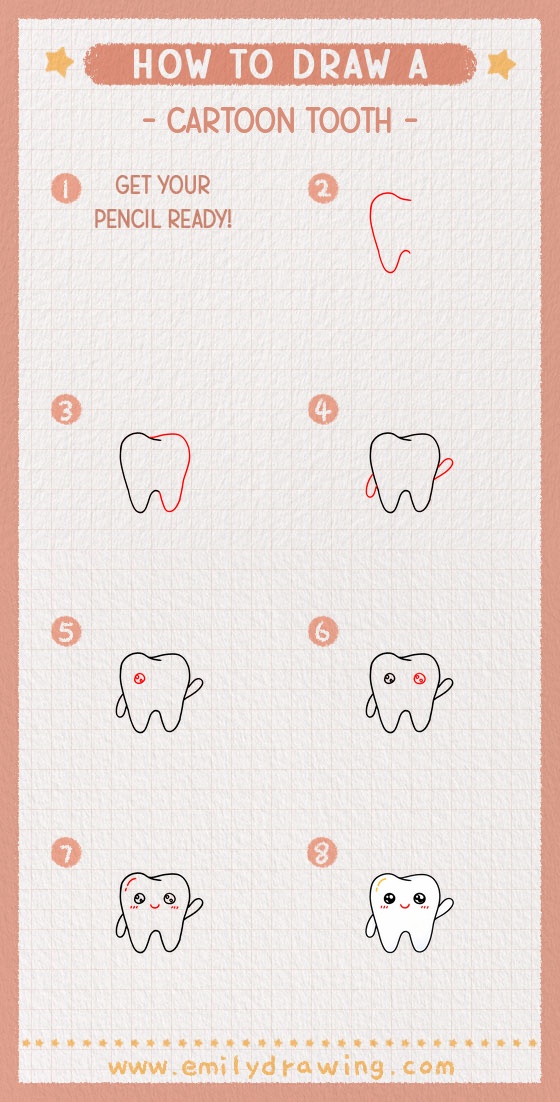
Step 1: Sketch the Big Tooth Outline
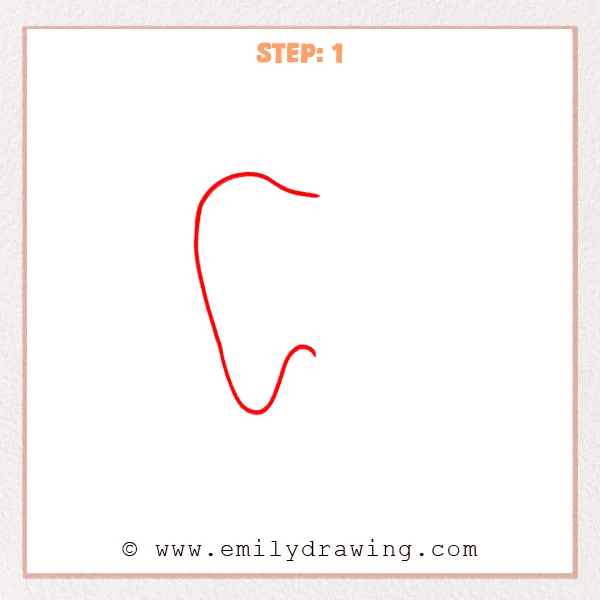
Start with one long, smooth curved line from the top and let it sweep down to form the left side of the tooth. Round the bottom gently, then curve upward and leave a small inward curve on the right for now.
Pro Tip: Keep the stroke smooth, and make the bottom turn rounded, not pointy.
Step 2: Complete the Tooth Shape and Add Two Roots
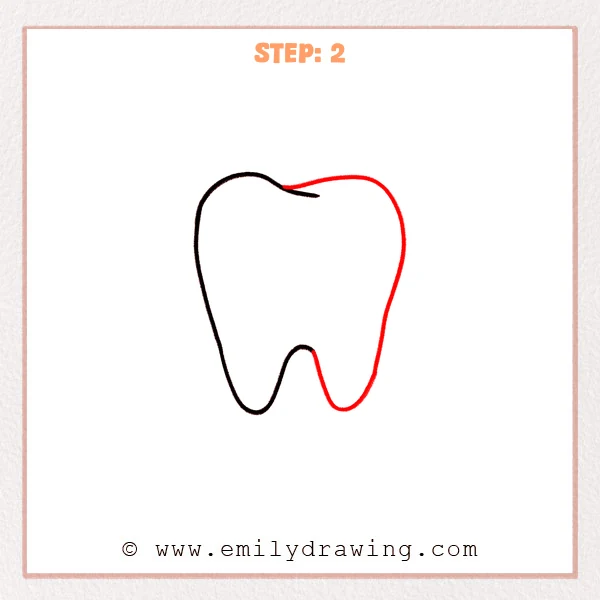
Add a rounded bump on the top right so the crown feels fuller. Then draw the right outer edge downward, shape a second smooth root at the bottom, and let the line travel back upward to close the tooth outline.
Pro Tip: Keep both roots similar in size, with soft U-shaped curves.
Step 3: Add Cute Little Arms on Both Sides
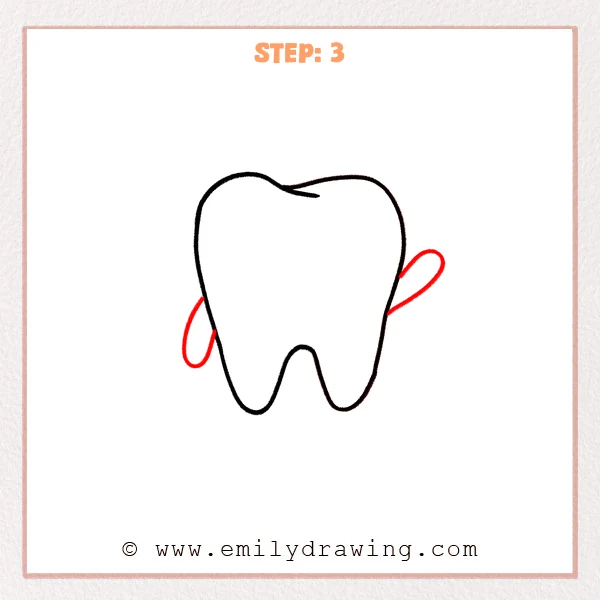
On the middle-left outside edge of the tooth, sketch a slim oval loop so it looks like a small arm sticking out. Repeat on the middle-right with a slightly smaller loop, placed a bit farther back for balance.
Pro Tip: Keep the arms small, and leave a little gap for a light look.
Step 4: Draw the First Eye (Left Eye)
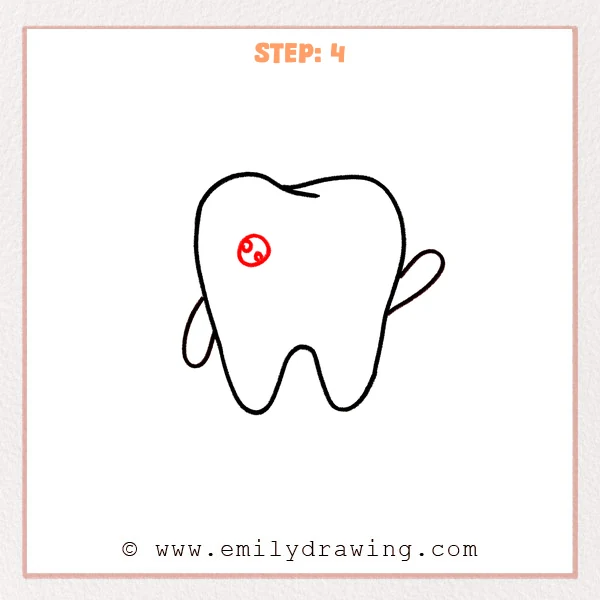
On the upper-left area of the tooth, draw a small circle for the left eye. Inside it, add two tiny highlight dots and a couple of short curved marks to give the eye a cute look.
Pro Tip: Don’t place the eye too close to the edge; leave a small margin.
Step 5: Draw the Second Eye (Right Eye)
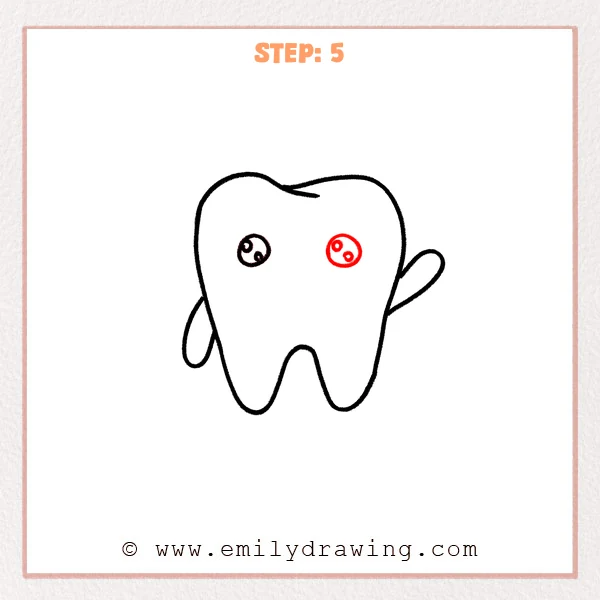
On the upper-right area of the tooth, draw a second circle similar in size for the right eye. Repeat the highlight dots and small curved details so both eyes feel like a matching pair.
Pro Tip: Keep both eyes at the same height with even spacing.
Step 6: Add a Smiley Face, Blush, and Shine Highlights
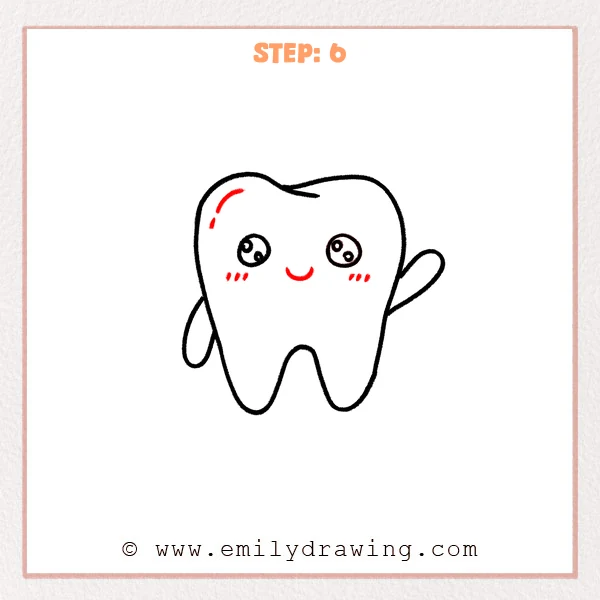
Below and between the eyes, add a small curved smile with a gentle crescent shape. Then draw three short blush lines on each cheek, and finish with two curved highlight strokes on the upper-left to make the tooth look shiny.
Pro Tip: Keep the smile small for cuteness, and place highlights close to the outline.
Step 7: Color in your drawing!
Fun Facts
- Tooth enamel is the hardest substance in the human body.
- Baby teeth help you chew and also guide adult teeth into place.
- Brushing helps remove plaque, a sticky film that can lead to cavities.
Pin it now, Draw later!
You now have a complete cartoon tooth with arms, bright eyes, and a sweet smile. Try coloring the tooth a soft white or pale blue, then shade lightly along one side to show gentle roundness. A common beginner mistake is making the roots too pointy, so keep those bottom curves smooth and U-shaped.
If you enjoyed this drawing for beginners, practice by drawing a whole row of teeth with different expressions. You can also try another easy drawing tutorial and build a little dental hero team.
Get the FREE Printable Drawing Guide

FREE Download Printable Cartoon Tooth Drawing Tutorial
Frequently Asked Questions
How do I keep the tooth shape even on both sides?
Sketch lightly first and compare the left and right widths as you go.
What if my eyes look uneven?
Draw a faint guide line across the face area, then place both eyes on that line.
Can I change the expression?
Yes. Try a bigger smile, a tiny “o” mouth, or add eyebrows for more emotion.