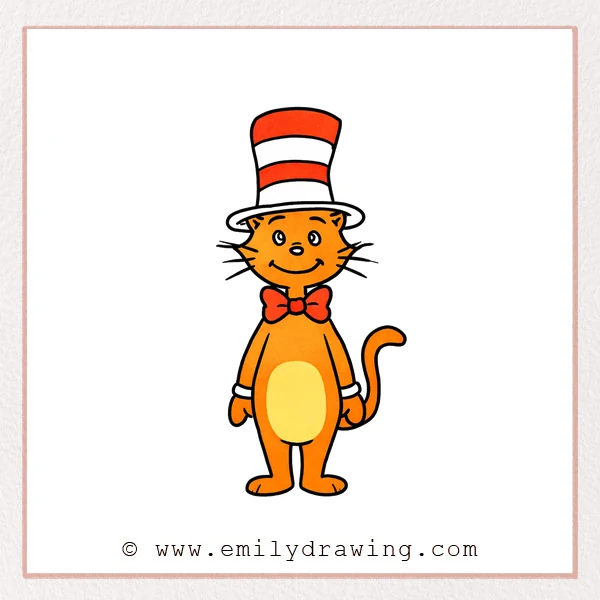
This easy drawing tutorial shows how to draw the Cat in the Hat with simple shapes. You will build the drawing step by step, adding one clear detail at a time. Take your time, and enjoy watching the character appear on the page.
What You Will Need
- Pencil
- Eraser
- Black marker or pen
- Red marker or colored pencil
- Paper
Here are my RECOMMENDED Art Supplies!
- Crayola Coloring Set (140 Pieces – Mega Value!)
- 24 Colored Crayon Set
- A4 Printer Paper
- Crayola Coloring Pencils
- HP Home Printer with Instant Ink!
Time needed:
29 minutes.
Step-by-Step Drawing Guide
Step 1: Block In the Tall Hat
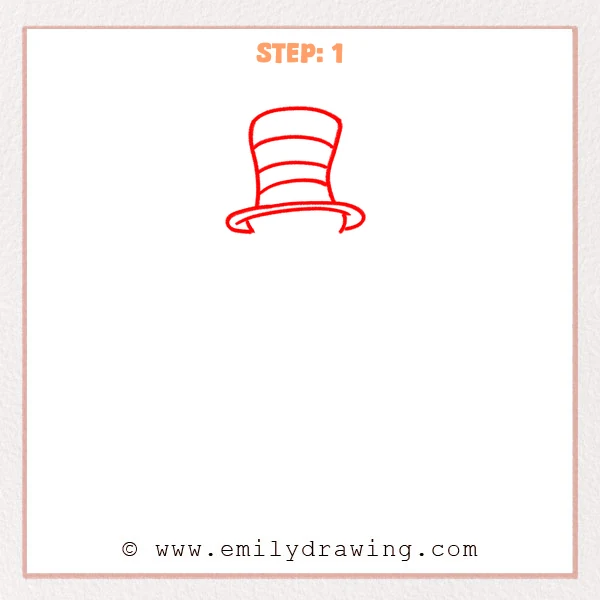
Start with a tall rounded shape, with sides that curve slightly inward. Add a wide, flat oval brim at the bottom, then place a few curved bands across the hat for the stripes.
Pro Tip: Keep the brim oval symmetrical and centered under the hat.
Alt Text: A simple outline of the Cat in the Hat’s tall striped hat with a wide oval brim.
Step 2: Add the Cat’s Head and Whiskers
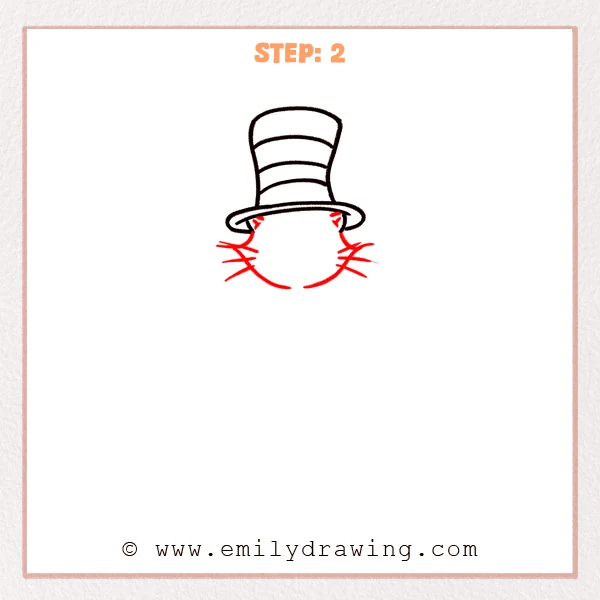
Under the brim, sketch a round face that widens gently at both cheeks. Add a small pointed ear on each side, then draw a few long whisker lines coming from the cheeks.
Pro Tip: Match the whiskers on both sides for a balanced, tidy look.
Alt Text: The Cat in the Hat now has a rounded head under the striped hat, with small ears and whiskers on both cheeks.
Step 3: Add the Eyes, Nose, and Smile
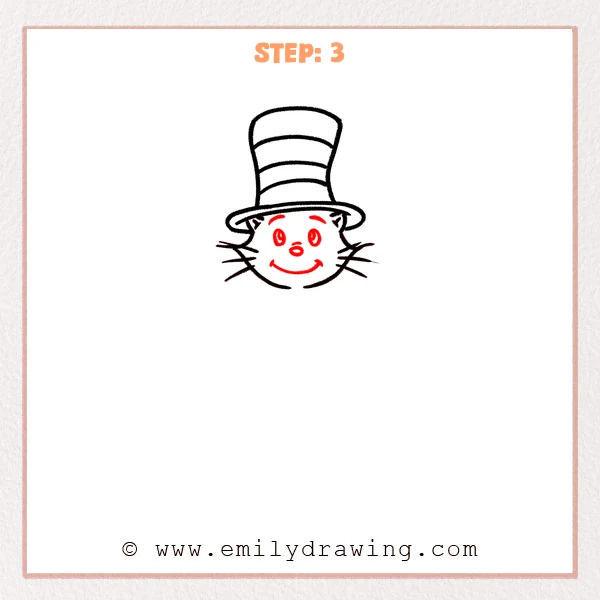
Add two tall oval eyes in the middle of the face, spaced evenly left and right. Between them, draw a small round nose, then curve a wide smile underneath.
Pro Tip: Lightly mark a center line first so both eyes feel balanced.
Alt Text: The Cat in the Hat now has oval eyes, a small round nose, and a wide smiling mouth added to the face.
Step 4: Draw the Bow Tie
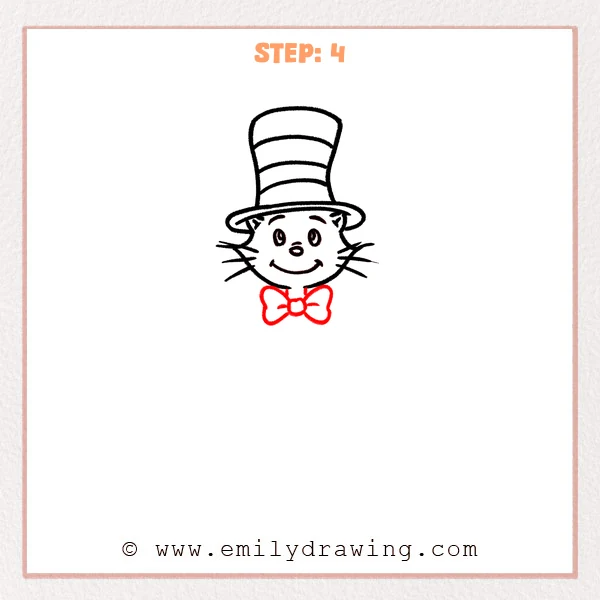
Just under the chin, add a small circle or square for the knot. On each side, draw a puffy bow loop, shaped like two soft petals.
Pro Tip: Keep both loops similar in size, with the knot centered.
Alt Text: The Cat in the Hat now has a bow tie under the smiling face, with a small center knot and two rounded loops.
Step 5: Add the Body, Arms, and Tail
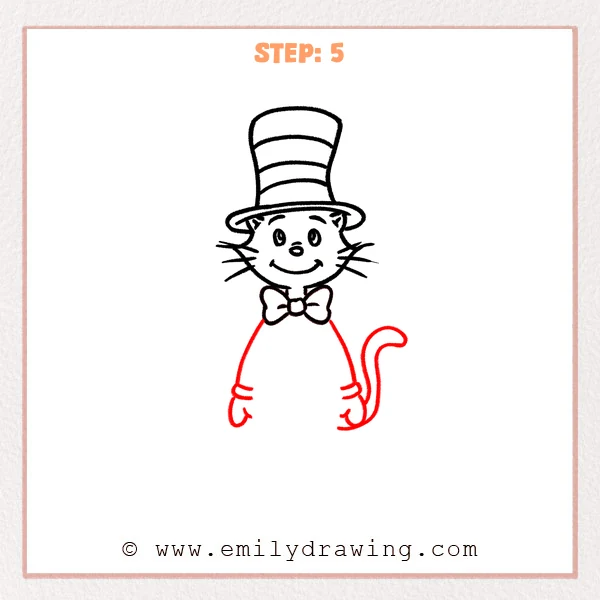
From under the bow tie, sketch a long teardrop-shaped body that widens near the bottom. Add curved arms with small hands at the sides, mark simple cuffs with two short lines, then draw a curved tail lifting to one side.
Pro Tip: Imagine a center line for the body so the arms and tail feel balanced.
Alt Text: The Cat in the Hat now has a long teardrop body with simple arms and cuff lines, plus a curved tail on one side.
Step 6: Add the Legs and Big Feet
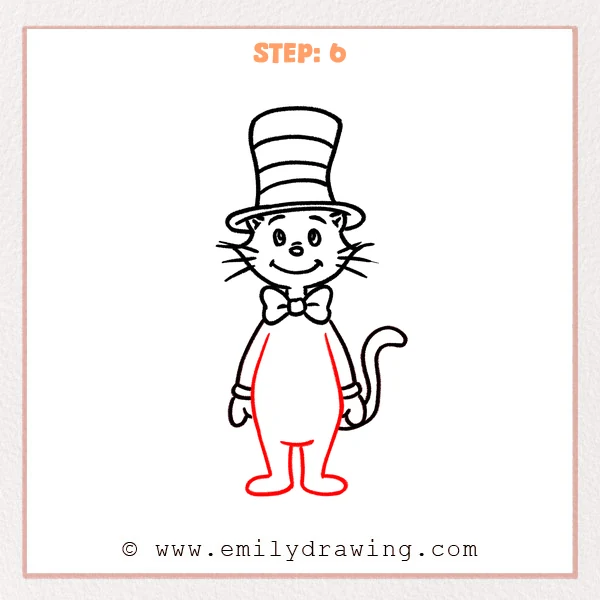
Add two slim leg lines beneath the body, splitting down from the center. Finish each leg with a wide, flat foot shape, like a soft oval shoe with toes angled outward.
Pro Tip: Keep both feet similar in width so the stance feels steady.
Alt Text: The Cat in the Hat now has long legs and oversized flat feet added beneath the body.
Step 7: Color in your drawing!
Fun Facts
- The Cat in the Hat is famous for his tall striped hat and big bow tie.
- Simple curved lines help the character look friendly and expressive.
- Oversized feet and a long tail make the pose feel playful.
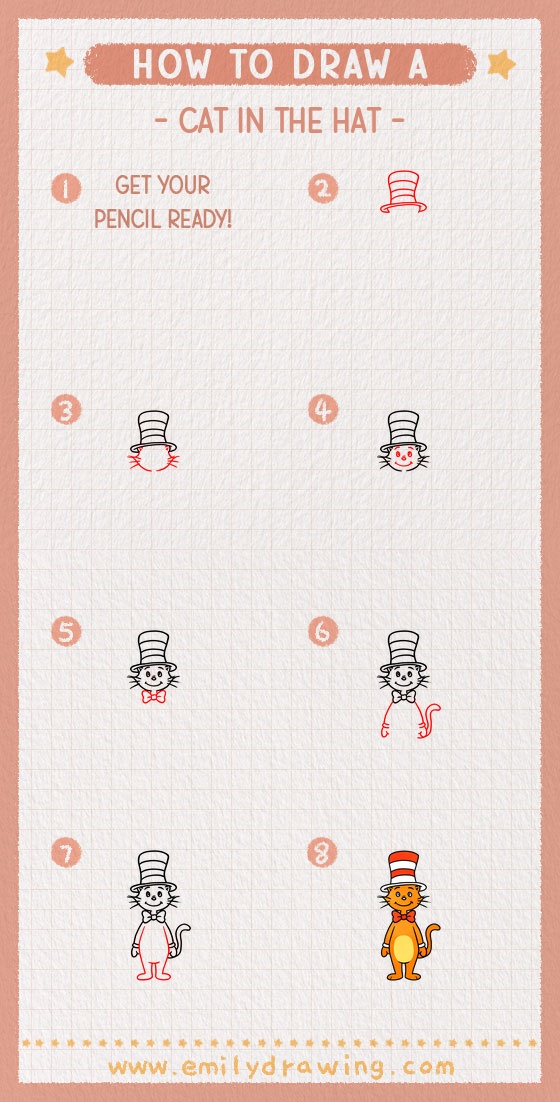
Pin it now, Draw later!
You now have a complete step by step drawing of the Cat in the Hat, from the tall hat down to the big feet. If you want to color, keep the hat stripes bright red and leave the other stripes white for a clean look. Add gentle shading under the brim, under the chin, and along one side of the body to make the shape feel round.
One common beginner mistake is making the hat brim off-center, which can tilt the whole face. If that happens, lightly redraw the brim so it sits evenly under the hat.
Keep practicing this drawing for beginners by changing the smile, whiskers, or tail curve. When you feel ready, try drawing the Cat in the Hat in a different pose.
Get the FREE Printable Drawing Guide
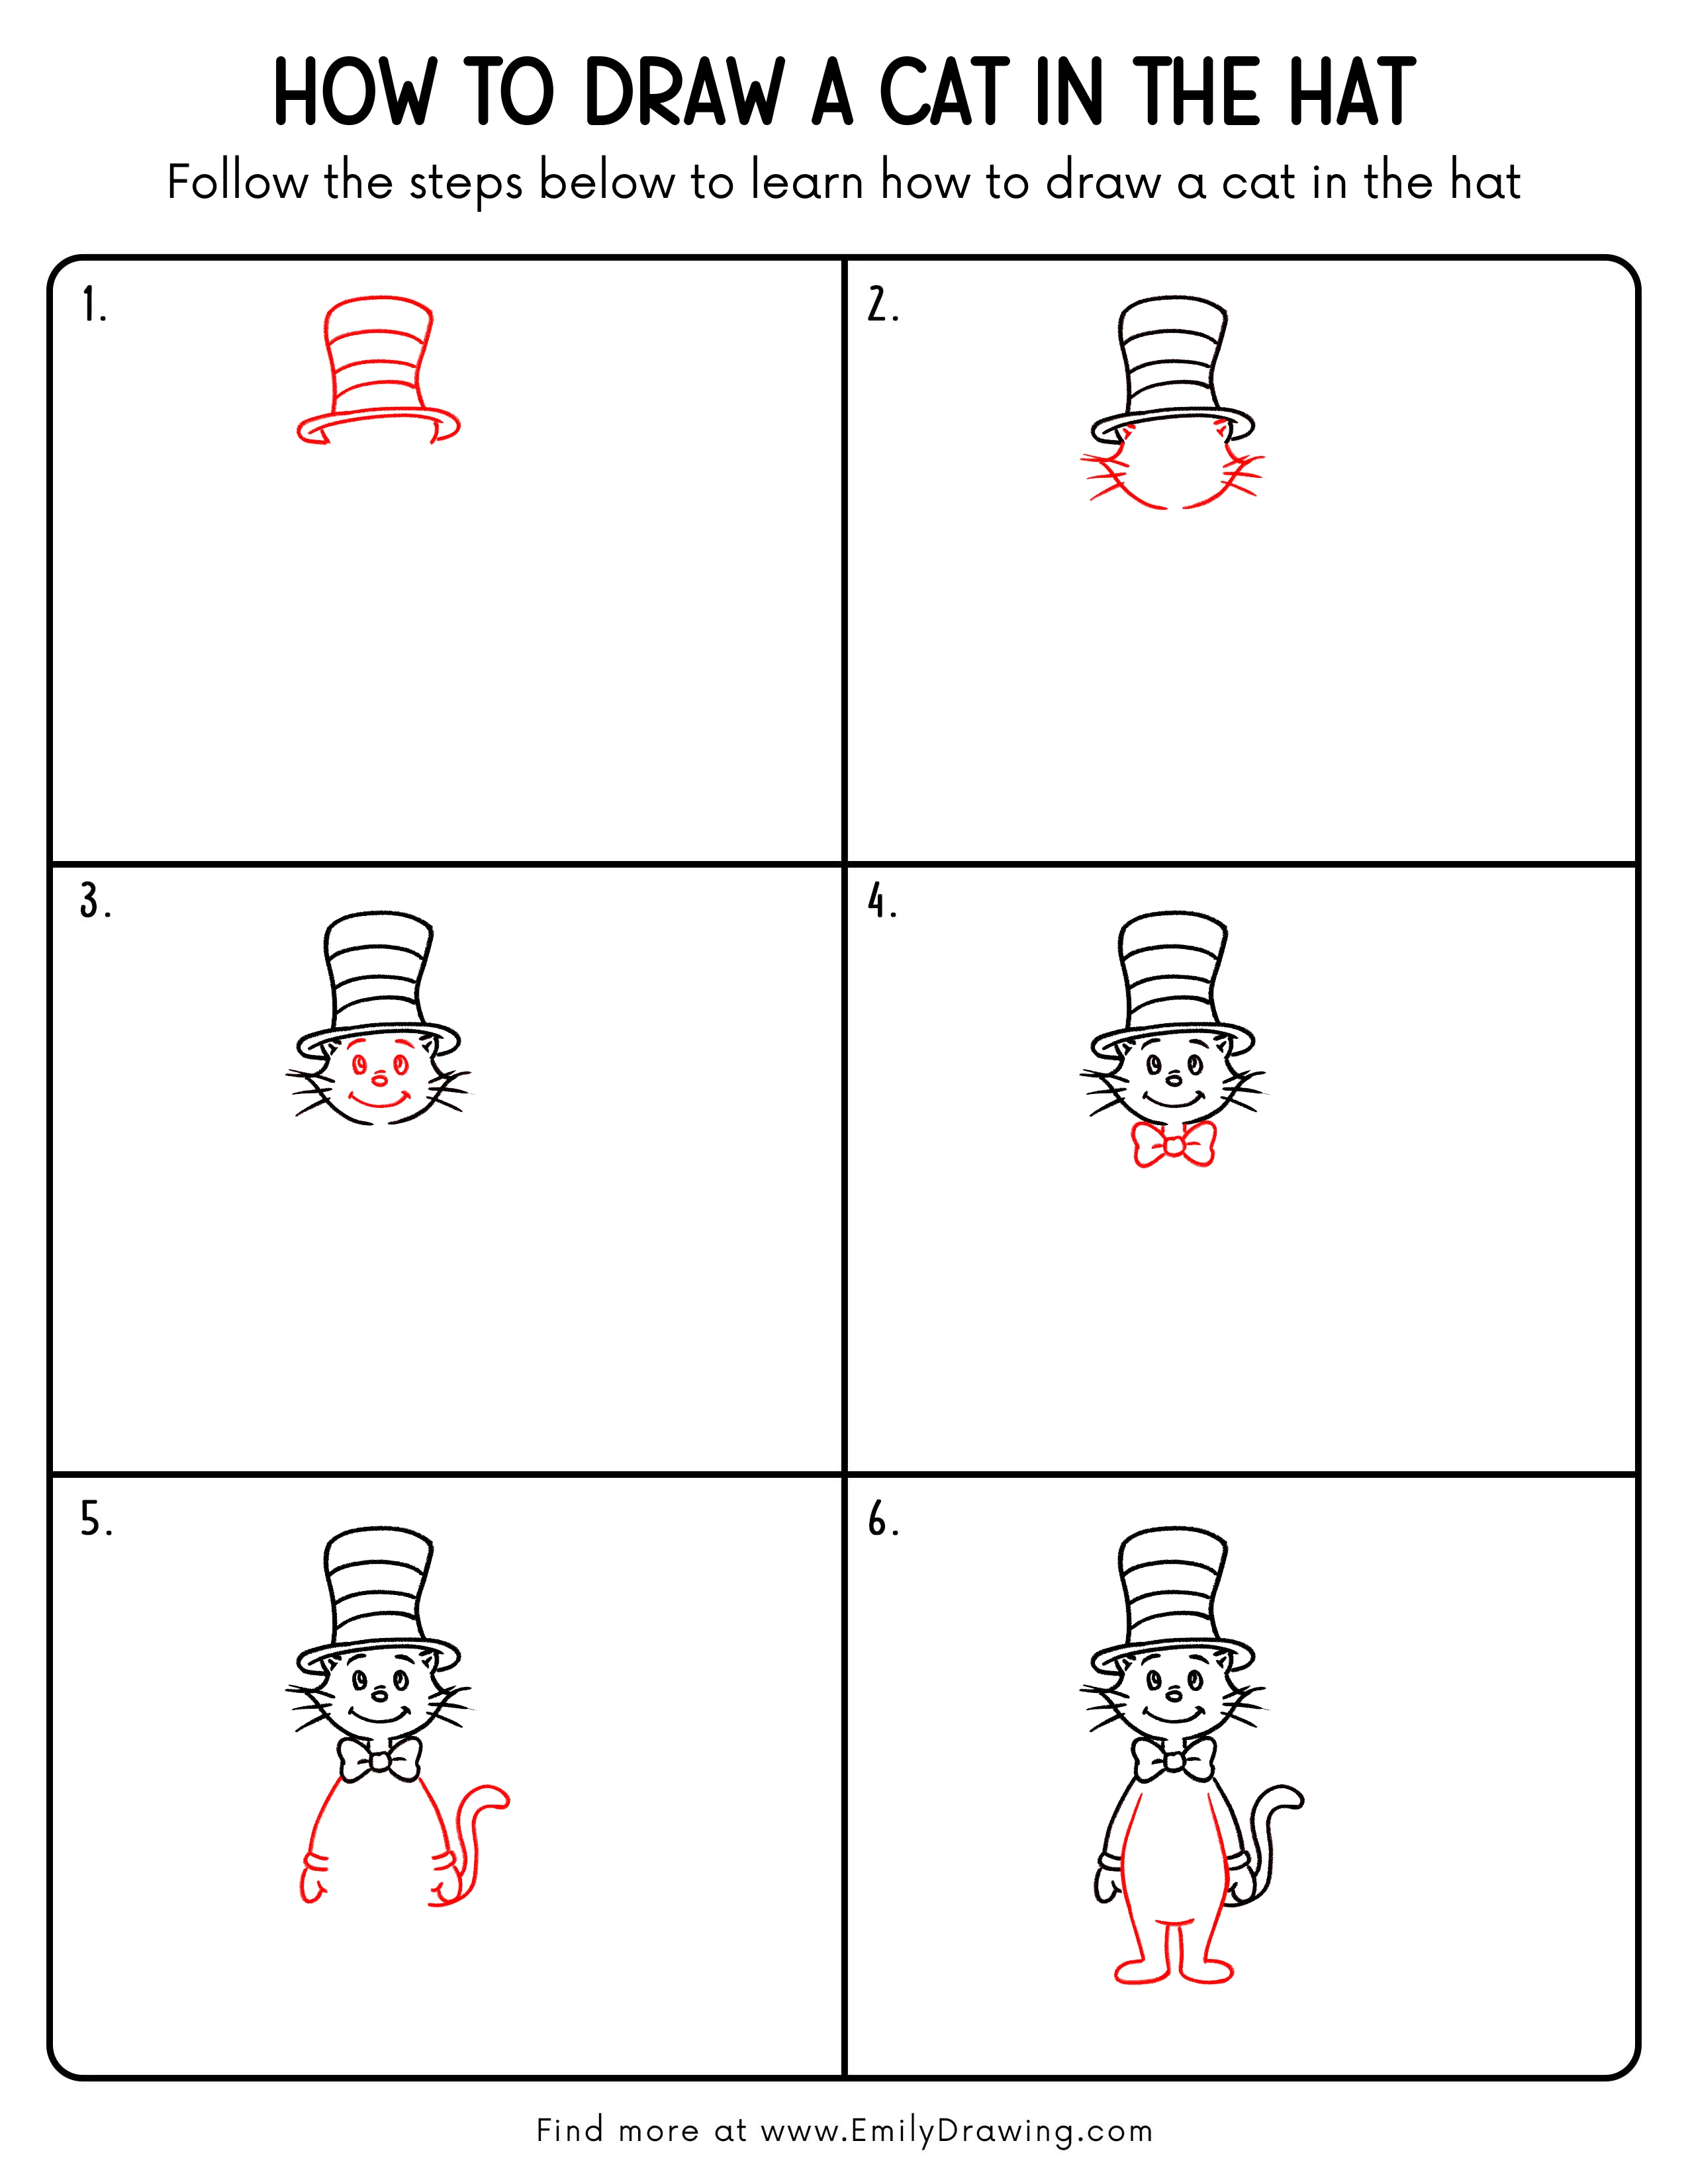
FREE Download Printable Cat In The Hat Drawing Tutorial
Frequently Asked Questions
How do I keep the Cat in the Hat’s face symmetrical?
Lightly sketch a vertical center line first, then place the eyes evenly on each side.
What if my hat looks lopsided?
Adjust the brim oval so it is centered, then match the hat sides to that brim.
How can I make the drawing look more finished?
Trace the final lines with a darker pen, erase extra sketch marks, and add light shading for depth.