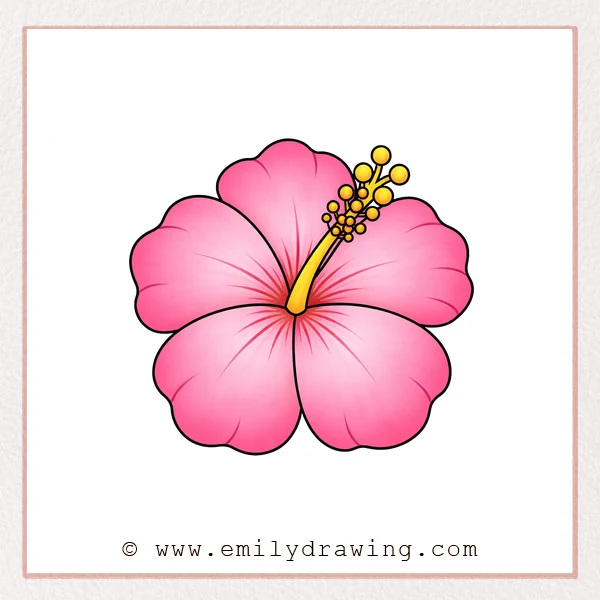
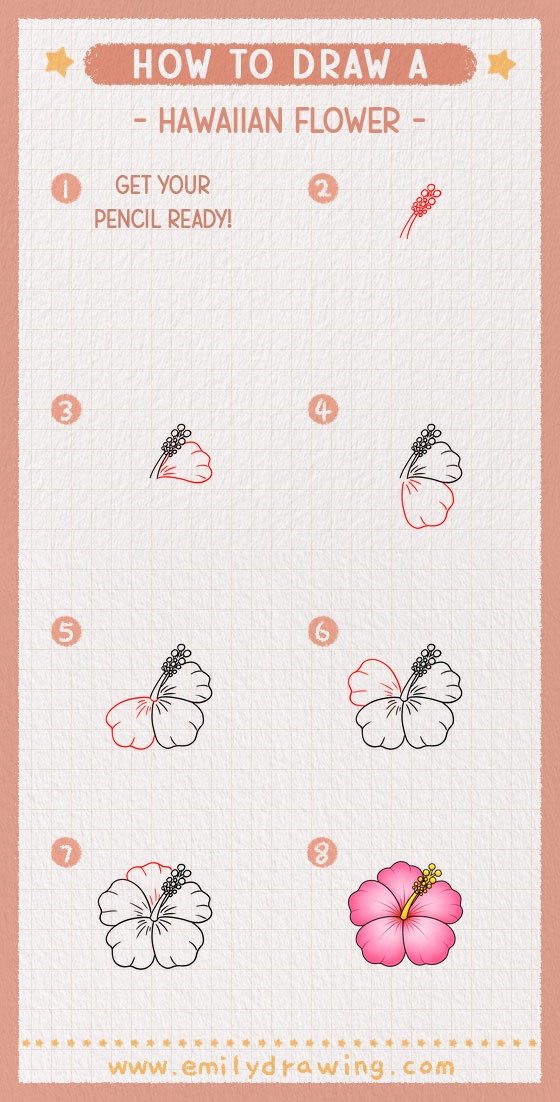
This easy drawing tutorial shows how to draw a hawaiian flower with big, soft petals.
We will start with simple shapes and refine them into a clean flower drawing.
Take your time and keep your lines light until the end.
What You Will Need
- Pencil (HB works well)
- Eraser
- Black pen or marker (optional for final lines)
- Paper
- Colored pencils or markers (optional)
Here are my RECOMMENDED Art Supplies!
- Crayola Coloring Set (140 Pieces – Mega Value!)
- 24 Colored Crayon Set
- A4 Printer Paper
- Crayola Coloring Pencils
- HP Home Printer with Instant Ink!
Time needed:
19 minutes.
Step-by-Step Drawing Guide
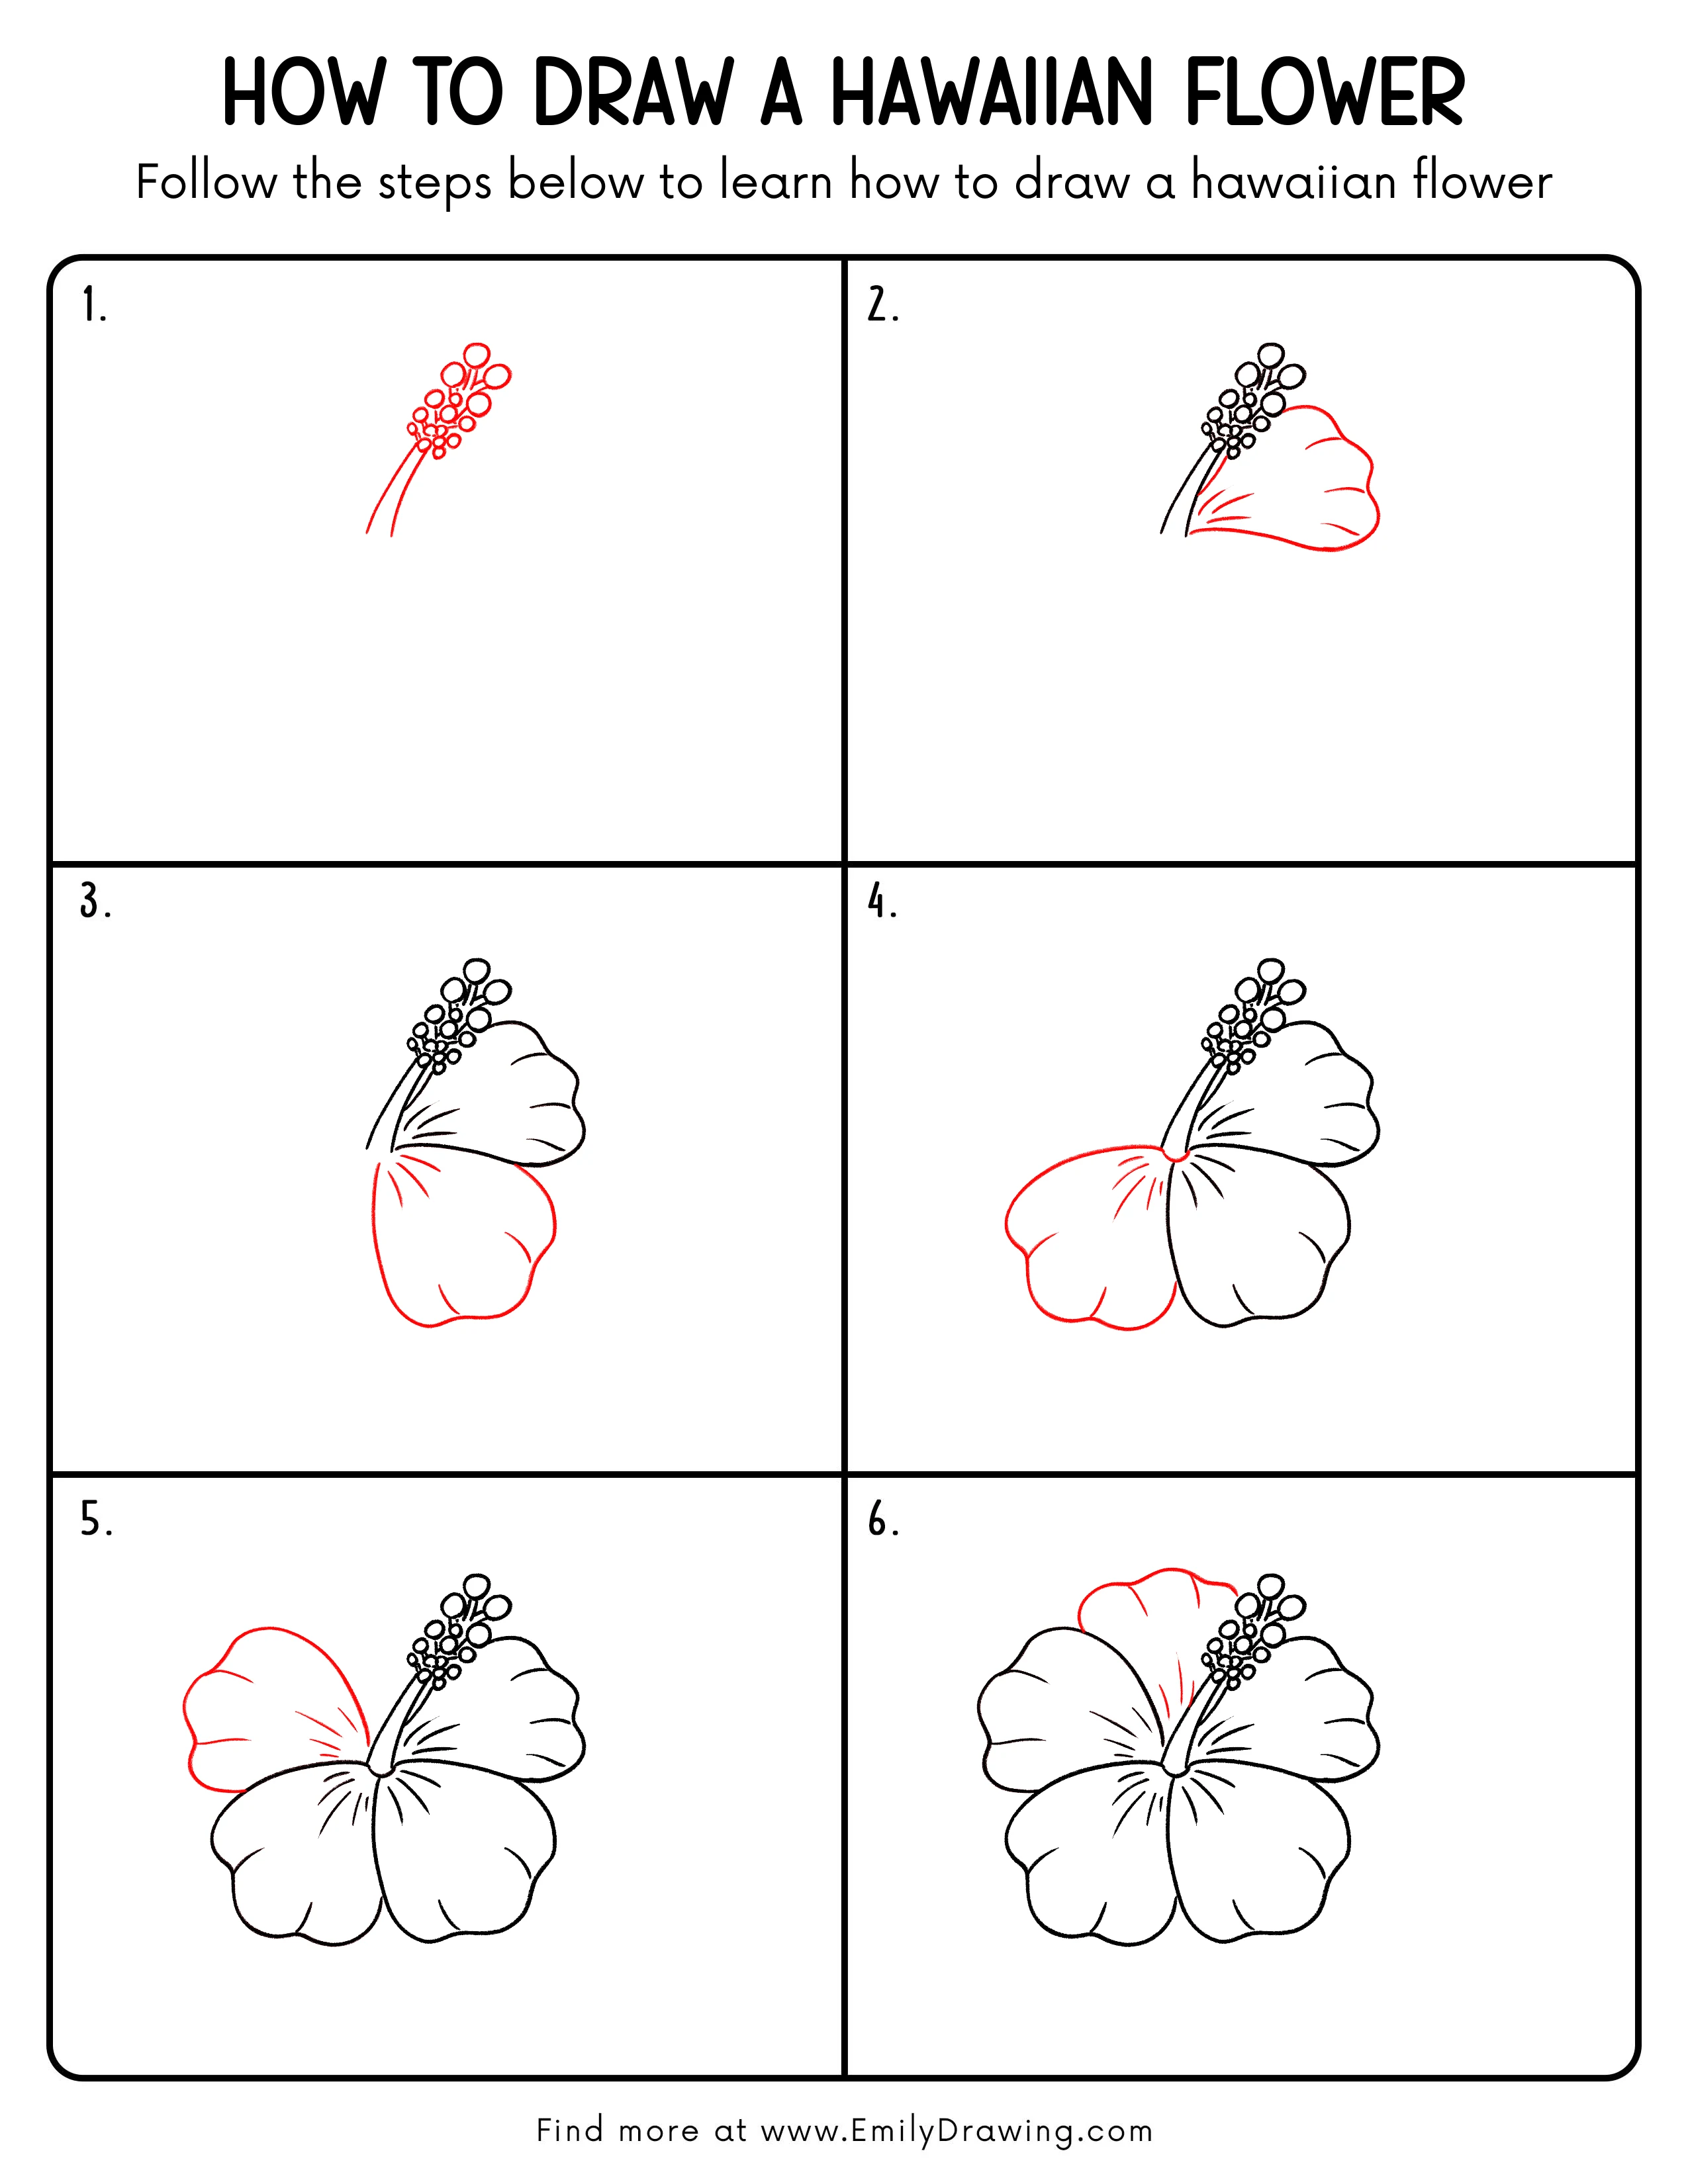
Step 1: Sketch the Stamen Stalks and Pollen Circles
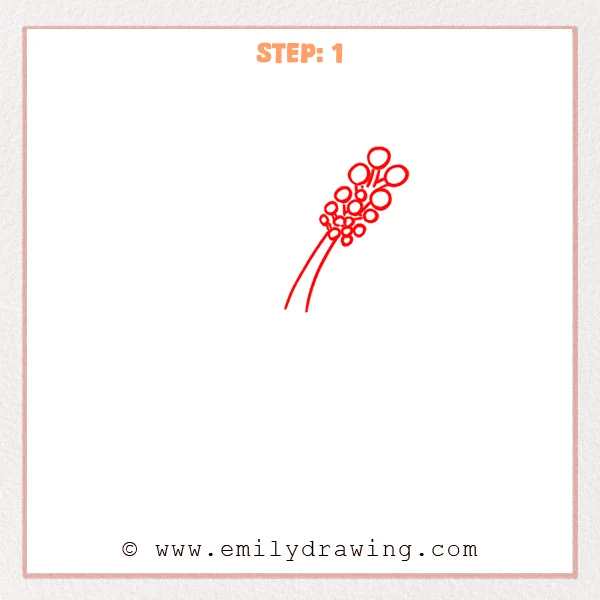
Near the upper-right area, draw a tight cluster of hollow circles in different sizes to show the pollen tips.
From beneath the cluster, draw two slightly separated curved lines downward to form the main stamen stalks.
Pro Tip: Make a few circles larger at the top and smaller below to add depth.
Step 2: Add the Large Petal Shape and Fold Lines
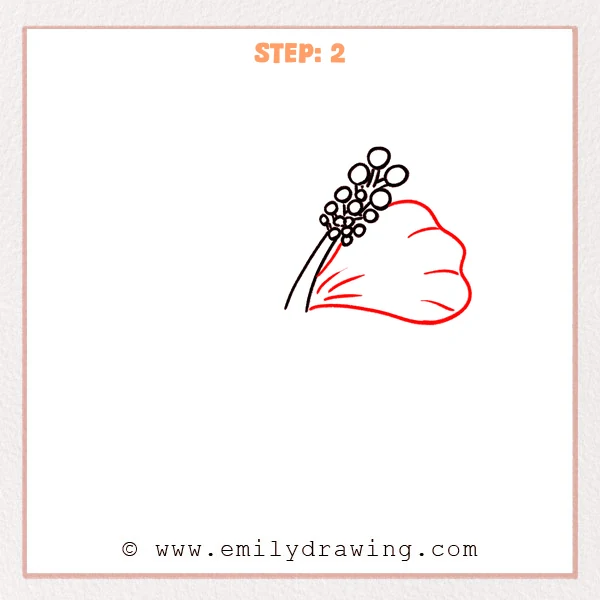
Draw one big, rounded petal shape on the right side, starting near the flower head and curving outward.
Add a few short curved lines inside the petal, fanning out from near the base to show folds.
Pro Tip: Keep the petal outline smooth, and make the base slightly narrower than the tip.
Step 3: Add the Second Large Petal
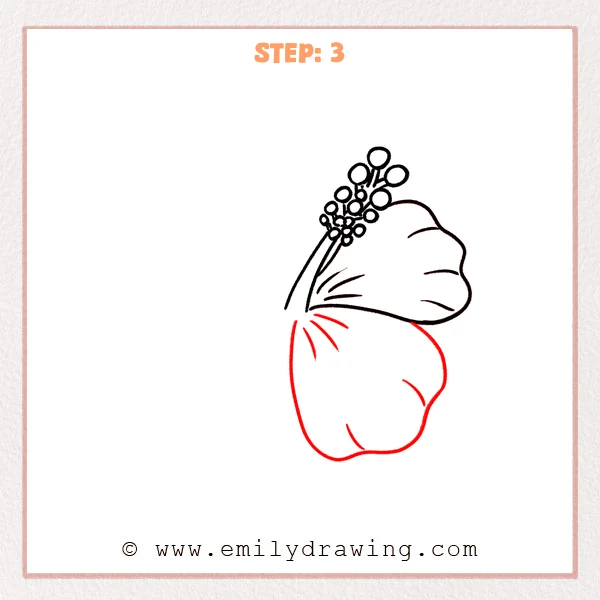
Below the first petal, draw a second, larger petal outline that bulges downward and ends in a soft, rounded tip.
Add one or two curved fold lines inside it, and draw a few short radiating lines at the petal base to show texture.
Pro Tip: Make the lower petal slightly fuller, with a rounder bottom curve for balance.
Step 4: Add the Third Side Petal
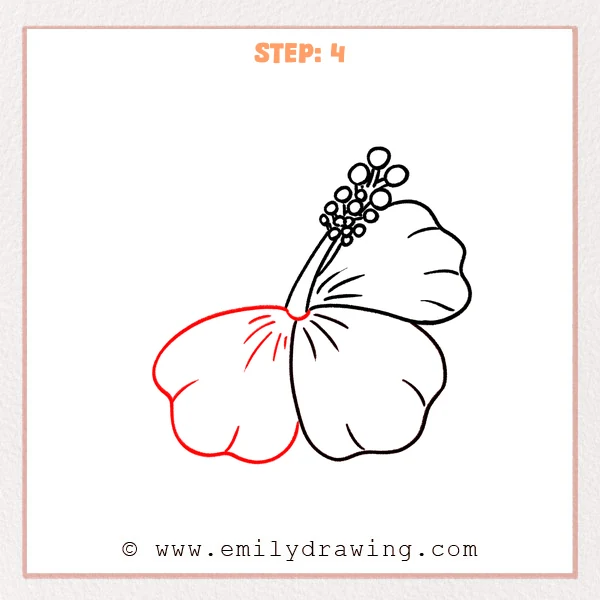
Add a third large petal extending to the left from the center, keeping it a bit flatter and wider than the lower petal.
Draw a few short curved fold lines near the base to show the petal opening outward.
Pro Tip: Use a broad, smooth curve on the left petal edge to keep it soft and natural.
Step 5: Add the Upper-Left Petal and Folds
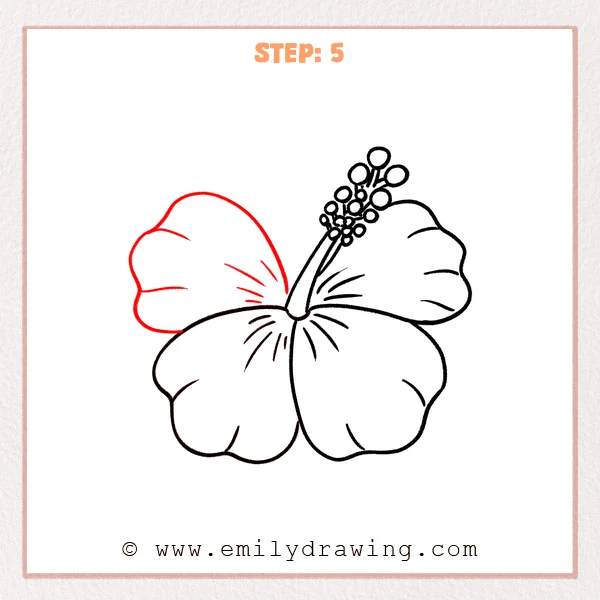
Above the left petal, draw another petal behind it, curving up and left from the center with a smooth edge.
Add two or three short curved fold lines inside, fanning out from the flower center like the others.
Pro Tip: Make this back petal slightly smaller so the overlap reads clearly.
Step 6: Add the Back Top Petal and Texture
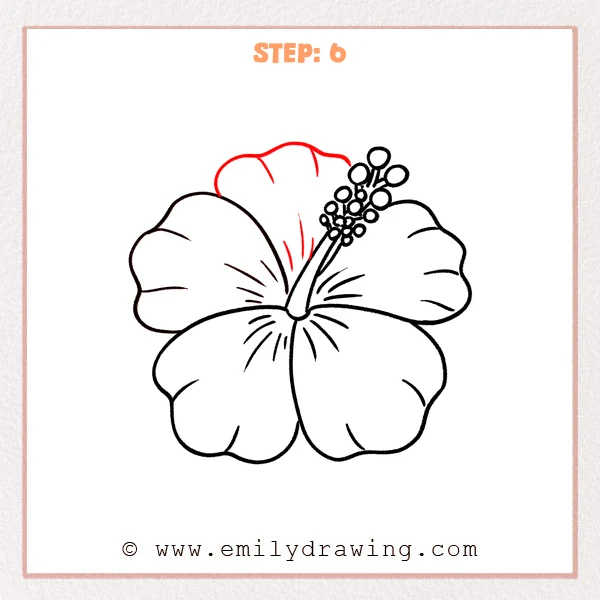
At the top of the flower, draw a back petal that rises upward from the center, with a few soft bumps along the edge.
Add a few short curved fold lines inside it, spreading upward from the flower center to match the other petals.
Pro Tip: Keep the back petal lines lighter and simpler so it stays in the background.
Step 7: Color in your drawing!
Fun Facts
- Many hawaiian flowers are known for bold colors and large, rounded petals.
- Flower centers often have strong, radiating lines that guide the eye outward.
- Overlapping petals help a simple drawing look more realistic.
Pin it now, Draw later!
Erase any sketchy overlaps and choose one clean outline for each petal edge.
If you want, ink the final lines and add color in flat, even fills first.
You now have a finished hawaiian flower drawing—try drawing a second one at a new angle to practice!
Get the FREE Printable Drawing Guide
FREE Download Printable Hawaiian Flower Drawing Tutorial
Frequently Asked Questions
How do I make the petals look more natural?
Use smooth, wide curves and vary the petal sizes slightly so they do not match.
What if my flower looks uneven?
Adjust by widening one petal or rounding the edges until the shape feels balanced.
Can I color this flower in a simple way?
Yes—start with one main petal color, then add a lighter center and a darker stamen color.