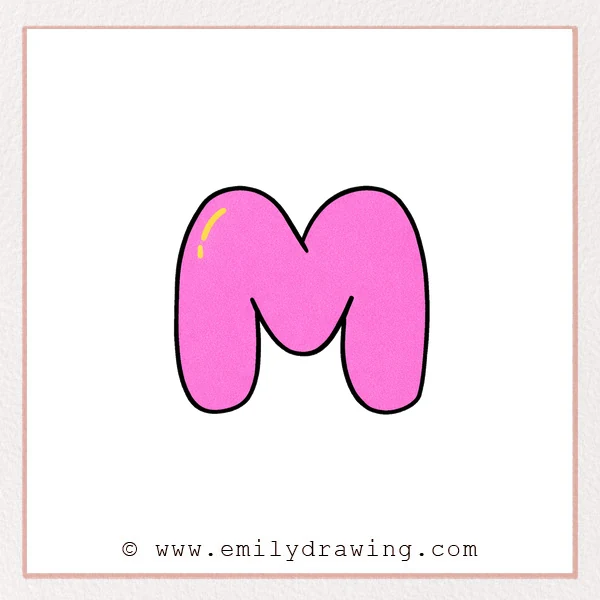
This easy drawing tutorial shows how to draw a bubble letter m step by step. It is a calm, simple way to practice lettering and build confidence. Follow along slowly, and you will have a puffy bubble m you can color and decorate.
What You Will Need
- Pencil
- Eraser
- Black marker or pen
- Coloring tools (markers, crayons, or colored pencils)
Here are my RECOMMENDED Art Supplies!
- Crayola Coloring Set (140 Pieces – Mega Value!)
- 24 Colored Crayon Set
- A4 Printer Paper
- Crayola Coloring Pencils
- HP Home Printer with Instant Ink!
Time needed:
16 minutes.
Step-by-Step Drawing Guide
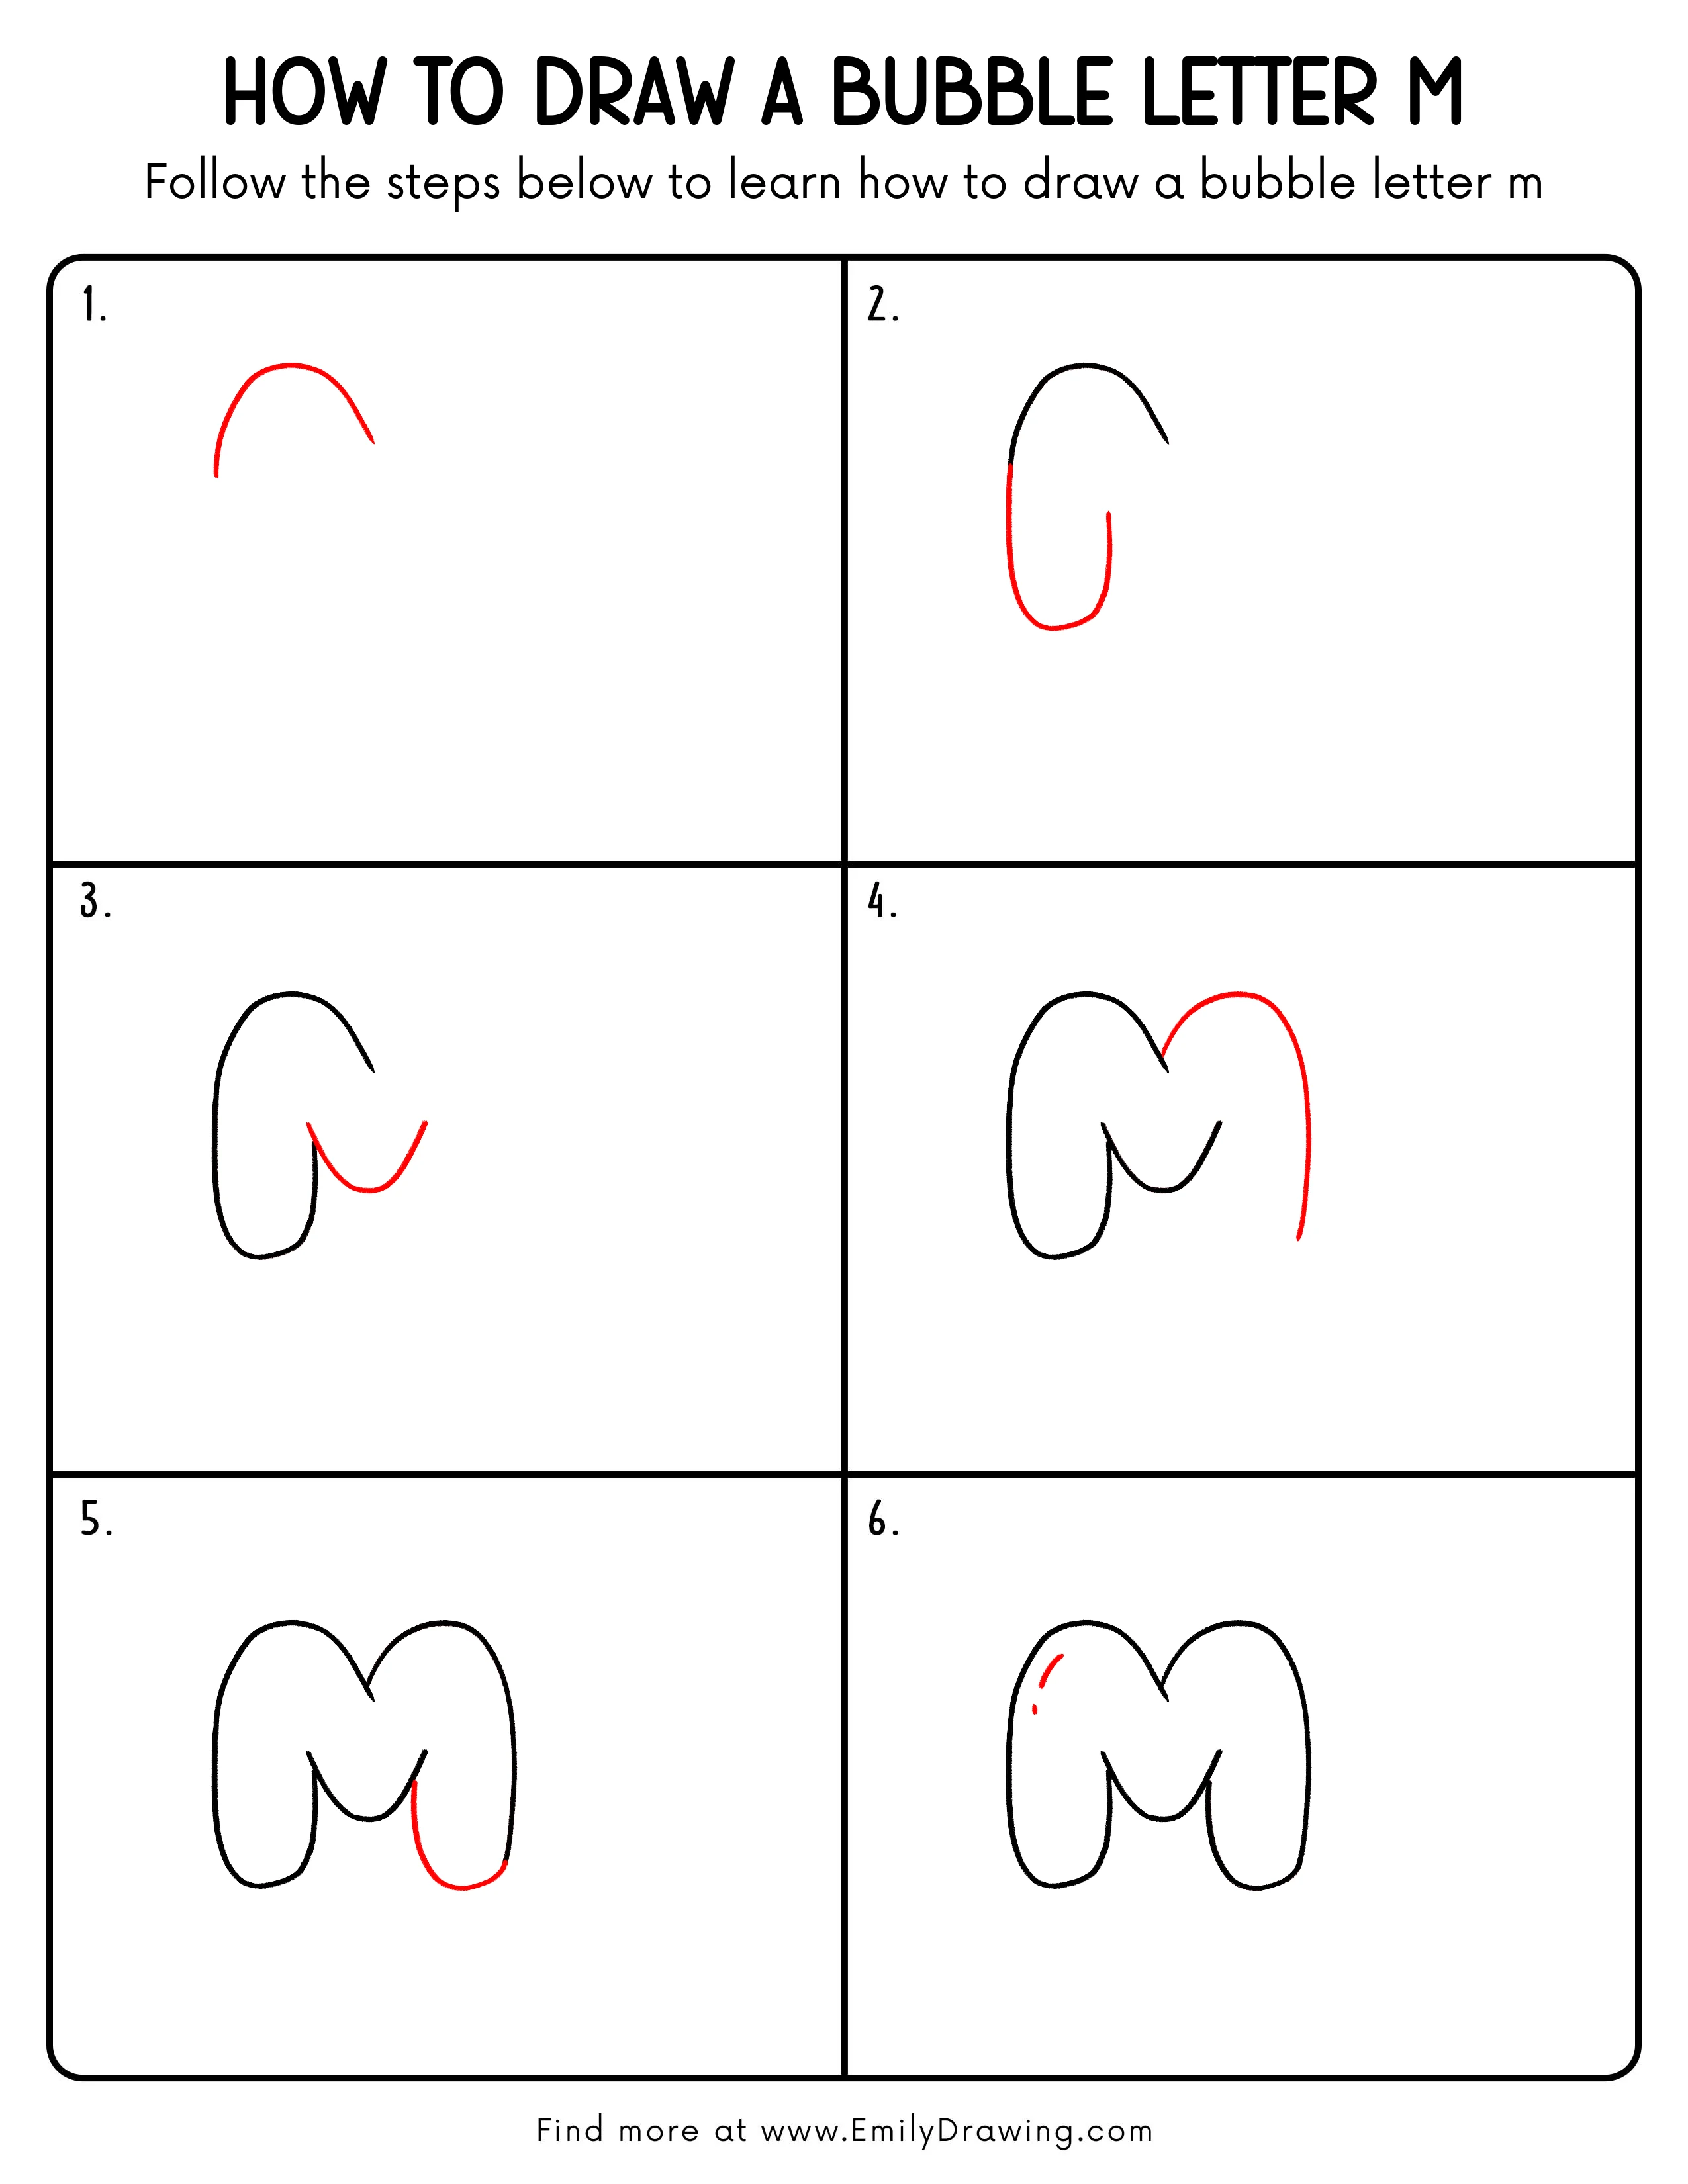
Step 1: Draw the Top Bubble Arch
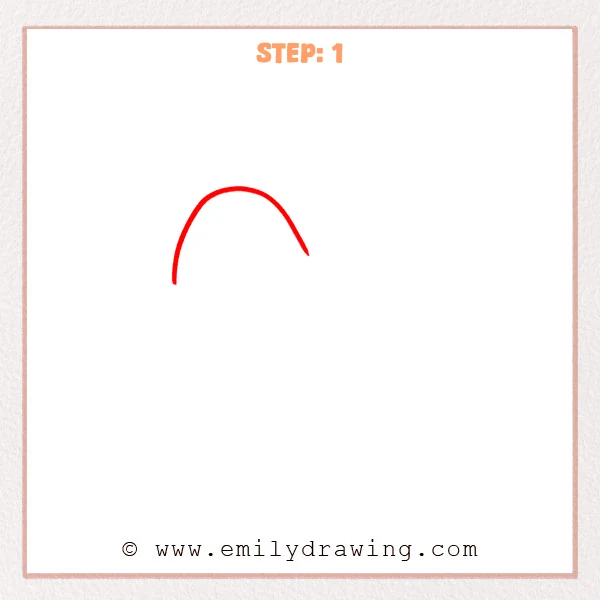
Start in the upper half of your page and sketch one wide curved line, like an upside-down “U.” Let both ends drop slightly downward, and keep the bottom open for now.
Pro Tip: A rounder, wider arch will make the bubble letter look softer.
Step 2: Add the Left Pillar and Inner Curve
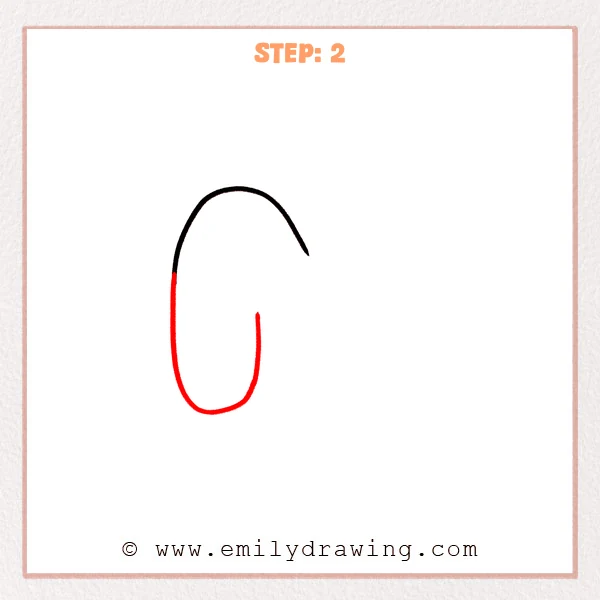
From the left end of the arch, extend a long rounded line downward, then sweep it into a soft curve along the bottom. Inside the shape, add a shorter vertical line rising upward to start the inner gap of the bubble letter m.
Pro Tip: Keep the bottom turn rounded so the bubble letter feels puffy.
Step 3: Draw the Middle Rounded Dip
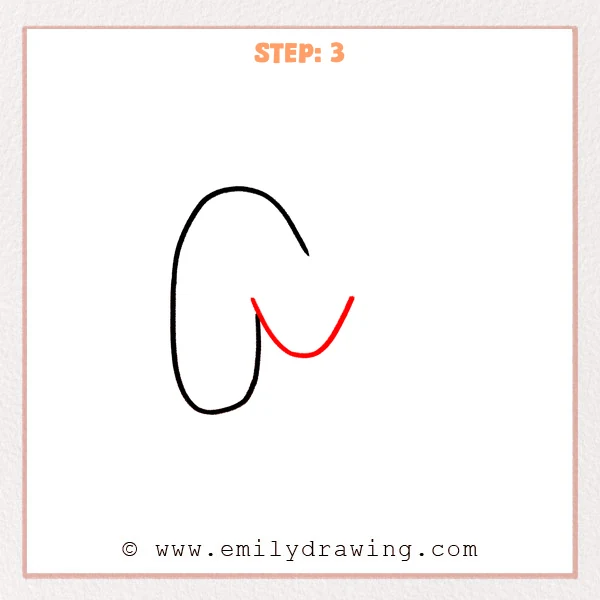
From the top of the short inner line, sweep a smooth curve to the right, dipping down and rising again like a wide “U.” This rounded dip becomes the middle valley of the bubble letter m, so keep it soft and even.
Pro Tip: Avoid a sharp point in the dip so it stays bubbly.
Step 4: Add the Right Arch and Outer Downstroke
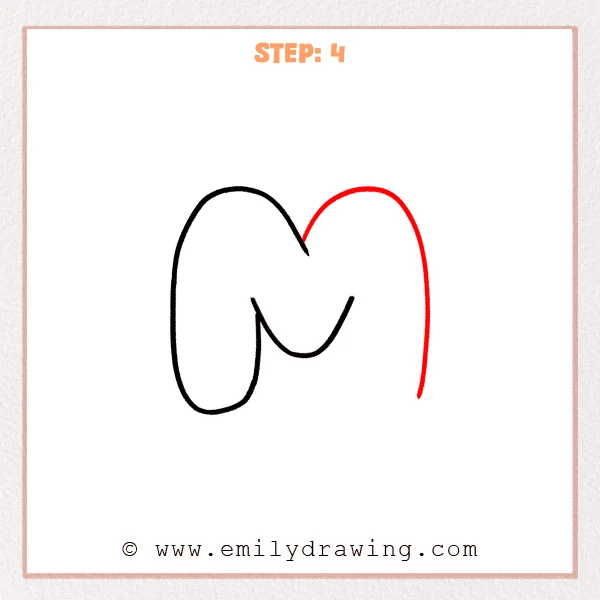
From the upper right side of the middle dip, sketch a second rounded arch, like a smaller upside-down “U.” Then pull a smooth outer line straight down from the right end, stopping before you close the bottom.
Pro Tip: Match the thickness of the right side to the left for balance.
Step 5: Add the Right Inner Edge and Bottom Round
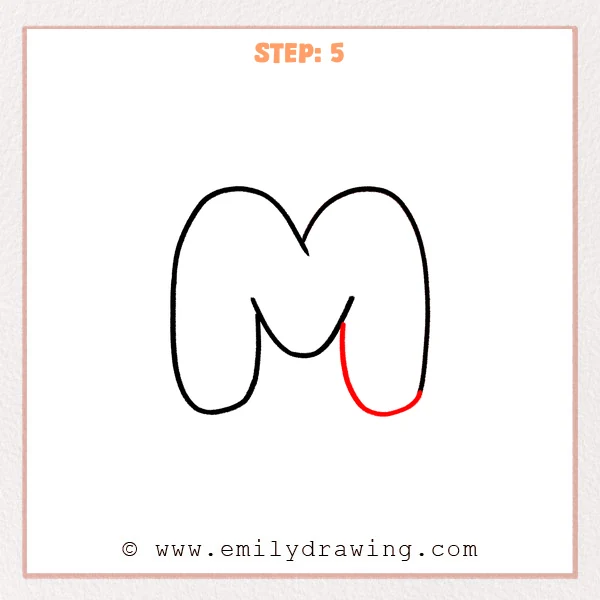
Inside the right outer stroke, draw a matching inner line downward, connecting smoothly to the middle curve. At the bottom, round it gently toward the right to start the puffy thickness of the right leg.
Pro Tip: Keep the inner line roughly parallel to the outer line for a true bubble look.
Step 6: Add Bubble Highlights
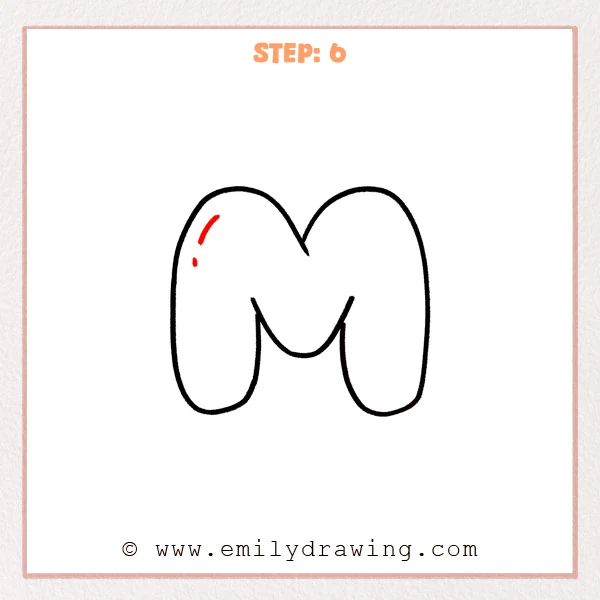
On the upper left “shoulder” of the bubble letter m, add a short curved stroke to show a shiny highlight. Below it, place a tiny dash or dot so the shine feels layered and soft.
Pro Tip: Leave a small gap from the outline so the highlight reads as shine.
Step 7: Color in your drawing!
Fun Facts
- Bubble letters look “puffy” because they use rounded edges and even thickness.
- Highlights make drawings look shiny by showing where light might reflect.
- Practicing one letter at a time is a smart way to improve hand lettering.
Pin it now, Draw later!

Now you have a clean bubble letter m with a shiny highlight. Try coloring it with one main color, then add a darker shade along one side for simple depth. If you want extra sparkle, leave the highlight area white or use a light gray shadow.
A common beginner mistake is making one side much thicker than the other. If that happens, lightly erase and redraw the inner line to balance it.
Keep practicing this step by step drawing, and try making a whole word with bubble letters next. If you would like, draw more letters and build your own easy drawing tutorial set.
Get the FREE Printable Drawing Guide
FREE Download Printable Bubble Letter M Drawing Tutorial
Frequently Asked Questions
How do I make my bubble letter m look more even?
Use the outer outline as a guide and keep the inner lines roughly parallel.
What if my curves look wobbly?
Slow down and sketch lightly first, then trace once you like the shape.
How can I add a shadow to my bubble letters?
Add a thin darker line on one side and blend it outward with a lighter color.