
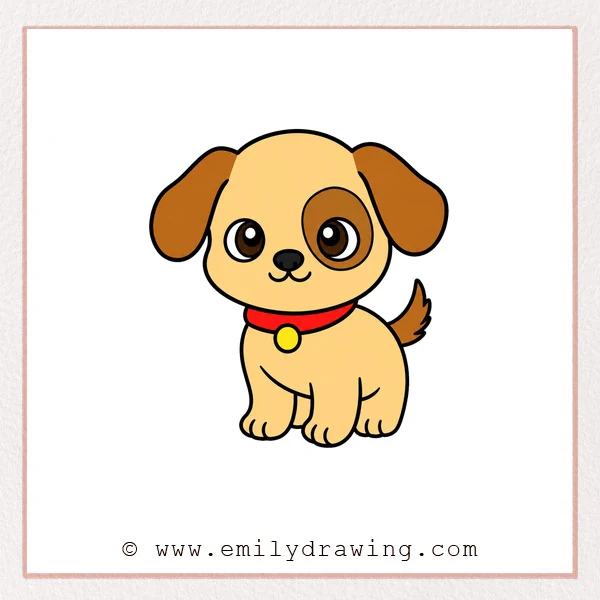
Learn how to draw puppy with this calm and easy drawing tutorial. This step by step drawing is made for beginners who want a cute sitting puppy with floppy ears, bright eyes, and a fluffy tail. Take your time with each shape, and keep your lines soft and rounded.
What You Will Need
- A pencil
- An eraser
- Drawing paper
- A black marker or pen
- Coloring tools, such as crayons or colored pencils
Here are my RECOMMENDED Art Supplies!
- Crayola Coloring Set (140 Pieces – Mega Value!)
- 24 Colored Crayon Set
- A4 Printer Paper
- Crayola Coloring Pencils
- HP Home Printer with Instant Ink!
Time needed:
22 minutes.
Step-by-Step Drawing Guide
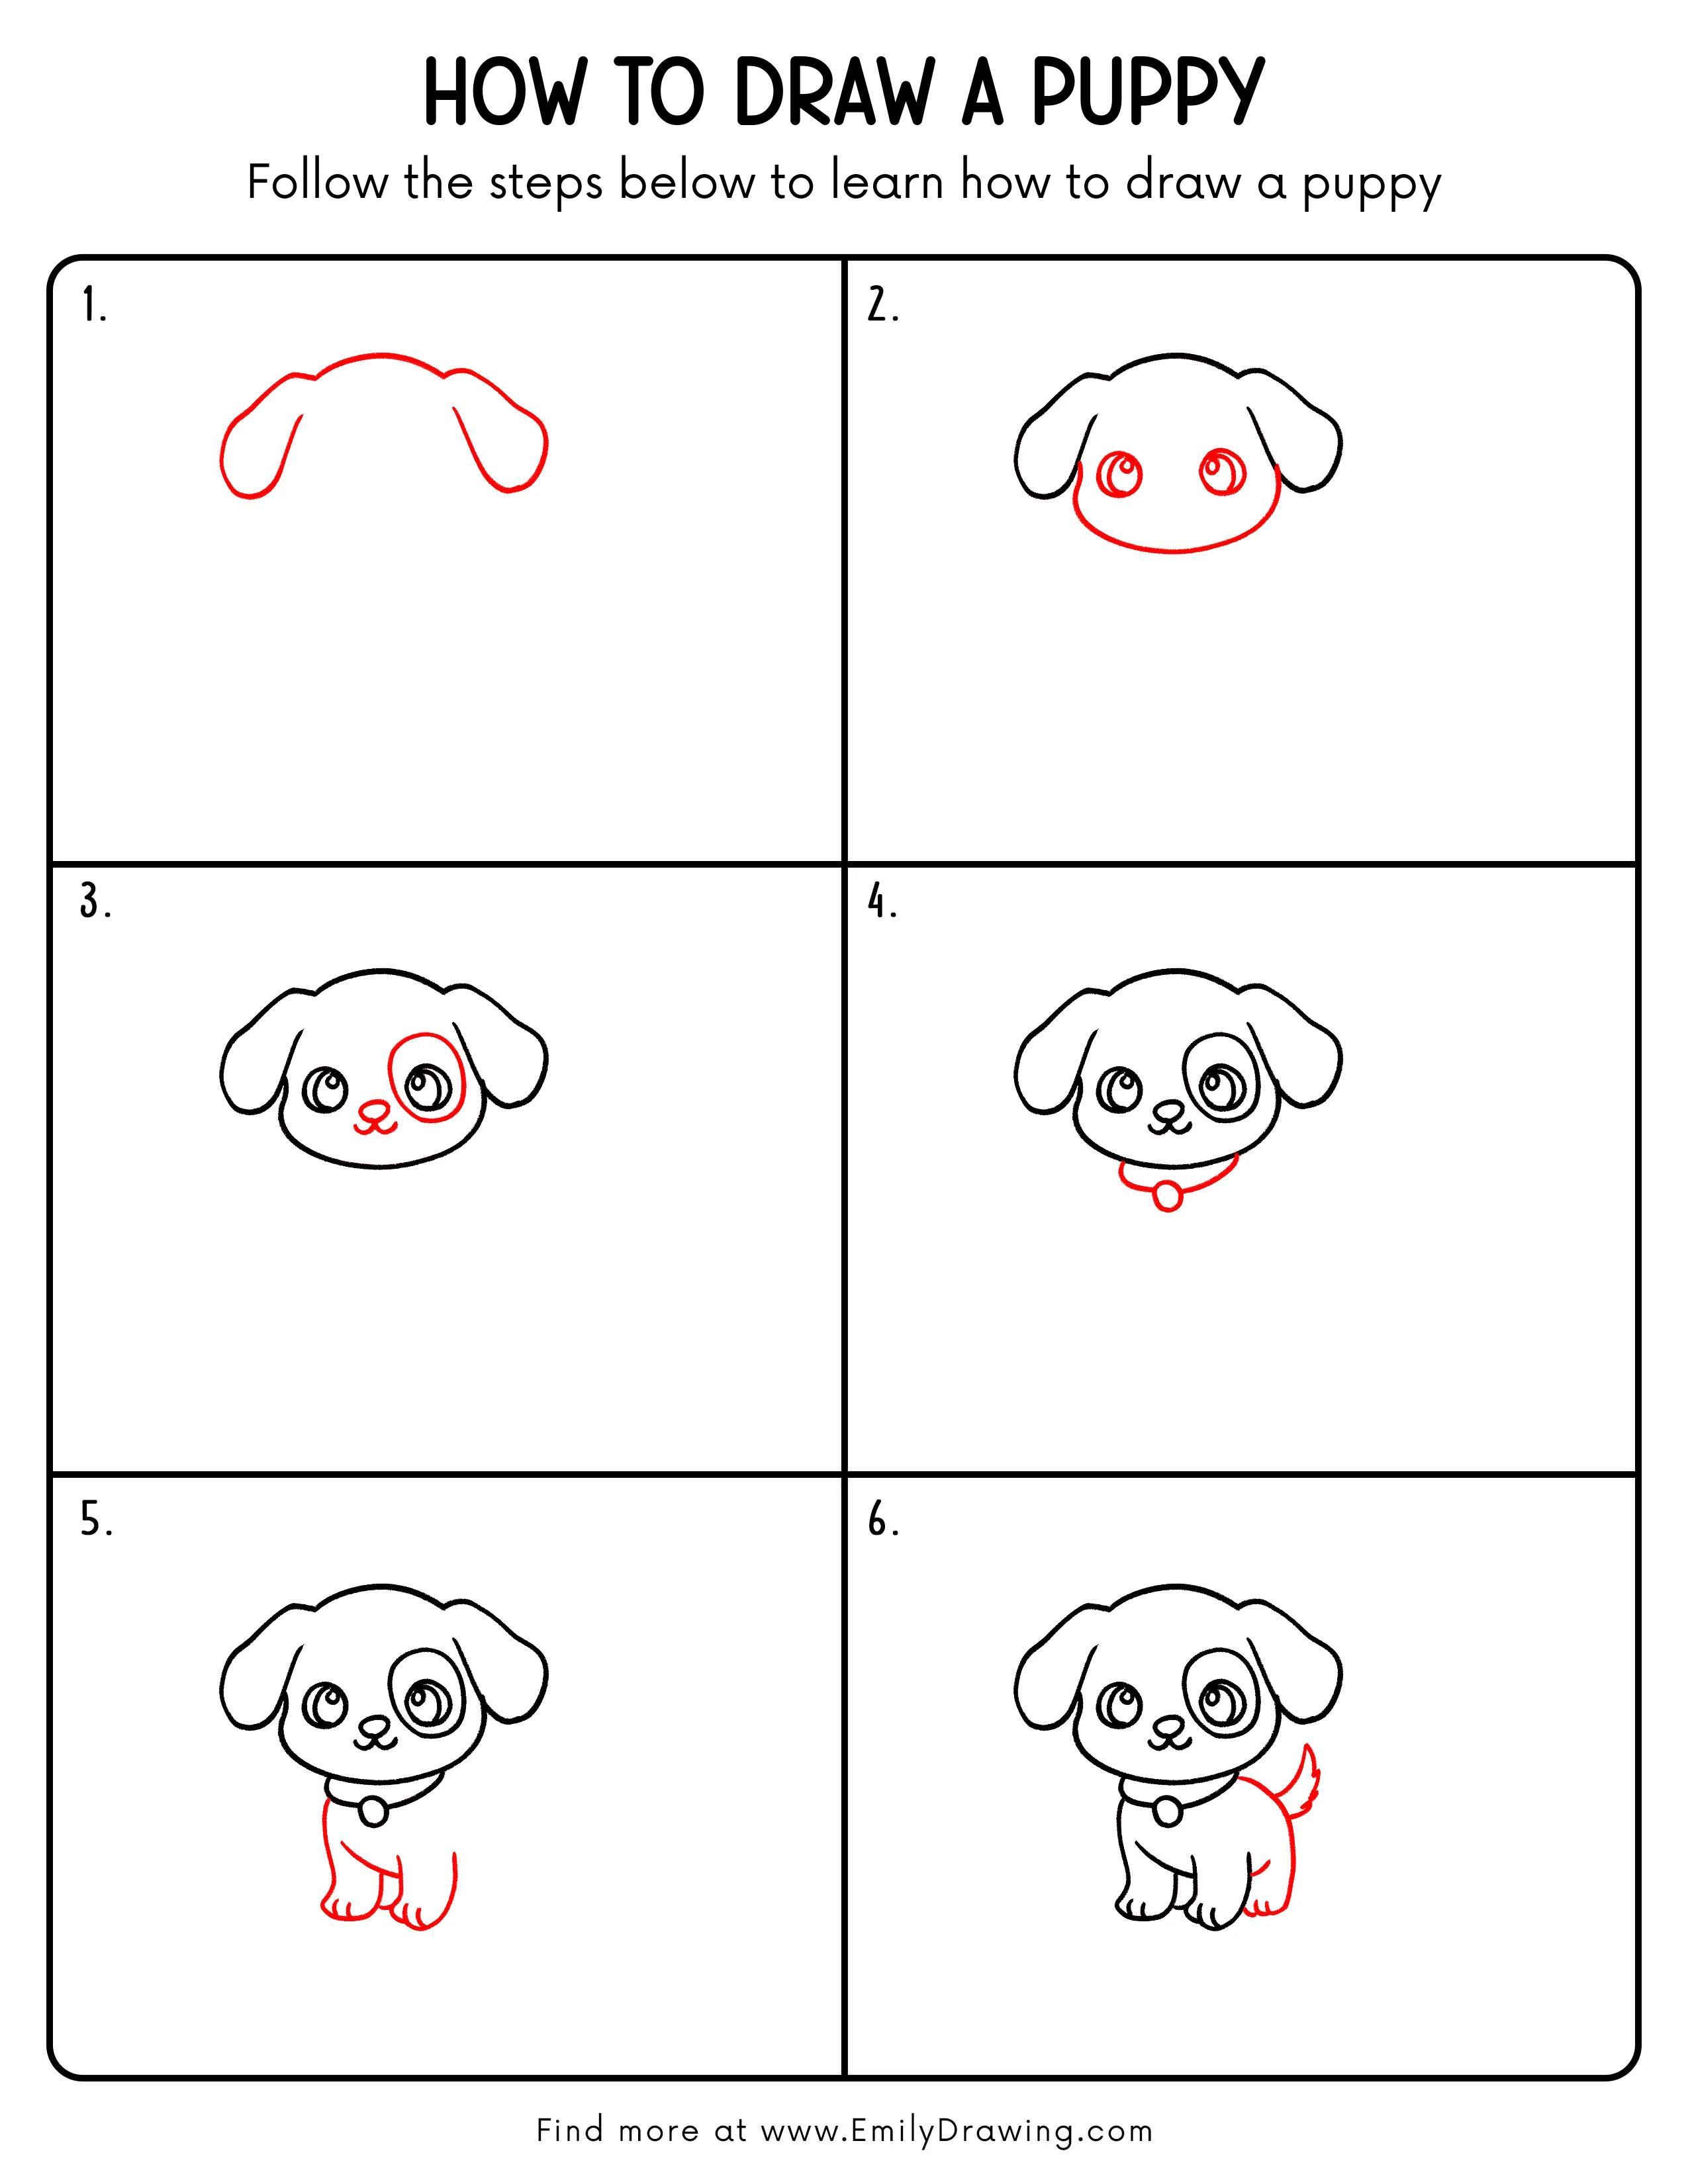
Step 1: Draw the Puppy’s Head and Ear Outline
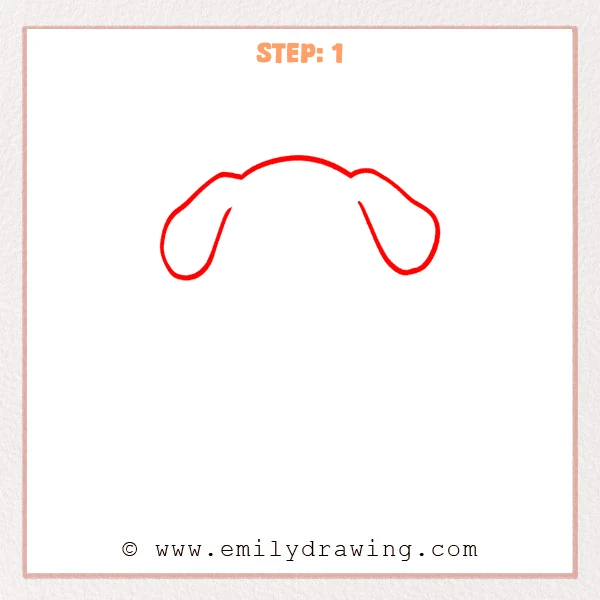
Start with a long, soft curved line across the top of the puppy’s head. Add two drooping ear shapes on both sides, keeping the bottom open for now.
Pro Tip: Keep both ears close in size so the puppy looks balanced.
Step 2: Add the Lower Face and Eyes
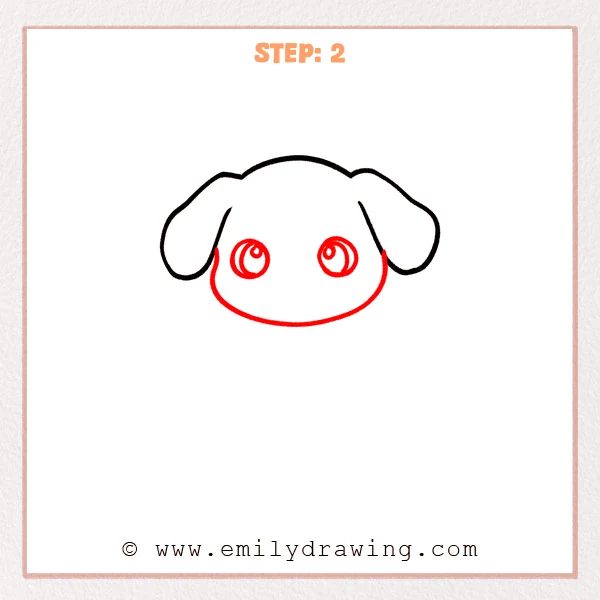
Draw a rounded chin line between the two ears to form the puppy’s face. Add two large round eyes inside the face, with smaller circles for shiny highlights.
Pro Tip: Keep both eyes at the same height so the puppy’s expression looks cute.
Step 3: Draw the Nose, Mouth, and Eye Patch
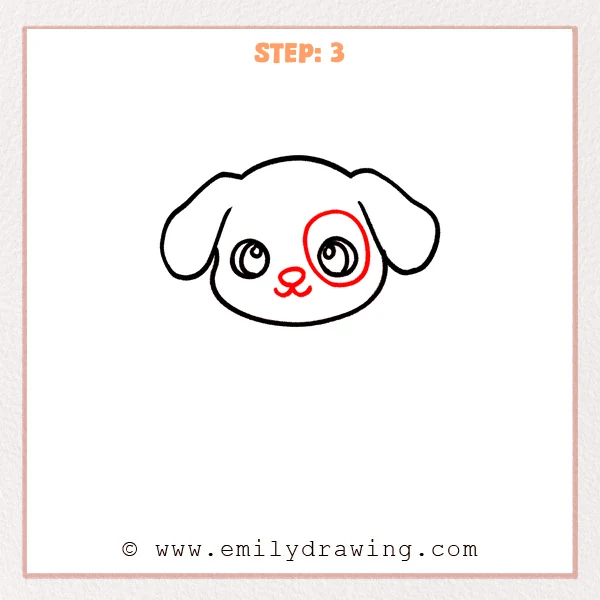
Draw a small oval nose slightly below the center between the eyes. Add a soft W-shaped mouth under the nose, then draw a large round patch around one eye.
Pro Tip: The eye patch can be a little larger, but leave space for the eye highlights.
Step 4: Add the Collar and Tag
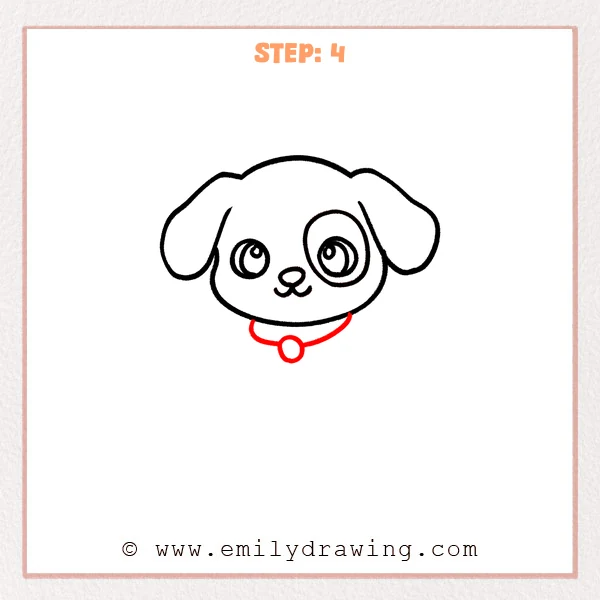
Draw a curved collar line under the puppy’s face. Add a small round tag hanging from the center of the collar.
Pro Tip: Place the tag directly under the face so the collar looks centered.
Step 5: Draw the Body and Front Paws
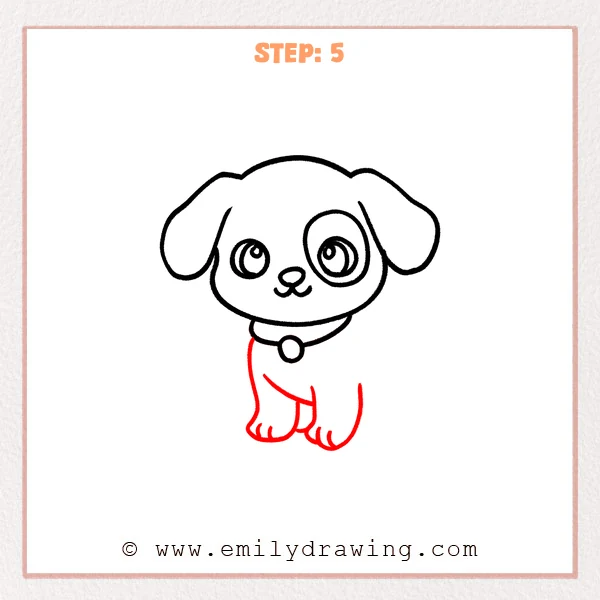
Draw the puppy’s sitting body outline below the collar. Add two front paws at the bottom, using short curved toe lines for detail.
Pro Tip: Keep the body smaller than the head so the puppy looks round and cute.
Step 6: Add the Back Leg and Tail
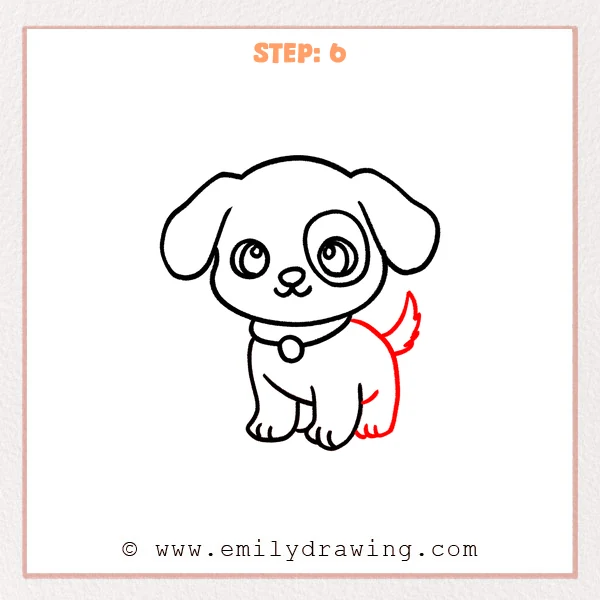
Draw the back leg and rounded hind paw on the right side of the body. Then add an upward-curving tail behind the body, with a slightly fluffy tip.
Pro Tip: Let the tail grow from the side of the body so it does not look too far away.
Step 7: Color in your drawing!
Fun Facts
Puppies use their tails to show many feelings, such as excitement and curiosity. Their floppy ears can make their faces look extra soft and friendly. Big shiny eyes are often used in cute puppy drawings because they help create a gentle expression.
Pin it now, Draw later!
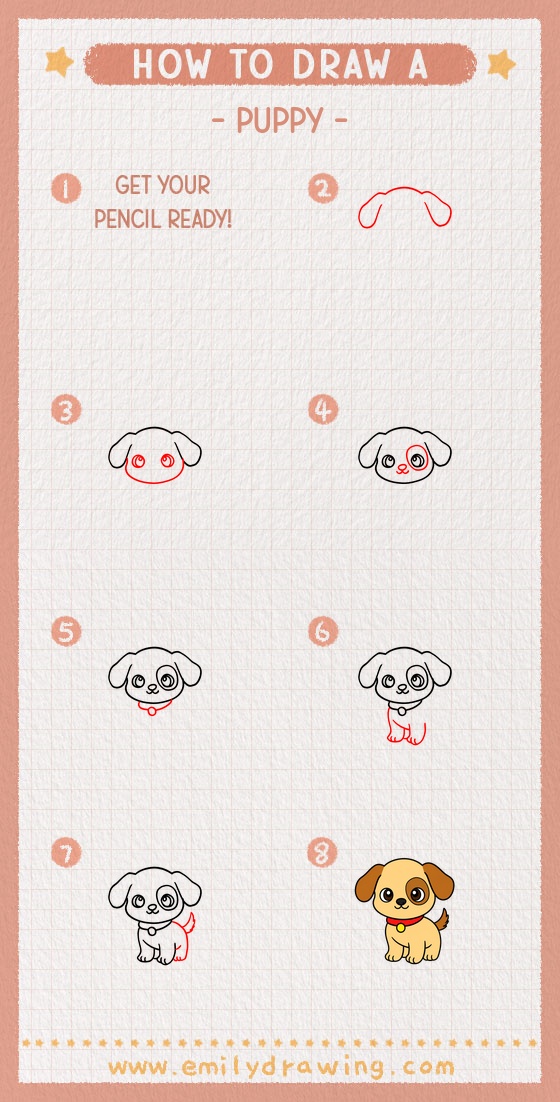
Now you have finished a cute puppy drawing for beginners. Trace your favorite lines with a marker, then erase extra pencil marks carefully. You can color the eye patch, ears, collar, and tag to make your puppy unique.
Keep practicing this easy drawing tutorial, and try changing the puppy’s colors or tail shape next time.
Get the FREE Printable Drawing Guide
FREE Download Printable Puppy Drawing Tutorial
Frequently Asked Questions
Is this puppy drawing good for beginners?
Yes, this step by step drawing uses simple curves, circles, and oval shapes. It is friendly for beginners and young artists.
How can I make my puppy look cuter?
Make the eyes large, keep the head rounded, and use soft curved lines. A small collar tag can also add charm.
Can I color the puppy after drawing it?
Yes, coloring is a great final step. Try light brown ears, a darker eye patch, and a bright collar.



