
Learning how to draw pretzel shapes can be fun and simple.
This easy drawing tutorial uses smooth curves, rounded ends, and cute face details.
Take your time with each step, and keep your lines soft.
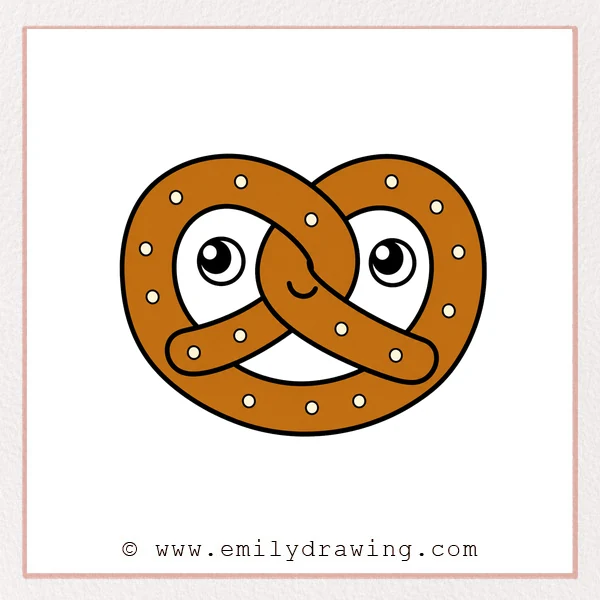
What You Will Need
- Pencil
- Eraser
- Black marker or pen
- Red pencil for new guide lines
- Coloring tools, such as crayons or colored pencils
- Drawing paper
Here are my RECOMMENDED Art Supplies!
- Crayola Coloring Set (140 Pieces – Mega Value!)
- 24 Colored Crayon Set
- A4 Printer Paper
- Crayola Coloring Pencils
- HP Home Printer with Instant Ink!
Time needed:
25 minutes.
Step-by-Step Drawing Guide
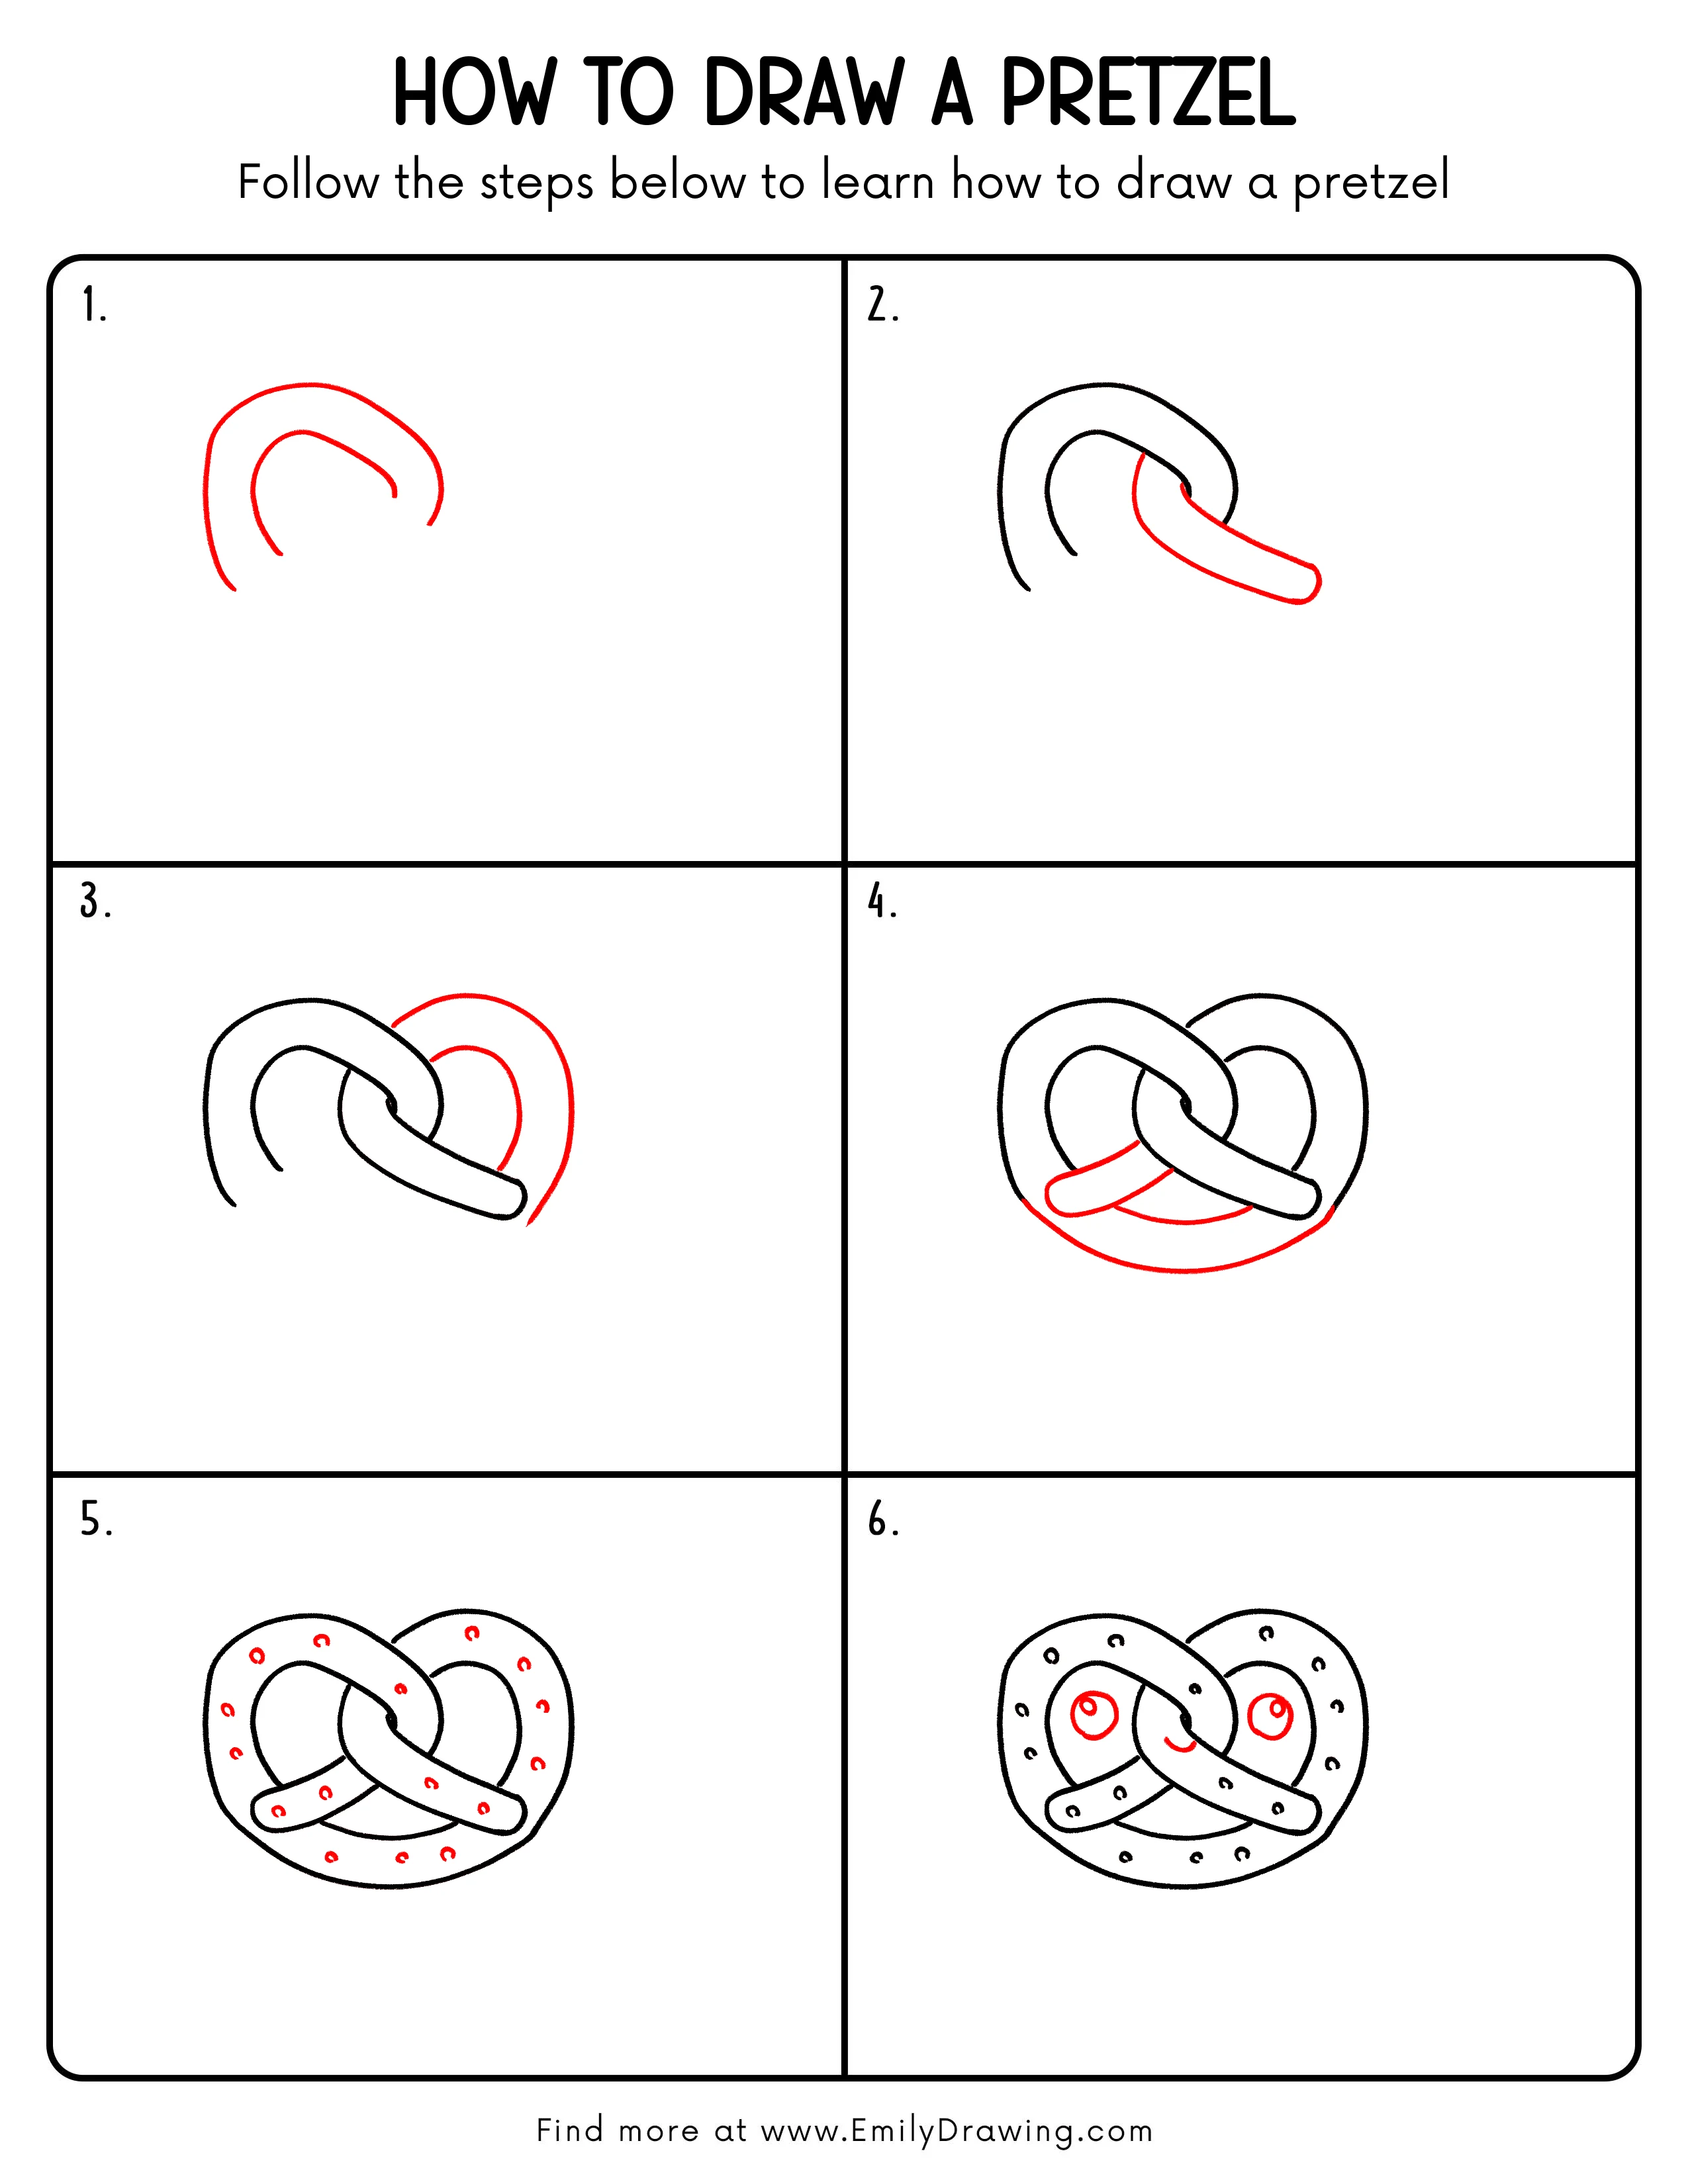
Step 1: Draw the Outer Curves of the Pretzel
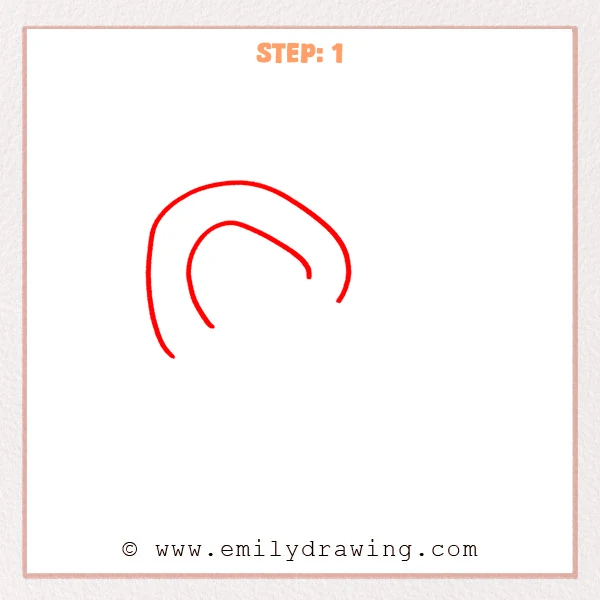
Start at the lower left and draw a large curve that rises over the top and bends to the right.
Add a shorter inner curve, keeping it close to the same rounded direction.
Pro Tip: Leave even space between the two curves so the pretzel looks soft and full.
Step 2: Add the Right Stretching Pretzel Strip
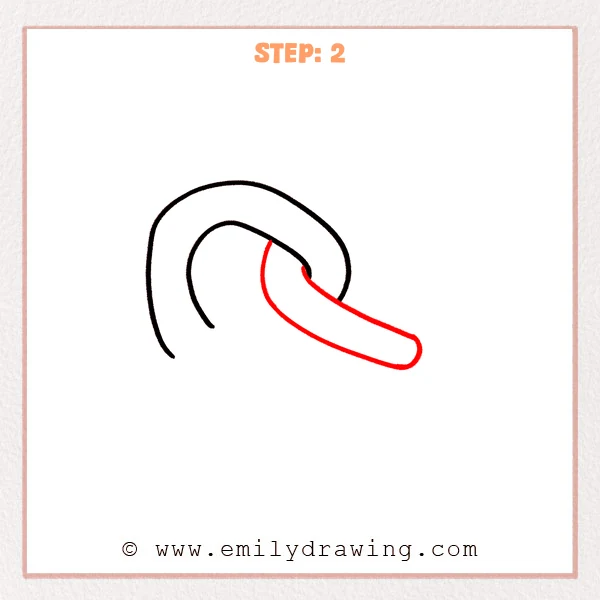
From the middle-right area, draw a long curve that stretches down to the right.
Add a parallel curve around it, then close the end with a rounded tip.
Pro Tip: Let the right strip become slightly wider so the rounded end looks natural.
Step 3: Draw the Large Right Loop
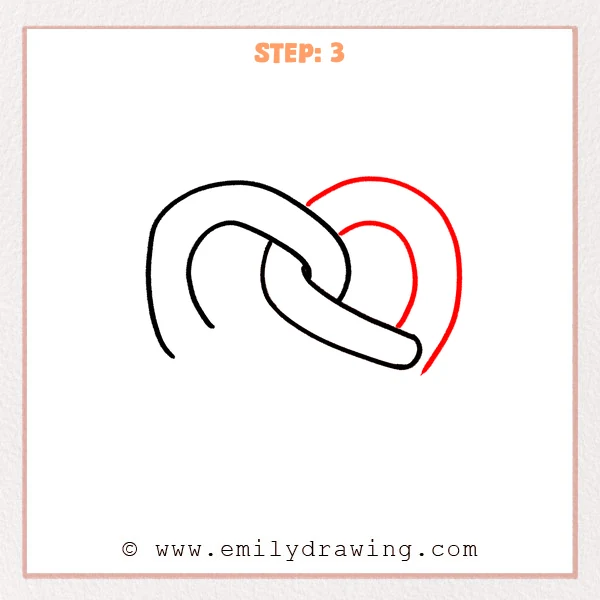
Add a new pair of curves on the right, wrapping from the top down into a large loop.
Keep the inner curve spaced from the outer curve, and let it come close to the right pretzel strip below.
Pro Tip: The right loop can sit slightly higher than the left so the overlapping shape reads clearly.
Step 4: Add the Lower Left Crossing Strip
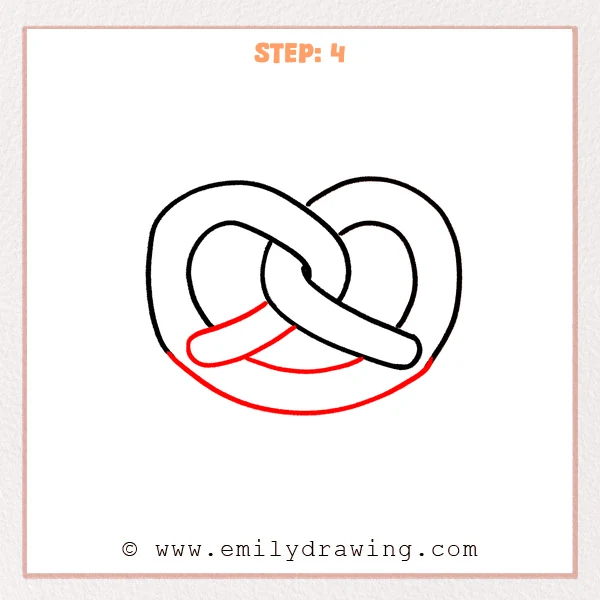
Draw a rounded pretzel strip at the lower left, letting it reach toward the middle.
Add a wide bottom curve to gently connect the left and right sides.
Pro Tip: Keep the bottom curve steady so the pretzel feels balanced on the page.
Step 5: Add the Salt Sprinkles
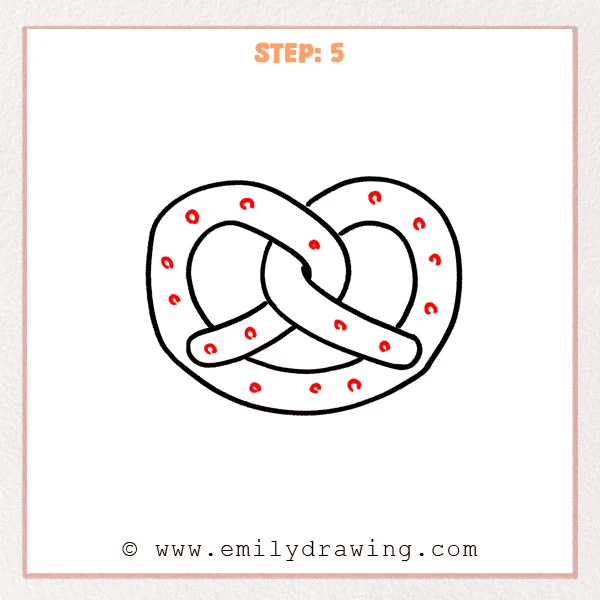
Draw many tiny circles and half-circles across the pretzel surface.
Spread the salt sprinkles in different spots so the whole pretzel looks tastier.
Pro Tip: The salt pieces can vary slightly in size, but keep them from crowding together.
Step 6: Draw the Cute Face
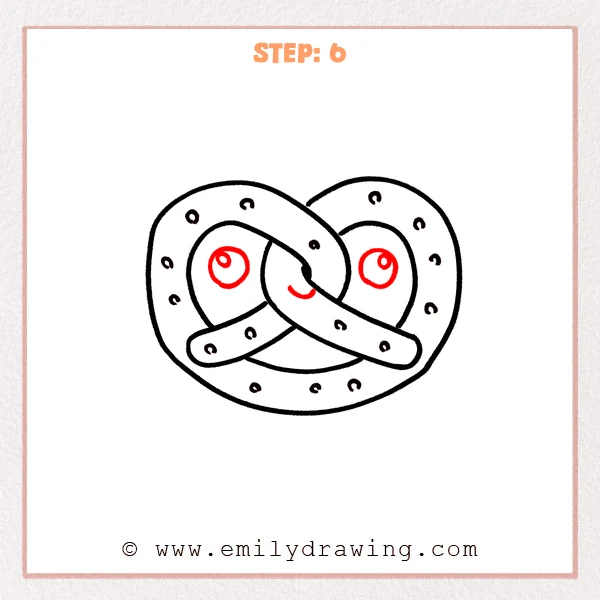
Draw one large round eye inside each opening, leaving a small highlight in each one.
Add a short curved line below the middle crossing area to make a smiling mouth.
Pro Tip: Keep both eyes at a similar height so the face looks neat and cute.
Step 7: Color in your drawing!
Fun Facts
Pretzels are known for their twisty shape and rounded loops.
Some pretzels are soft and chewy, while others are small and crunchy.
The tiny salt pieces make a pretzel easy to recognize in drawings.
Pin it now, Draw later!
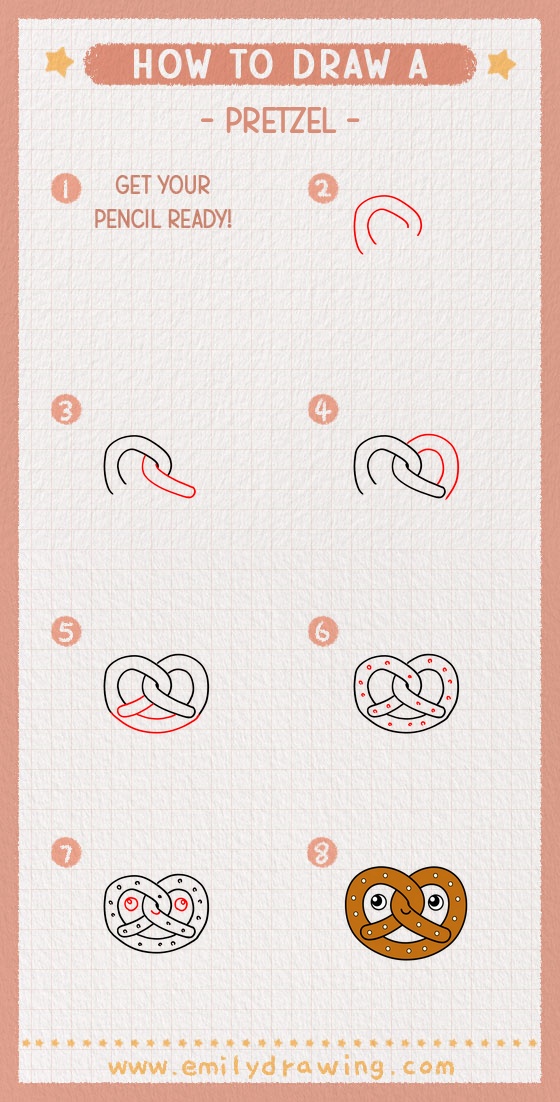
Now you know how to draw pretzel shapes using simple curves and clear details.
Trace your best lines with a marker, then erase any extra sketch marks.
Color the pretzel golden brown, and leave the salt sprinkles bright.
Try this drawing for beginners again with a different face or extra toppings.
Get the FREE Printable Drawing Guide
FREE Download Printable Pretzel Drawing Tutorial
Frequently Asked Questions
Is this pretzel step by step drawing good for beginners?
Yes, this step by step drawing uses simple curved lines and rounded shapes.
Beginners can follow each part slowly and build the pretzel piece by piece.
How can I make my pretzel drawing look softer?
Use wide curves and rounded ends instead of sharp corners.
A little shading along the lower edges can also make it look soft and puffy.
What colors should I use for a pretzel?
Use golden brown for the main pretzel shape.
Keep the salt sprinkles white or very light, so they stand out clearly.



