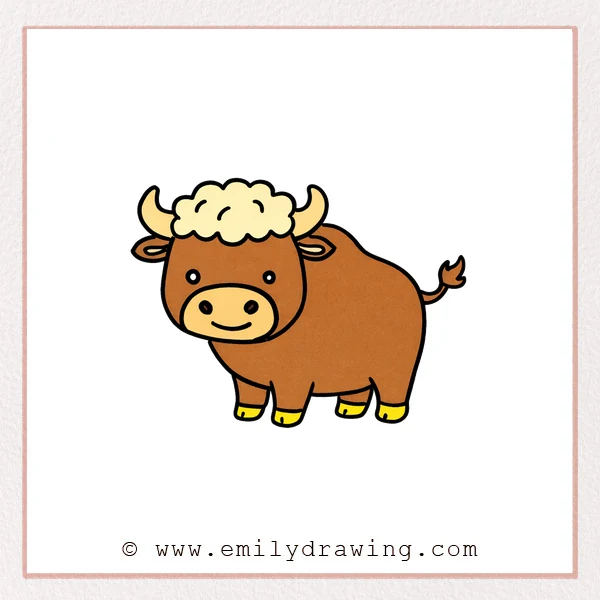
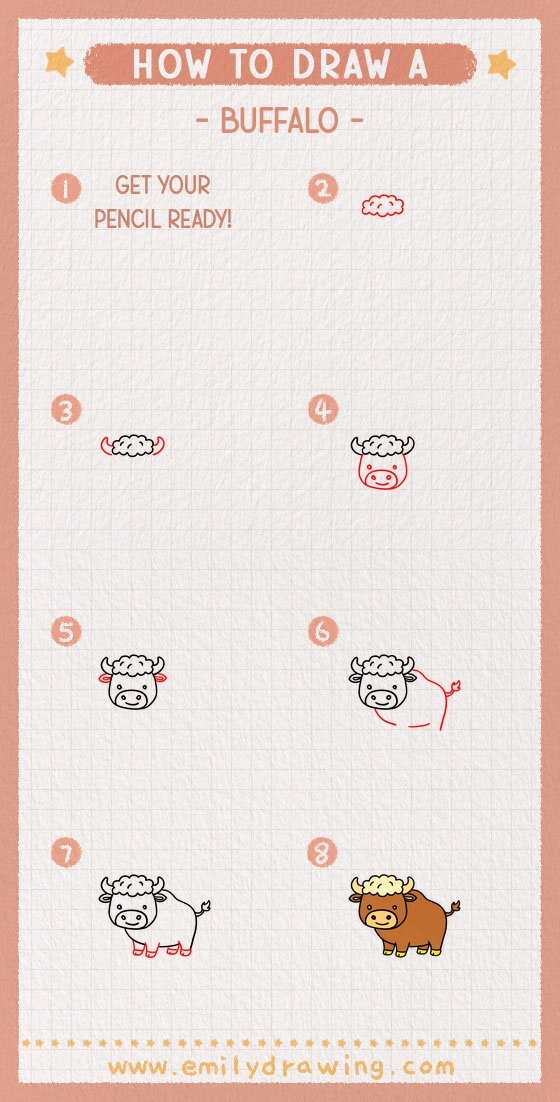
This easy drawing tutorial shows how to draw a buffalo step by step. You will build a friendly buffalo using simple shapes and smooth curves. Take your time and enjoy each small change as the drawing grows.
What You Will Need
- Pencil
- Eraser
- Black marker or pen (optional for outlining)
- Coloring tools (crayons, colored pencils, or markers)
- Paper
Here are my RECOMMENDED Art Supplies!
- Crayola Coloring Set (140 Pieces – Mega Value!)
- 24 Colored Crayon Set
- A4 Printer Paper
- Crayola Coloring Pencils
- HP Home Printer with Instant Ink!
Time needed:
14 minutes.
Step-by-Step Drawing Guide
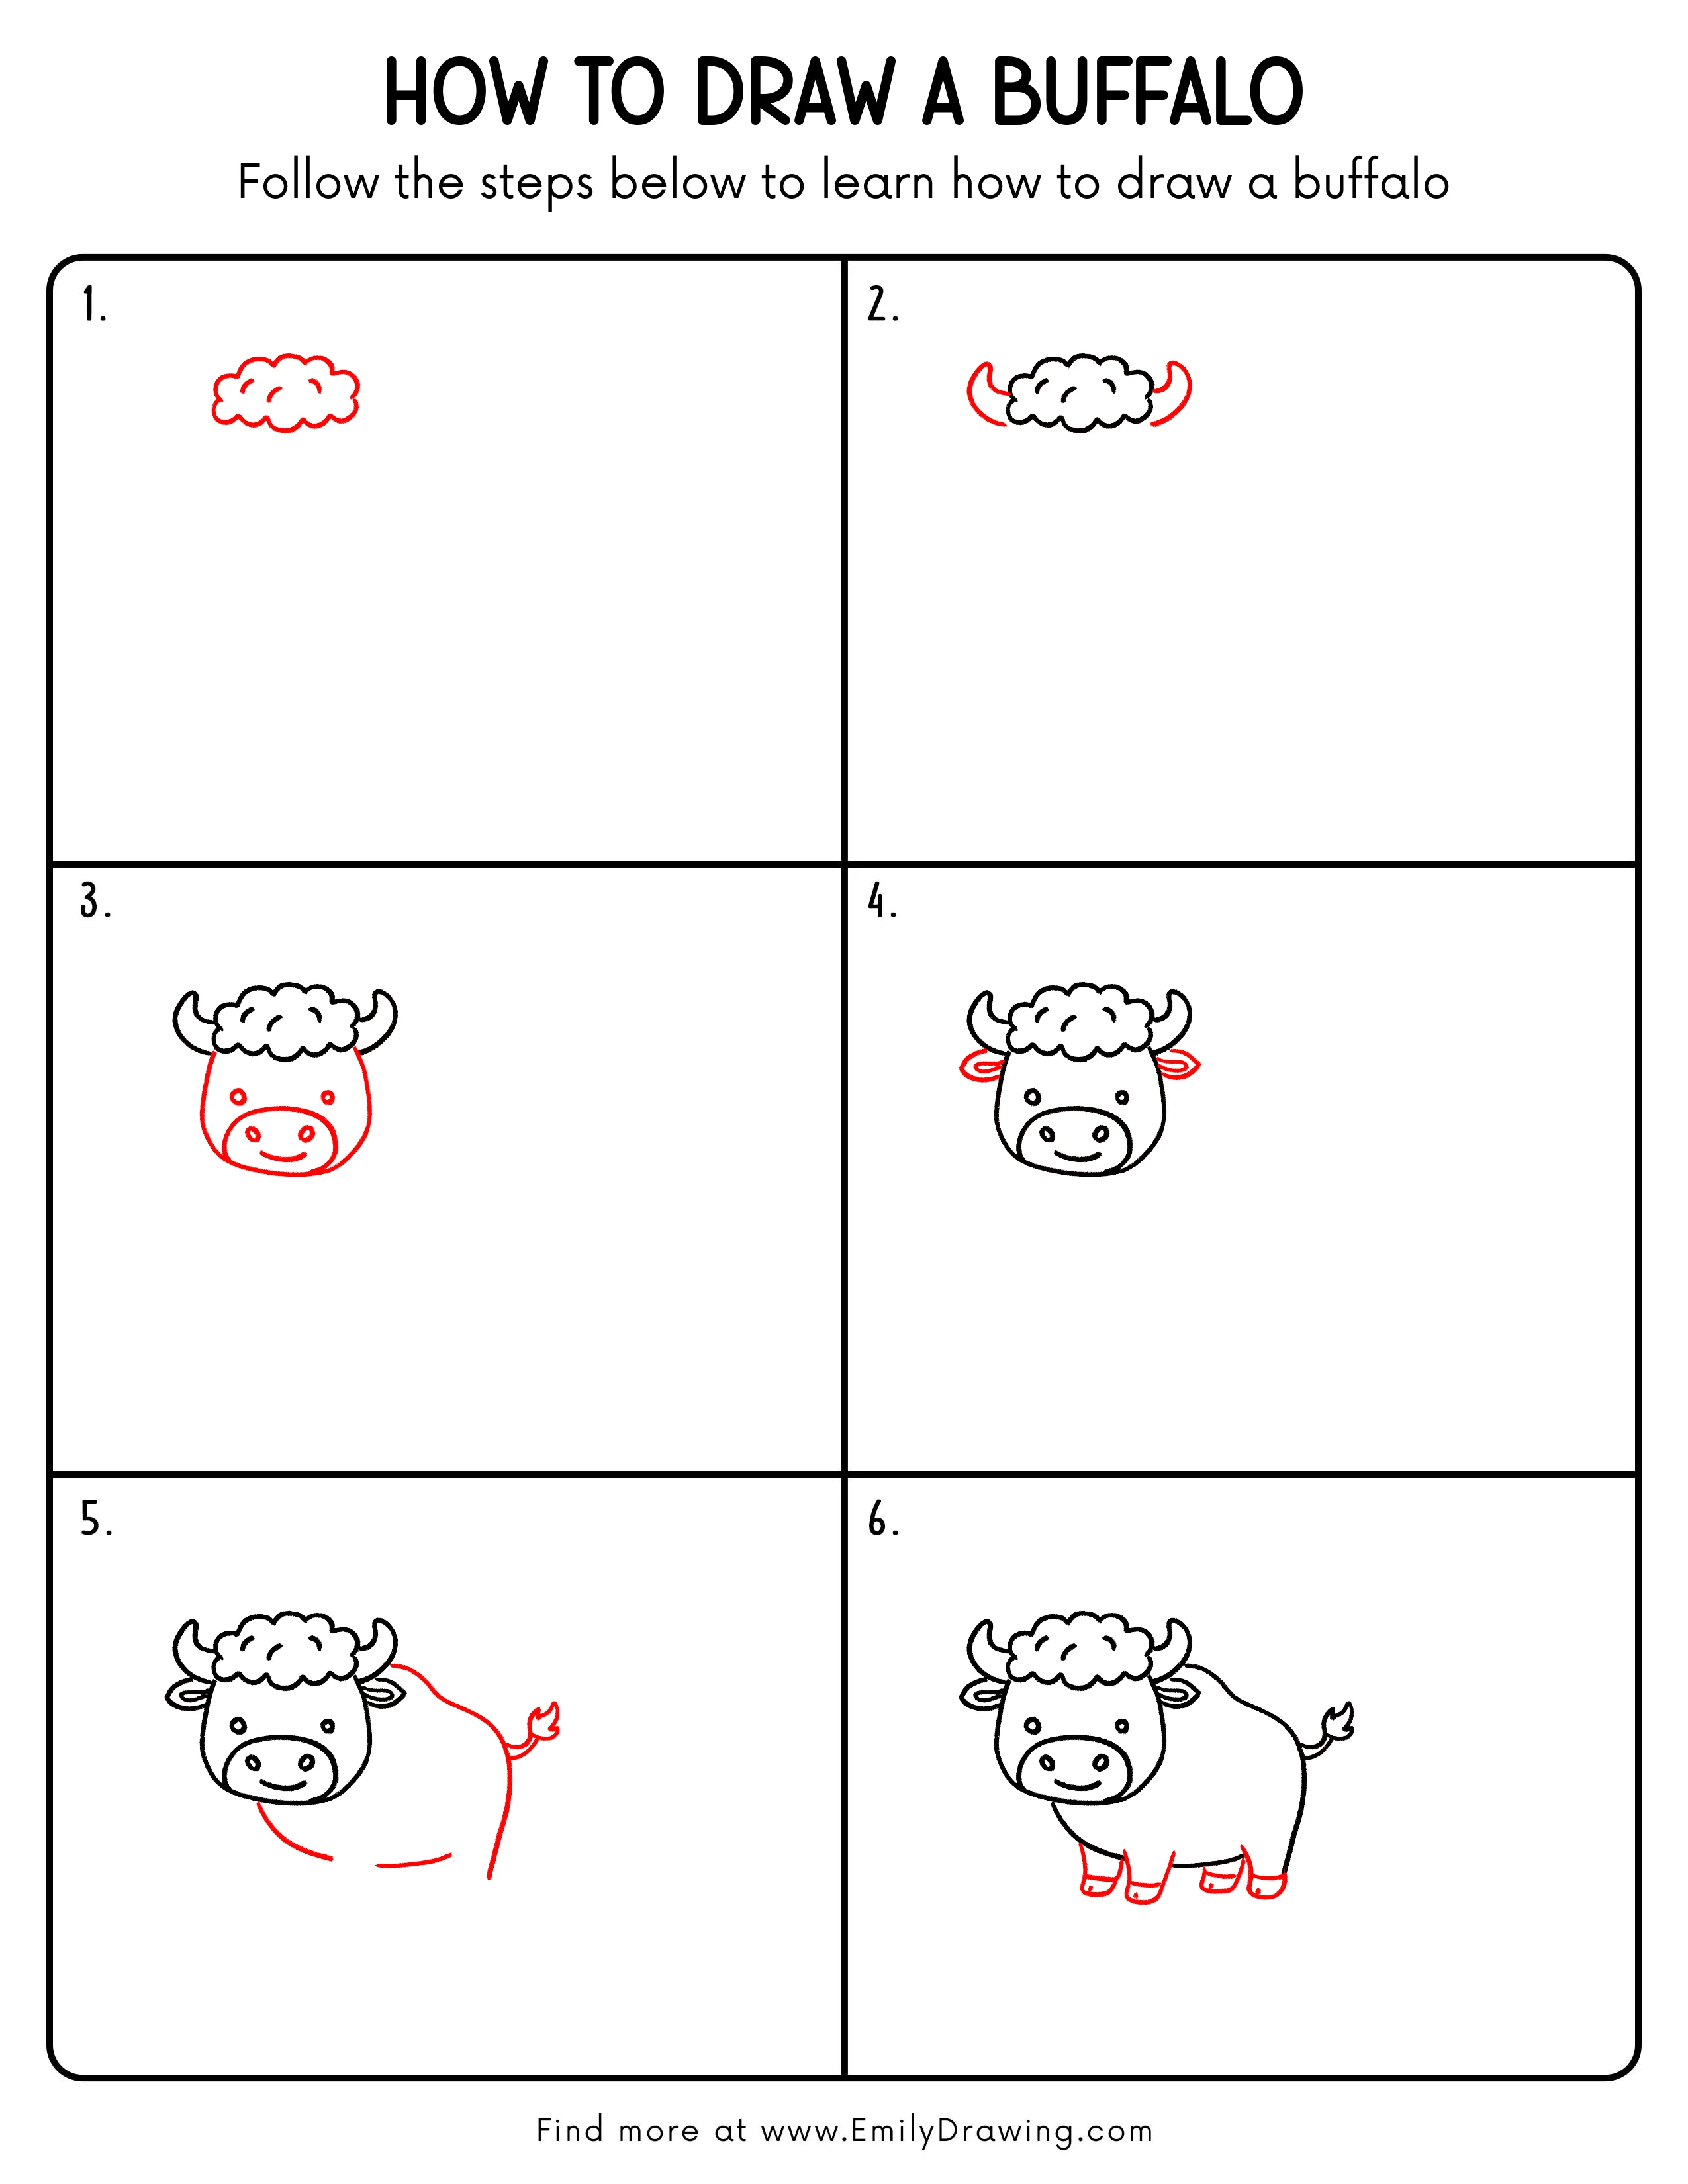
Step 1: Sketch the Fluffy Head Outline
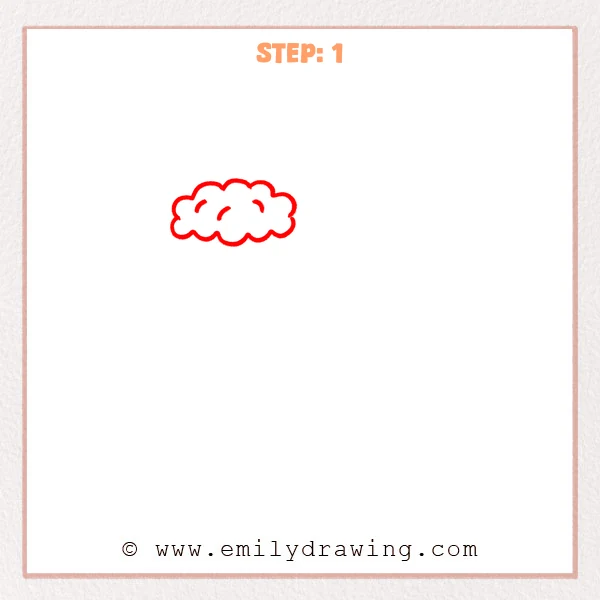
Start near the top of your page with a cloud-like shape to form the buffalo’s fluffy forehead. Use a chain of small curved bumps so the outline feels soft and rounded. Add three short curved marks inside to suggest fur texture.
Pro Tip: Keep the bumps similar in size so the fluffy shape looks neat.
Alt Text: A simple cloud-like outline at the top of the page, with three small curved fur marks inside, beginning an easy buffalo drawing.
Step 2: Add the Curved Horns
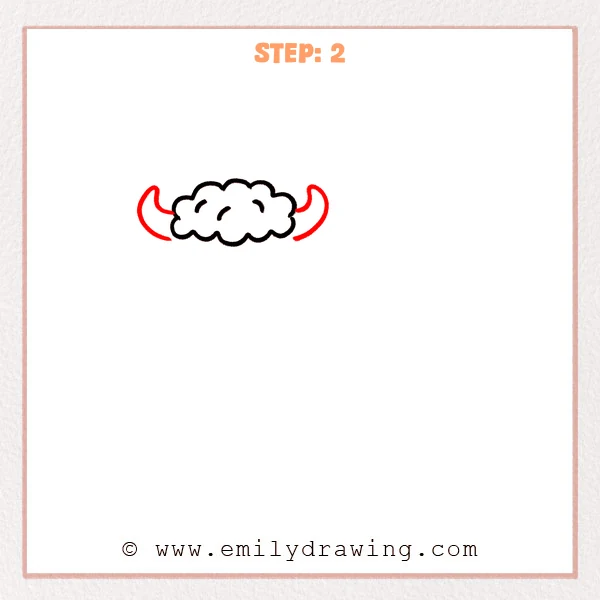
On both sides of the fluffy forehead, sketch a crescent-shaped horn. Let each horn grow out from the fur edge, with a longer, sharper outer curve and a shorter inner curve to close the shape. Keep them balanced, even if they are not perfectly identical.
Pro Tip: Lightly match the height on both sides before you darken the lines.
Alt Text: The buffalo’s fluffy forehead now has two matching crescent-shaped horns extending from the left and right sides.
Step 3: Add the Face Shape and Simple Features
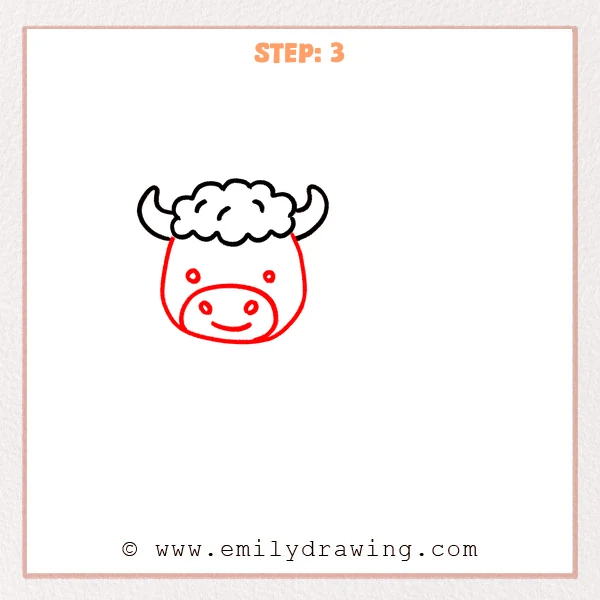
Pull two smooth curved lines down from under the fluffy forehead to form the buffalo’s wide face, then close it with a soft curve at the bottom. Add a large oval for the muzzle, place two small nostrils inside, and draw a gentle smile line. Finish with two small round eyes above the muzzle for a friendly look.
Pro Tip: Center the muzzle so the space on both sides feels even.
Alt Text: A cute buffalo head now includes a rounded face outline, a large oval muzzle with two nostrils, a small smile, and two simple dot eyes beneath fluffy hair and curved horns.
Step 4: Add the Small Ears

On each side of the head, just below the horns, add a flat leaf-shaped ear that sticks out from the outline. Inside each ear, draw one curved line to show the inner ear fold. Keep the ears small so the face stays nicely rounded.
Pro Tip: Make both ears about the same length for a balanced look.
Alt Text: The cute buffalo head now includes two small side ears beneath the horns, each with a simple inner ear curve.
Step 5: Add the Round Body and a Little Tail
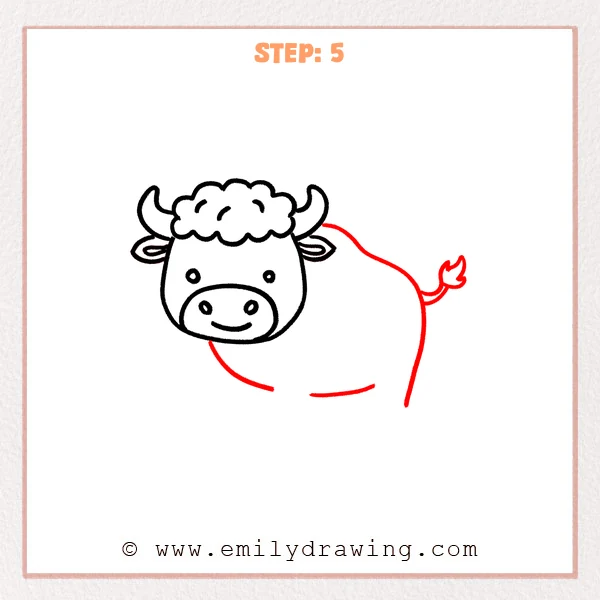
From the right side of the head, extend a big curved line to form the buffalo’s rounded back, then add a lower curve to suggest the belly without closing the shape yet. At the back, draw a thin tail that curves outward. Finish with a small tuft at the tip, split into three soft points.
Pro Tip: Make the body curve large and smooth to keep the buffalo cute.
Alt Text: The buffalo head now connects to a large rounded body outline on the right, with a curved tail ending in a small three-point tuft.
Step 6: Add the Short Legs and Hooves
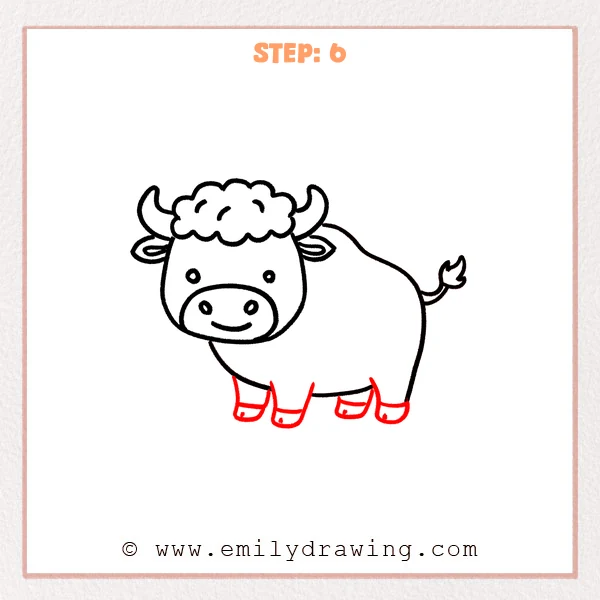
Under the belly, add four short legs using simple lines with rounded corners so they feel sturdy. At the bottom of each leg, draw a flat hoof shape and add a small line to show the hoof edge. Stagger the front and back legs slightly to make the buffalo stand naturally.
Pro Tip: Keep the legs similar in length so the buffalo looks stable.
Alt Text: The buffalo now has four short legs under the rounded body, each ending in a simple hoof with a small detail line.
Step 7: Color in your drawing!
Fun Facts
- Buffalo have thick coats that help them handle cold weather.
- Their horns create a strong silhouette, even in simple cartoons.
- Many buffalo live and travel in groups, called herds.
Pin it now, Draw later!
You now have a complete buffalo drawing for beginners, built with an easy step by step drawing process. If you like, trace your final lines with a darker pen and erase leftover sketch marks. For coloring, try warm browns or deep grays, then add a slightly darker shade under the belly and behind the legs for soft shadow. One common beginner mistake is drawing legs at different lengths, so check that the hooves sit evenly on the ground. Keep practicing how to draw a buffalo, and try changing the pose or adding a simple background next time.
Get the FREE Printable Drawing Guide
FREE Download Printable Buffalo Drawing Tutorial
Frequently Asked Questions
How do I make my buffalo look fluffier?
Add a few extra small curved bumps along the forehead fur. Keep the bumps rounded and close together.
What if my horns look uneven?
Sketch both horns lightly first, then adjust the curves before outlining. Small differences can still look friendly.
How can I make the buffalo stand on the ground?
Draw a light ground line under the hooves. You can also add a small shadow shape under the body for depth.