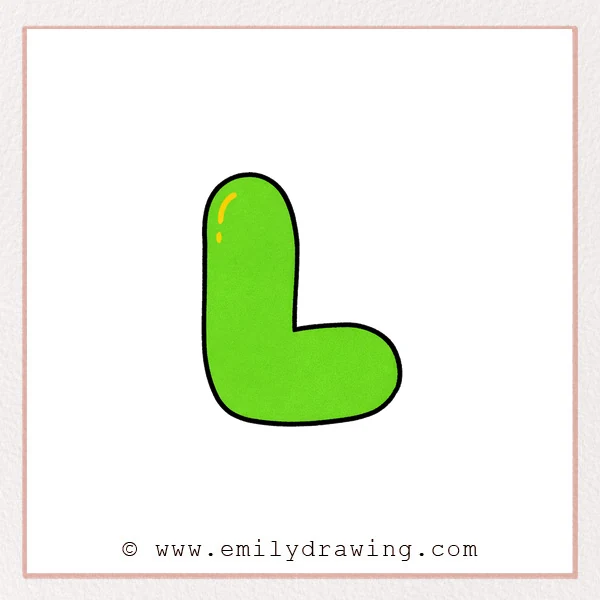
This easy drawing tutorial shows you how to draw a bubble letter L step by step. We will build one smooth, puffy outline and add a simple shine. It is a calm drawing for beginners and a fun way to practice curves.
What You Will Need
- Pencil and eraser
- Black marker or pen
- Colored markers or crayons (optional)
- Drawing paper
Here are my RECOMMENDED Art Supplies!
- Crayola Coloring Set (140 Pieces – Mega Value!)
- 24 Colored Crayon Set
- A4 Printer Paper
- Crayola Coloring Pencils
- HP Home Printer with Instant Ink!
Time needed:
16 minutes.
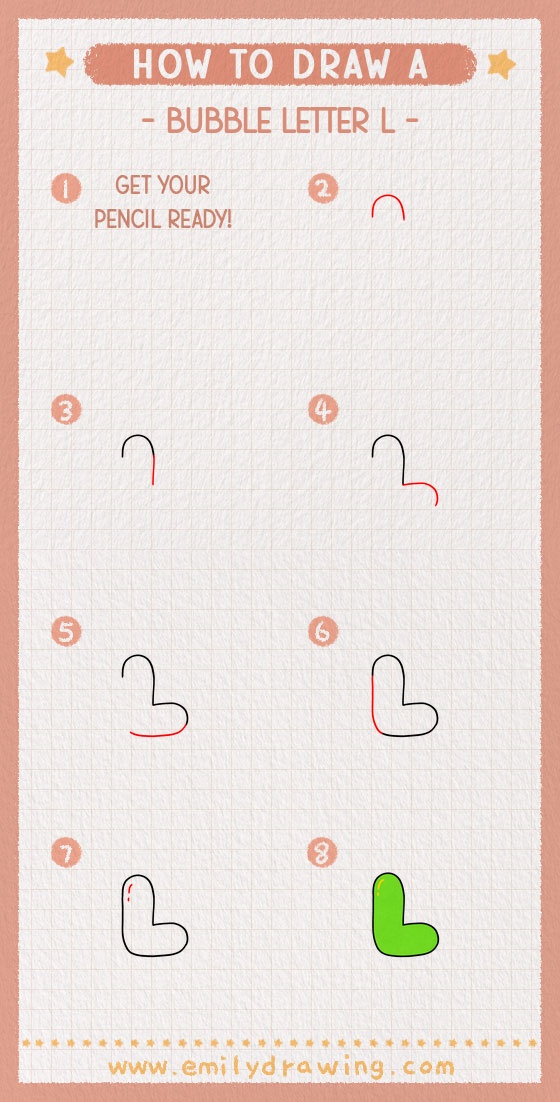
Step-by-Step Drawing Guide
Step 1: Draw the Rounded Top Arc
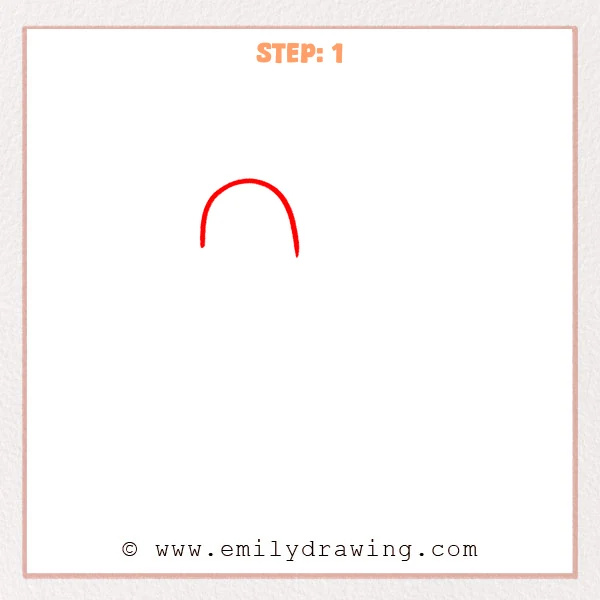
Start near the top of the page with a thick upside-down “U” arc, like a smooth doorway. Let both ends drop slightly downward so the curve feels soft and puffy.
Pro Tip: Keep the curve wide and smooth so it looks bubbly, not sharp.
Step 2: Extend the Right Vertical Stroke
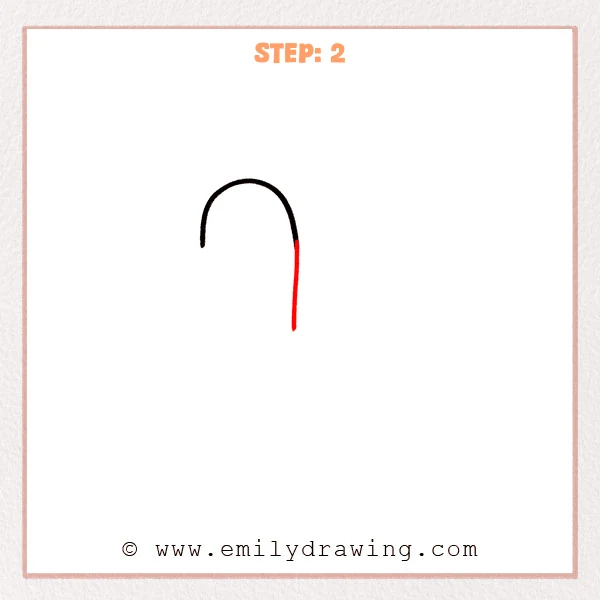
From the right end of the top arc, pull a thick vertical line downward. Keep it mostly straight, and let the bottom end stop softly so it stays rounded.
Pro Tip: Blend the join into the curve so it feels like one smooth, puffy stroke.
Step 3: Add the Rounded Bottom Foot
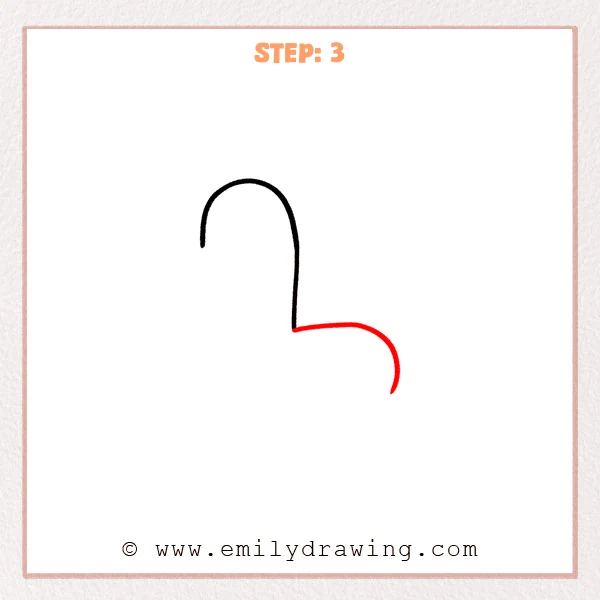
From the bottom of the vertical stroke, extend a short thick line to the right. Then curve it into a big rounded bulge that dips downward, keeping the far right end open for now.
Pro Tip: Make the corner feel like part of a circle, not a sharp bend.
Step 4: Add the Long Bottom Curve

From the lower right bulge, draw a long, smooth curved line traveling left to form the bottom edge. Let the left end lift gently and stay open so you can connect it in the next step.
Pro Tip: Keep the bottom curve even and gradual so it feels inflated.
Step 5: Add the Left Outer Side and Connect the Bottom
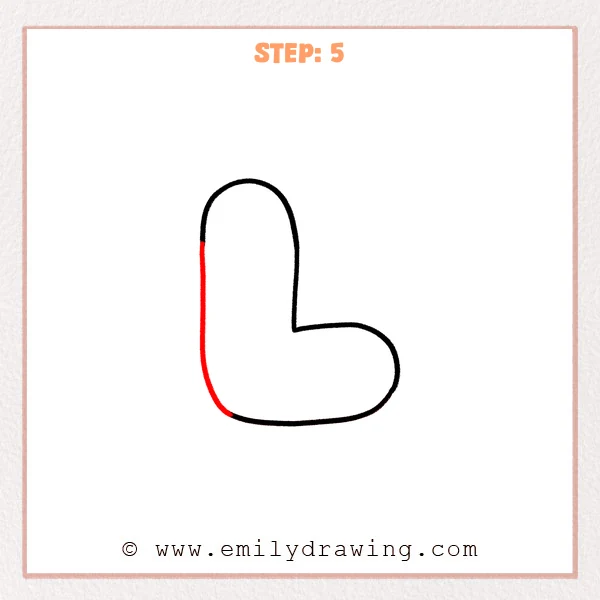
From the left end of the top arc, draw a thick outer line straight down. As you reach the bottom, round the corner and smoothly join it into the bottom curve to close the outside shape.
Pro Tip: Keep the bottom-left corner wide and rounded for a true bubble look.
Step 6: Add Shiny Highlights
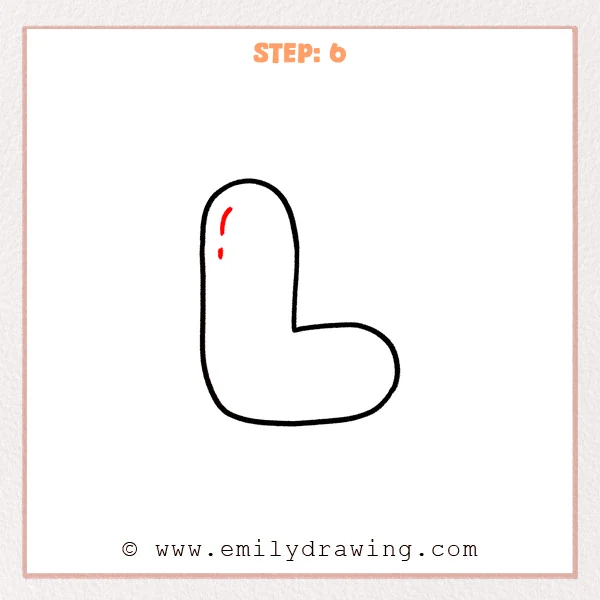
Inside the tall left part of the bubble letter L, add a short curved highlight near the top, following the outer curve. Place a smaller curved mark beneath it to make the letter look glossy.
Pro Tip: Keep highlights slightly away from the outline so they feel like light, not extra edges.
Step 7: Color in your drawing!
Fun Facts
- Bubble letters became popular in graffiti and poster art because they are bold and easy to read.
- Rounded letters feel friendly because they have fewer sharp corners.
- Adding highlights is a simple trick that makes flat shapes look shiny.
Pin it now, Draw later!
You now have a complete bubble letter L with a smooth outline and simple shine. Try coloring it with one bright color, then add a darker shade along the lower-right edges for gentle depth. A common beginner mistake is making corners too pointy, so keep every turn wide and rounded. Practice a few more bubble letters, and try drawing your initials next.
Get the FREE Printable Drawing Guide

FREE Download Printable Bubble Letter L Drawing Tutorial
Frequently Asked Questions
How do I make my bubble letter L look more even?
Lightly sketch the shape first, then trace it slowly with a marker.
What if my bottom curve looks wobbly?
Use one long, calm stroke, or draw it in two smooth parts that meet gently.
Can I add more shine or details?
Yes, add one more small highlight, or draw a soft shadow behind the letter.