
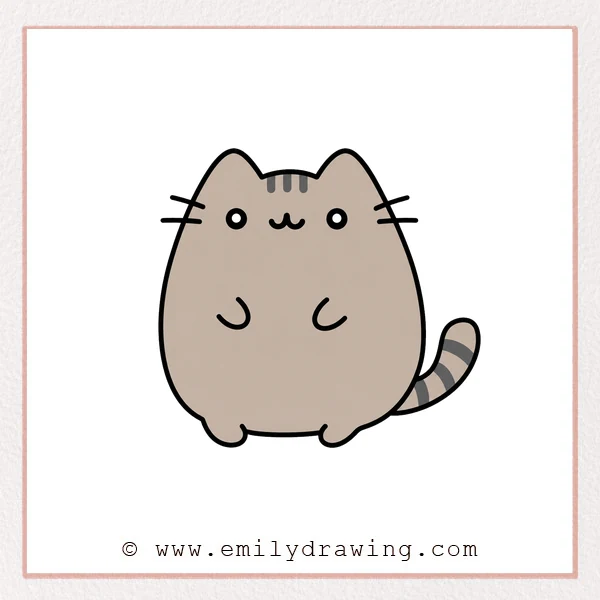
In this easy drawing tutorial, you will learn how to draw Pusheen cat with simple curved lines.
This step by step drawing is friendly for beginners and young artists.
Take your time, keep your lines soft, and enjoy building the cute round shape.
What You Will Need
- A pencil
- An eraser
- Black marker or pen
- Colored pencils, crayons, or markers
- Drawing paper
Here are my RECOMMENDED Art Supplies!
- Crayola Coloring Set (140 Pieces – Mega Value!)
- 24 Colored Crayon Set
- A4 Printer Paper
- Crayola Coloring Pencils
- HP Home Printer with Instant Ink!
Time needed:
18 minutes.
Step-by-Step Drawing Guide
Step 1: Draw the Left Body Outline
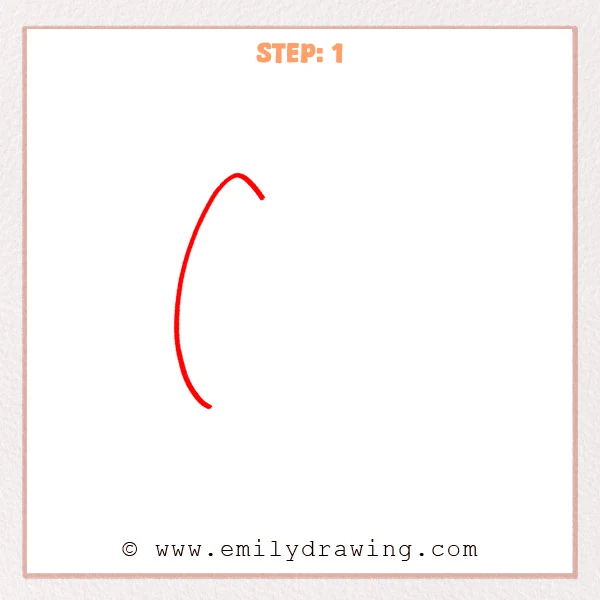
Start near the top with a soft, long curved line.
Let it bend down to the lower left, then gently turn inward to form one side of the Pusheen cat’s round body.
Pro Tip: Keep the curve smooth, and avoid making the turns too sharp.
Step 2: Complete the Head Top and Right Body
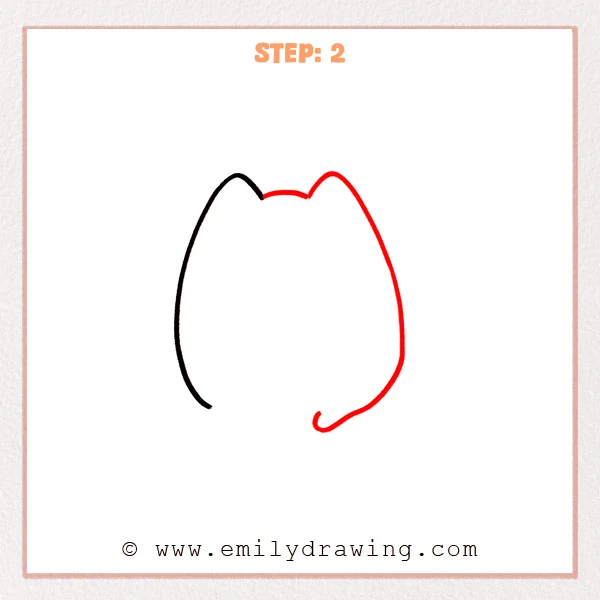
Continue from the top of the left curve, adding two small rounded ears.
Then extend the line down the right side of the body, leaving a tiny curled tail shape near the bottom.
Pro Tip: Keep both ears close in height so the Pusheen cat looks balanced.
Step 3: Draw the Bottom and Little Feet
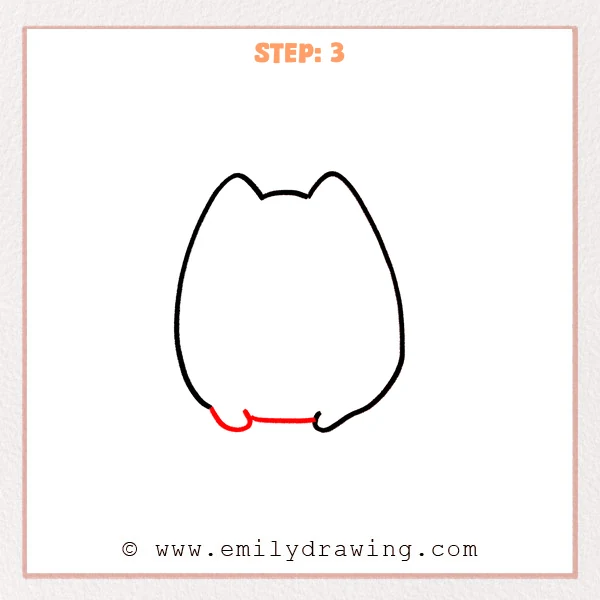
Add a short horizontal line along the bottom to connect both sides.
Draw a small curved hook at each end of the line to form the Pusheen cat’s rounded little feet.
Pro Tip: Keep the bottom line steady, and make the little feet similar in size.
Step 4: Add the Striped Tail
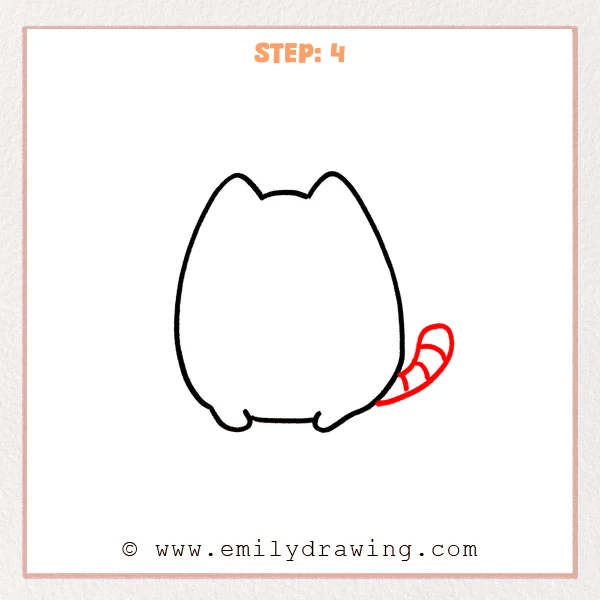
Draw a thick tail curving outward from the right side of the body.
Add a few curved lines inside the tail to give the Pusheen cat clear stripes.
Pro Tip: Make the tail outline longer and rounder than the inner stripe lines.
Step 5: Add the Face and Head Stripes
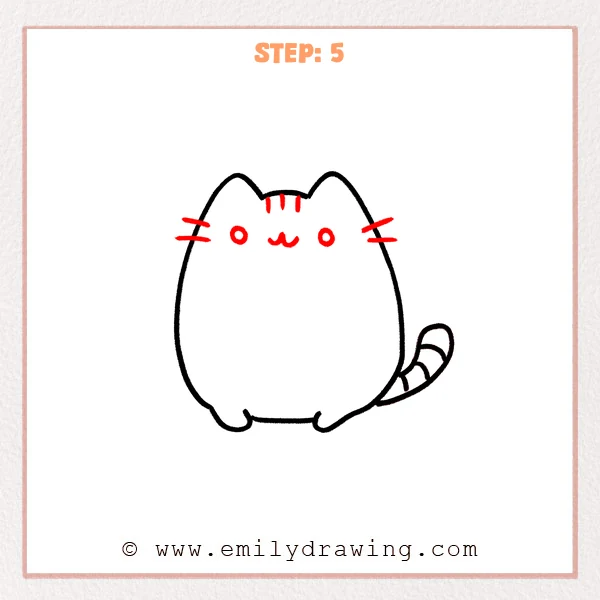
Draw two round eyes on the face, then use small curved lines for the mouth.
Add short whiskers on both cheeks, and draw three small vertical stripes on the top of the head.
Pro Tip: Place the eyes at the same height, and keep the mouth centered between them.
Step 6: Draw the Front Paws
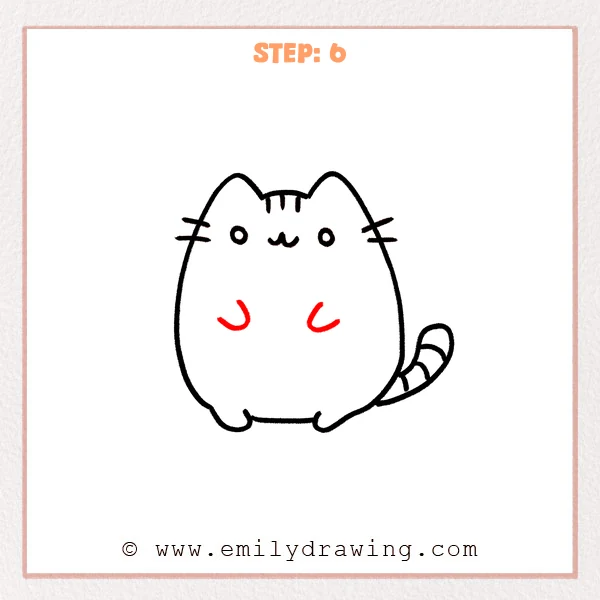
Add two small curved front paws on the lower middle part of the body.
Each paw looks like a soft hook, gently curving back toward the center.
Pro Tip: Keep both front paws aligned, with a comfortable space between them.
Step 7: Color in your drawing!
Fun Facts
Pusheen cat is known for a very round body and simple, cute expressions.
The design uses soft shapes, which makes it great for drawing for beginners.
Small details like whiskers, stripes, and paws help the character feel complete.
Pin it now, Draw later!
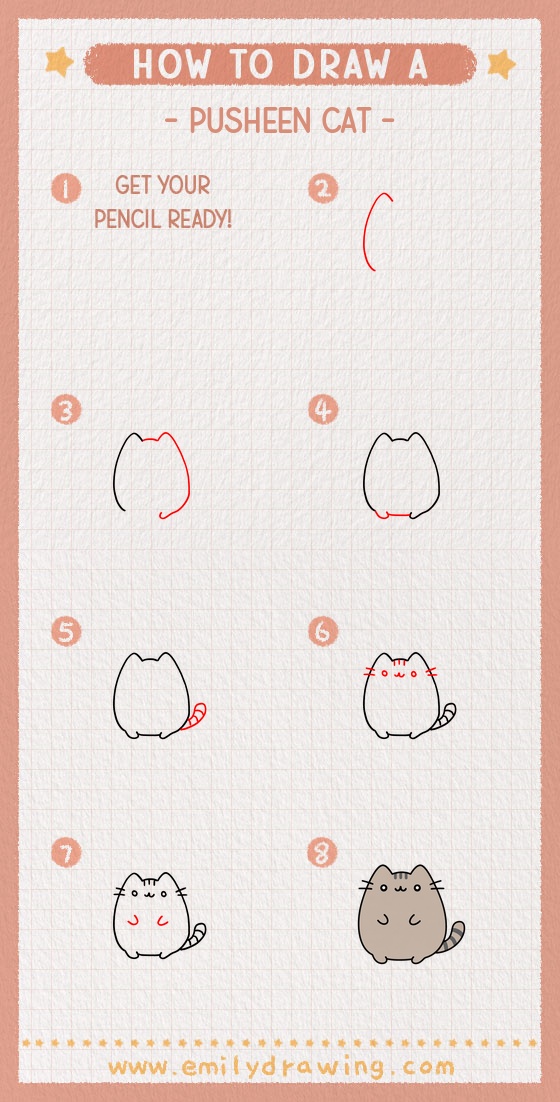
Trace your final lines with a black marker when you feel ready.
Erase any extra pencil marks, then color the body a soft gray if you like.
You have finished a cute Pusheen cat step by step drawing, so try drawing it again with a new pose or accessory.
Get the FREE Printable Drawing Guide
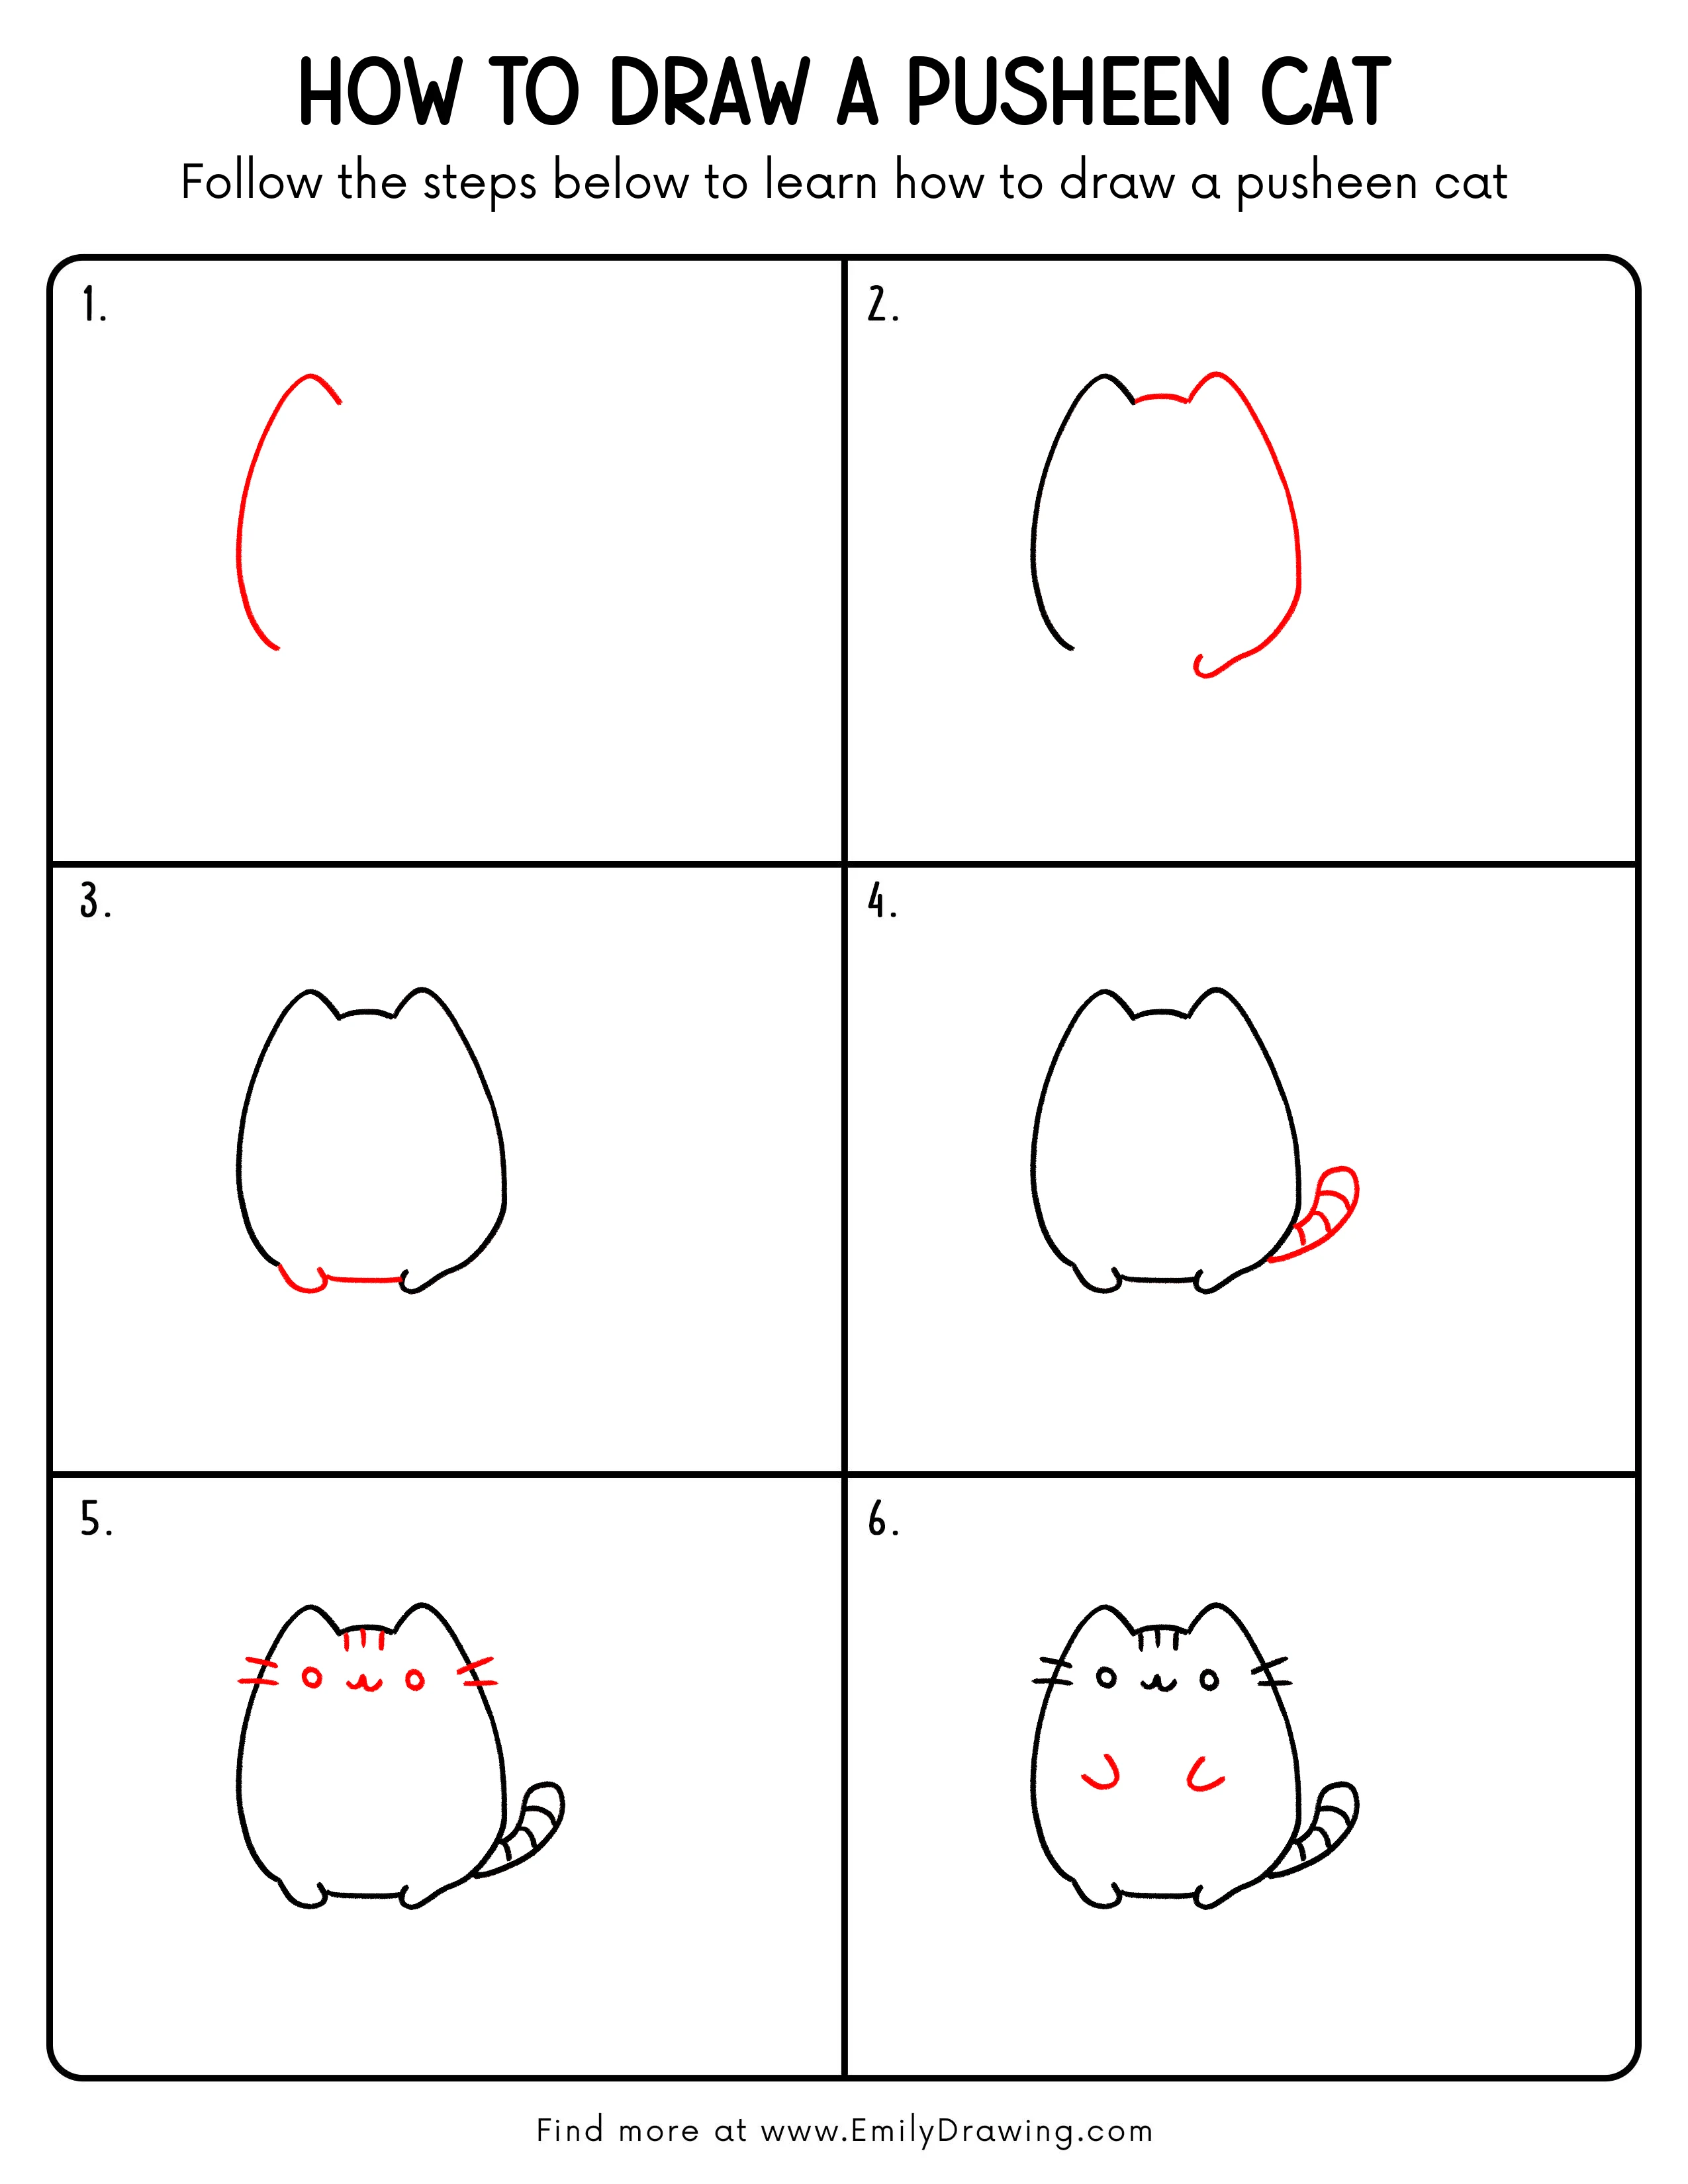
FREE Download Printable Pusheen Cat Drawing Tutorial
Frequently Asked Questions
Is this how to draw Pusheen cat for beginners?
Yes, this guide uses simple curves and small details, so it works well for beginners.
What is the hardest part of this easy drawing tutorial?
The round body outline may take the most patience because it needs smooth curves.
Can I color my Pusheen cat differently?
Yes, you can use gray, pastel colors, or any fun color style you enjoy.



