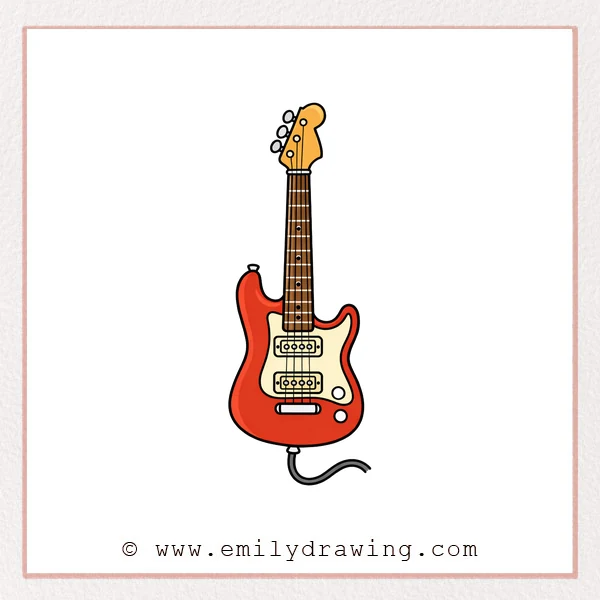
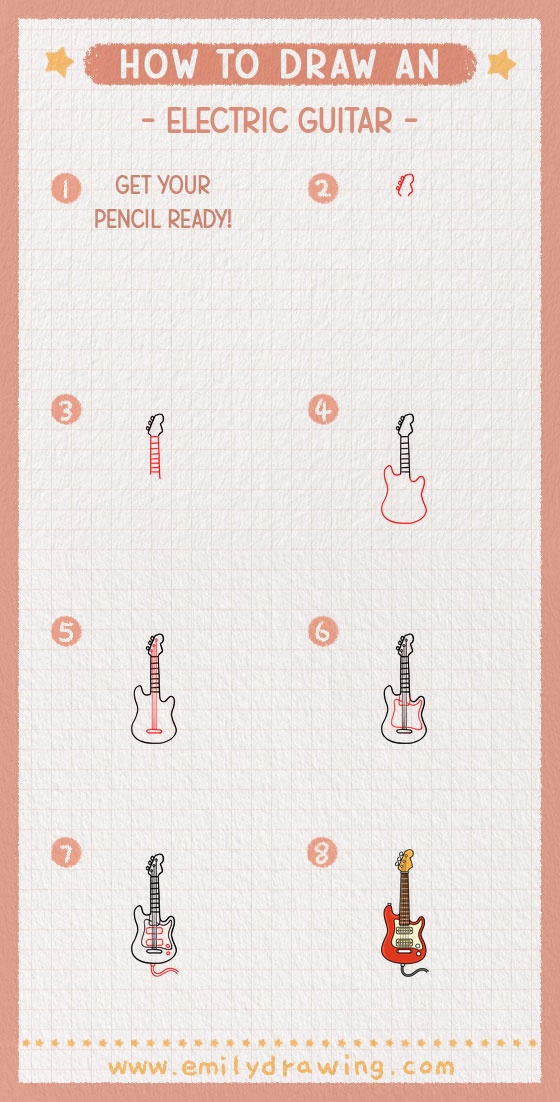
In this easy drawing tutorial, you will learn how to draw an electric guitar step by step. We will build the shape using simple lines and smooth curves. Take your time and keep your sketch light at first.
What You Will Need
- Pencil
- Eraser
- Black marker or pen (optional, for outlining)
- Paper
- Colored pencils or markers (optional)
Here are my RECOMMENDED Art Supplies!
- Crayola Coloring Set (140 Pieces – Mega Value!)
- 24 Colored Crayon Set
- A4 Printer Paper
- Crayola Coloring Pencils
- HP Home Printer with Instant Ink!
Time needed:
12 minutes.
Step-by-Step Drawing Guide
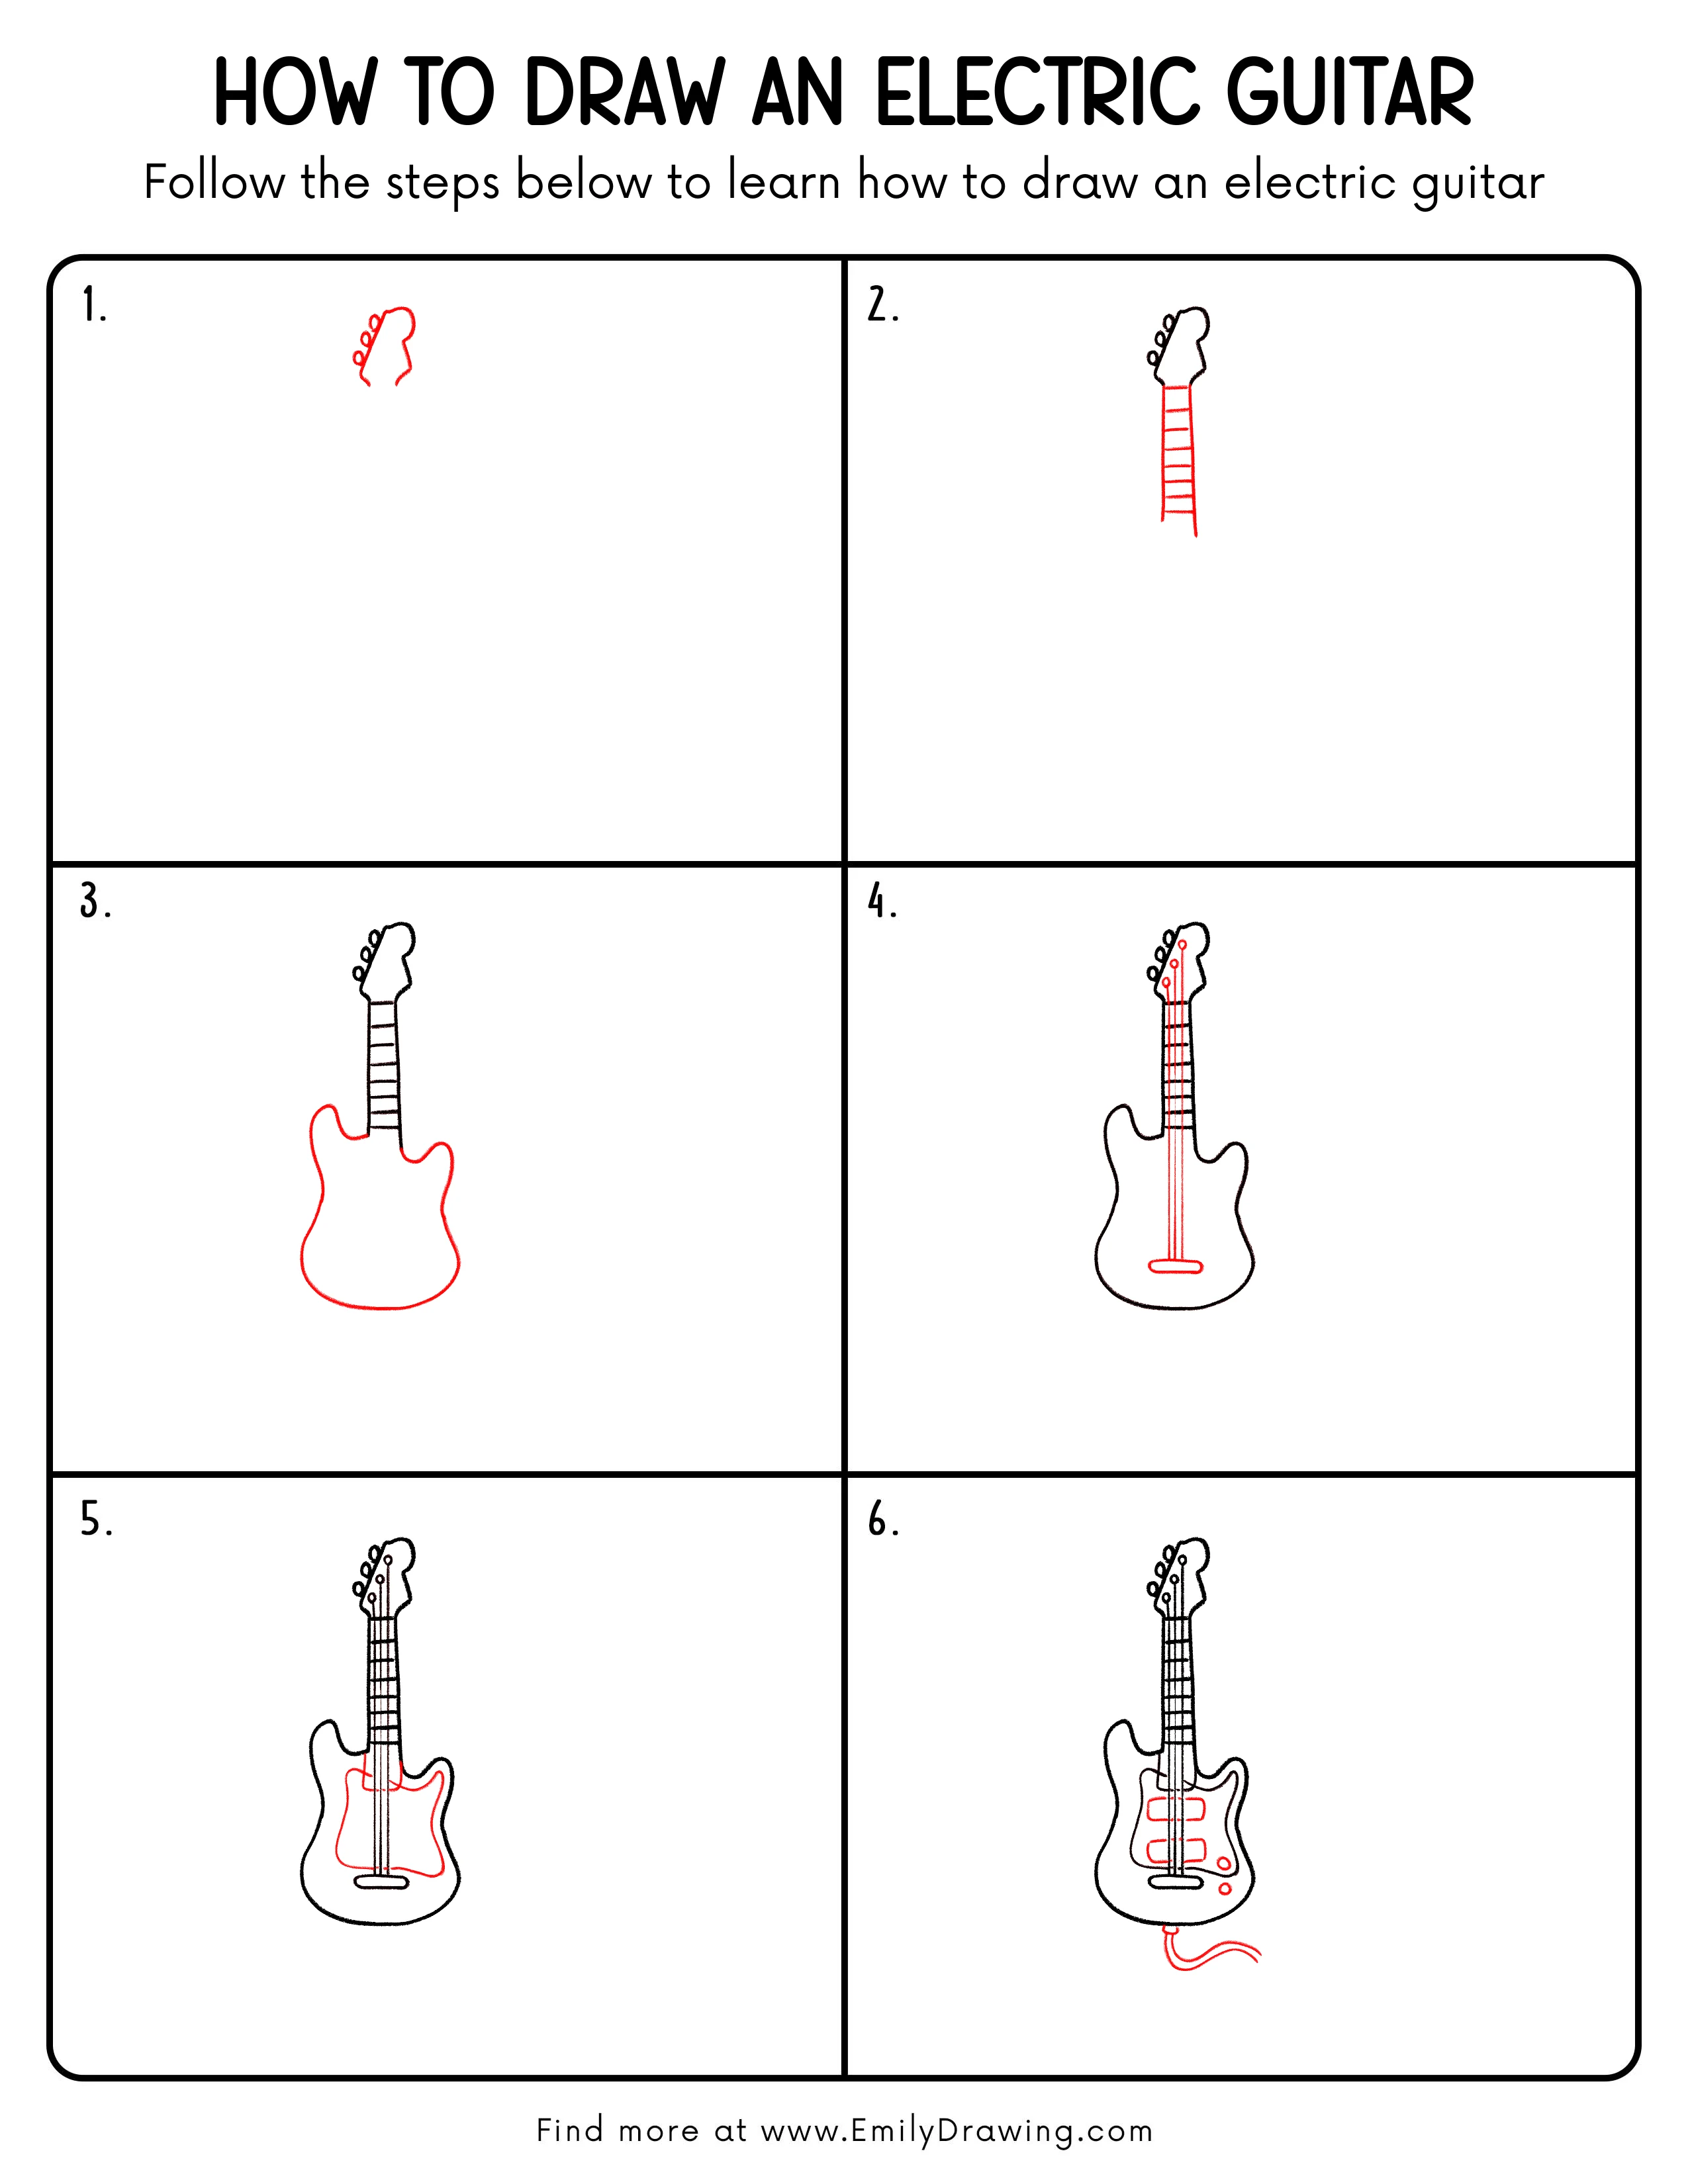
Step 1: Sketch the Headstock Shape
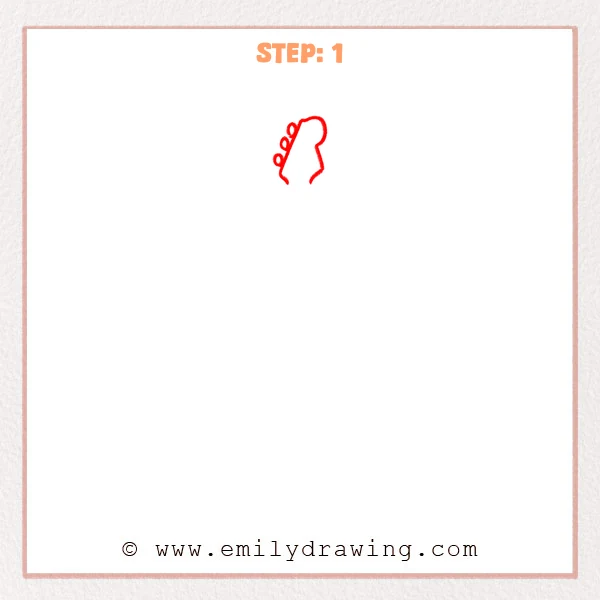
Start with a long curved line to form the left edge of the headstock, keeping the top rounded. Add the right outer edge so the top feels wider and the lower part tapers inward. Place a few small circles along the left side to mark the tuning pegs.
Pro Tip: When tapering the headstock, keep both sides narrowing at a similar rate.
Step 2: Add the Neck and Frets
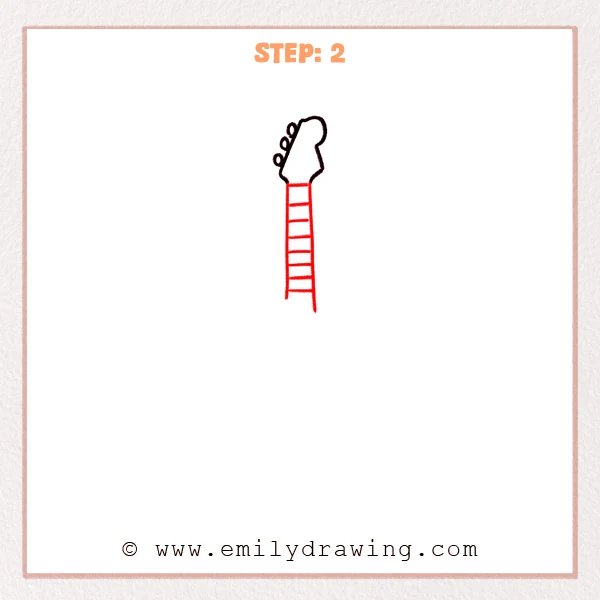
Draw two long, almost-parallel lines down from the bottom of the headstock to form the neck. Add several short horizontal lines across the neck to mark the frets. Keep the top fret close to the headstock and align the lines neatly.
Pro Tip: Keep the neck edges nearly parallel for a more realistic electric guitar proportion.
Step 3: Draw the Guitar Body Outline
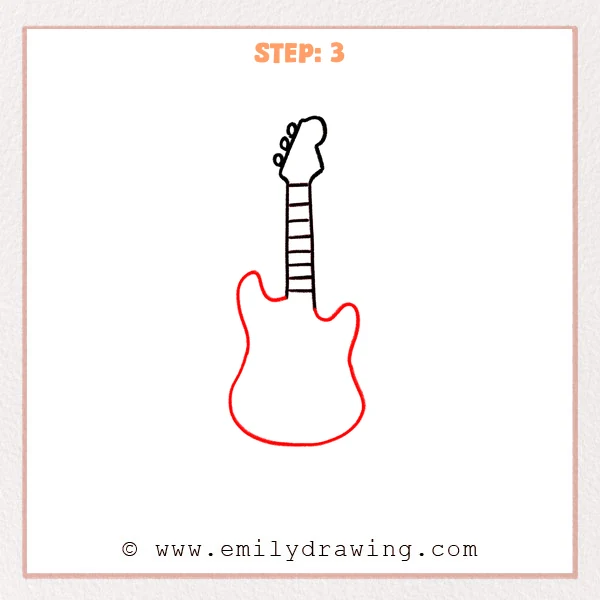
Starting at the bottom of the neck, use a smooth curve to form the left upper bout, then round down into the lower body. Add the right side to match, leaving a scooped-in notch near the top for the double-cut shape. Keep the joint where the body meets the neck soft and rounded.
Pro Tip: Draw the body a little rounder first, then fine-tune both curves at the end.
Step 4: Add the Strings and Bridge
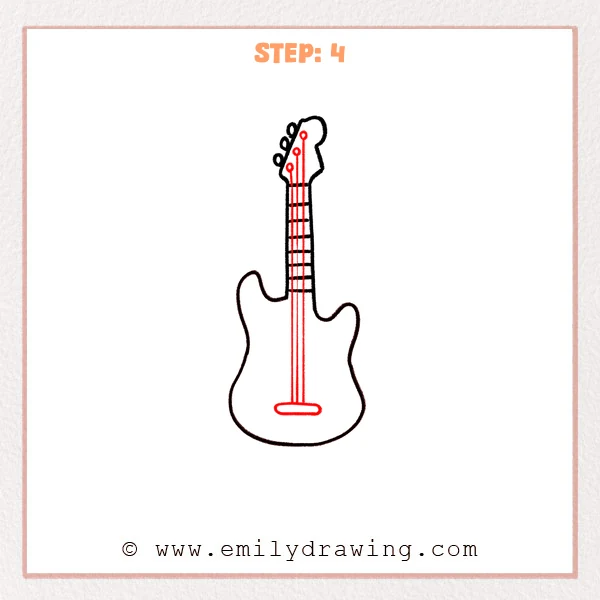
Add a few small circles on the headstock to mark where the strings begin. Draw several thin straight lines down the neck and into the body to create the strings. Sketch a rounded, flat bar near the lower body as the bridge so the strings end neatly.
Pro Tip: Keep the strings straight and parallel, with even spacing from top to bottom.
Step 5: Add the Pickguard and Neck Joint Detail
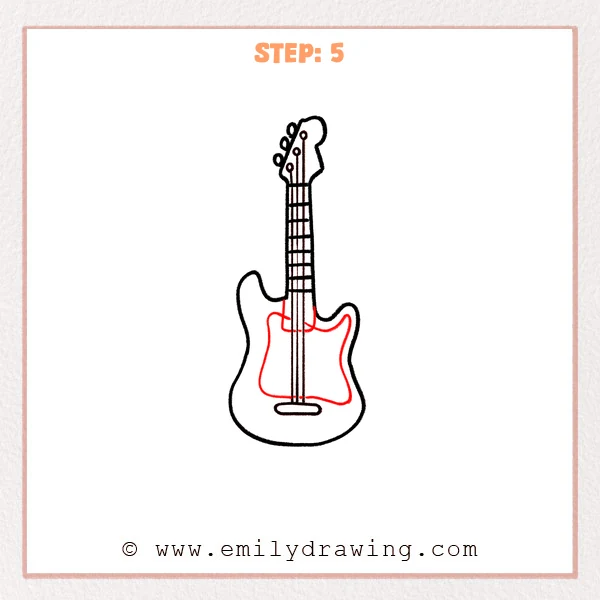
Draw an irregular inner outline on the body that follows the curves to form a pickguard panel. Add a curved edge line where the neck meets the body to show the joint more clearly. Leave space near the bridge so the pickguard does not cover the string endings.
Pro Tip: Keep the pickguard outline roughly parallel to the body edge for a clean look.
Step 6: Add Pickups, Knobs, and the Cable
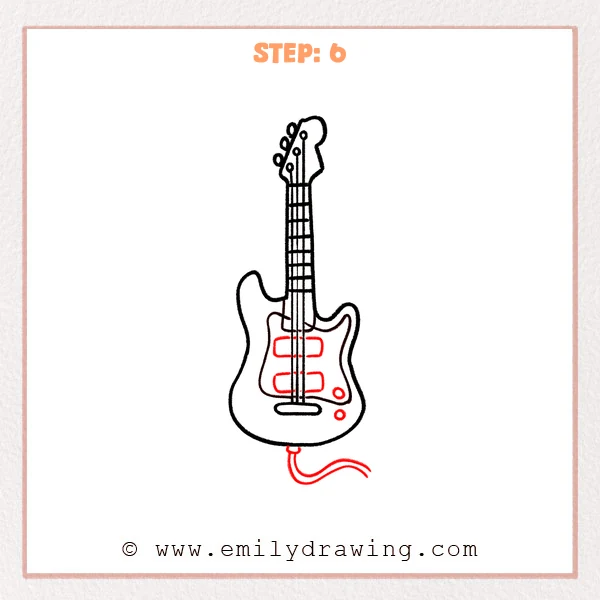
Draw two rounded rectangles on the pickguard for the pickups, and add tiny dots for screws. Add two small circles on the lower right of the body for the control knobs. Sketch a small jack at the bottom edge, then draw two curving lines flowing outward as the cable.
Pro Tip: Keep the pickups level and similar in size for a tidy electric guitar look.
Step 7: Color in your drawing!
Fun Facts
- Electric guitars use pickups (magnets and coils) to turn string vibrations into an electrical signal.
- Many electric guitars have a “double-cut” body shape so players can reach higher notes easily.
- Different pickup types can change the sound, making it brighter, warmer, or more powerful.
Pin it now, Draw later!
Trace your final outline with a pen or marker once you are happy with the shapes. Erase leftover sketch lines to make the drawing clean and bold. Add color, shading, or simple highlights to personalize your electric guitar, and keep practicing to make your lines smoother each time.
Get the FREE Printable Drawing Guide
FREE Download Printable Electric Guitar Drawing Tutorial
Frequently Asked Questions
How many strings should I draw on an electric guitar?
Most electric guitars have six strings, so drawing six parallel lines is a great choice for beginners.
Why do my frets look uneven?
Try drawing the neck edges first, then use light guide marks to keep the fret lines straight and evenly spaced.
Can I change the guitar body shape?
Yes, you can adjust the curves and cutaways to create your own style while keeping the neck and headstock aligned.