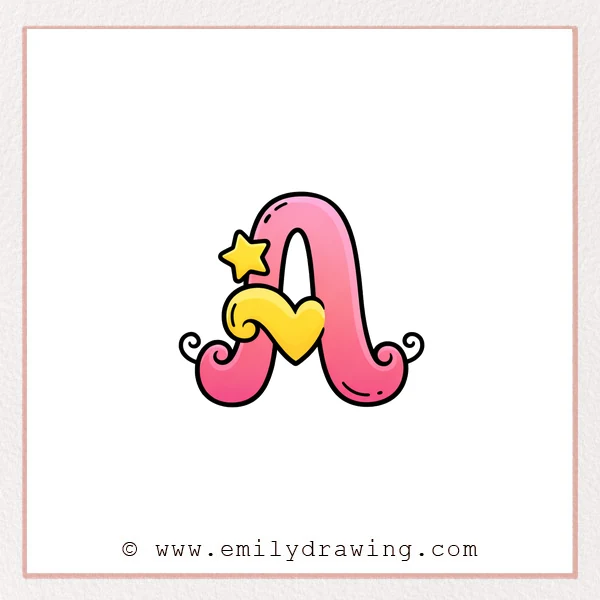
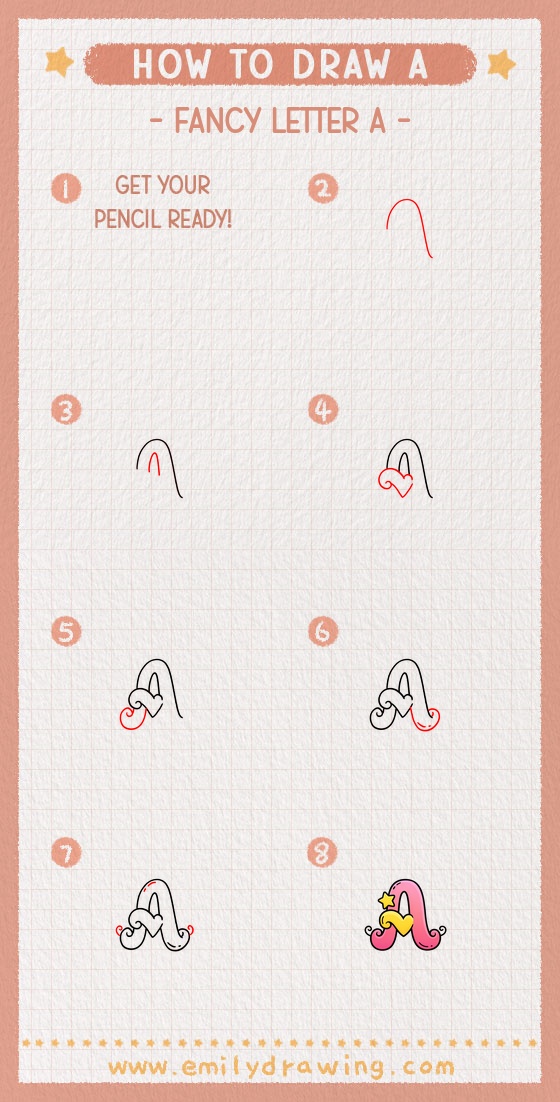
This easy drawing tutorial shows how to draw a fancy letter A with smooth flourishes.
Take your time with the curves, and build the shape one stroke at a time.
By the end, you will have a bold, decorative capital A ready for coloring.
What You Will Need
- Pencil (or a light sketch brush)
- Eraser
- Black pen or marker (optional for clean outlines)
- Paper or a drawing tablet
Here are my RECOMMENDED Art Supplies!
- Crayola Coloring Set (140 Pieces – Mega Value!)
- 24 Colored Crayon Set
- A4 Printer Paper
- Crayola Coloring Pencils
- HP Home Printer with Instant Ink!
Time needed:
29 minutes.
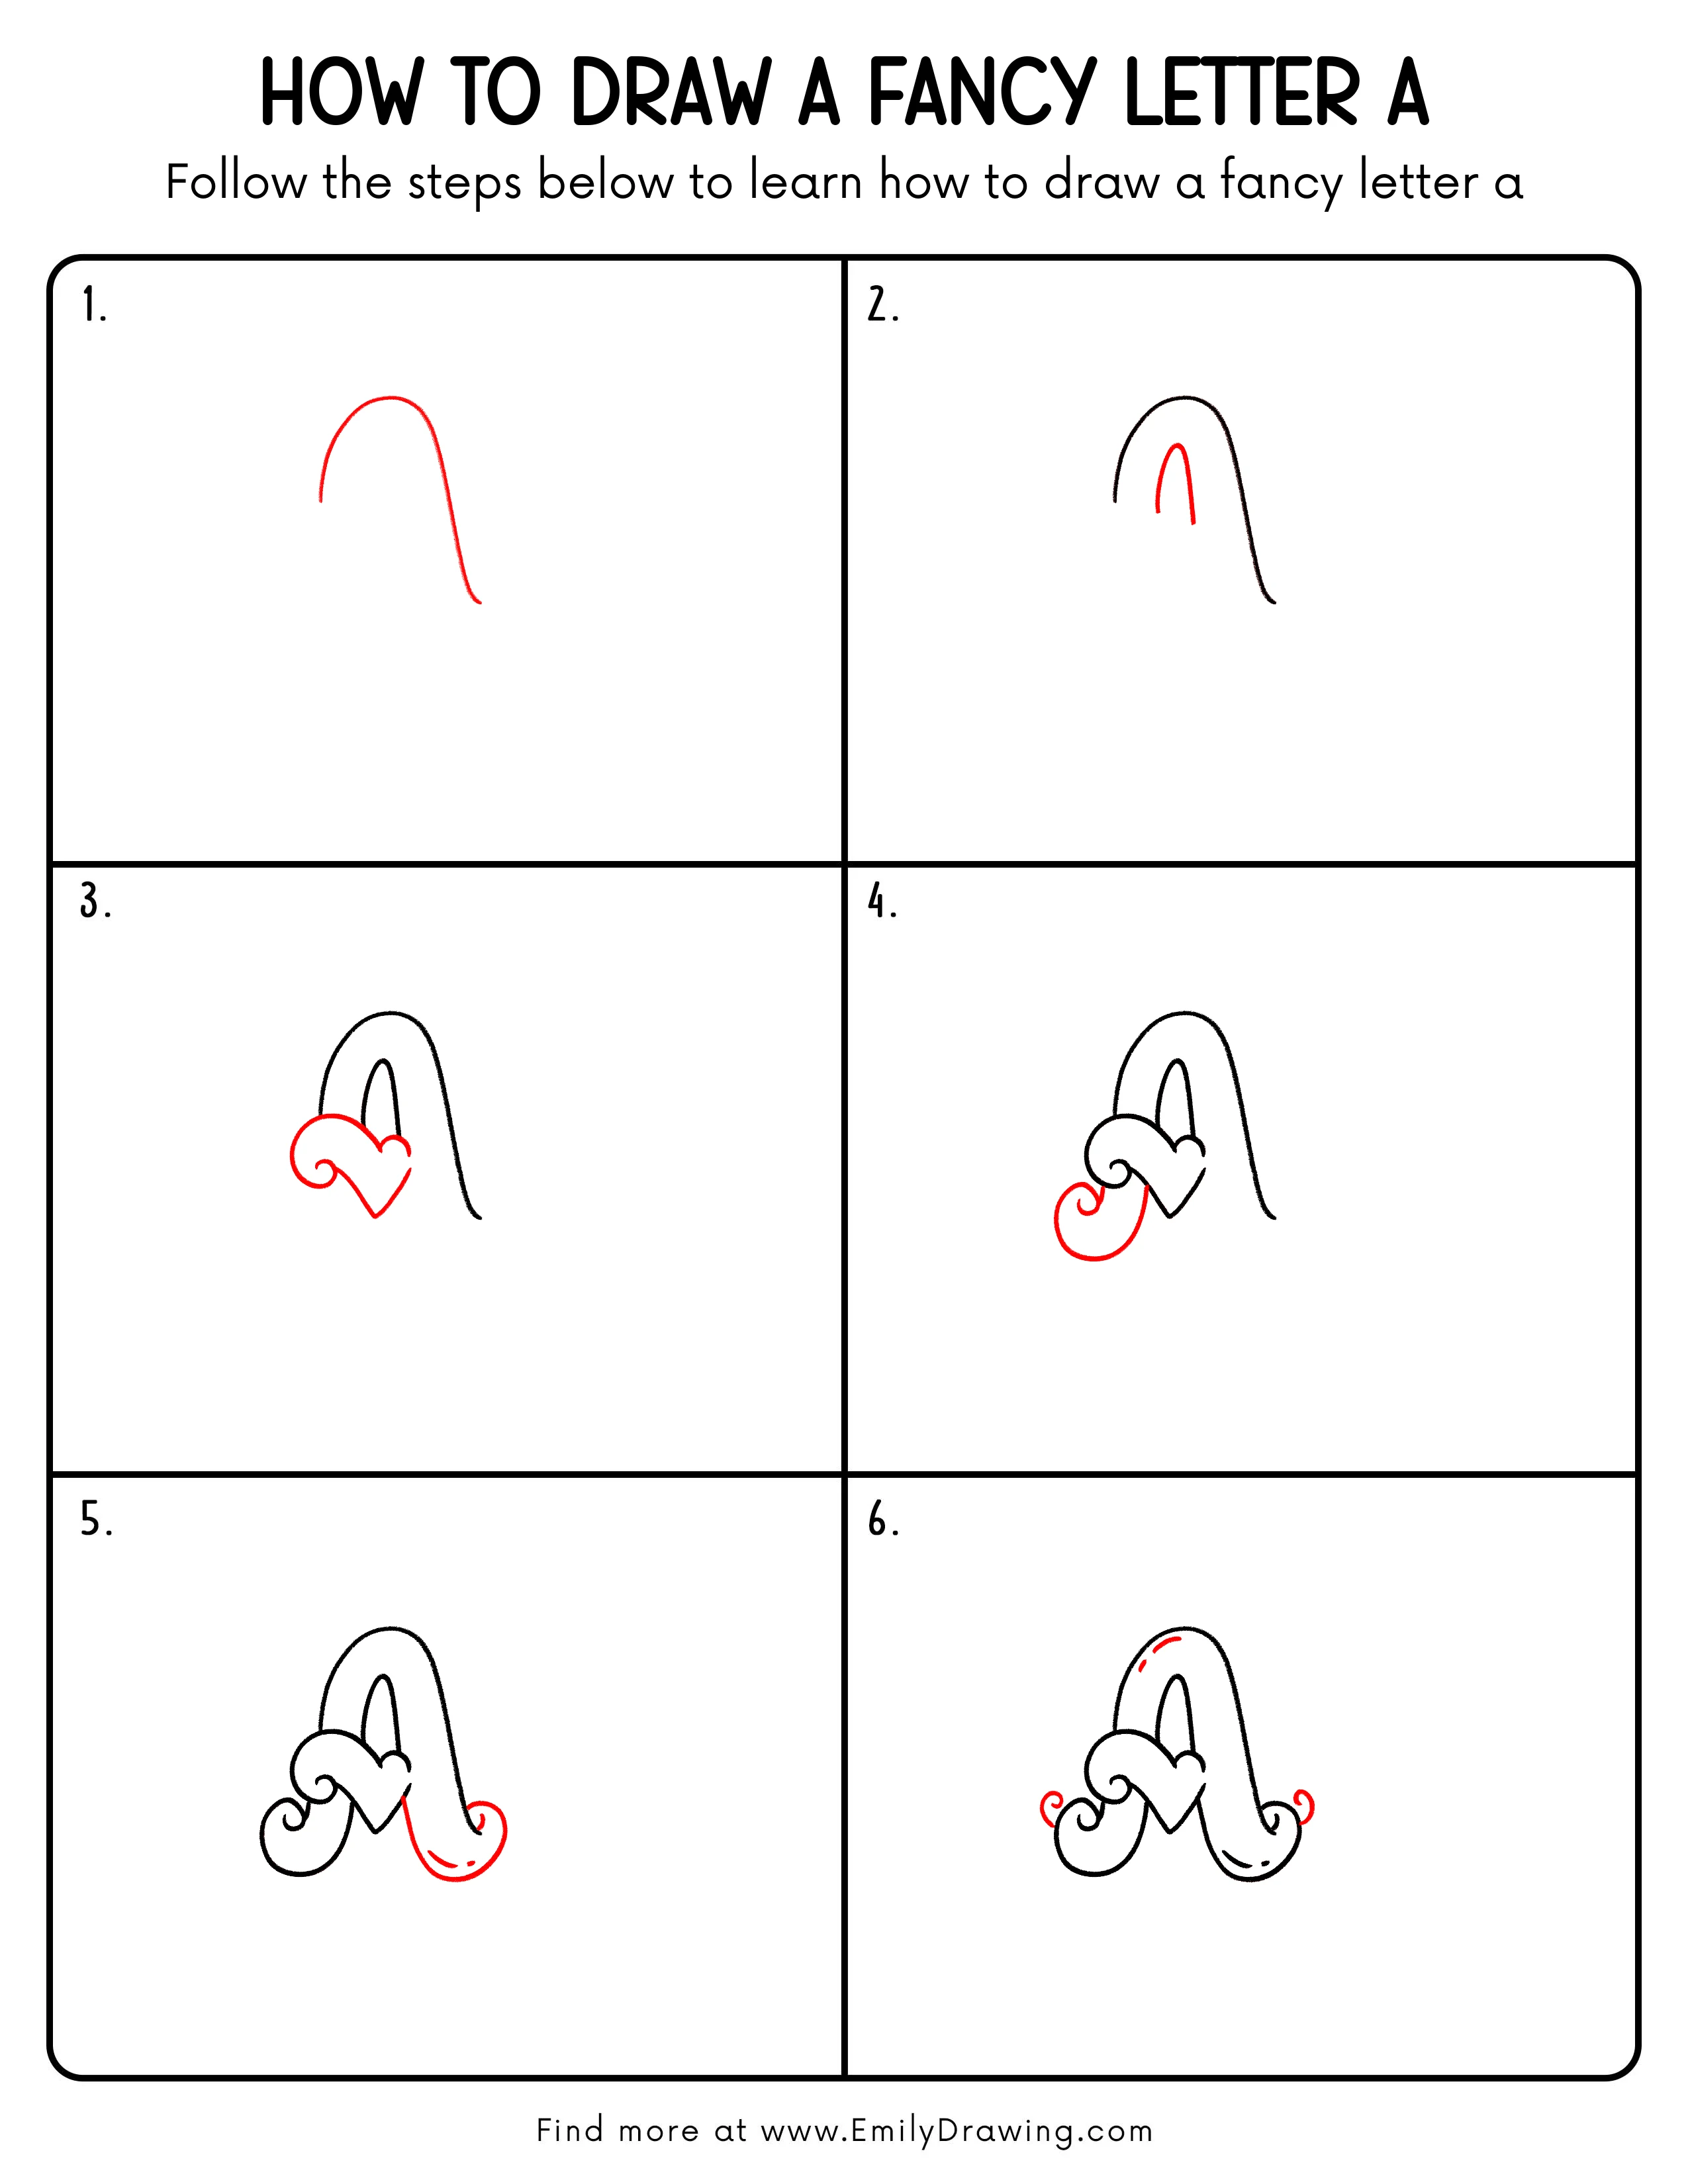
Step-by-Step Drawing Guide
Step 1: Draw the Main Curved Stroke
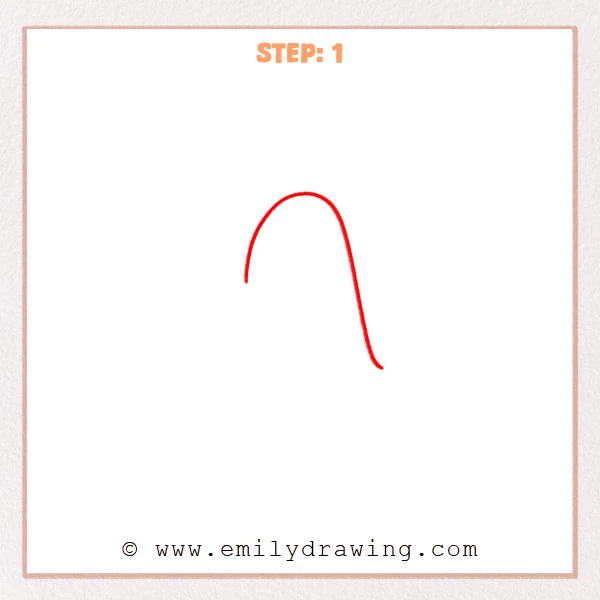
Start with a tall arch, like an upside-down “U.”
From the top on the right side, pull a long curved line downward, tapering slightly near the end.
Pro Tip: Sketch the curve lightly first, then press a bit more to mimic a fancy stroke.
Step 2: Add the Outer Outline and Inner Arch
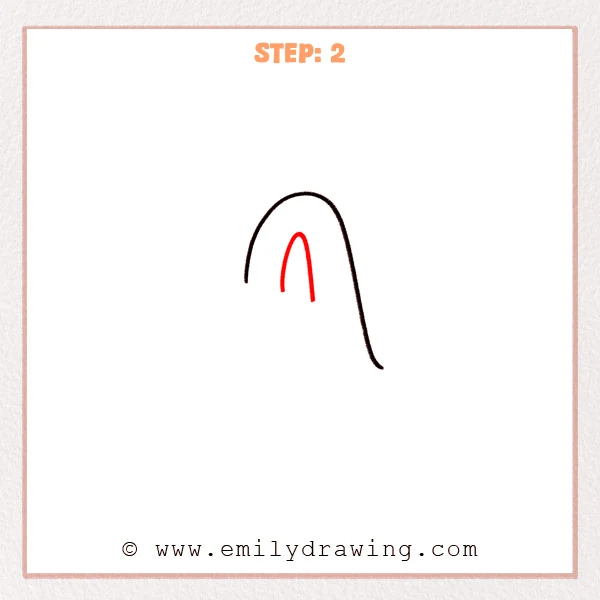
Trace a larger outer arch around the first curve, and thicken the long right downstroke into the main stroke.
Add a smaller inner arch inside to suggest the inner space of a fancy letter A.
Pro Tip: Keep the gap between the outer outline and inner arch evenly spaced for a cleaner look.
Step 3: Add the Inner Stroke and Heart Flourish
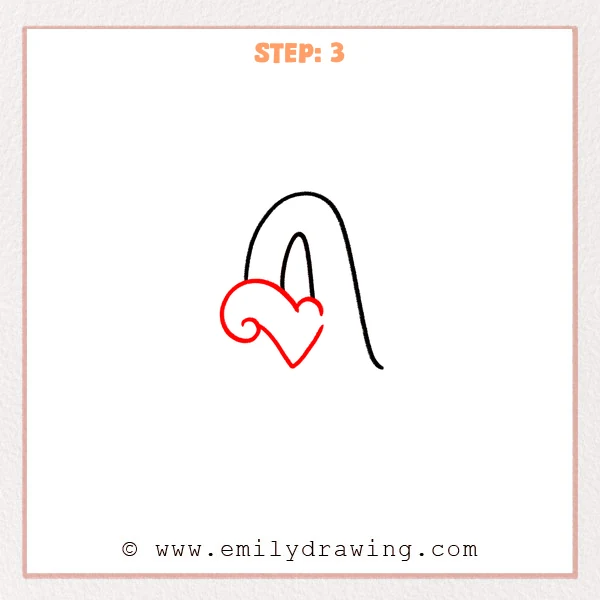
Draw a slimmer inner vertical curve inside the arch to define the center structure of the fancy A.
Add a heart-shaped flourish on the left middle area, and curl the lower-left into a small spiral.
Pro Tip: Sketch the heart outline first, then add the spiral so the curve stays smooth.
Step 4: Add the Large Lower Spiral Flourish
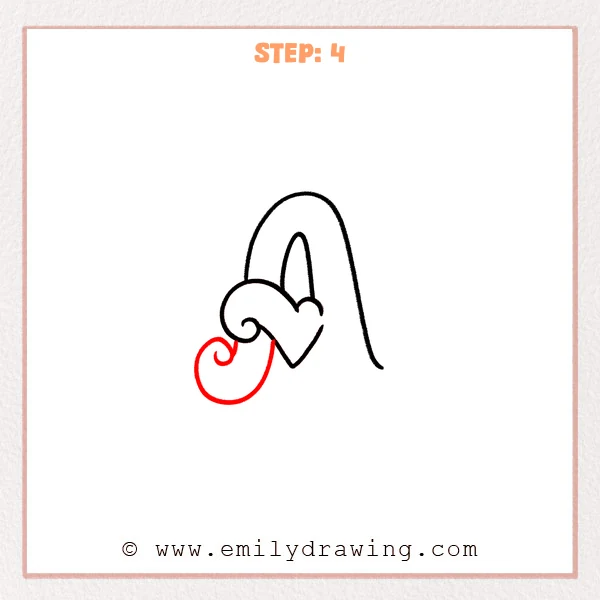
Extend a long curved line from the lower-left of the heart and loop it into a bigger spiral.
Curl the tip back inward into a tight little hook so it connects smoothly to the heart flourish.
Pro Tip: Draw the outer loop first, then the inner curl to keep the spiral round and steady.
Step 5: Add the Right Curl and Bottom Swoosh
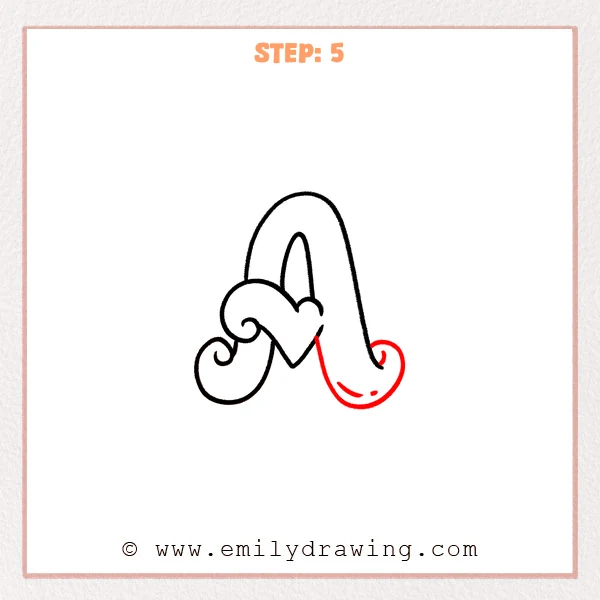
Add a small inward curl at the end of the long right tail to finish the stroke elegantly.
Pull a thick curved swoosh from under the heart toward the right, then leave two small gaps inside as decorative highlights.
Pro Tip: Keep the right curl smaller than the left spiral so the flourishes feel balanced.
Step 6: Add Highlights and Tiny Flourishes
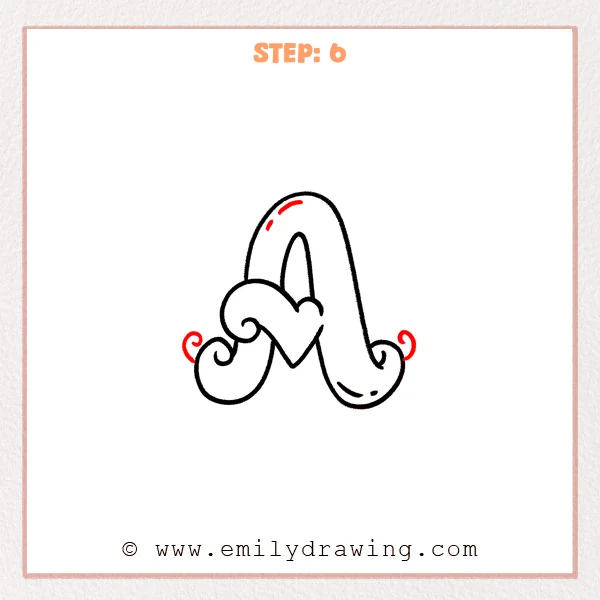
Add two short curved highlight strokes near the top inside of the fancy A to make it look glossy.
Add a tiny curl accent beside each side spiral to finish with a decorative touch.
Pro Tip: Keep highlights short and near the edge so they read like real shine.
Step 7: Color in your drawing!
Fun Facts
- Fancy letterforms are often inspired by calligraphy, where pressure changes create thick and thin strokes.
- Flourishes are decorative extensions that help a letter feel lively and elegant.
- Simple highlight marks can make flat shapes look polished without adding shading.
Pin it now, Draw later!
Go over your final lines with a steady pen if you want a crisp look.
Erase any sketch marks, then try coloring the letter with bright fills or soft pastels.
Keep practicing this step by step drawing method, and soon you will design your own fancy letters.
Get the FREE Printable Drawing Guide
FREE Download Printable Fancy Letter A Drawing Tutorial
Frequently Asked Questions
1) How do I keep the curves smooth while drawing for beginners?
Draw lightly first, use longer strokes, and adjust the curve before darkening it.
2) What if my fancy letter A looks lopsided?
Check the top arch and inner gap, then widen the thinner side slightly.
3) Can I change the decorations and still keep it readable?
Yes, keep the main A shape clear first, then add flourishes around it.