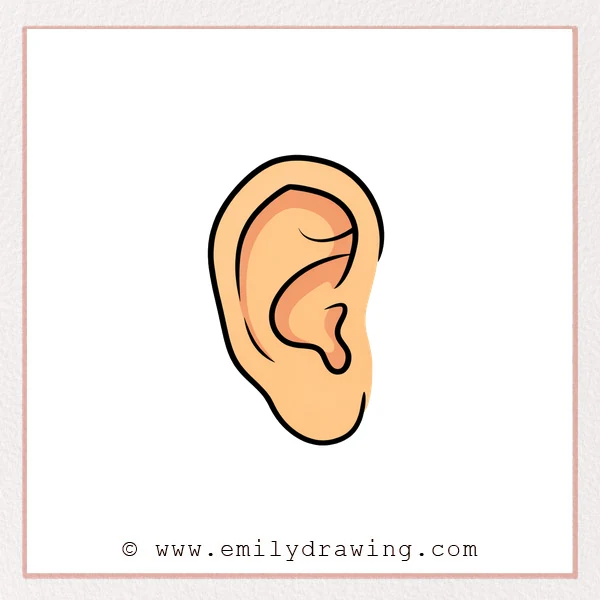
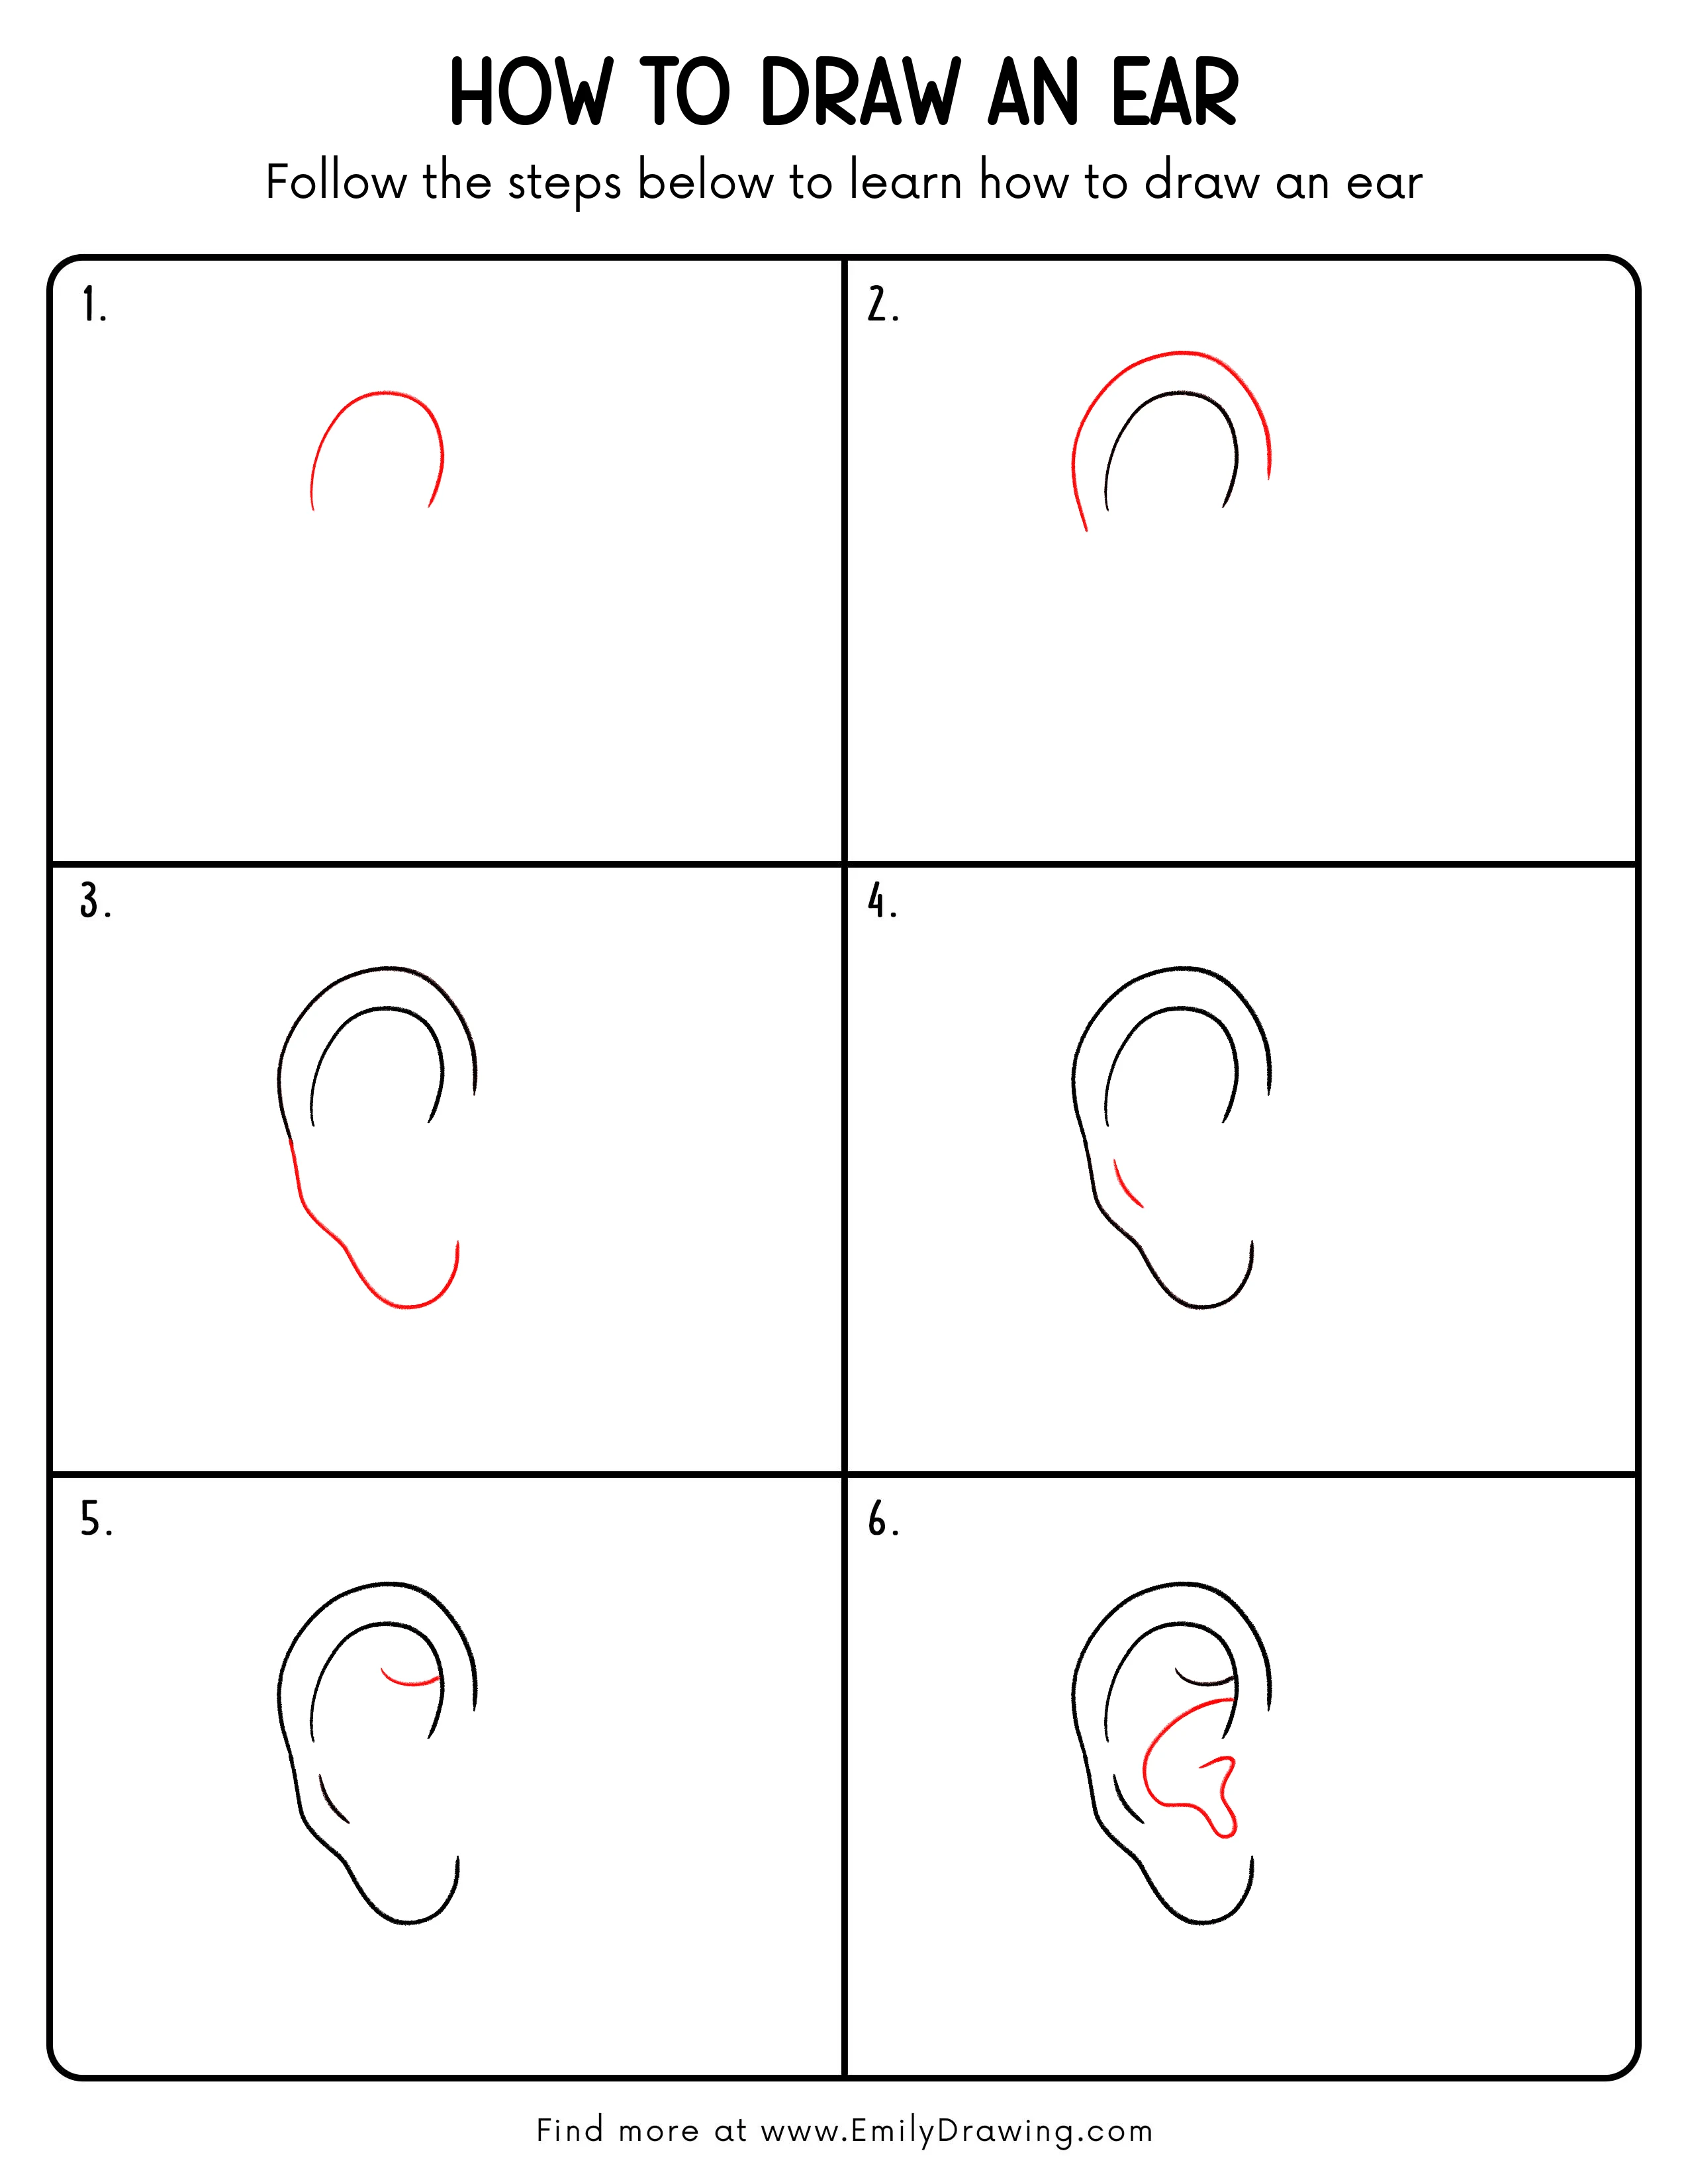
Drawing an ear is easier when you build it from simple curved shapes. In this guide, you will add a few clean lines to show the ear’s main forms. Take your time and keep your curves smooth.
What You Will Need
- Pencil
- Eraser
- Black pen or marker (optional)
- Paper
Here are my RECOMMENDED Art Supplies!
- Crayola Coloring Set (140 Pieces – Mega Value!)
- 24 Colored Crayon Set
- A4 Printer Paper
- Crayola Coloring Pencils
- HP Home Printer with Instant Ink!
Time needed:
13 minutes.
Step-by-Step Drawing Guide
Step 1: Outline the Ear Shape
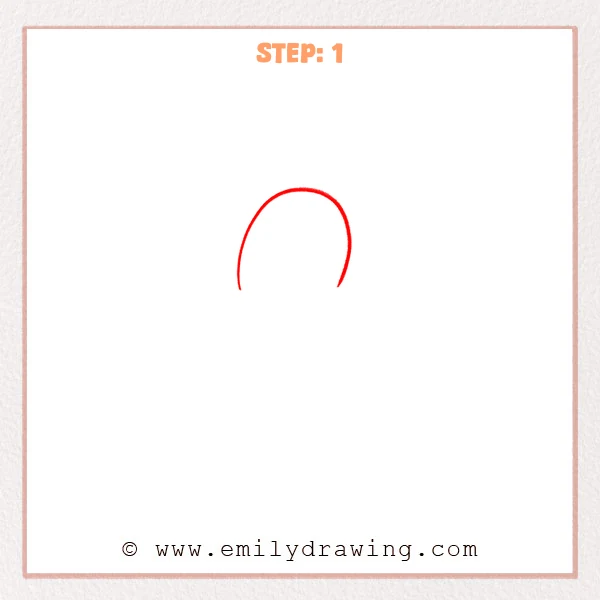
Start with a big curved arch to form the top of the ear. Let both sides taper downward, and keep the bottom open for now so you can shape the earlobe later.
Pro Tip: Keep the curve smooth, and make both sides reach a similar height.
Step 2: Add the Inner Ear Curve
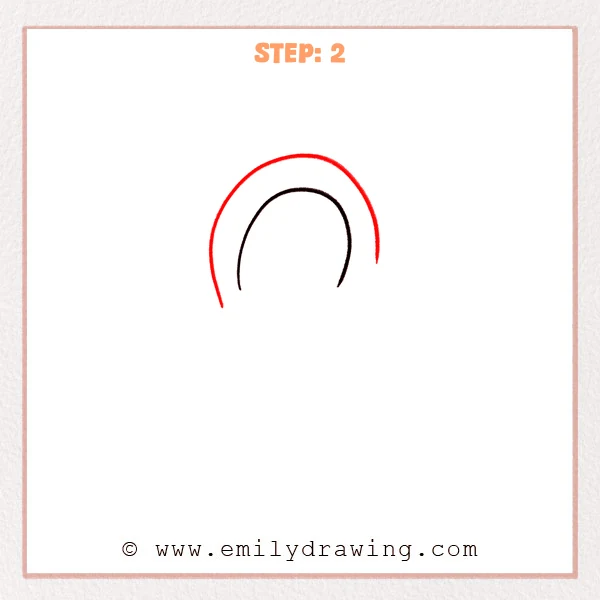
Inside the outer outline, draw a smaller arched curve that roughly follows the same shape. Let both ends taper downward, but keep a small gap from the outer line.
Pro Tip: Keep the inner curve’s top slightly lower than the outer arch for a natural look.
Step 3: Complete the Lower Ear and Earlobe
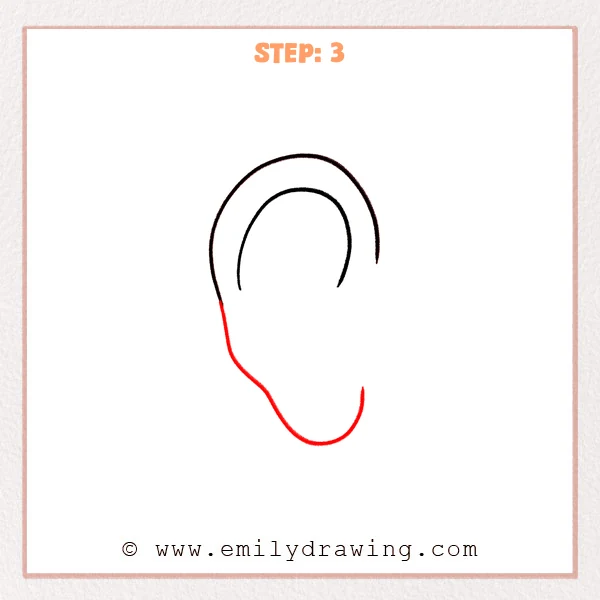
Continue the outer line down the left side with a long, smooth curve. Round it into a soft “U” shape at the bottom to suggest the earlobe, then bring it up toward the right side.
Pro Tip: Keep the earlobe curve rounded, not pointy, for a more realistic ear.
Step 4: Add a Small Tragus Curve
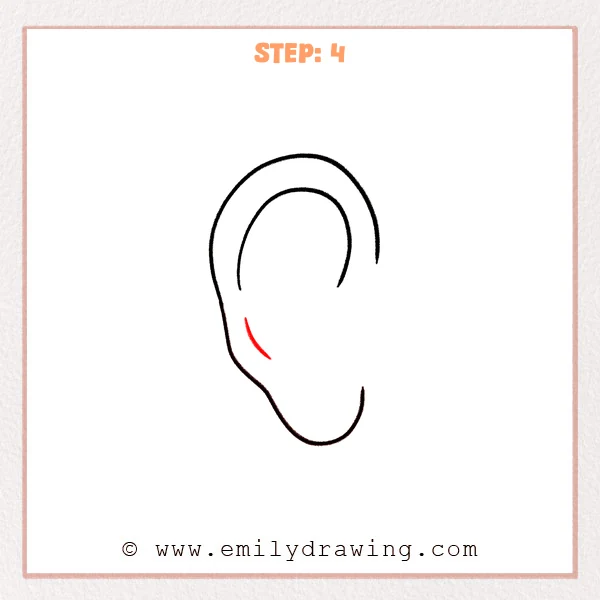
In the lower-middle area of the ear, draw a short curved stroke, like a small comma. Bend it toward the inside of the ear to suggest the tragus form.
Pro Tip: Keep this small curve short so the ear stays clean and readable.
Step 5: Add an Upper Inner Fold
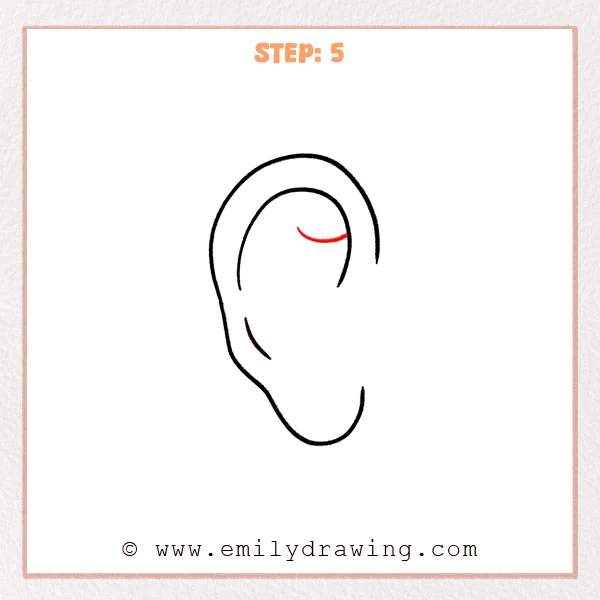
In the upper area inside the inner ear curve, draw a short curved line. Let it lift slightly like a soft crescent to suggest an inner fold.
Pro Tip: Keep this fold line light and short, and avoid touching the inner outline.
Step 6: Draw the Concha and Inner Contour
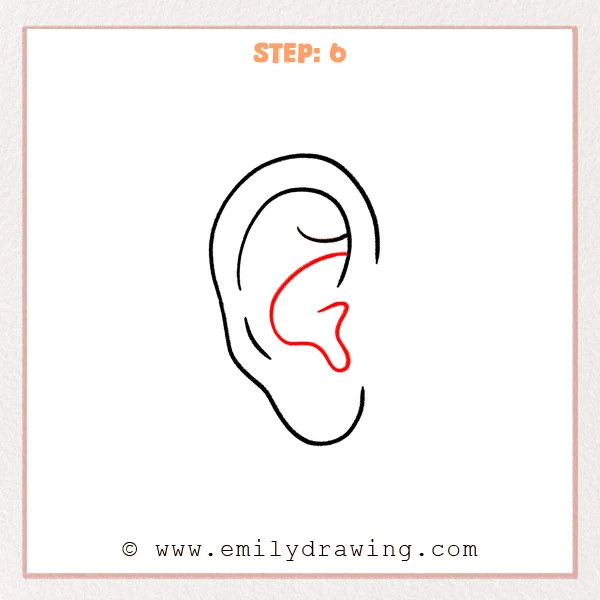
From the upper inner area, draw a long curved line sweeping downward to form a larger inner shape. Round it into a small bump near the lower area, then turn it back inward to suggest the concha depth.
Pro Tip: Keep this larger inner curve slightly deeper than the inner outline to show clear layers.
Step 7: Color in your drawing!
Fun Facts
- Your ears keep growing slowly throughout your life.
- The outer rim of the ear is called the helix.
- No two ears are exactly the same, even on the same person.
Pin it now, Draw later!
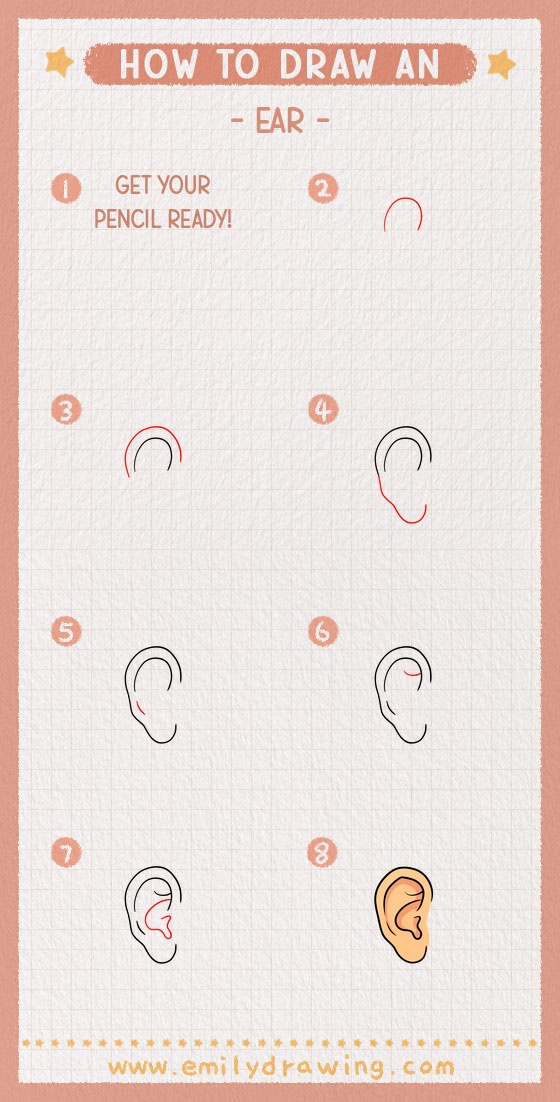
Lightly erase any sketchy overlaps and darken the clean lines you want to keep. If you like, add a tiny bit of shading inside the ear to show depth. Keep practicing, and try drawing ears at different sizes and angles next.
Get the FREE Printable Drawing Guide
FREE Download Printable Ear Drawing Tutorial
Frequently Asked Questions
Why does my ear look too flat?
Add a few inner folds with gentle curves, and keep clear spaces between layers.
How do I make the ear look more realistic?
Use smooth, confident lines and avoid sharp corners, especially on the earlobe.
Do I need to shade the ear?
No, a clean line drawing works well, but light shading can help show depth.