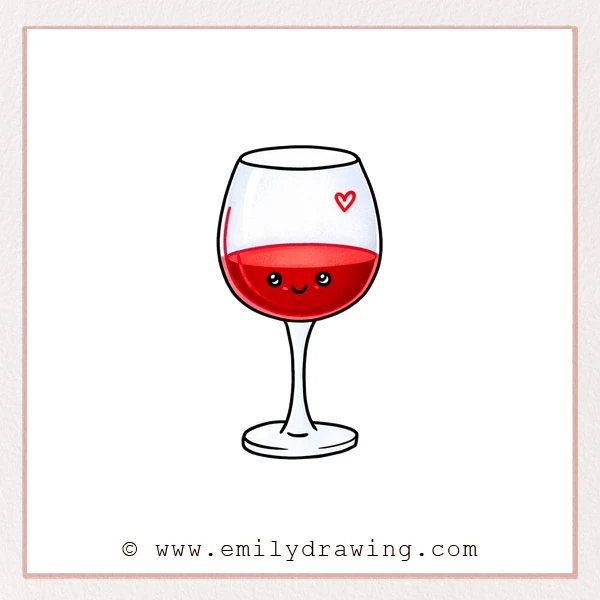
This easy drawing tutorial shows you how to draw a wine glass step by step in a calm and simple way. It is a good drawing for beginners because each part is built from soft curves and basic shapes. Take your time, and enjoy watching the glass come together one small step at a time.
What You Will Need
- Pencil
- Eraser
- Black pen or marker
- Paper
- Colored pencils or crayons
Here are my RECOMMENDED Art Supplies!
- Crayola Coloring Set (140 Pieces – Mega Value!)
- 24 Colored Crayon Set
- A4 Printer Paper
- Crayola Coloring Pencils
- HP Home Printer with Instant Ink!
Time needed:
26 minutes.
Step-by-Step Drawing Guide
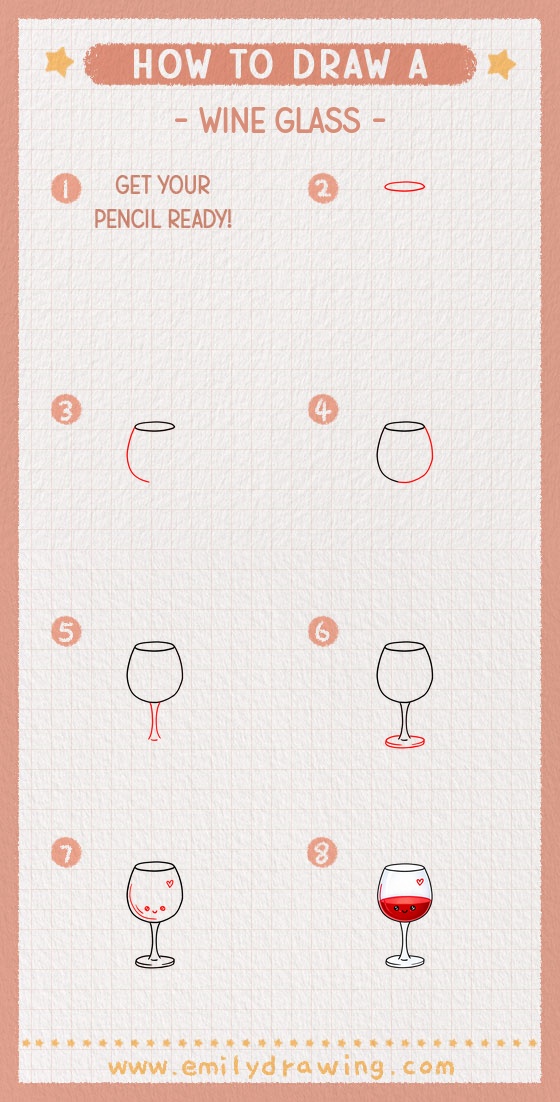
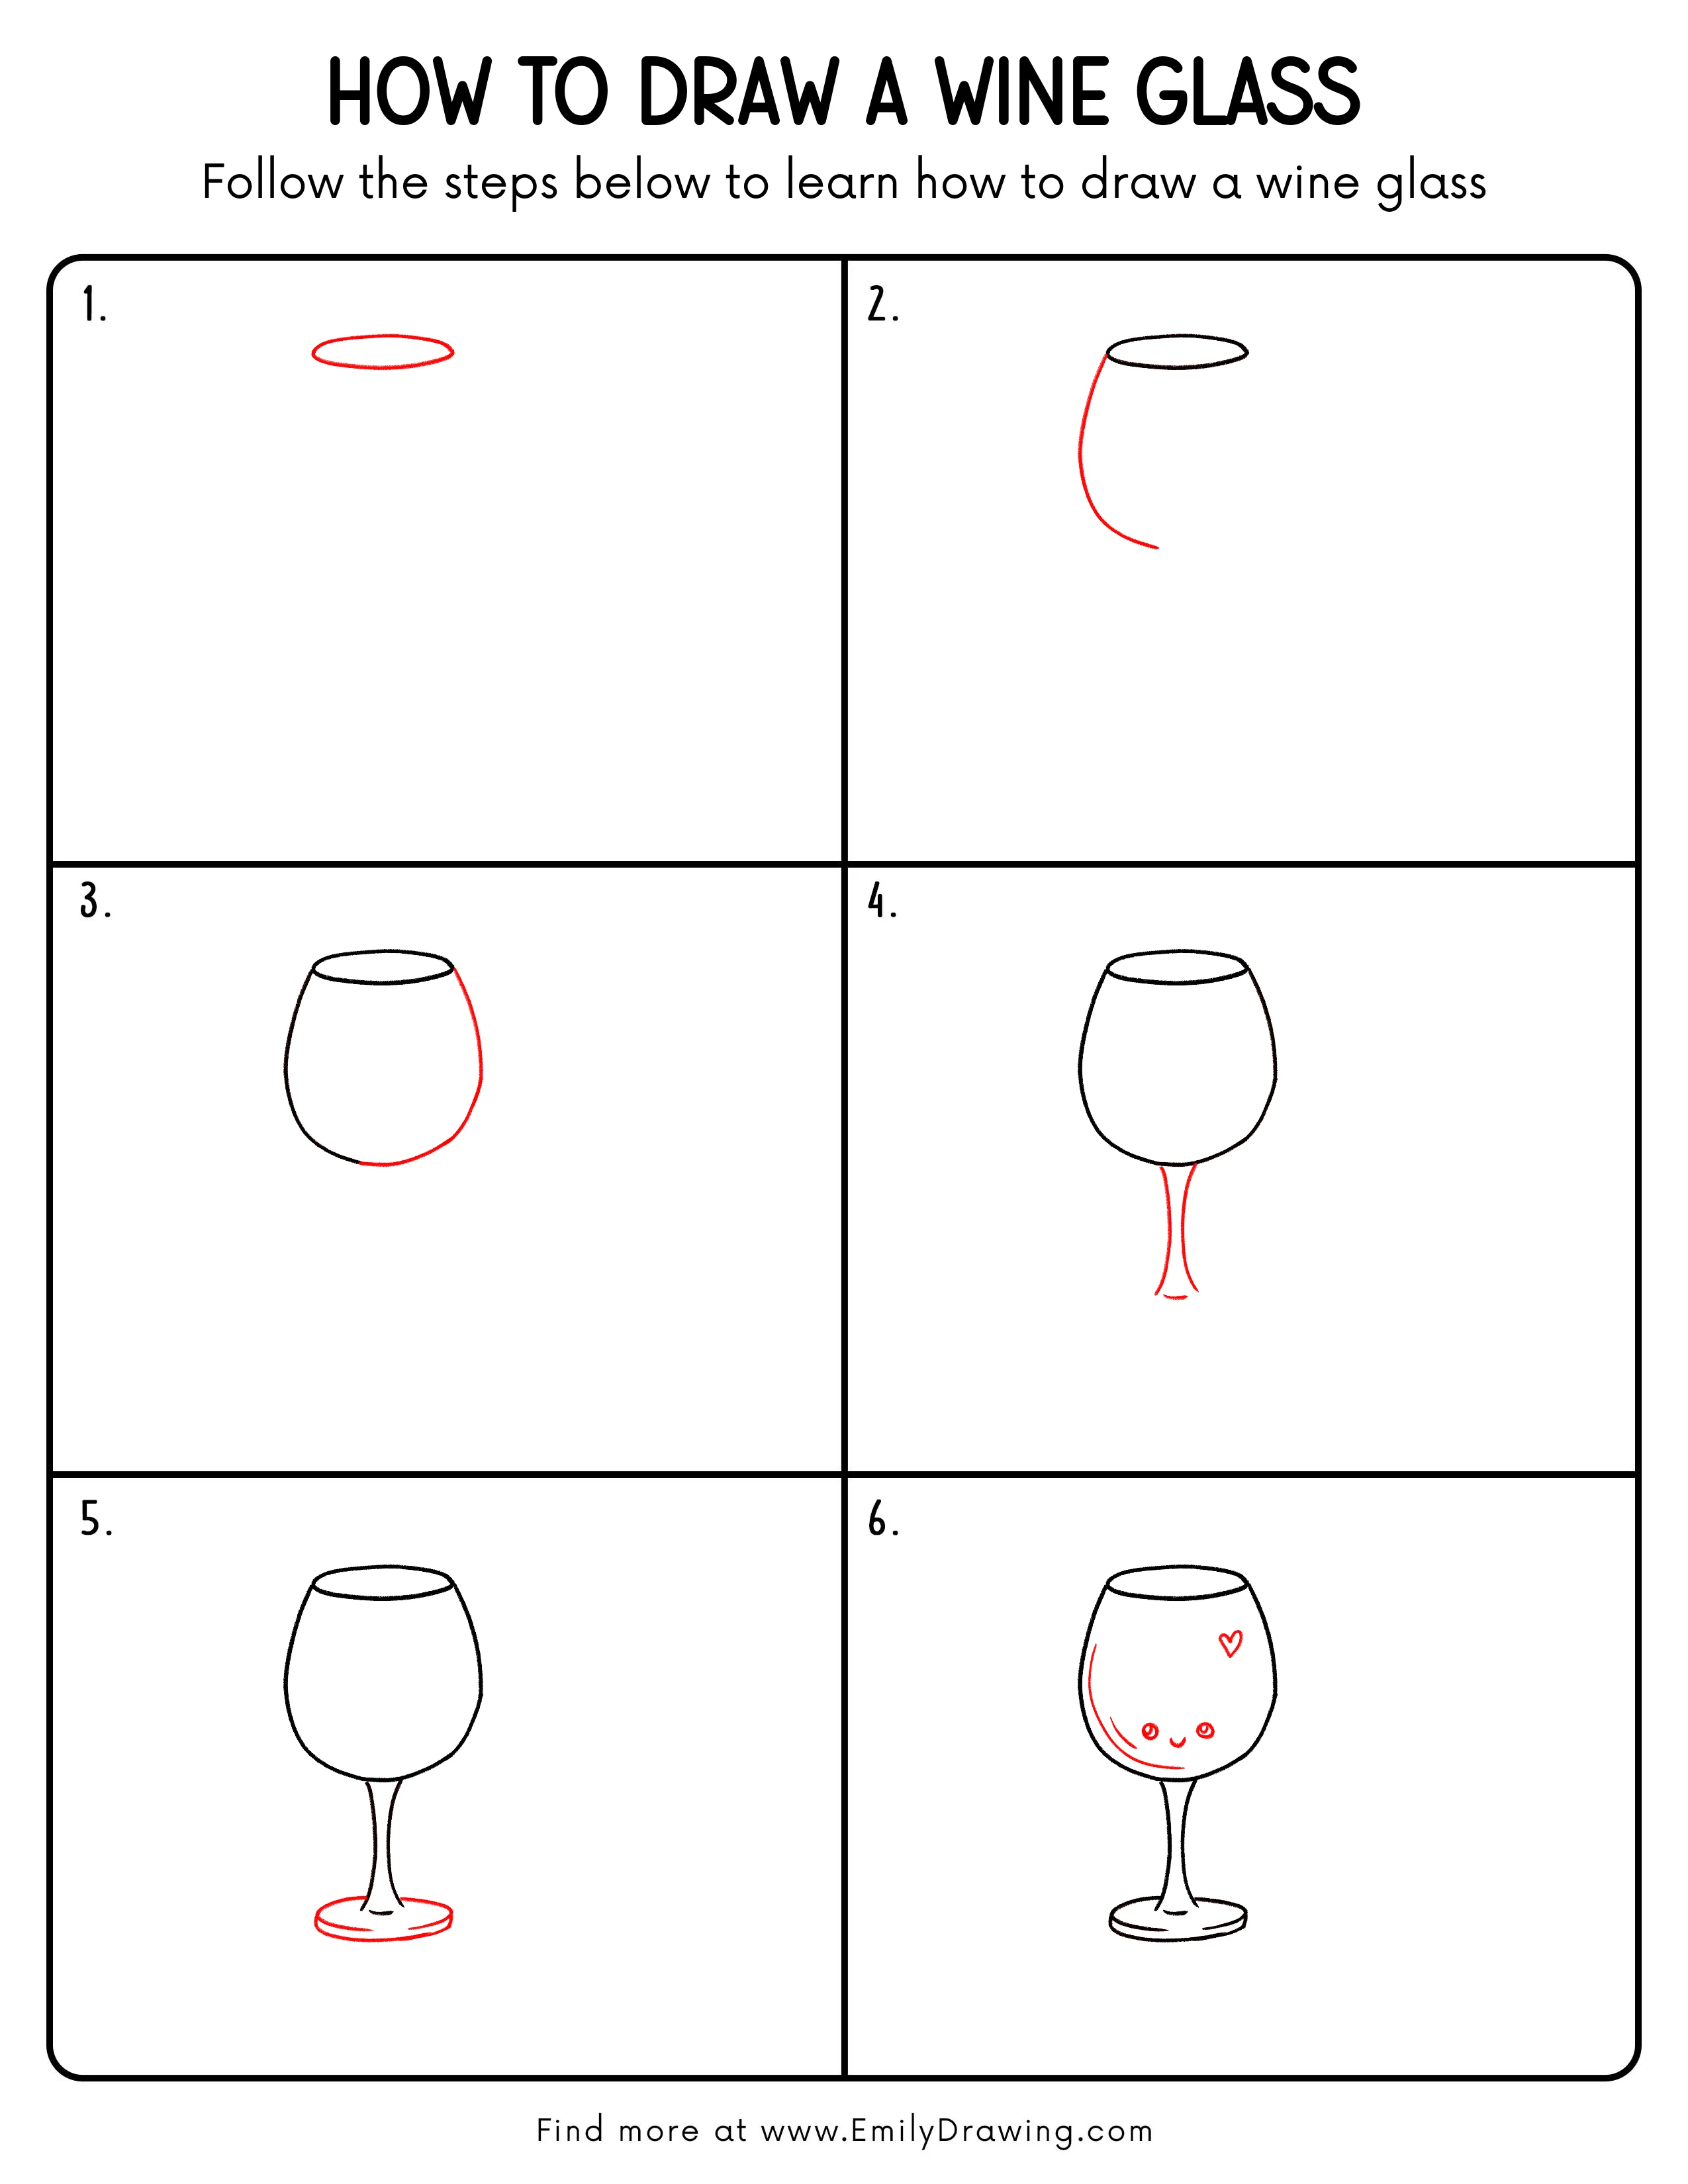
Step 1: Draw the Rim of the Glass
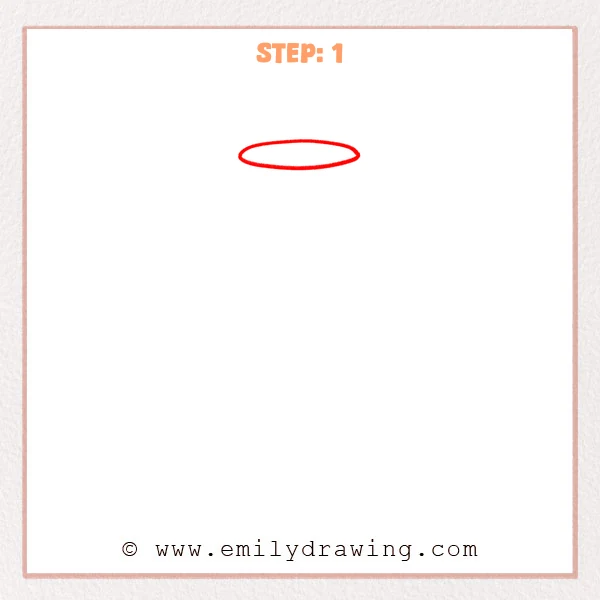
Start near the upper middle of the page and sketch a flat horizontal oval. This soft oval marks the top opening of the wine glass. Keep the shape light and wide.
Pro Tip: Keep both sides of the oval even so the rim looks balanced.
Step 2: Add the Left Curve of the Bowl
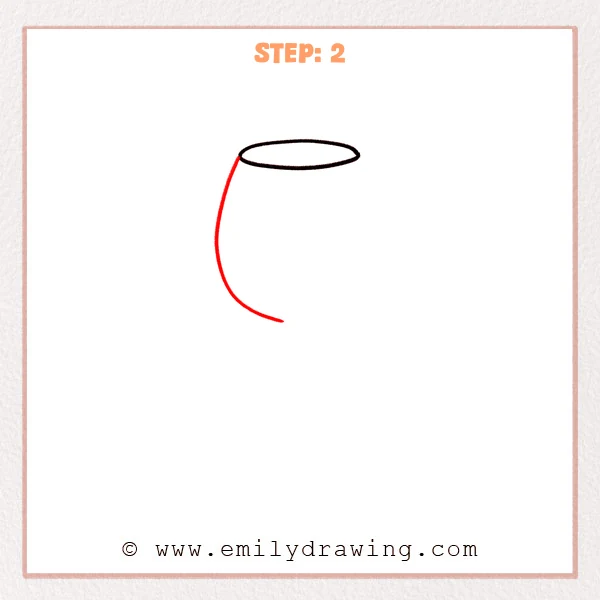
From the left side of the rim, bring down one long smooth curve. Let the line move outward first, then bend inward gently. This begins the rounded bowl of the wine glass.
Pro Tip: Keep the curve smooth so the bowl looks soft and natural.
Step 3: Add the Right Side and Round the Bottom
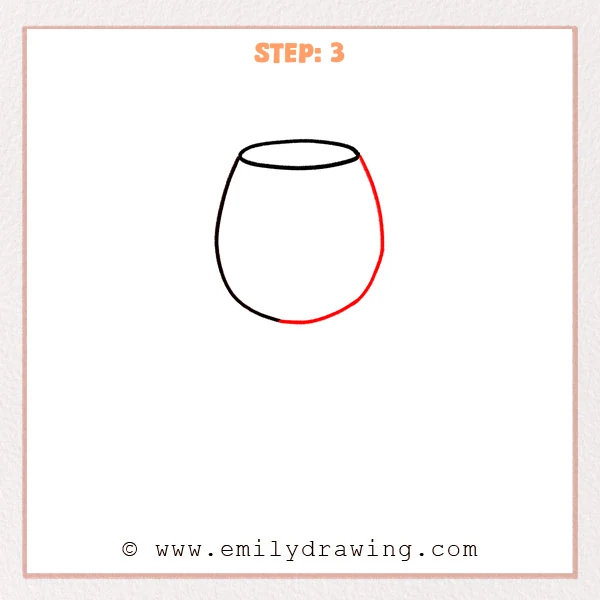
From the right side of the rim, sketch a matching curve downward. Connect the lower part with a soft rounded line. Now the bowl looks full and complete.
Pro Tip: Try to match the outward curves on both sides so the bowl looks even.
Step 4: Add the Slim Stem and the Start of the Base
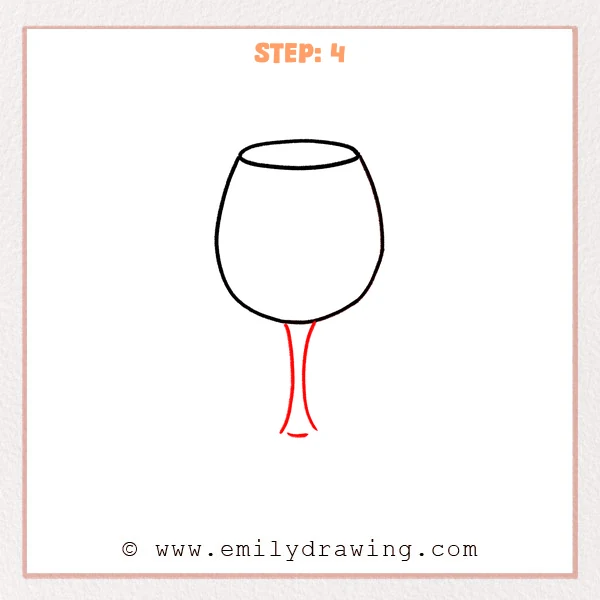
From the middle of the bowl’s bottom edge, extend two slender curved lines downward. Let them narrow softly through the center. Leave a small curved opening at the bottom to show where the base will begin.
Pro Tip: Keep the stem centered under the bowl so the glass looks balanced.
Step 5: Finish the Round Base
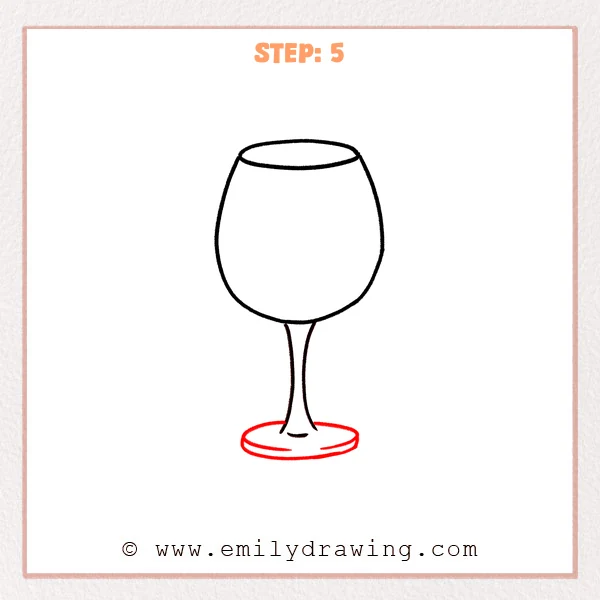
Under the stem, add a flat oval base that spreads gently to both sides. Draw a second curved line inside the base to suggest thickness. This gives the wine glass a steady and finished look.
Pro Tip: Make the base much wider than the stem so the glass looks steady.
Step 6: Add a Cute Face and Simple Decorations
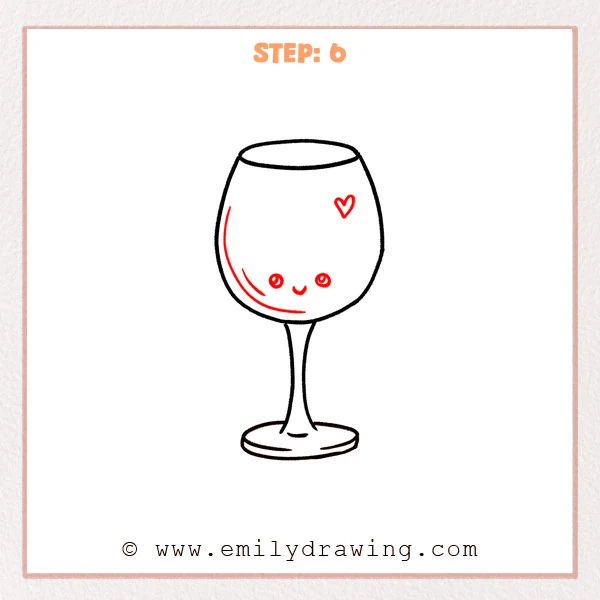
On the front of the bowl, add two small round eyes and a soft curved smile. Then draw a highlight curve along the left side and place a small heart near the upper right area. These details make the wine glass look sweet and playful.
Pro Tip: Place the face slightly below the center of the bowl so it feels balanced.
Step 7: Color in your drawing!
Fun Facts
- A wine glass often has a bowl, a stem, and a base.
- The wide bowl helps show the shape of the drink inside.
- Artists often use glasses to practice drawing smooth curves and reflections.
Pin it now, Draw later!
You started with a simple oval and slowly turned it into a complete wine glass drawing. The bowl, stem, and base all work together to create a neat and balanced shape. You can now color the glass lightly with gray, blue, or soft pink tones, and add gentle shading along one side for a shiny look. One common beginner mistake is making the stem off-center, which can make the glass look tilted. Keep practicing these soft curved shapes, and try more easy drawing tutorials to build your confidence.
Get the FREE Printable Drawing Guide
FREE Download Printable Wine Glass Drawing Tutorial
Frequently Asked Questions
How do I make the wine glass look more even?
Lightly sketch the center line first and compare both sides as you draw. Small checks can help the bowl stay balanced.
What if my oval looks too flat or too round?
That is completely normal in drawing for beginners. Try drawing a few practice ovals first until the shape feels comfortable.
Can I color the wine glass after outlining it?
Yes, you can. Use soft colors and light shading to keep the glass looking clear and smooth.