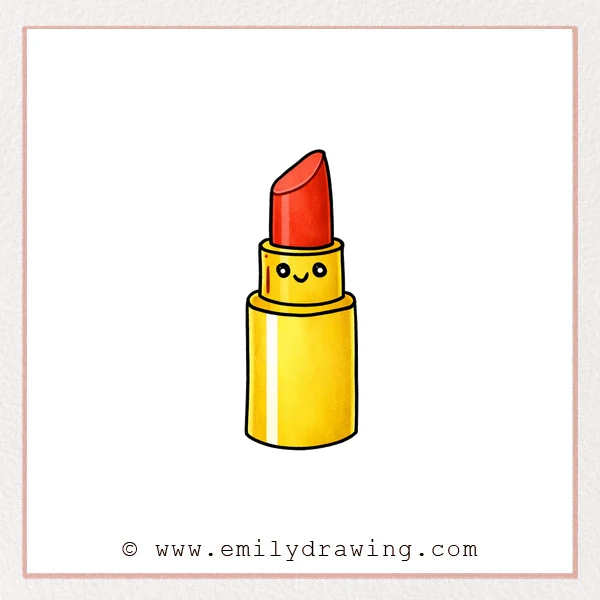
This easy drawing tutorial shows you how to draw a cute lipstick step by step in a calm and simple way. It is a lovely drawing for beginners, and each stage helps you build the shape a little more clearly.
What You Will Need
- Pencil
- Eraser
- Black pen or marker
- Red crayon, pencil, or marker
- Paper
Here are my RECOMMENDED Art Supplies!
- Crayola Coloring Set (140 Pieces – Mega Value!)
- 24 Colored Crayon Set
- A4 Printer Paper
- Crayola Coloring Pencils
- HP Home Printer with Instant Ink!
Time needed:
20 minutes.
Step-by-Step Drawing Guide
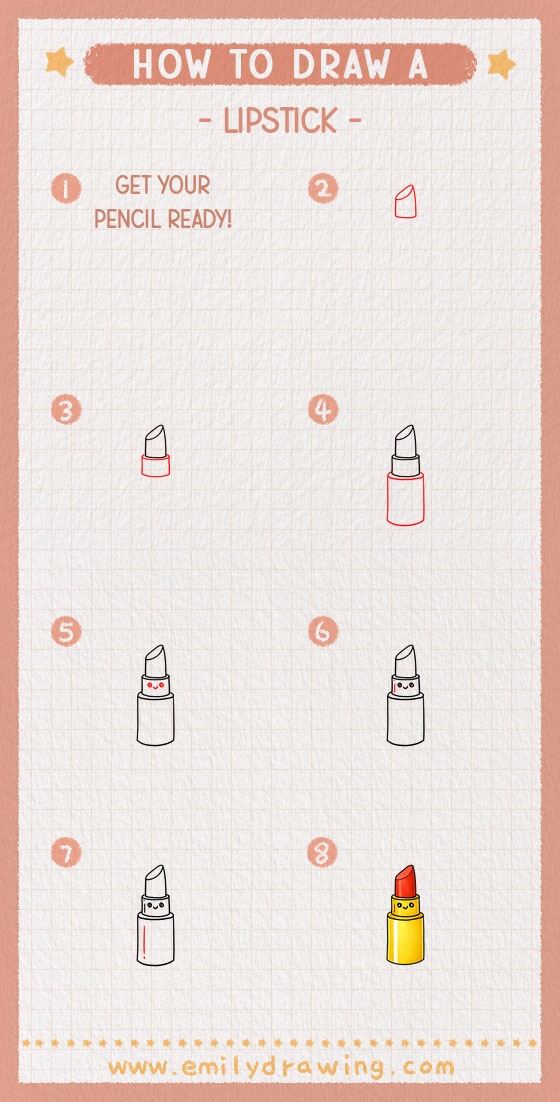
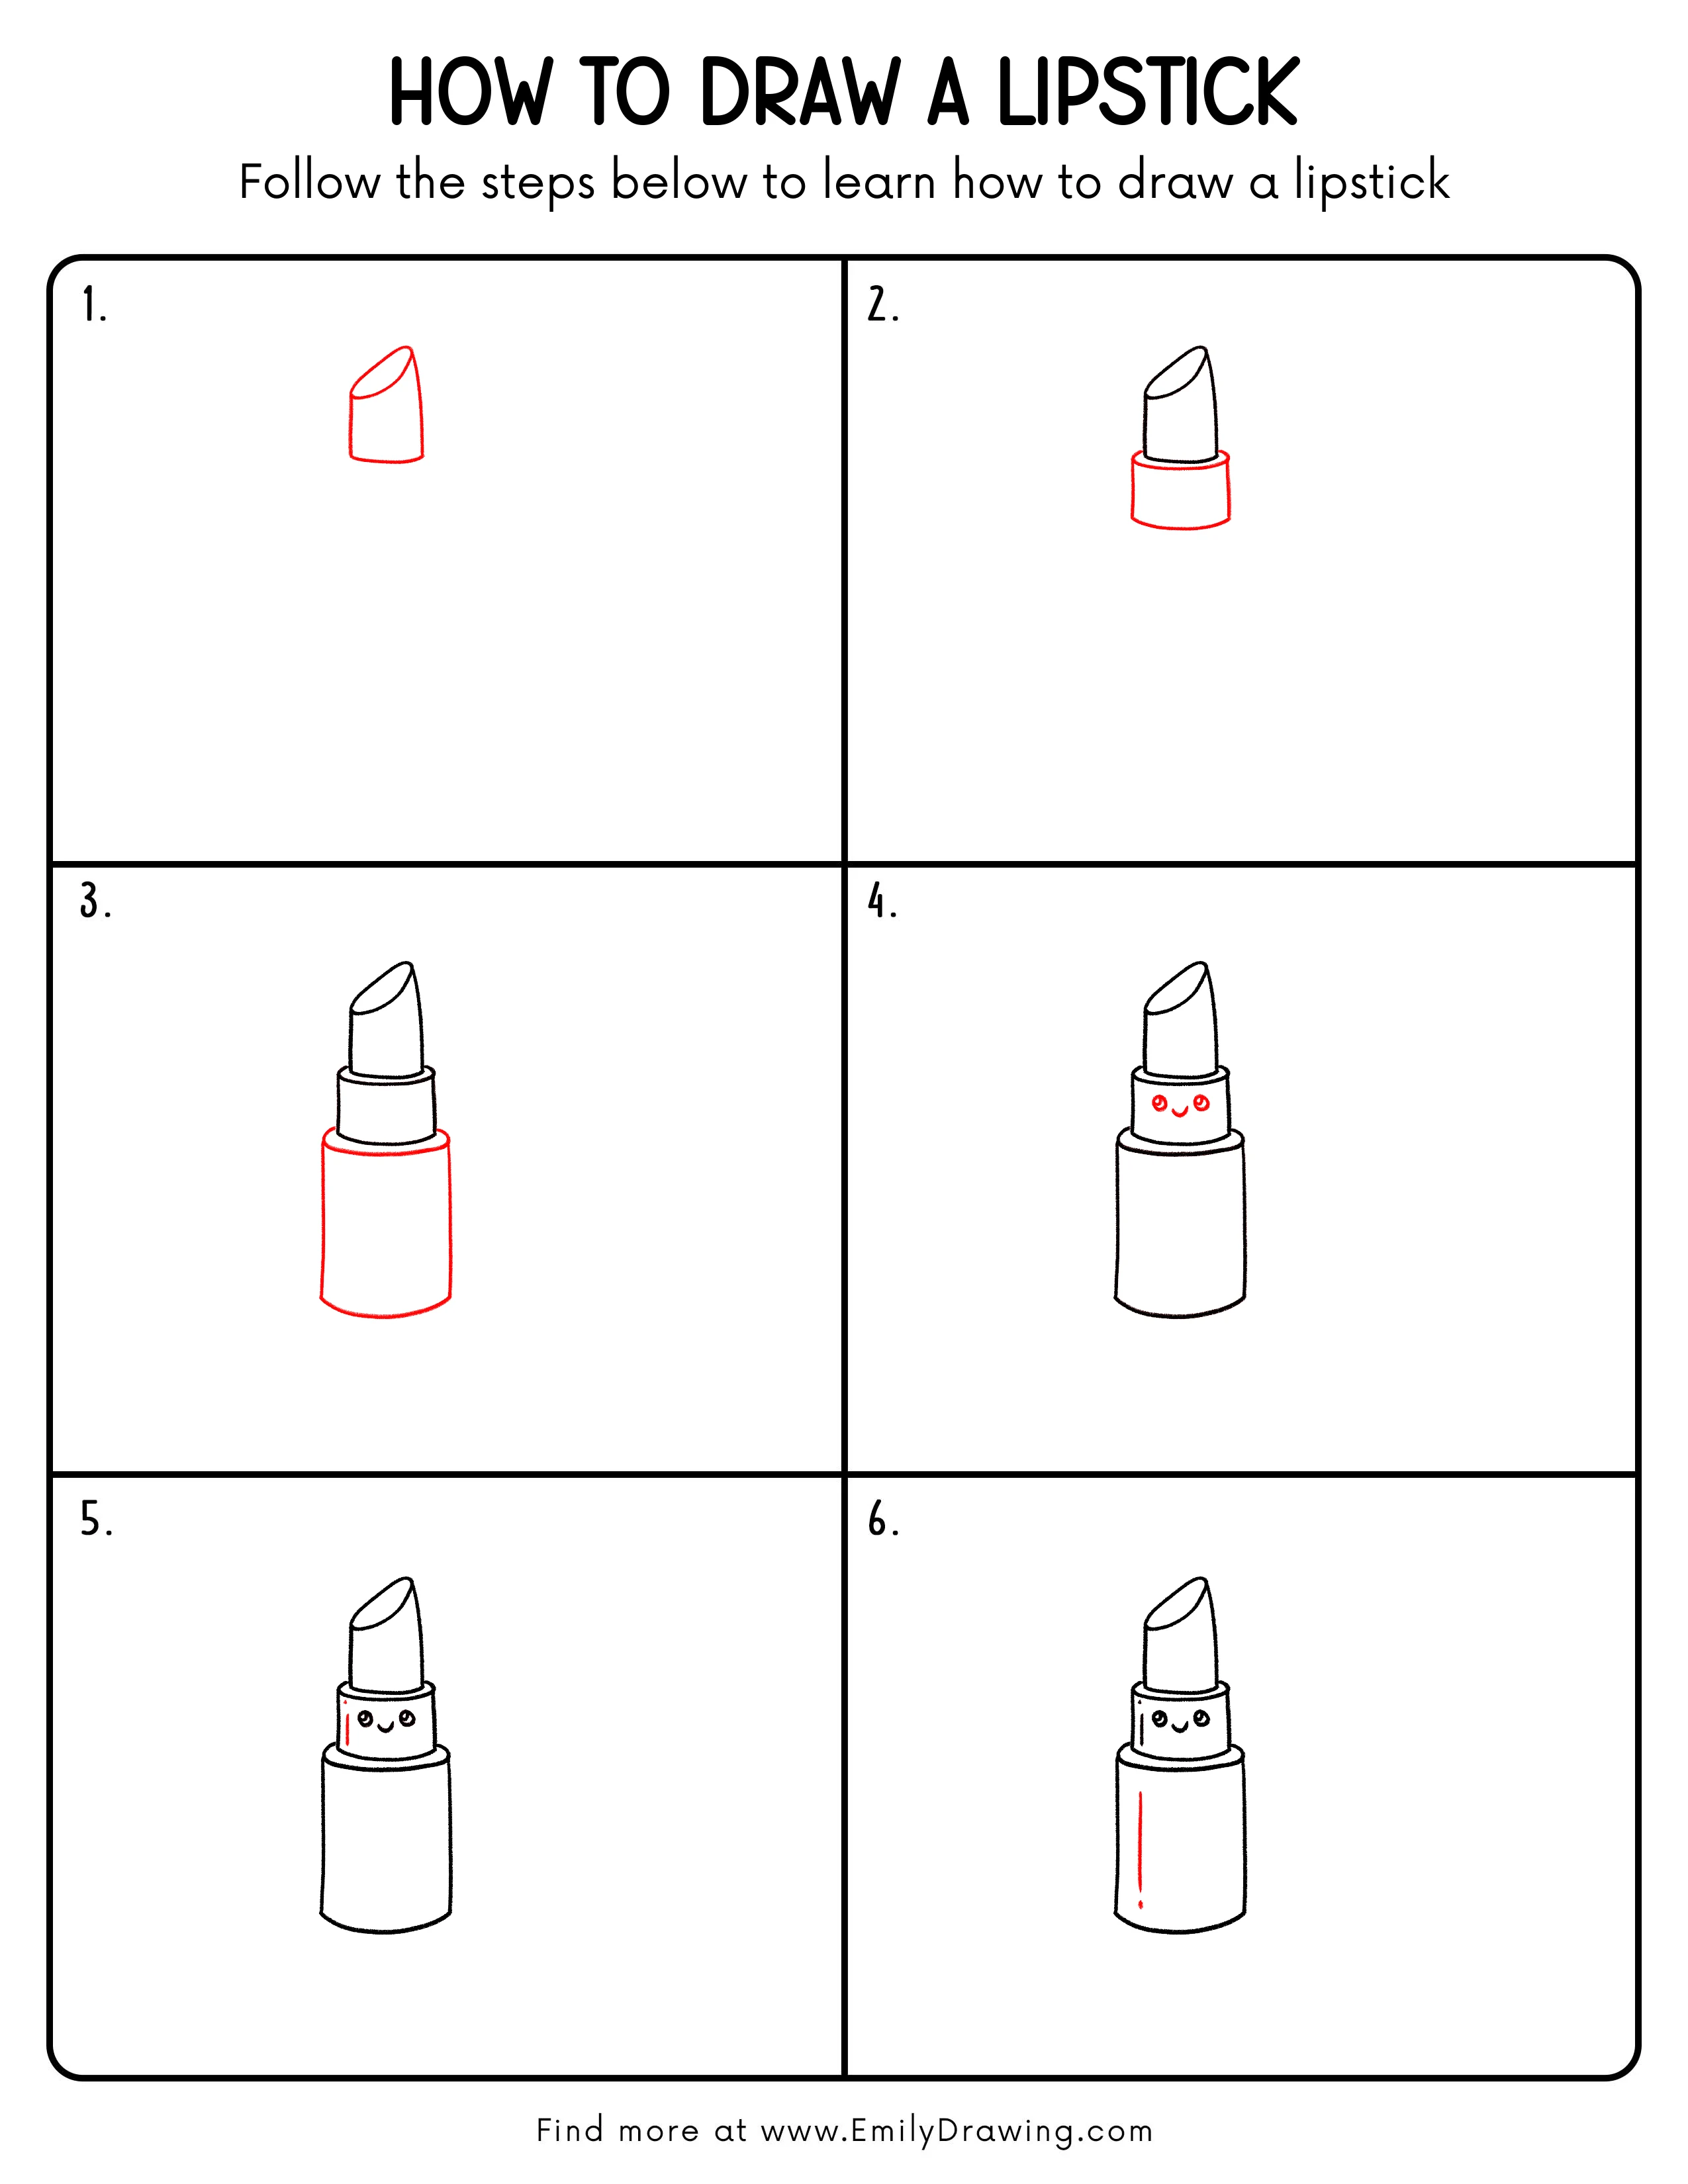
Step 1: Draw the Basic Lipstick Shape
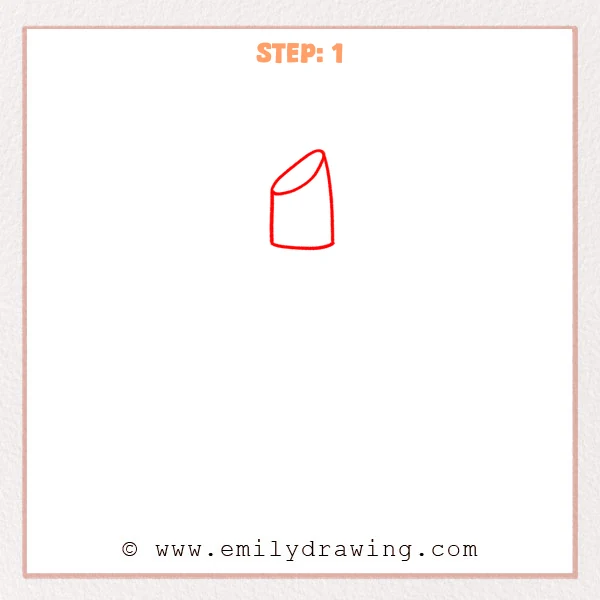
Start with a tall, simple tube in the middle of the page. Add a slanted top that leans to the right, so it looks like the cut surface of a real lipstick. Keep the base slightly rounded to make the form feel soft.
Pro Tip: Keep the first outline light, so the angle of the lipstick top is easy to adjust.
Step 2: Add the Lipstick Base
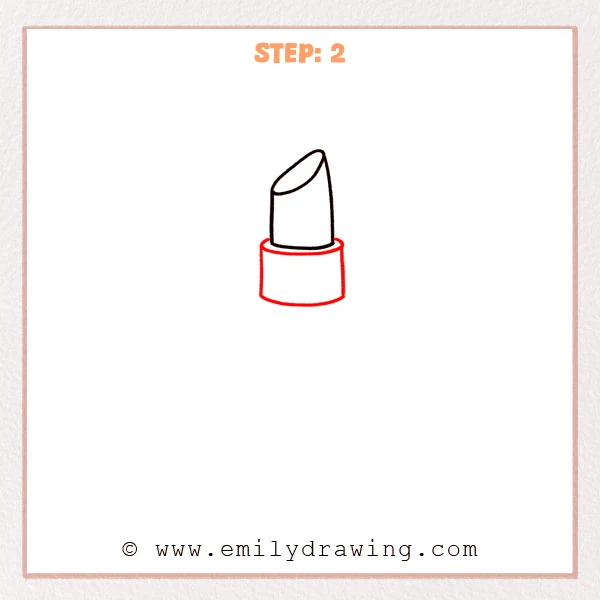
Now add a wider cylinder under the lipstick bullet, so it looks supported and balanced. Let the top edge curve into a slim oval line, which helps the case feel more three-dimensional. Keep this section neat and centered under the top shape.
Pro Tip: Make the base slightly wider than the lipstick bullet, so the proportions look more natural.
Step 3: Build the Full Lipstick Case
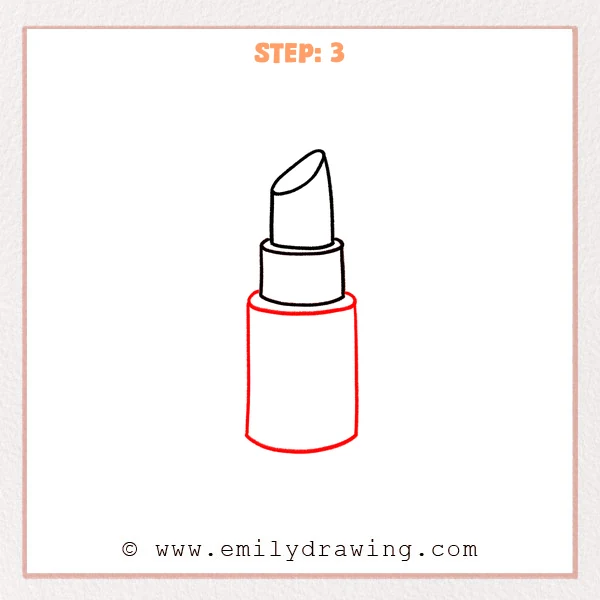
Extend a taller, larger cylinder below the middle section, so the lipstick starts to look complete. Keep the top rim and bottom curve smooth and rounded, which helps the case feel solid and three-dimensional. This lower section becomes the main outer case.
Pro Tip: Make the lower case taller than the middle section, so the layers read more clearly.
Step 4: Add a Cute Face
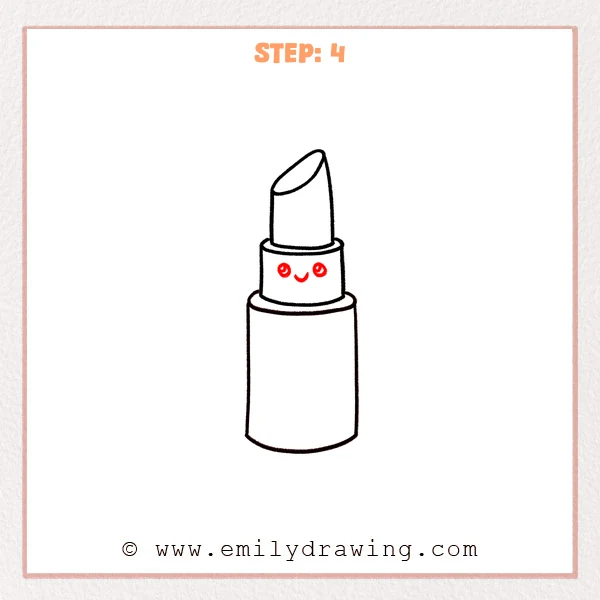
Place two small round eyes on the middle section, then add a soft curved smile between them. Keep the features centered with a little space around them, so the lipstick looks cute and neat. Small features work best for this gentle style.
Pro Tip: Keep the eyes close in size and level with each other, so the face looks balanced.
Step 5: Add a Small Decorative Accent
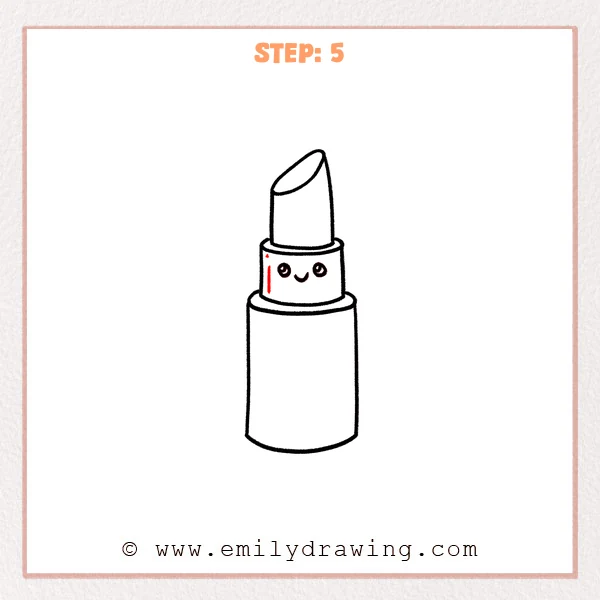
Place a slim vertical line on the left side of the middle section, then add a tiny teardrop-shaped mark above it. This little detail makes the lipstick look more playful, like a cute design on the case. Keep the accent small so it does not crowd the face.
Pro Tip: Keep the accent lines thin and light, so they suit the cute style better.
Step 6: Add a Bold Decorative Mark on the Case
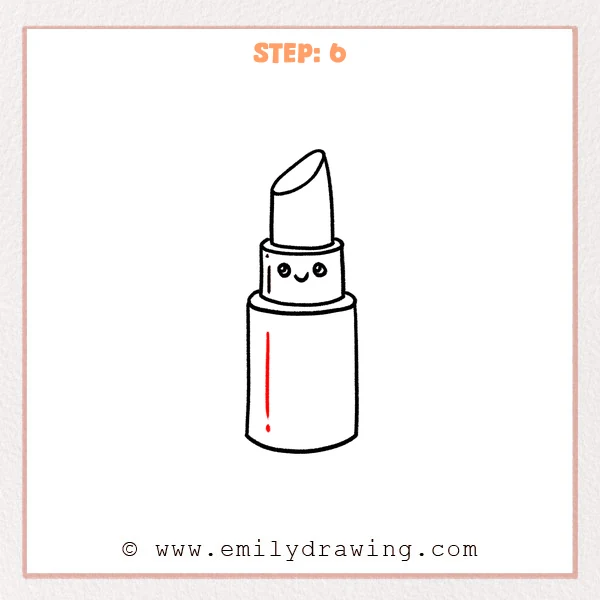
Place a long vertical line on the left side of the lower case, then add a small dot at the bottom so it looks like a cute exclamation mark. This extra detail gives the lipstick case more design and makes the drawing feel livelier. Leave the rest of the case clean for a simple finish.
Pro Tip: Leave a small gap between the long line and the dot, so the decorative mark reads more clearly.
Step 7: Color in your drawing!
Fun Facts
- Lipstick comes in many shapes, but the slanted tip is one of the most common.
- Many artists turn everyday objects into cute characters by adding simple faces.
- A lipstick drawing is a fun way to practice cylinders, curves, and small details.
Pin it now, Draw later!
You have now completed a cute lipstick drawing for beginners by building the shape one step at a time. Add color to the lipstick tip, and try gentle shading along one side of the case to help it look round. One common beginner mistake is making the face too large, so keep the features small and centered. Keep practicing this step by step drawing, and enjoy trying more easy drawing tutorials.
Get the FREE Printable Drawing Guide
FREE Download Printable Lipstick Drawing Tutorial
Frequently Asked Questions
How do I make my lipstick drawing look more 3D?
Use curved top edges and add light shading on one side. This helps the round parts look more solid.
Can beginners draw lipstick easily?
Yes, they can. The shape is made from simple cylinders and a few small details.
What color should I use for the lipstick?
You can use red, pink, purple, or any color you like. Bright colors often make the drawing feel cheerful.