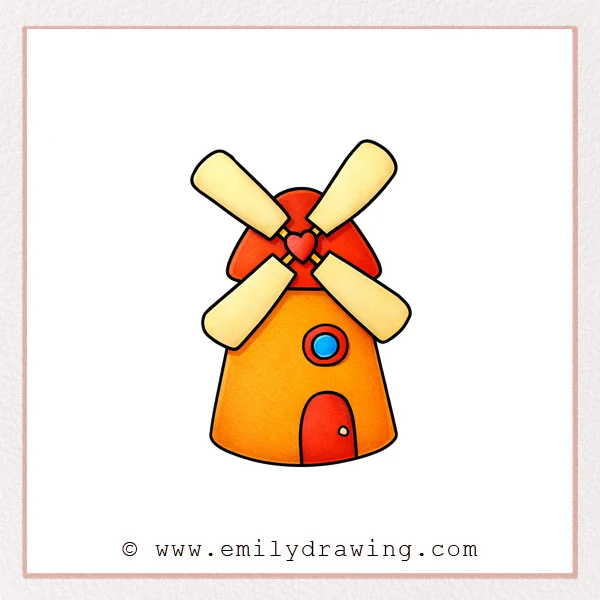
Drawing a windmill is a calm and enjoyable activity for beginners. In this easy drawing tutorial, you will build the picture one small step at a time, using simple shapes and soft lines. By the end, you will have a cute windmill with rounded blades, a heart-shaped center, and a cozy little tower.
What You Will Need
- Drawing paper
- Pencil
- Eraser
- Black pen or marker
- Colored pencils or crayons
Here are my RECOMMENDED Art Supplies!
- Crayola Coloring Set (140 Pieces – Mega Value!)
- 24 Colored Crayon Set
- A4 Printer Paper
- Crayola Coloring Pencils
- HP Home Printer with Instant Ink!
Time needed:
17 minutes.
Step-by-Step Drawing Guide
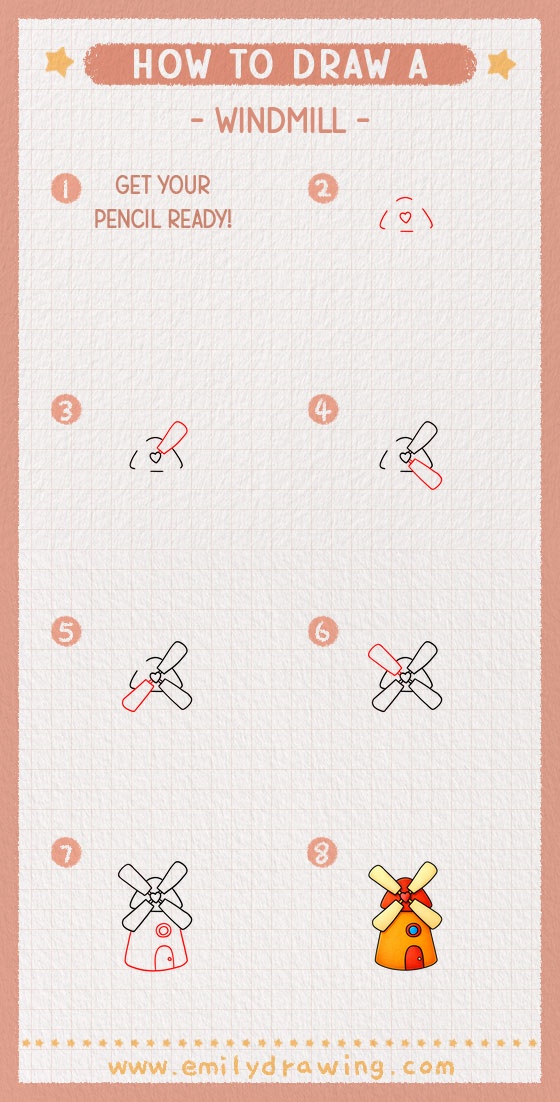
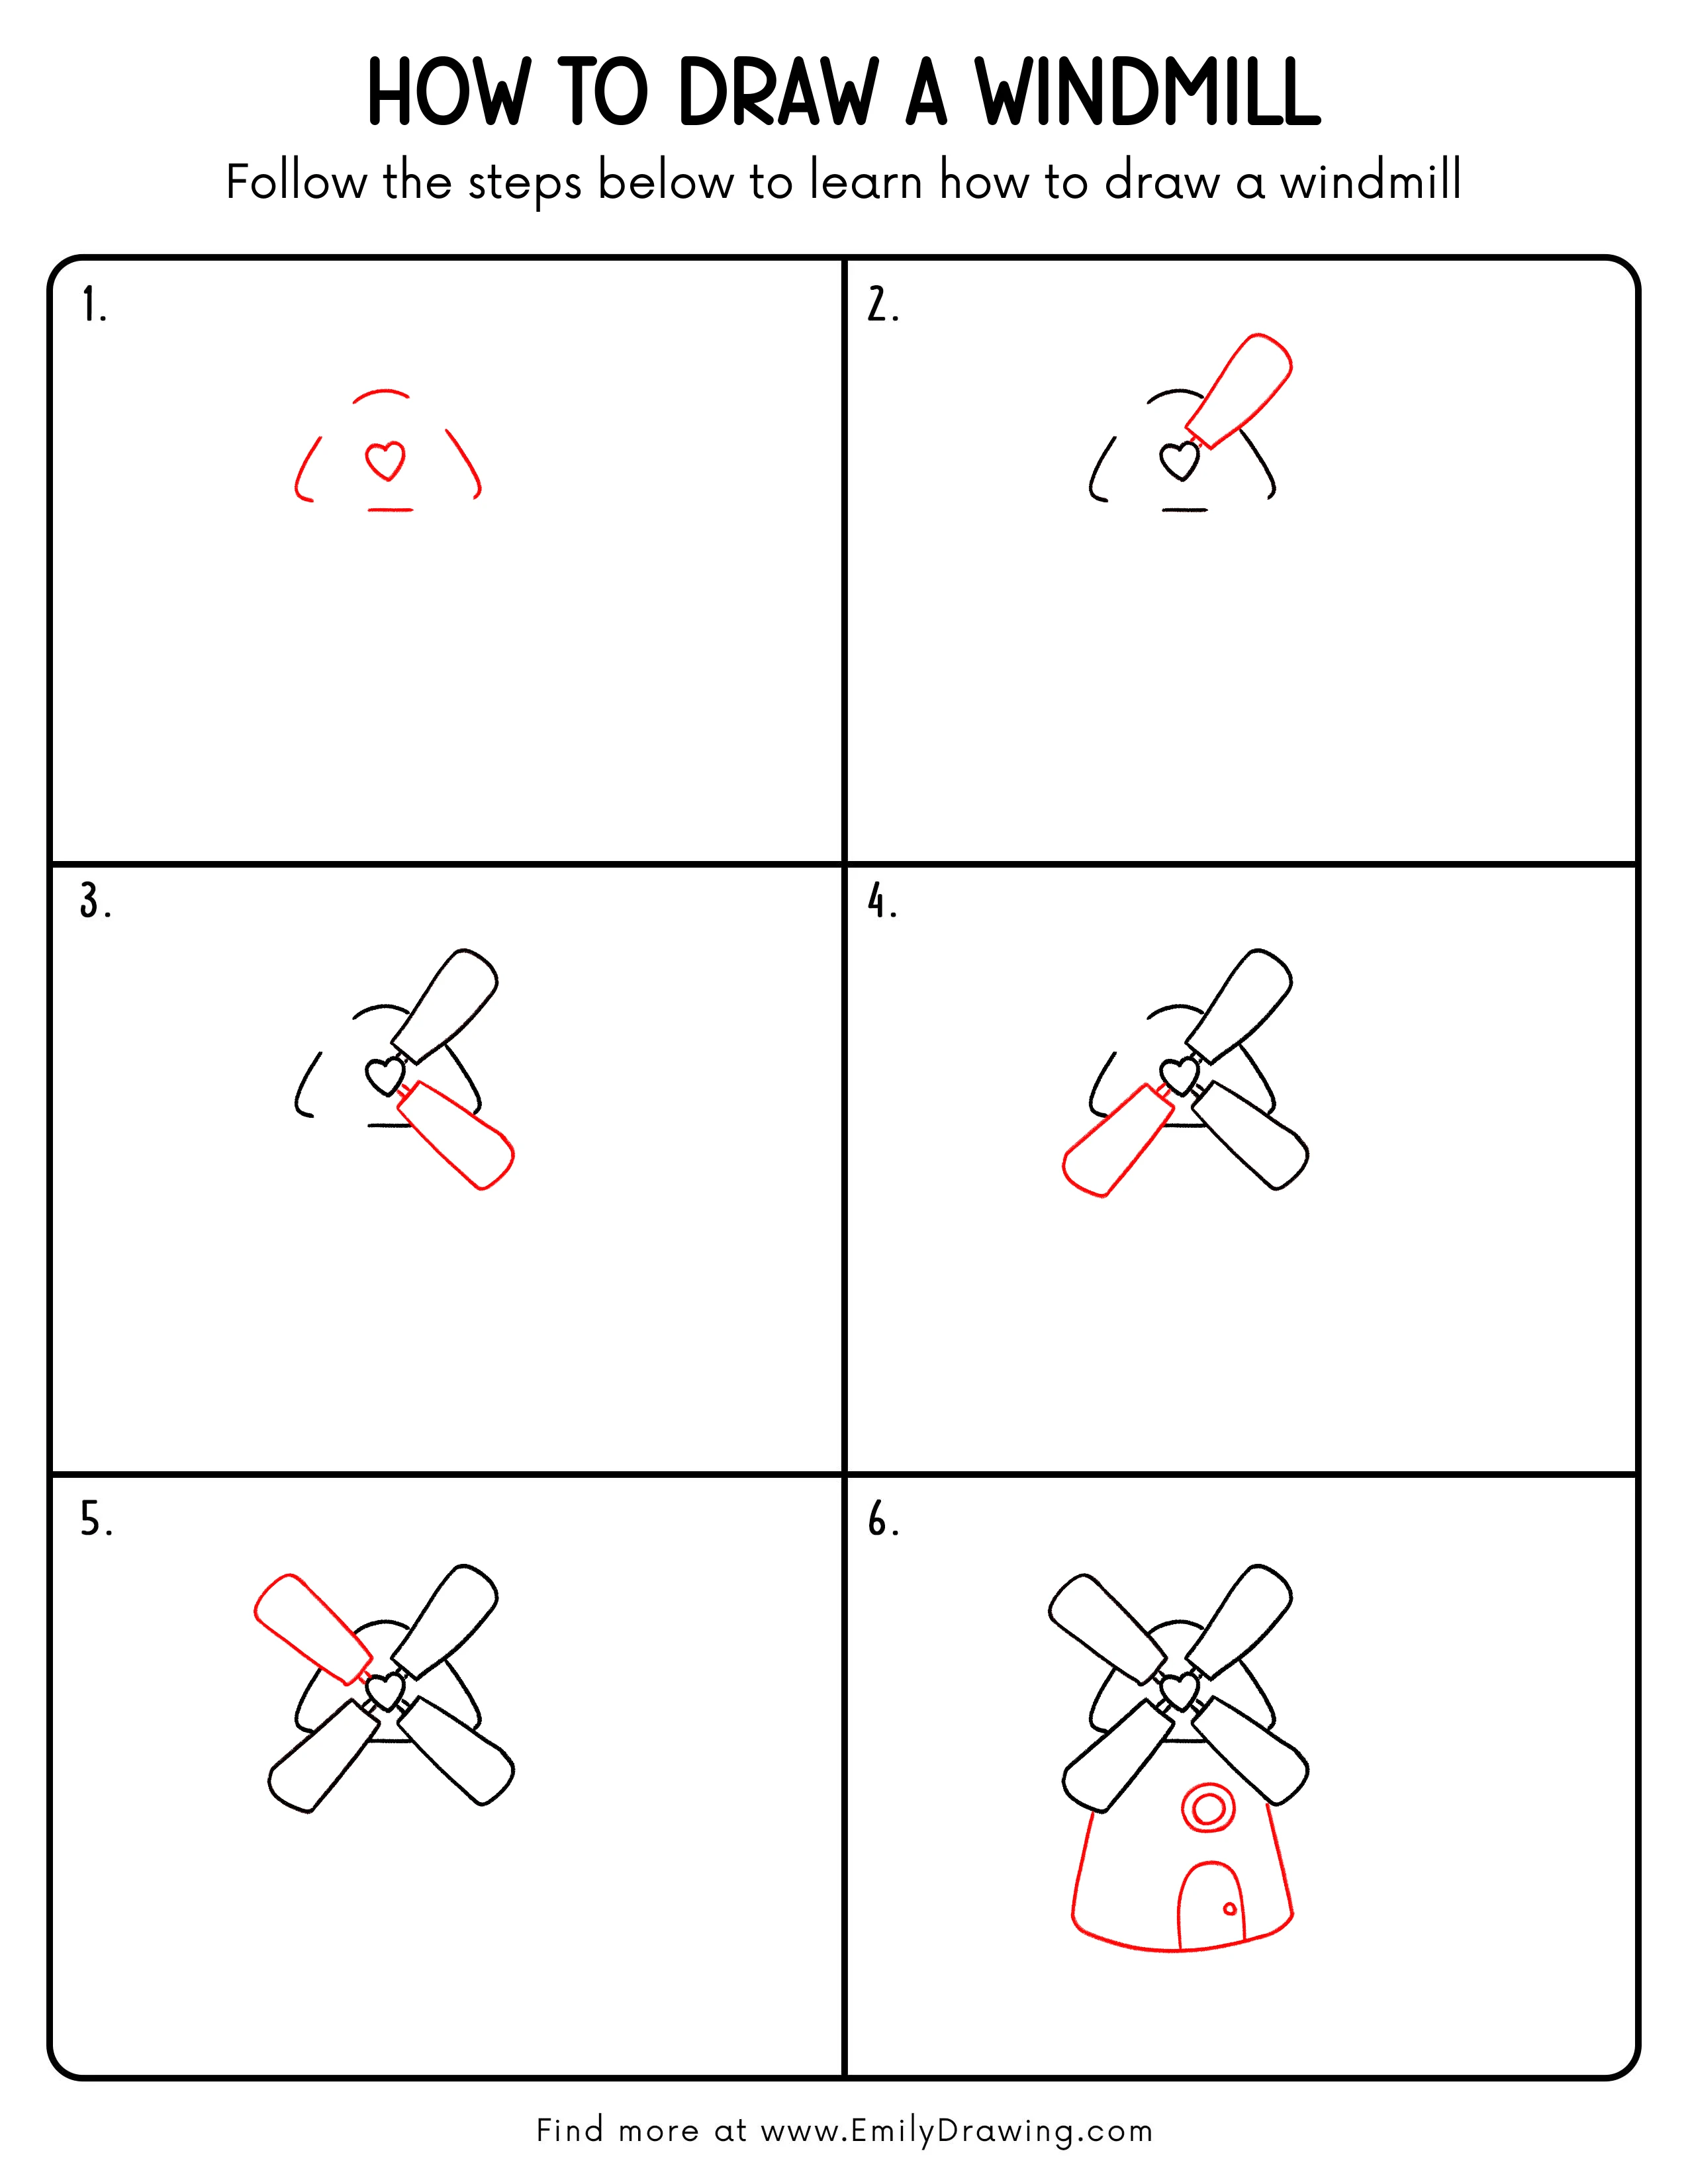
Step 1: Draw the Windmill Center and Outer Guide
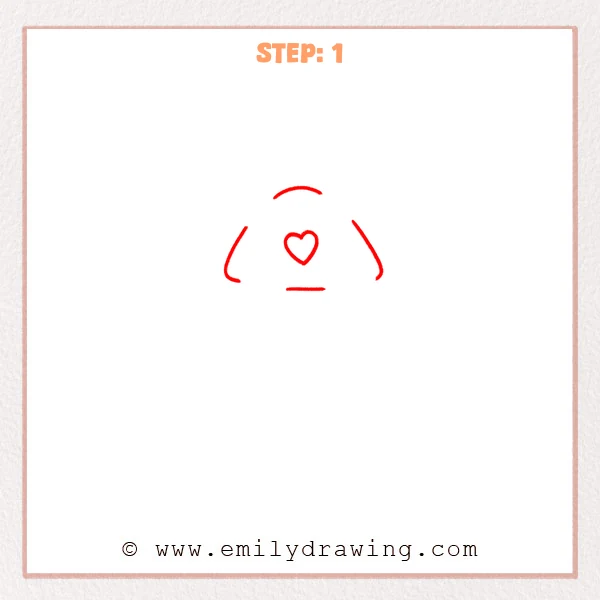
Start with a small heart in the middle for the windmill’s center decoration. Then add short curved guide lines around it at the top, both sides, and bottom. Keep a little space between the heart and these outer marks.
Pro Tip: Keep the heart fairly small so the space around it stays even.
Step 2: Add the First Windmill Blade
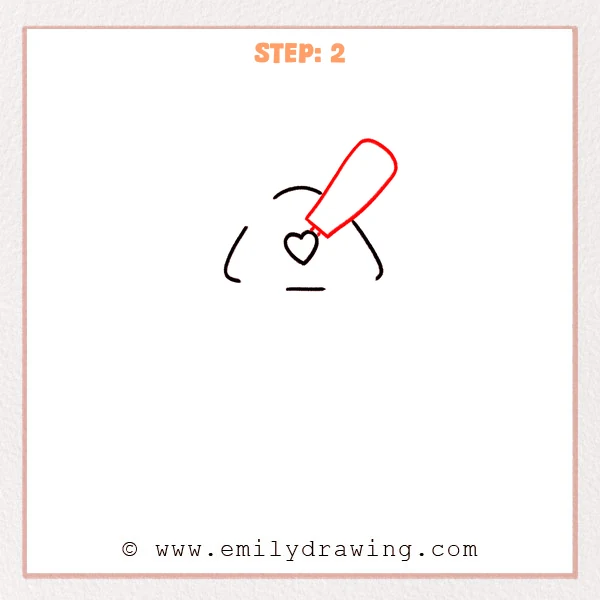
Start from one side of the heart and sketch a long blade stretching toward the upper right. Give the blade a rounded tip and bring its base back near the center. Let the shape feel soft and wide.
Pro Tip: Keep the blade tip nicely rounded so the windmill looks soft and balanced.
Step 3: Add the Second Windmill Blade
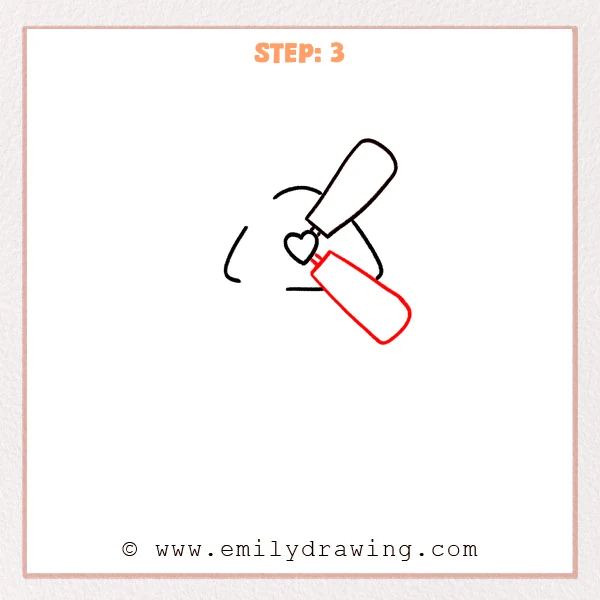
From the lower right side of the heart, add a second blade reaching diagonally down to the right. Match the rounded end and gentle width of the first blade. This helps the windmill begin to feel open and spinning.
Pro Tip: Keep this blade close in length to the first one so the shape stays balanced.
Step 4: Add the Third Windmill Blade
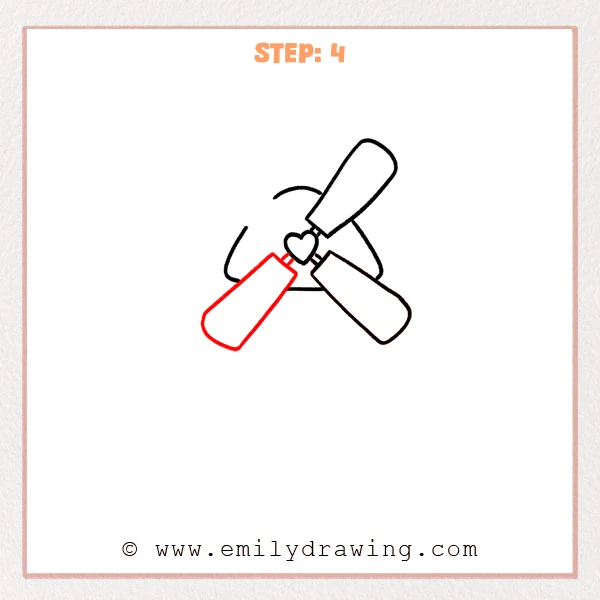
Now add a third blade from the lower left side of the heart. Let it lean down toward the left with the same rounded top and soft corners. The group of blades should now feel fuller.
Pro Tip: Let this blade echo the angle of the lower right blade so the windmill feels more balanced.
Step 5: Add the Final Windmill Blade
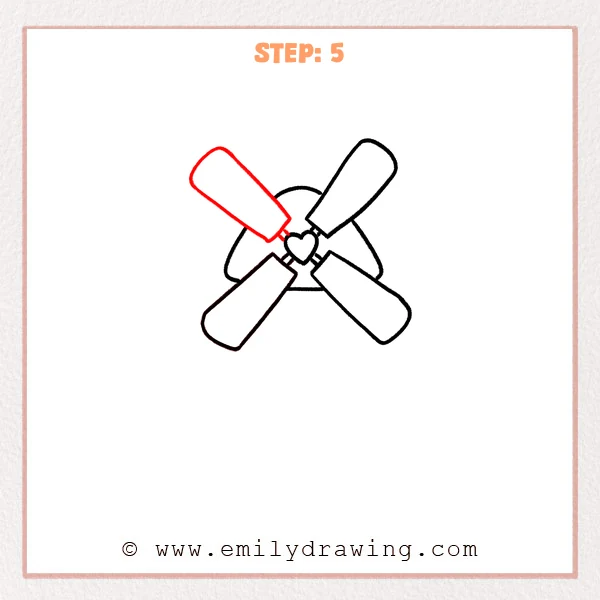
From the upper left side of the heart, sketch the last blade leaning toward the upper left. Keep its shape similar to the other three blades. The four blades should now circle the center in a neat pinwheel pattern.
Pro Tip: Keep this blade close in angle to the upper right blade so the windmill looks even.
Step 6: Add the Windmill Tower, Window, and Door
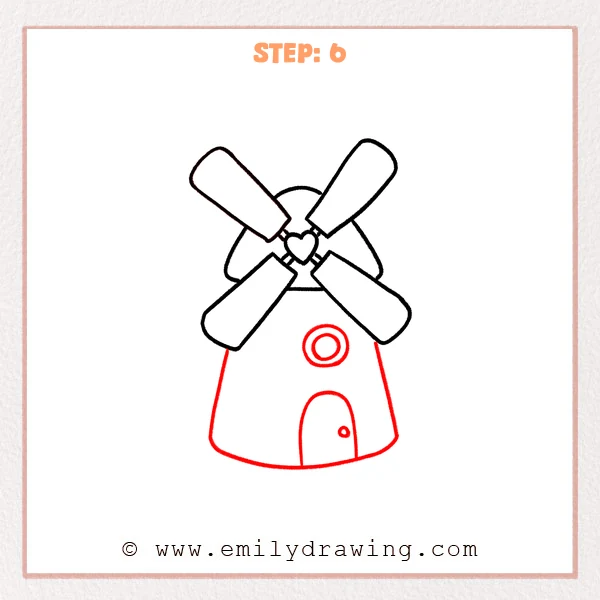
Under the blades, draw a tower shape that is narrower at the top and wider at the bottom. Close the base with a soft curved line, then add a round window near the top half. Finish with an arched door and a small door knob near the bottom.
Pro Tip: Keep the tower sides fairly even, and place the window and door near the center line for balance.
Step 7: Color in your drawing!
Fun Facts
- Windmills use wind power to turn their blades.
- Some windmills were used to grind grain into flour.
- Modern wind turbines work in a similar way to make electricity.
Pin it now, Draw later!
You now have a simple and charming windmill drawing made from easy shapes. Add color to the blades, tower, heart center, and door to bring the picture to life. Try light shading along one side of each blade and near the base of the tower for a gentle 3D look.
One beginner mistake is making the blades very different in size, so take your time and compare them as you draw. Keep practicing this step by step drawing and try more easy drawing tutorials to build your confidence.
Get the FREE Printable Drawing Guide
FREE Download Printable Windmill Drawing Tutorial
Frequently Asked Questions
Is this windmill drawing good for beginners?
Yes, this drawing for beginners uses simple shapes and clear steps.
How can I make my windmill look more even?
Compare the blade lengths and angles as you work. Small checks help the whole drawing stay balanced.
What colors look nice on a windmill?
Soft reds, blues, yellows, and browns work well. You can also invent your own bright color mix.