If you want to learn how to draw lily of the valley, this easy drawing tutorial will guide you one step at a time. The shapes are simple, the lines are soft, and the finished flower looks graceful and elegant. This step by step drawing lesson is great for beginners, kids, and anyone who enjoys calm botanical drawing.
What You Will Need
- Drawing paper
- Pencil
- Eraser
- Black pen or marker
- Colored pencils, crayons, or markers (optional)
Here are my RECOMMENDED Art Supplies!
- Crayola Coloring Set (140 Pieces – Mega Value!)
- 24 Colored Crayon Set
- A4 Printer Paper
- Crayola Coloring Pencils
- HP Home Printer with Instant Ink!
Time needed:
24 minutes.
Step-by-Step Drawing Guide
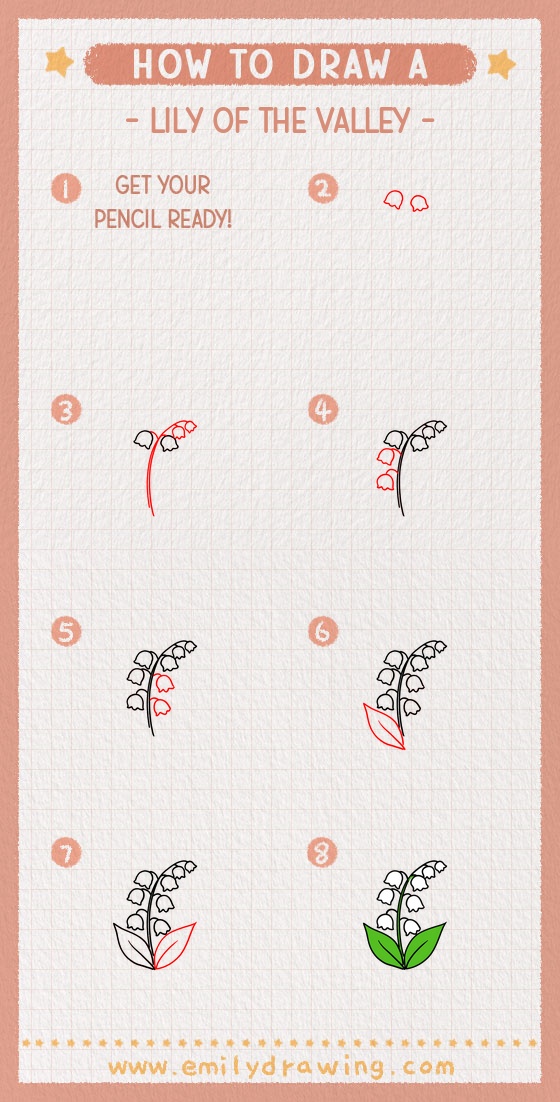
Step 1: Draw the Outer Shapes of Two Bell Flowers
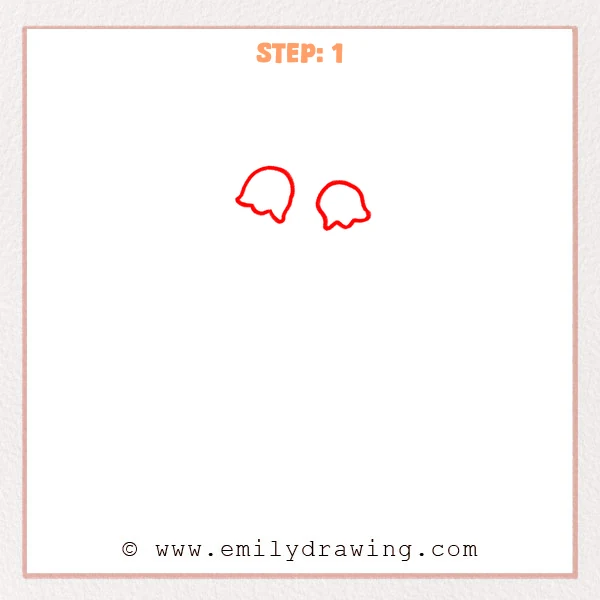
Start with two hanging bell shapes near the top of your page. Make the left flower slightly larger than the right one. Add soft wavy edges at the bottom of each flower to suggest the delicate petals of lily of the valley.
Pro Tip: Make the two flowers slightly different sizes so the drawing feels more natural.
[Alt Text: A beginner lily of the valley sketch showing two simple bell-shaped flowers with soft wavy petal edges.]
Step 2: Add the Curved Stem and More Flowers
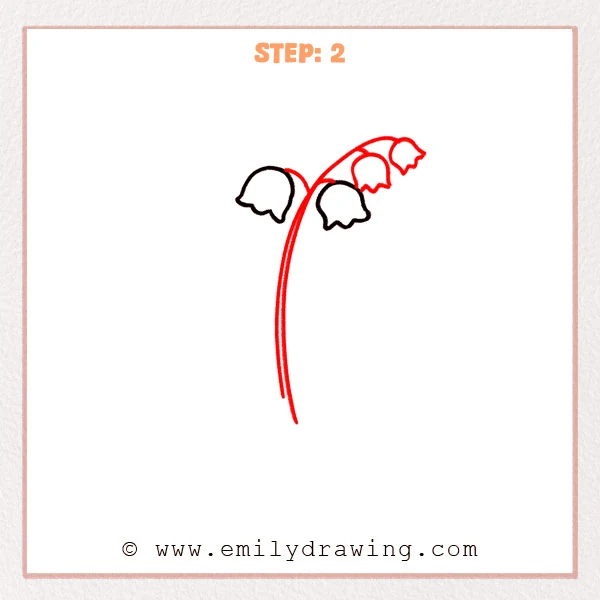
Draw a long curved main stem dropping down from between the first flowers. Add a second line beside it to give the stem some thickness. Along the upper curve, place several smaller bell flowers so the cluster begins to droop to one side.
Pro Tip: Keep the stem gently curved to give the flower cluster a soft hanging look.
[Alt Text: A lily of the valley drawing with a long curved stem and several additional small bell-shaped flowers along the upper arc.]
Step 3: Add Two Drooping Flowers on the Left
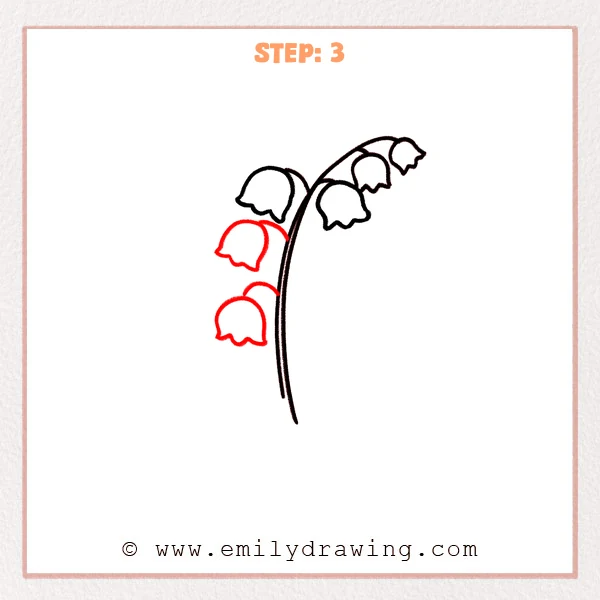
Draw two short curved branches coming out from the left side of the main stem. At the end of each branch, add another bell-shaped flower with rounded, wavy petal edges. These extra blooms help the cluster look fuller and more balanced.
Pro Tip: Angle the small branches slightly downward to show the natural droop of the flowers.
[Alt Text: A beginner step by step drawing of lily of the valley with two added drooping flowers on the left side of the stem.]
Step 4: Add Two Drooping Flowers on the Right
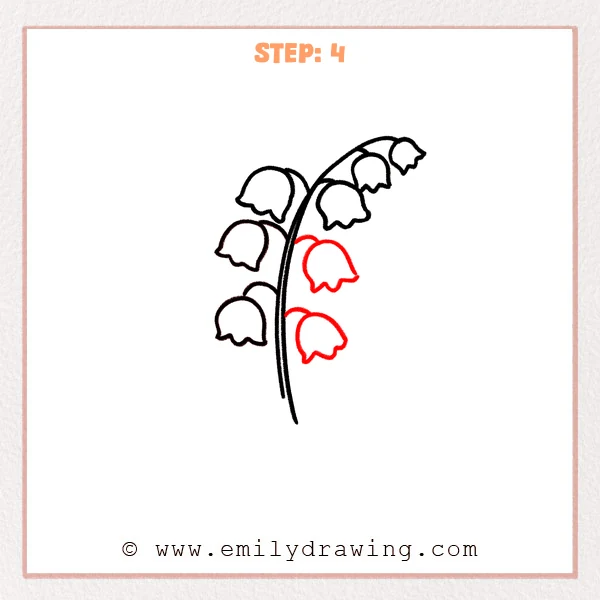
Now draw two short curved branches on the right side of the main stem. Add one bell flower at the end of each branch, keeping the same soft shape and wavy petal edge. This step makes the flower spray look fuller on both sides.
Pro Tip: Make the right-side flowers a little smaller to create a gentle sense of depth.
[Alt Text: A lily of the valley drawing for beginners with two new drooping bell flowers added on the right side of the stem.]
Step 5: Draw the Large Leaf at the Bottom
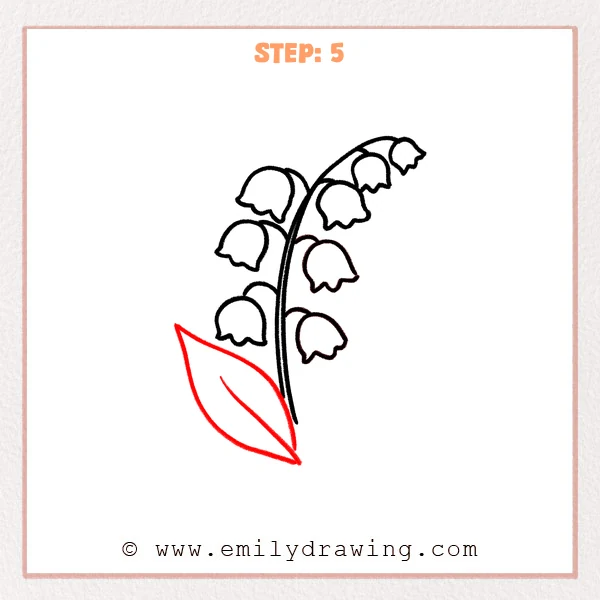
At the lower left side of the stem, draw a long pointed leaf. Let the tip stretch upward and outward. Add one curved vein inside the leaf to define its shape more clearly.
Pro Tip: Draw the leaf larger than the flowers so it supports the overall composition.
[Alt Text: A lily of the valley drawing with one large pointed leaf added at the bottom left and a curved vein inside it.]
Step 6: Add the Large Leaf on the Right
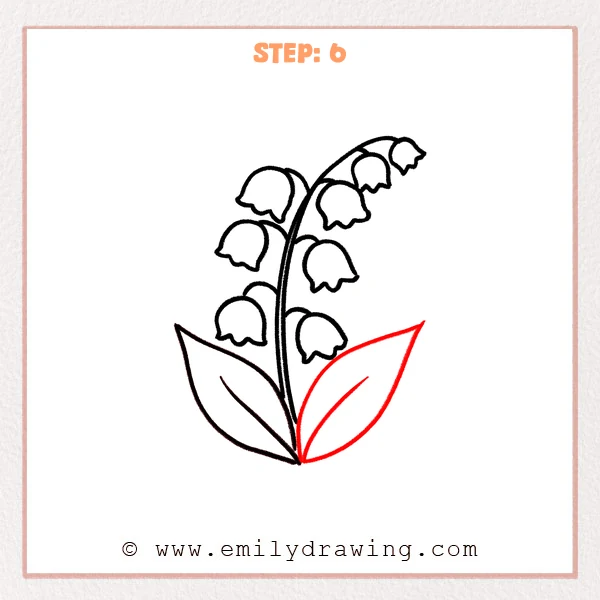
Draw a second long pointed leaf on the lower right side of the stem. Let it spread outward in a different direction from the first leaf. Add a curved vein inside to complete the base of the plant.
Pro Tip: Point the two leaf tips in different directions to make the plant look more open and natural.
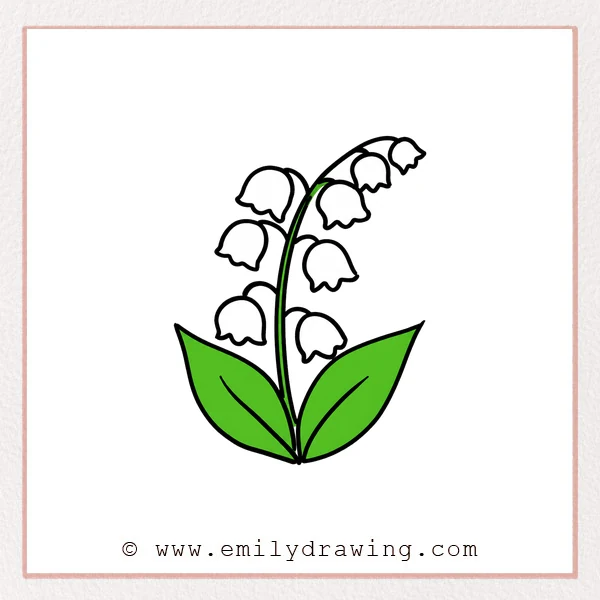
[Alt Text: A finished beginner lily of the valley drawing with two large pointed leaves at the base and multiple bell-shaped flowers on a curved stem.]
Step 7: Color in your drawing!
Fun Facts
- Lily of the valley is known for its small white bell-shaped flowers.
- It is often linked with spring because it blooms during that season.
- The plant has a gentle appearance, but it is actually poisonous if eaten.
- Many people love lily of the valley for its sweet fragrance and elegant shape.
Pin it now, Draw later!
You have now completed an easy drawing tutorial on how to draw lily of the valley. If you like, trace your final lines with a black pen and color the leaves green while keeping the flowers white or very pale cream. This step by step drawing is a lovely way to practice flower shapes, curved stems, and simple leaf forms. Keep practicing, and try drawing another flower cluster to build your confidence as a beginner artist.
Get the FREE Printable Drawing Guide
FREE Download Printable Lily Of The Valley Drawing Tutorial
Frequently Asked Questions
Is this lily of the valley drawing good for beginners?
Yes, this is a simple and beginner-friendly drawing for anyone learning basic flower shapes and plant structure.
How can I make my drawing look more natural?
Use gentle curves, vary the flower sizes slightly, and angle the flowers downward so they appear to hang naturally.
Can I color my lily of the valley drawing?
Yes, you can color the leaves green and keep the flowers white, or add very light shading for a soft botanical look.