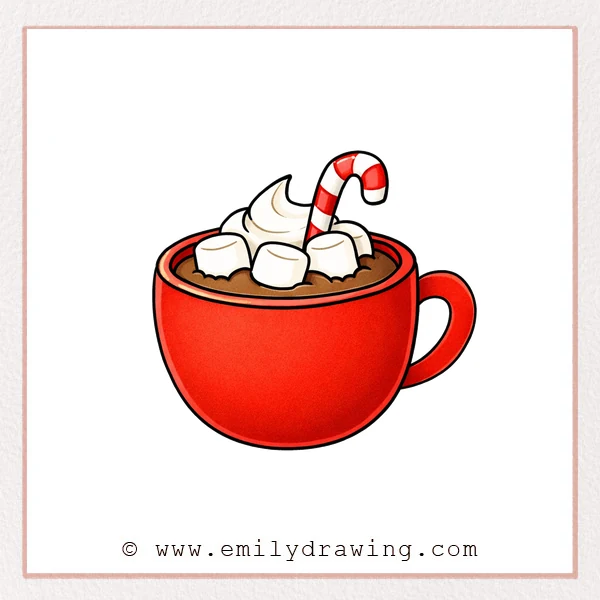
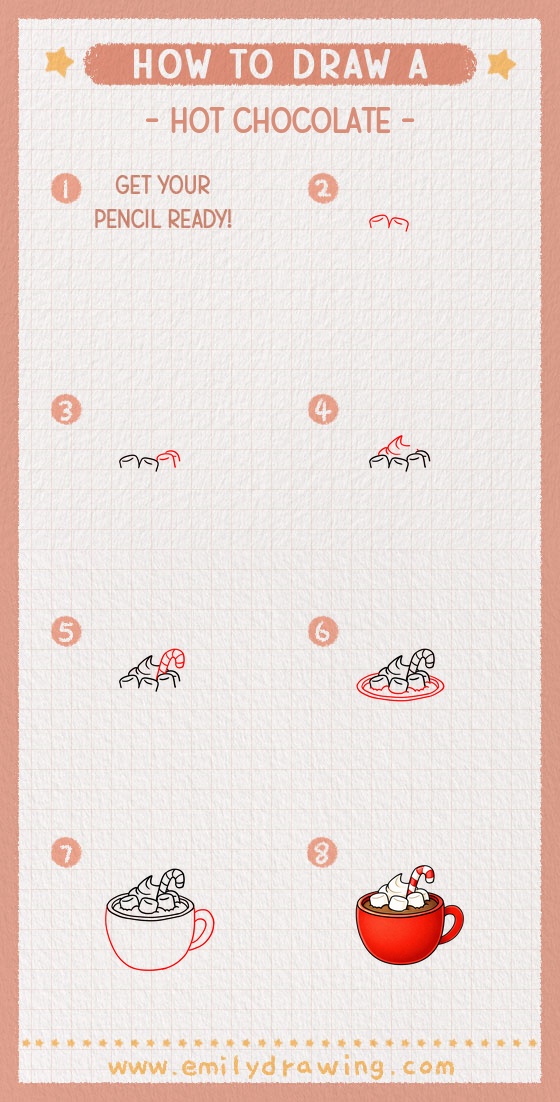
This easy drawing tutorial shows you how to draw hot chocolate step by step in a calm and simple way. It is a lovely drawing for beginners, and each small stage helps you build a warm mug filled with whipped cream, marshmallows, and a candy cane.
What You Will Need
- Pencil
- Eraser
- Black pen or marker
- Paper
- Colored pencils or crayons
Here are my RECOMMENDED Art Supplies!
- Crayola Coloring Set (140 Pieces – Mega Value!)
- 24 Colored Crayon Set
- A4 Printer Paper
- Crayola Coloring Pencils
- HP Home Printer with Instant Ink!
Time needed:
30 minutes.
Step-by-Step Drawing Guide
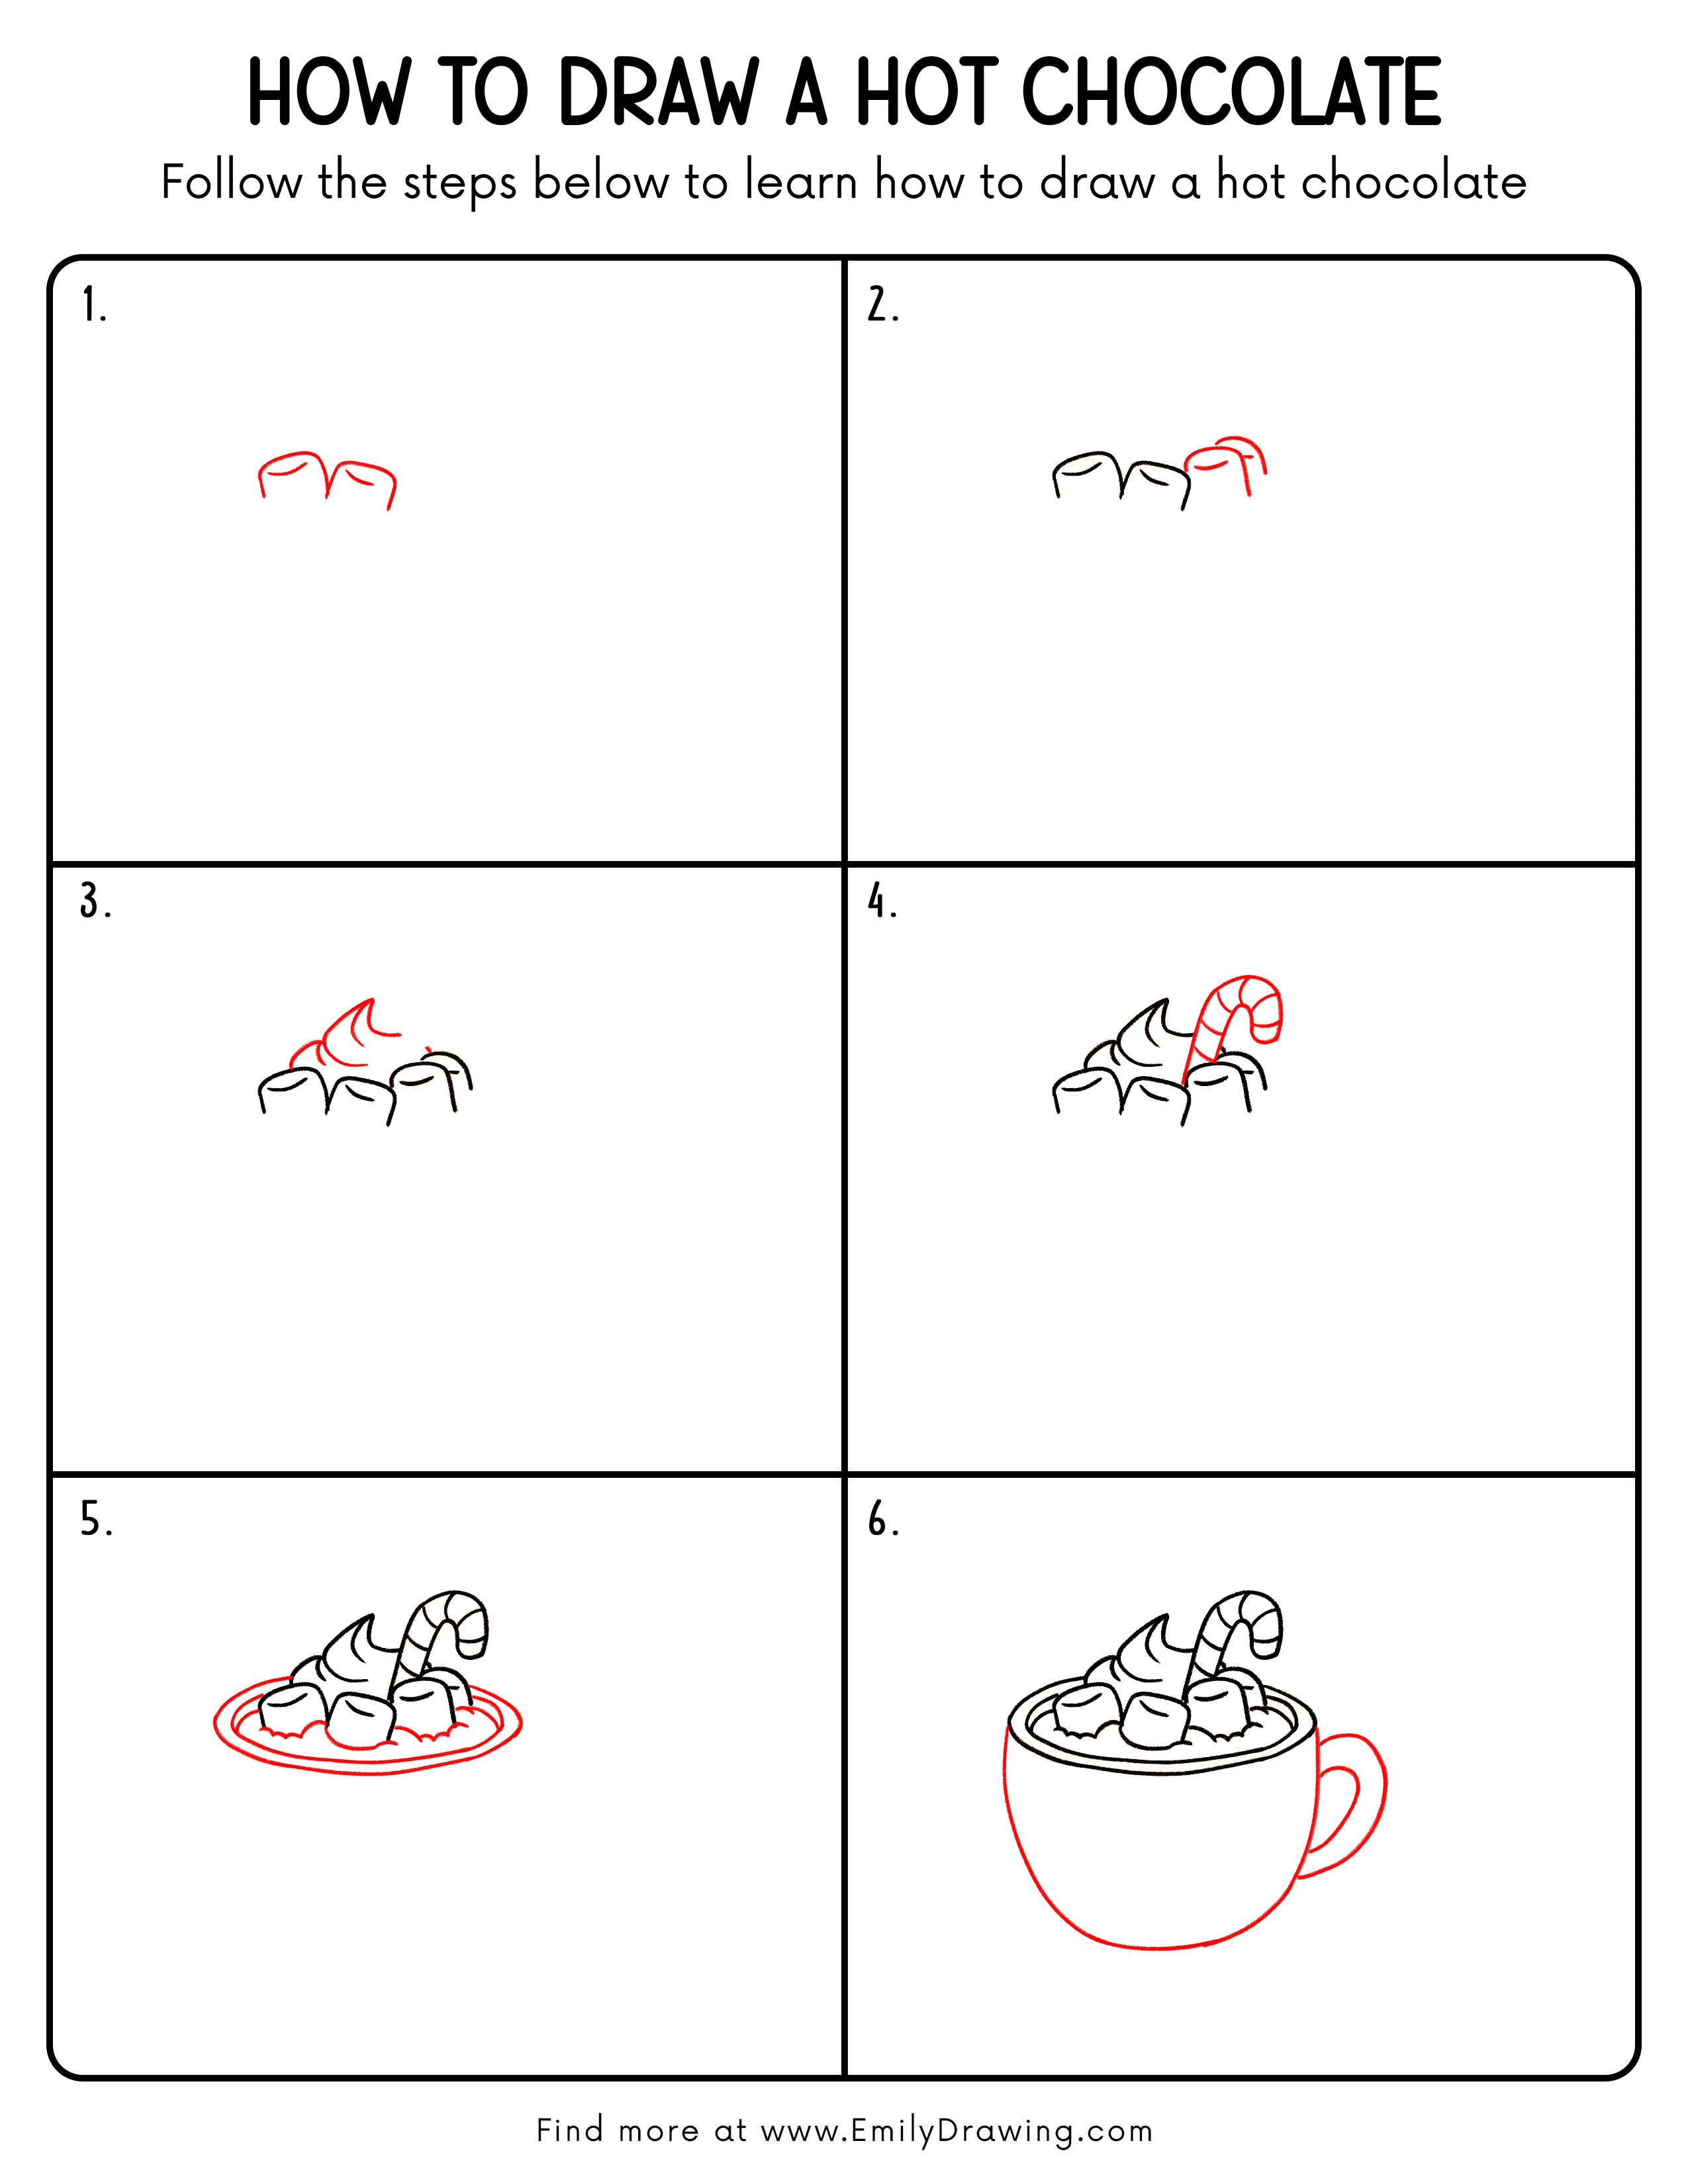
Step 1: Sketch the Whipped Cream Top
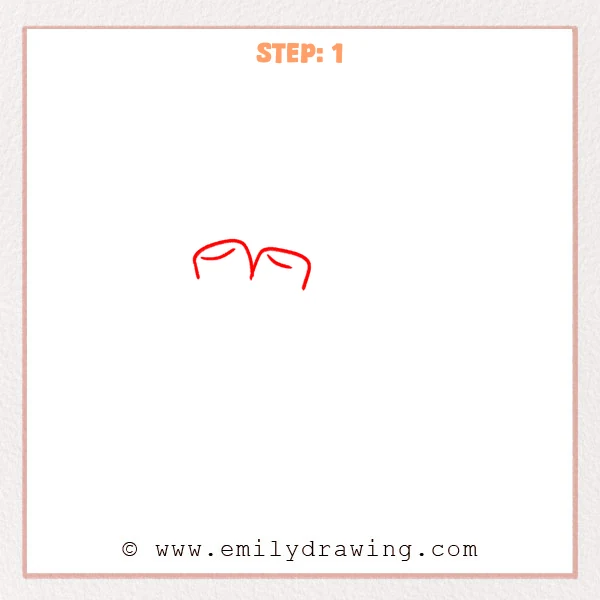
Start near the upper middle of the page with two soft, rounded bumps side by side. Let them meet gently in the center, so they look like the fluffy top of whipped cream on hot chocolate.
Pro Tip: Let the two sides sit at slightly different heights for a more natural look.
Step 2: Add Another Whipped Cream Puff
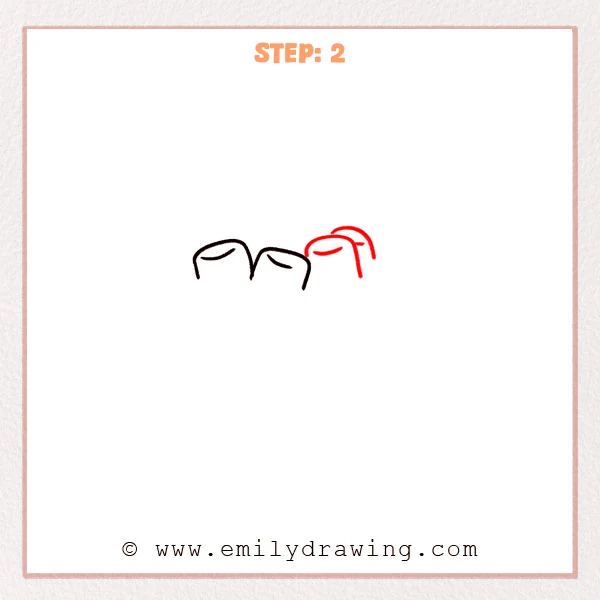
Add one more rounded whipped cream puff on the right to make the top look fuller. Let this one sit a little higher, and place a short curved line behind it so it feels like a soft layer peeking from the back.
Pro Tip: Keep the back line shorter so the front and back layers feel clearer.
Step 3: Add the Center Whipped Cream Swirl
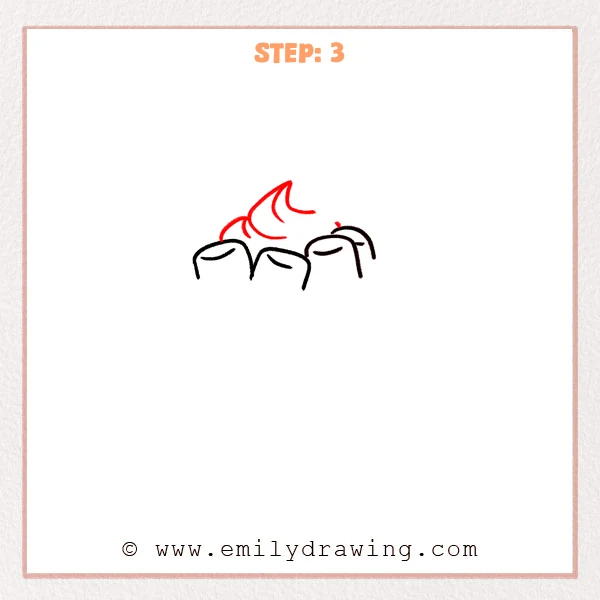
Start above the middle and add a larger whipped cream swirl that curves upward into a soft point. Then place a few short curved lines where it meets the puffs below, so the top feels like one fluffy mound of cream.
Pro Tip: Keep the tip gently curved instead of straight so the whipped cream looks softer.
Step 4: Add a Candy Cane
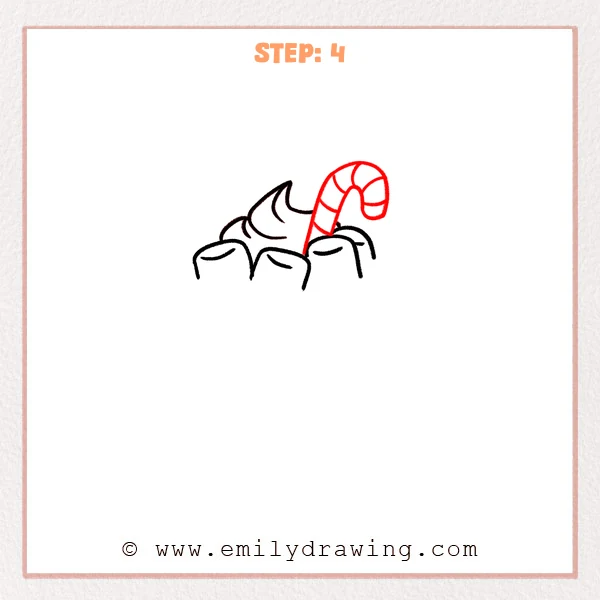
Start on the upper right and add a curved candy cane, letting it lean into the whipped cream at an angle. Sketch the outer shape first, then place a few curved bands across it so the candy cane feels striped and cheerful.
Pro Tip: Keep the stripe spacing fairly even so the candy cane looks neat.
Step 5: Add the Surface of the Hot Chocolate
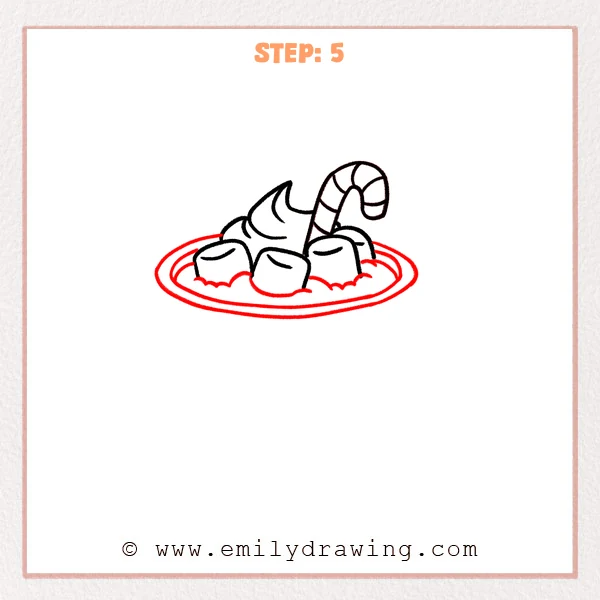
Start below the whipped cream and candy cane with a wide oval line to show the surface of the hot chocolate. Then add a few small wavy edges around the marshmallows so they look like they are floating gently on the drink.
Pro Tip: Keep the oval smooth and even so the top of the drink feels more natural.
Step 6: Add the Mug Body and Handle

Start under the drink surface and add a round mug body, letting the lower curve spread gently to both sides. Then place a large curved handle on the right, so the cup feels cozy and easy to hold.
Pro Tip: Keep both sides of the mug fairly balanced so the shape feels steady.
Step 7: Color in your drawing!
Fun Facts
- Hot chocolate has been enjoyed in many parts of the world for hundreds of years.
- Candy canes and marshmallows are often added to make winter drinks feel extra festive.
- A rounded mug shape helps your drawing look warm and friendly.
Pin it now, Draw later!
You now have a sweet hot chocolate drawing with fluffy whipped cream, soft marshmallows, and a candy cane. Add gentle brown shading to the drink, creamy white tones to the topping, and red stripes on the candy cane to bring it to life.
One common beginner mistake is making the mug body uneven, so take your time with the side curves. Keep practicing step by step drawing, and try more easy drawing tutorial ideas to build your confidence.
Get the FREE Printable Drawing Guide
FREE Download Printable Hot Chocolate Drawing Tutorial
Frequently Asked Questions
Is this hot chocolate drawing good for beginners?
Yes, this drawing for beginners uses simple rounded shapes and small details added one step at a time.
How can I make my hot chocolate look more realistic?
Add soft shading under the whipped cream and around the marshmallows. A little highlight on the mug can also help.
Can I color the mug in any style?
Yes, you can keep it simple or decorate it with stripes, hearts, or winter patterns.