
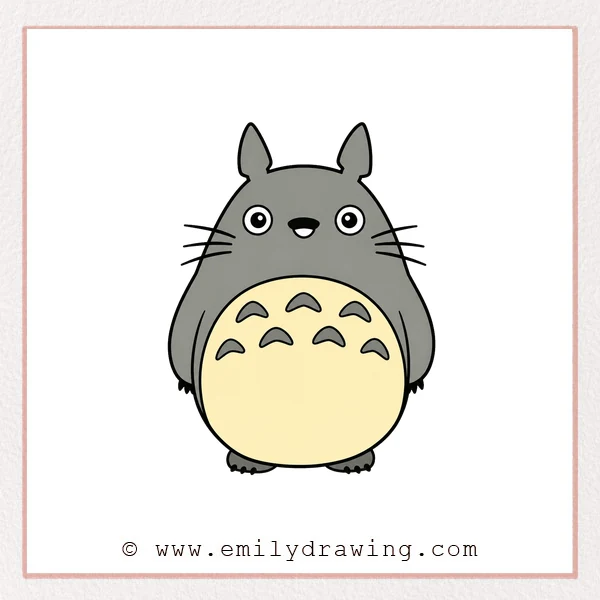
Learn how to draw Totoro with a calm, beginner-friendly method. This easy drawing tutorial uses simple curves, circles, and small details. Take your time with each step, and build the character slowly.
What You Will Need
- Pencil
- Eraser
- Black marker or pen
- Drawing paper
- Colored pencils or crayons, optional
Here are my RECOMMENDED Art Supplies!
- Crayola Coloring Set (140 Pieces – Mega Value!)
- 24 Colored Crayon Set
- A4 Printer Paper
- Crayola Coloring Pencils
- HP Home Printer with Instant Ink!
Time needed:
23 minutes.
Step-by-Step Drawing Guide
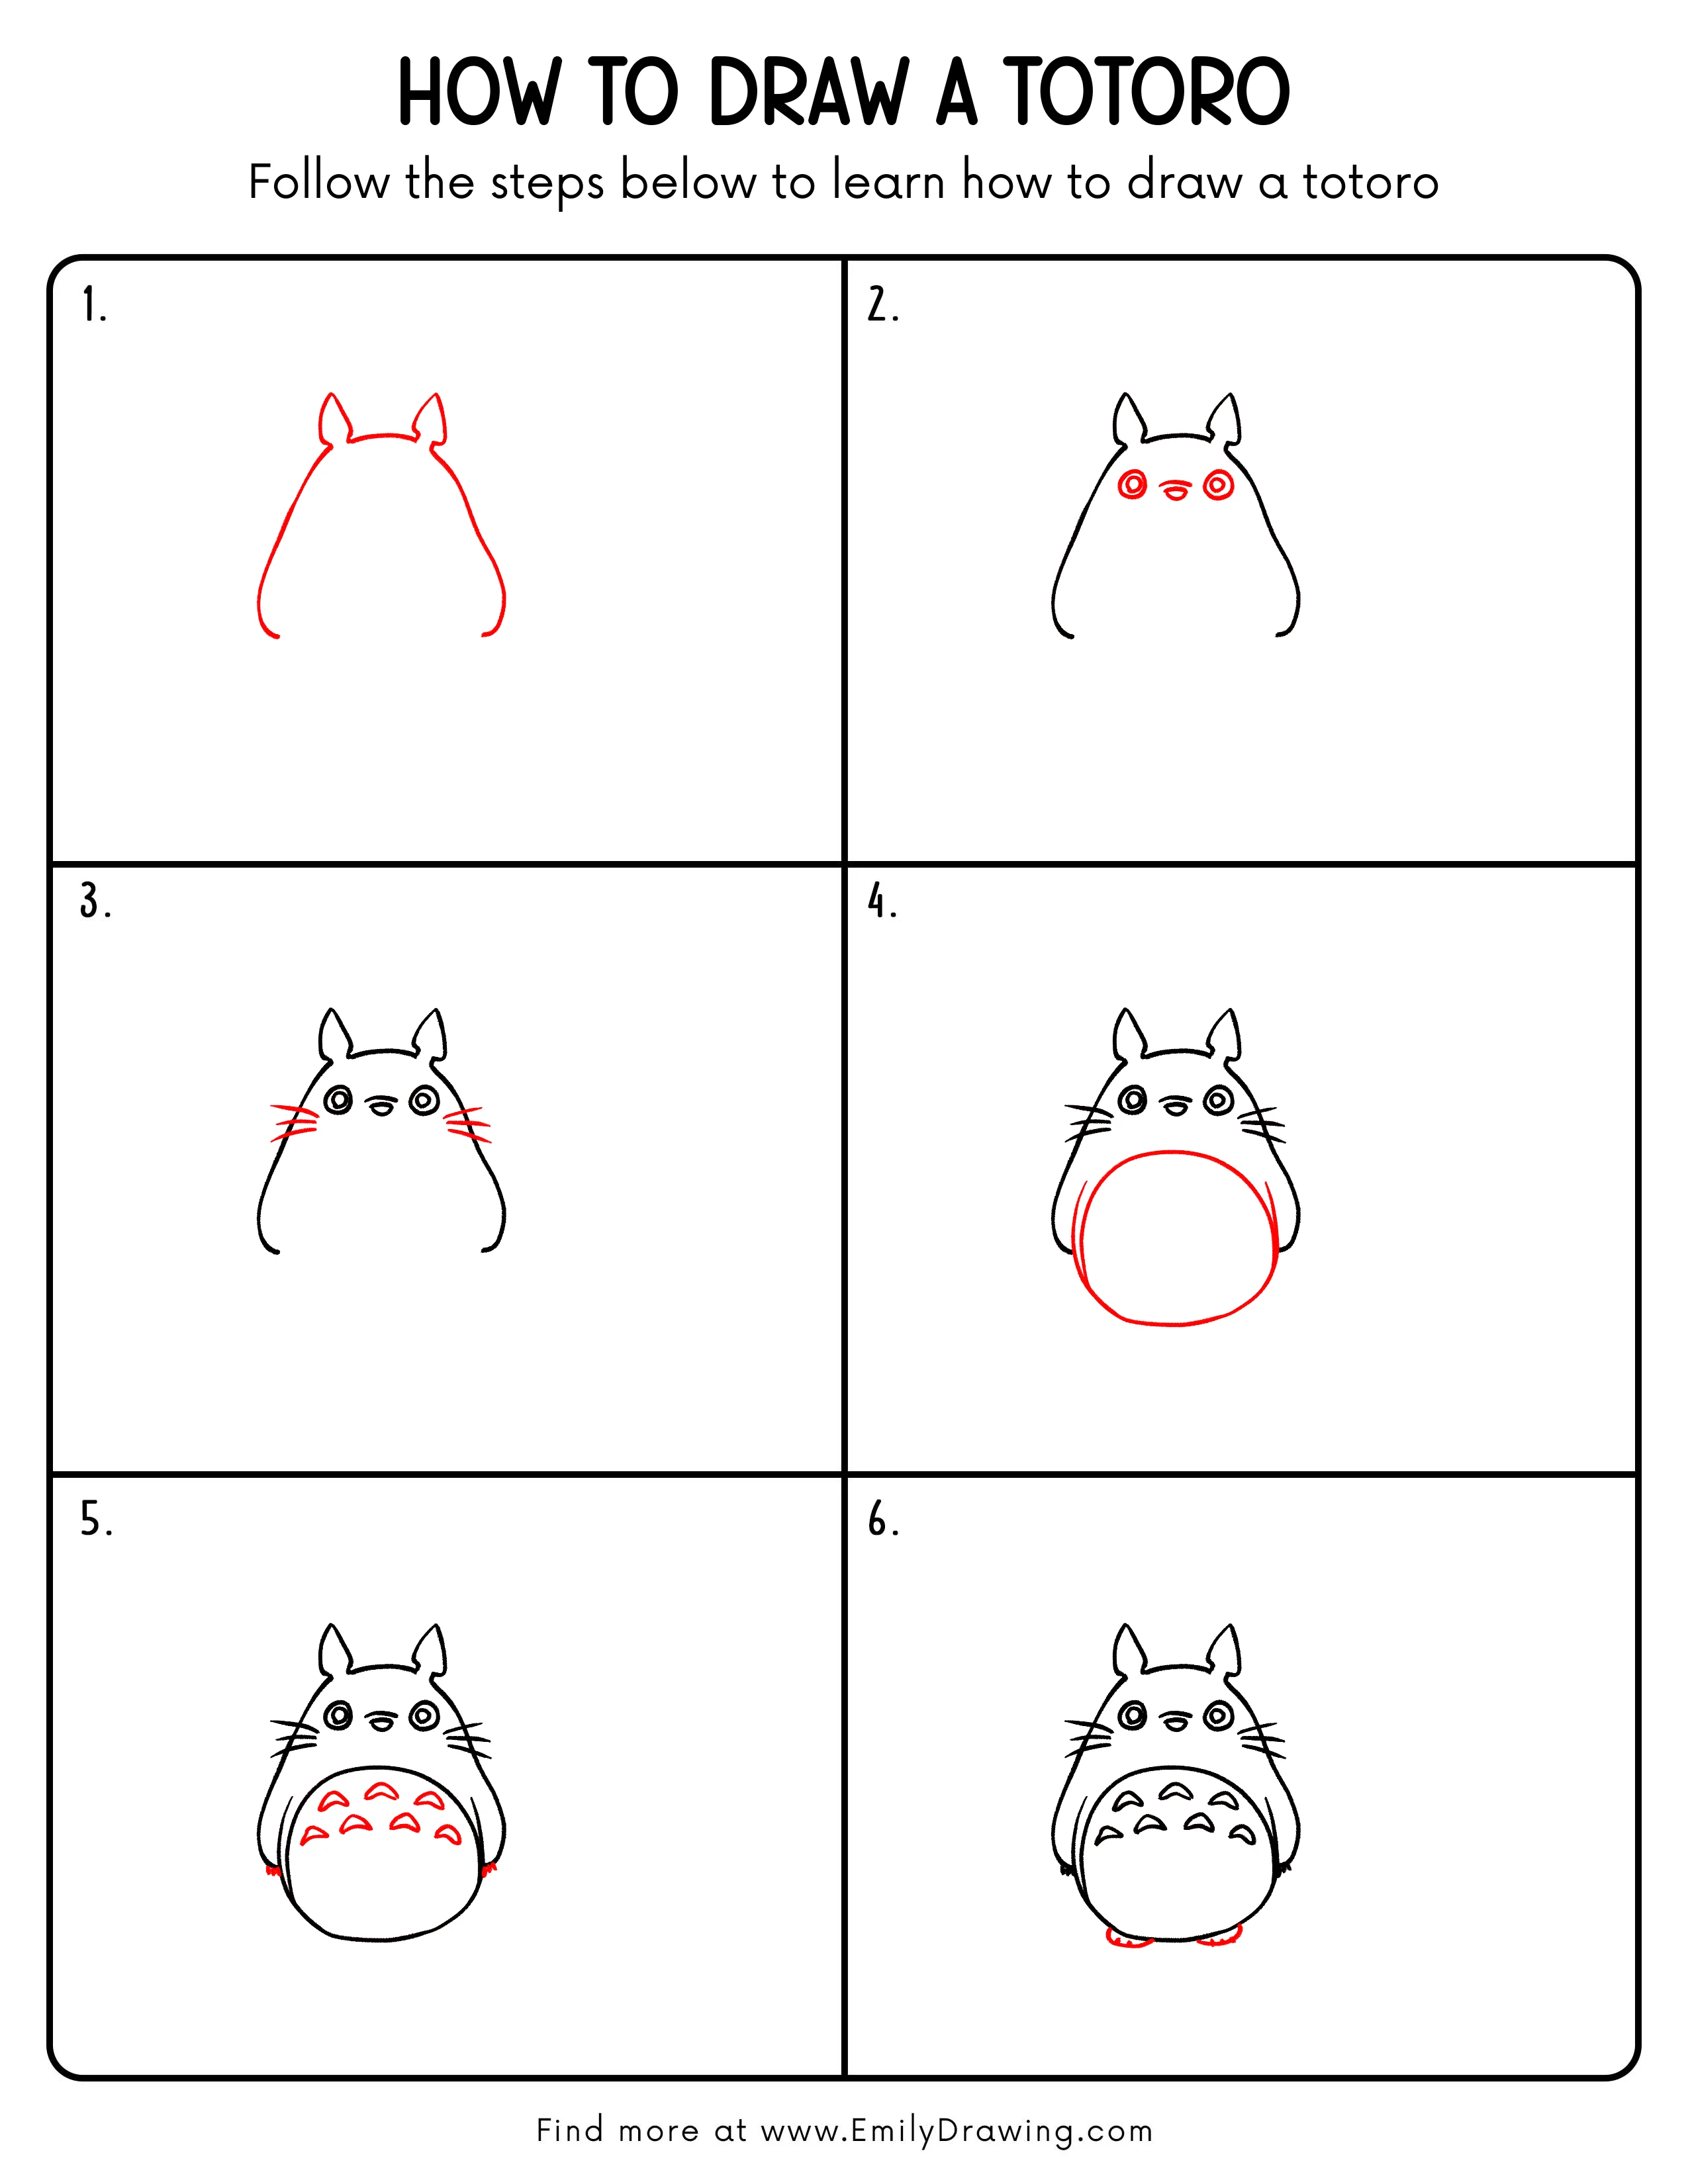
Step 1: Draw the Body Outline and Ears
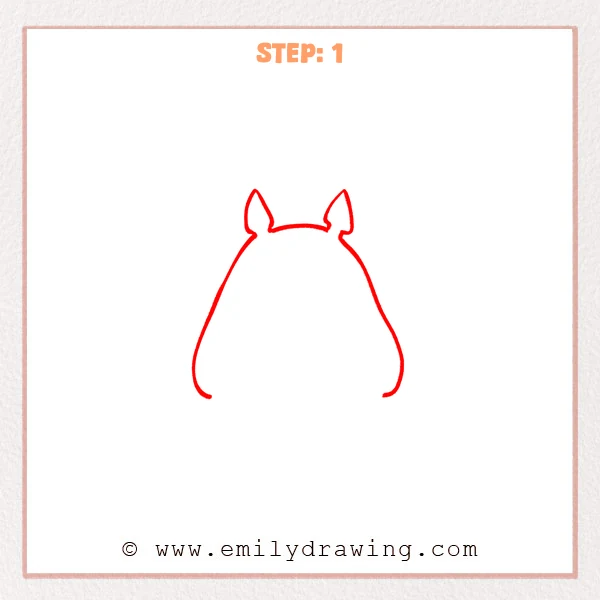
Start with a wide curved outline for Totoro’s round body sides. Add two pointed ears on top, then connect them with a gentle head curve. Keep the bottom open for now so the body can be finished later.
Pro Tip: Keep both sides as balanced as possible, but leave the bottom open for now.
Step 2: Add the Eyes, Nose, and Mouth
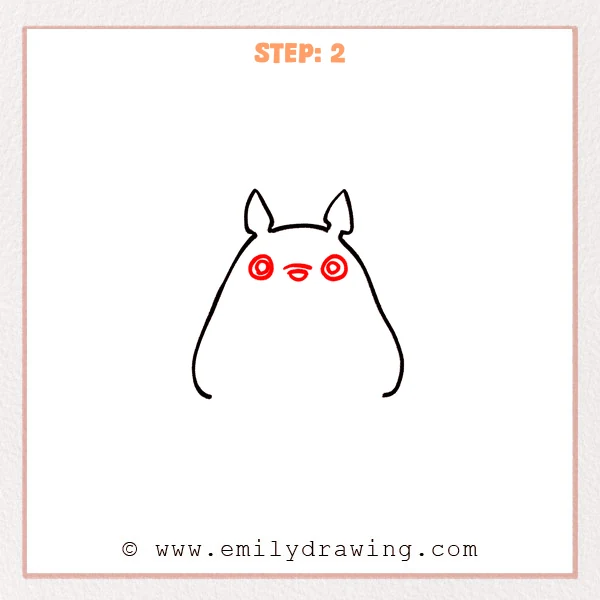
Add two round eyes in the middle of the face. Draw a smaller circle inside each eye to create the bright pupil area. Place a short curved nose between the eyes, then add a small curved mouth underneath.
Pro Tip: Keep both eyes at the same height so Totoro’s expression feels steady.
Step 3: Draw the Whiskers on Both Sides
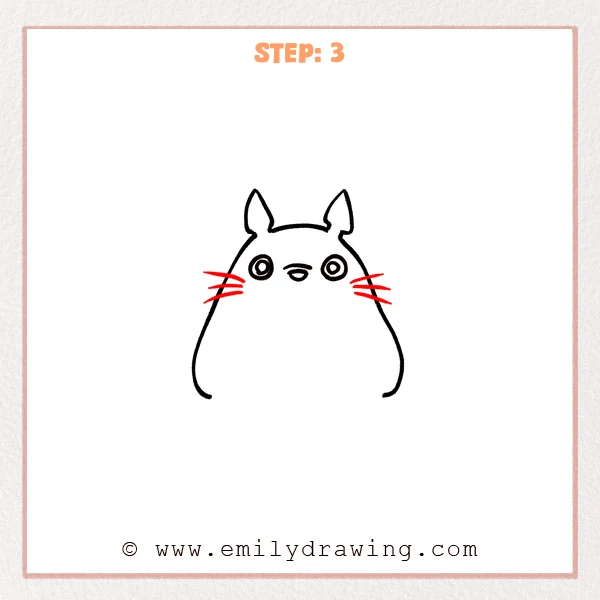
Add three short whisker lines on each side of the face. Let the whiskers extend outward from the cheeks. Spread them slightly so they form a gentle fan shape.
Pro Tip: Keep the whiskers nearly the same length on both sides so Totoro’s face looks balanced.
Step 4: Draw the Round Belly
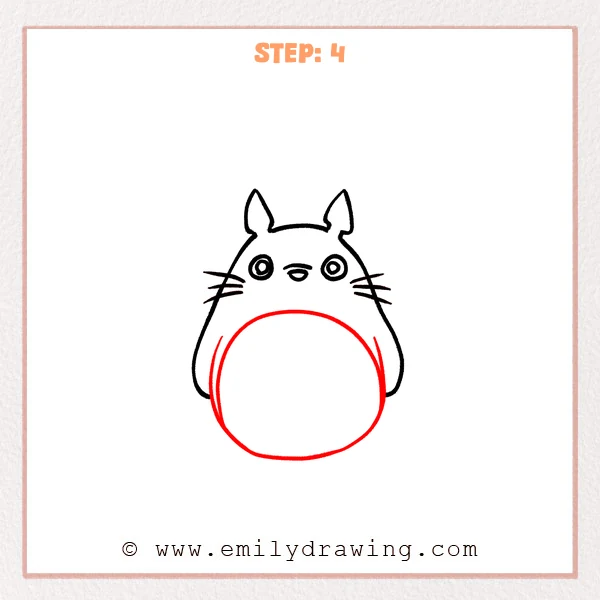
Add a large round belly area on the lower half of the body. Keep the belly line close to the inside of the body. Leave narrow spaces on both sides so the arms still show.
Pro Tip: Make the bottom of the belly a little wider so Totoro looks steady.
Step 5: Add Belly Marks and Tiny Claws
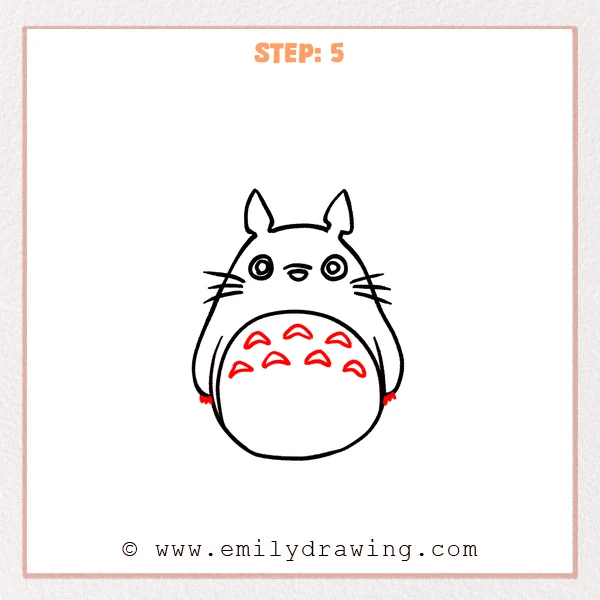
Draw several small upside-down V-shaped curves across the belly. These simple marks create Totoro’s classic belly pattern. Add short tiny claws near the lower sides of the body to make the shape feel complete.
Pro Tip: Arrange the belly marks in two loose rows and follow the curve of the belly.
Step 6: Draw the Two Feet
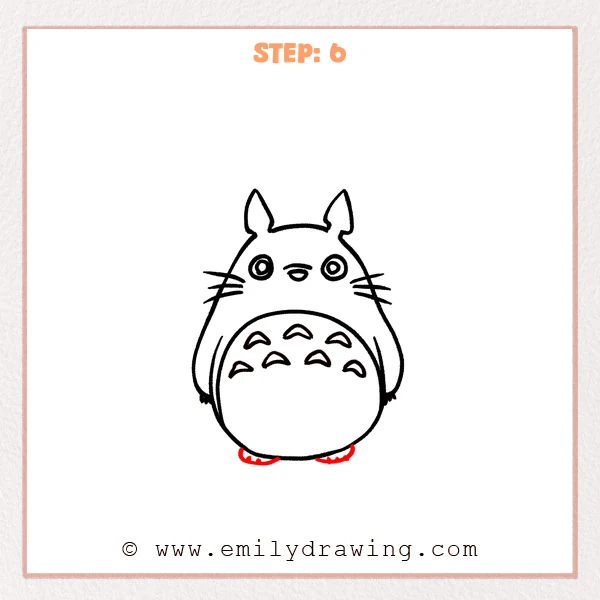
Add two small feet underneath the belly, one on each side. Use short curved lines for the toes. These final shapes help Totoro look firmly balanced and ready to stand.
Pro Tip: Keep both feet close to the bottom of the belly and similar in size.
Step 7: Color in your drawing!
Fun Facts
Totoro is known for his round body, tall ears, and gentle expression. His simple shape makes him a great drawing for beginners. The belly marks are one of the easiest ways to make the character recognizable.
Pin it now, Draw later!
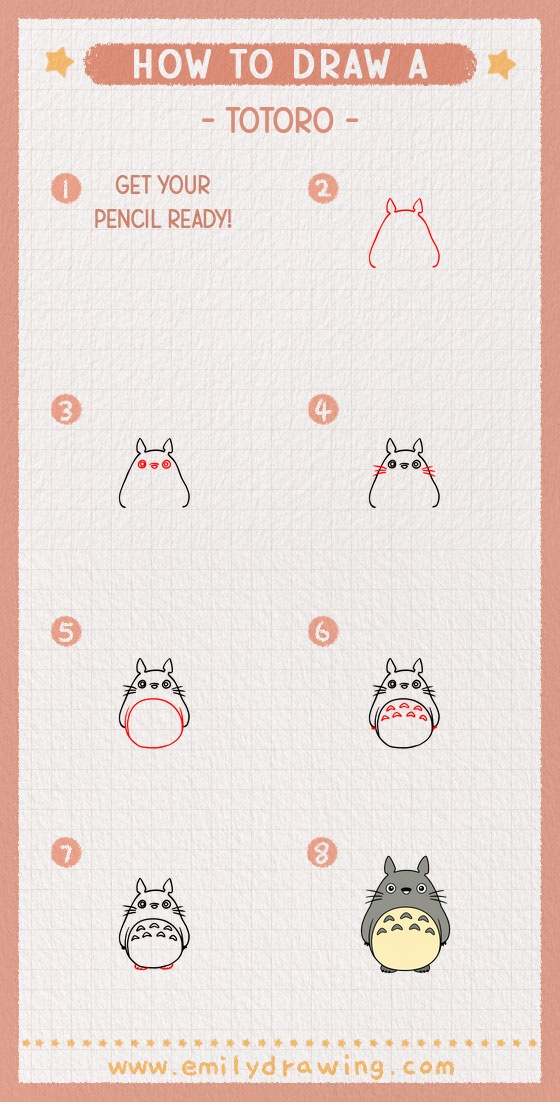
Trace the final lines with a black marker when you are happy with the sketch. Erase extra pencil marks gently, then add soft gray coloring and a pale belly. Now you know how to draw Totoro step by step, so try drawing him again in a different pose.
Get the FREE Printable Drawing Guide
FREE Download Printable Totoro Drawing Tutorial
Frequently Asked Questions
Is this Totoro drawing good for beginners?
Yes, this drawing for beginners uses basic curves, circles, and small repeated shapes.
How can I make Totoro look more even?
Lightly sketch a center guide down the body before adding the eyes, belly, and feet.
What colors should I use for Totoro?
Use soft gray for the body, light cream for the belly, and black for the eyes and details.



