
Learning how to draw tractor shapes can be simple and fun. In this easy drawing tutorial, you will build the tractor from the cab, windows, hood, wheels, and small details. Take your time with each step and keep your lines light at first.
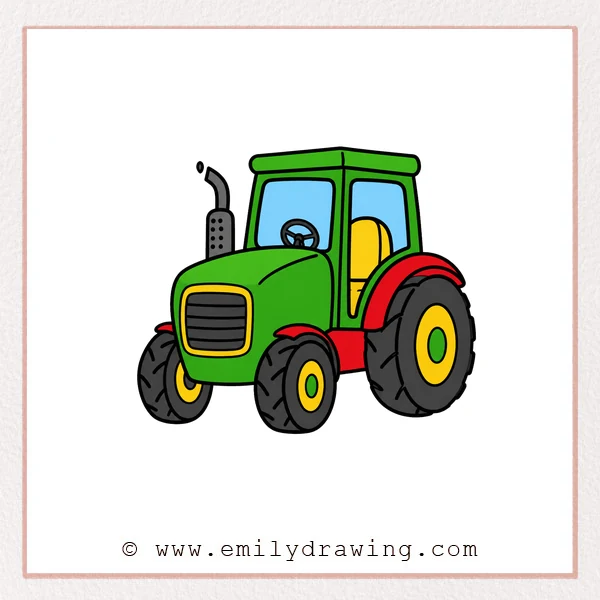
What You Will Need
- A pencil
- An eraser
- Drawing paper
- A black marker or pen
- Colored pencils, crayons, or markers
Here are my RECOMMENDED Art Supplies!
- Crayola Coloring Set (140 Pieces – Mega Value!)
- 24 Colored Crayon Set
- A4 Printer Paper
- Crayola Coloring Pencils
- HP Home Printer with Instant Ink!
Time needed:
16 minutes.
Step-by-Step Drawing Guide
Step 1: Draw the Tractor’s Top Frame
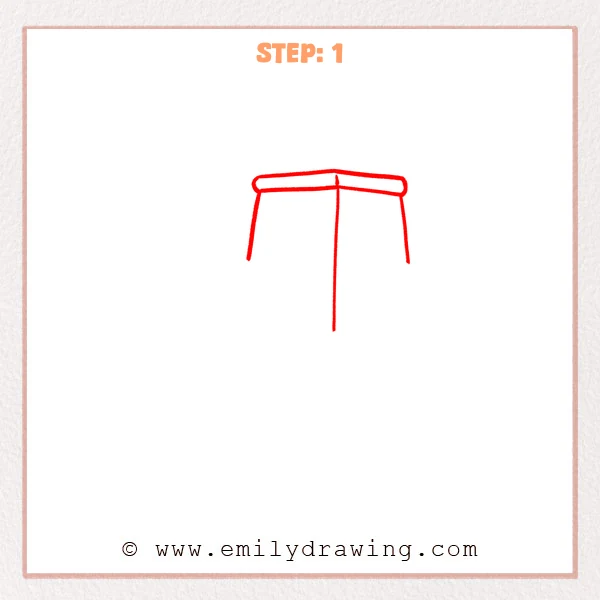
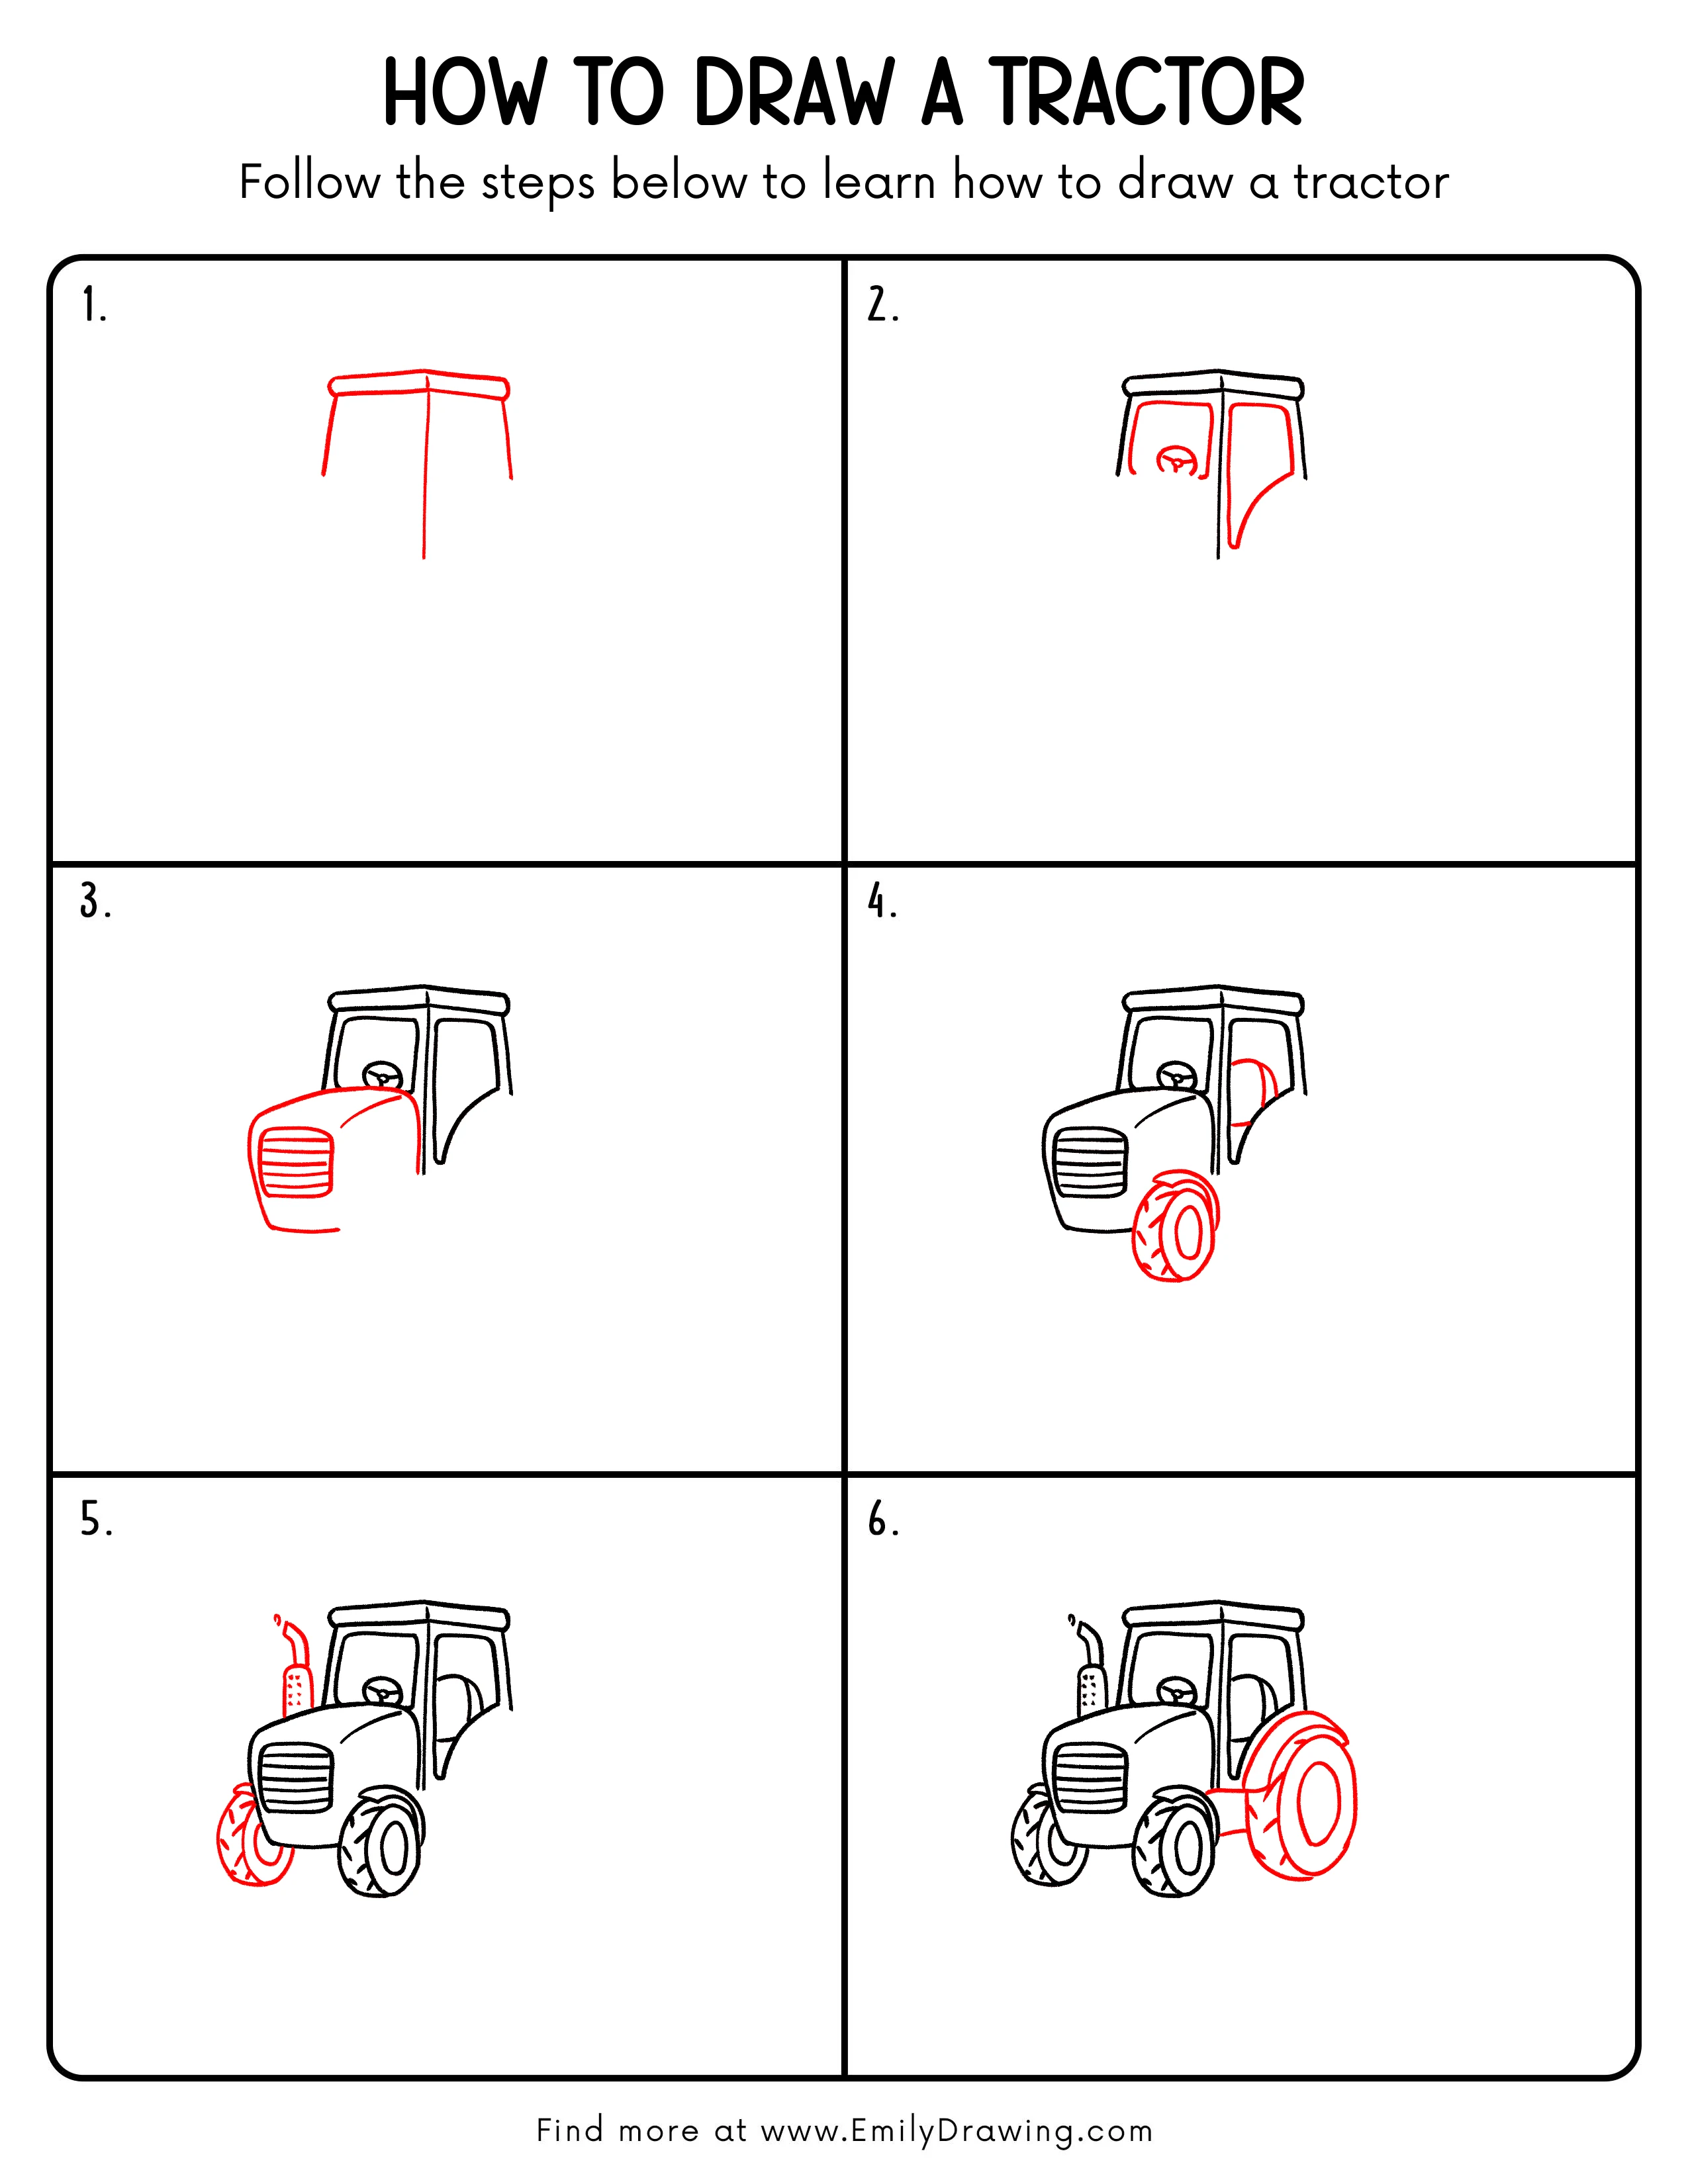
Start with a long rounded bar for the top of the tractor cab. Add a few vertical and slanted lines below it to mark the support posts. Keep the shapes open for now so later parts can connect easily.
Pro Tip: Keep the top bar steady so the tractor looks strong and balanced.
Step 2: Add the Windows and Steering Wheel
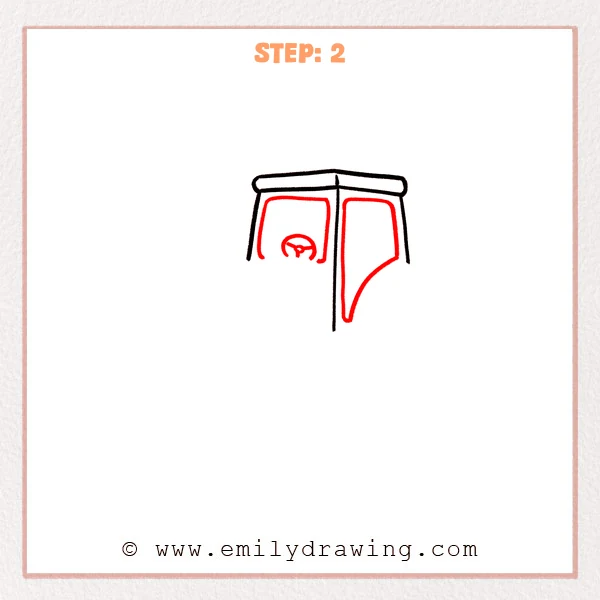
Draw two large windows inside the cab, using soft rounded corners. Add the steering wheel below the left window with a half circle and short lines. This makes the tractor cab feel ready for a driver.
Pro Tip: Keep both windows close to the center support so the cab looks neat.
Step 3: Draw the Hood and Front Grille
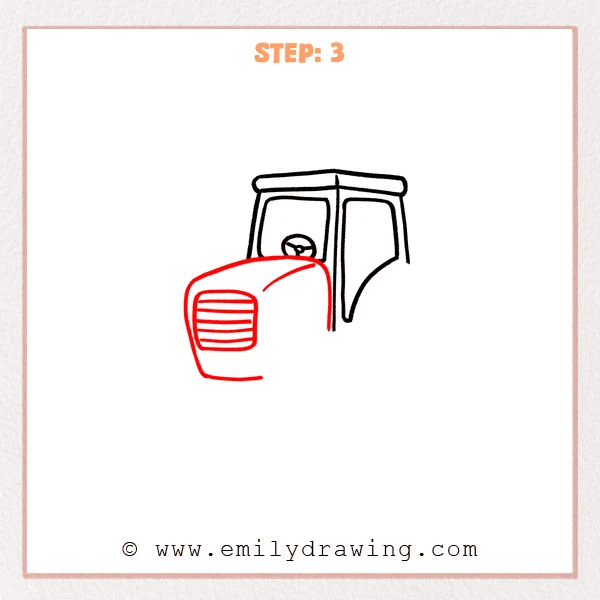
Add a large rounded hood in front of the cab, stretching toward the left. Place a rounded rectangle grille at the front, then add several horizontal vent lines. These details help the tractor look strong and recognizable.
Pro Tip: Curve the top of the hood slightly upward to give the tractor more depth.
Step 4: Add the Wheel and Rear Seat Lines
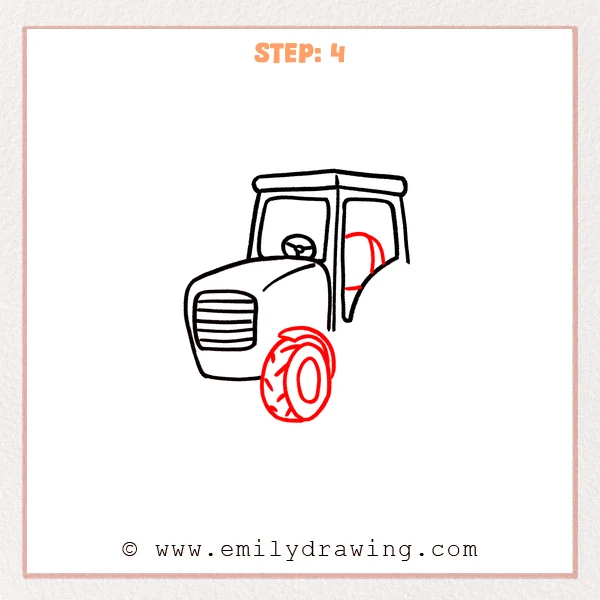
Draw the front wheel below the hood, using two oval shapes for the tire and hub. Add curved tread marks around the tire, then draw the seat curve behind the cab. These new shapes make the tractor feel more solid.
Pro Tip: Make the outer tire much larger than the hub so the tractor wheel feels powerful.
Step 5: Add the Small Front Wheel and Exhaust Pipe
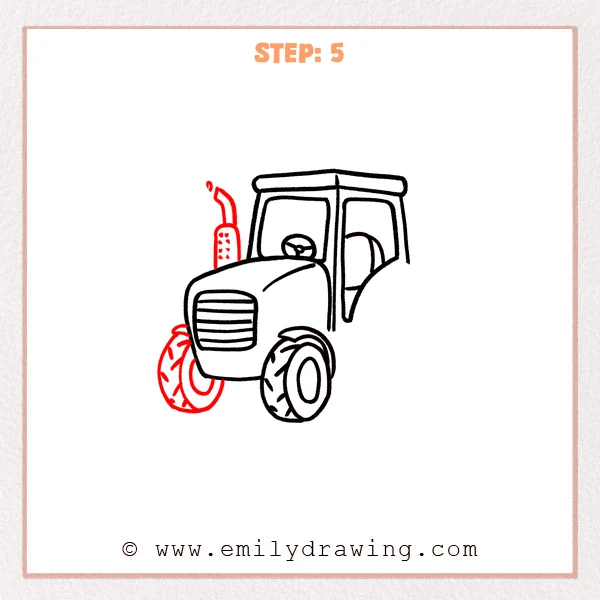
Draw a smaller front wheel below the front of the hood, adding curved tire treads. Add the exhaust pipe above the hood with a vertical body, curved top, and small dot. These details bring more character to the tractor drawing.
Pro Tip: Keep the small front wheel below the hood edge so the tractor’s stance looks natural.
Step 6: Draw the Large Rear Wheel and Fender
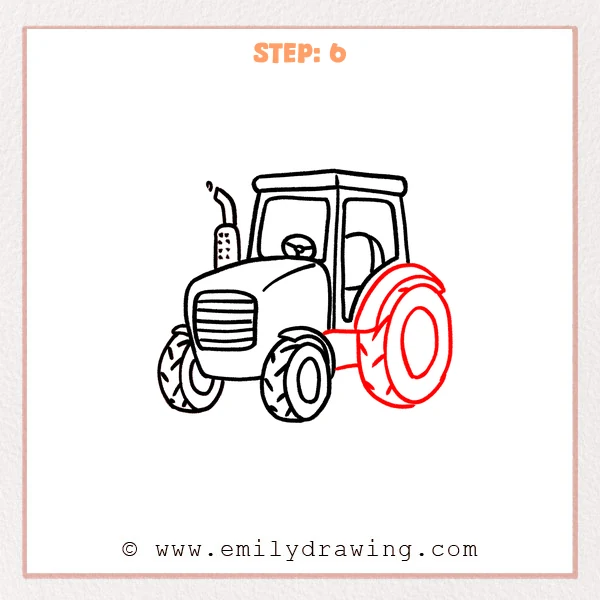
Add a very large rear wheel behind the cab, using a big oval and an inner oval. Draw a curved fender above the wheel, then add short lines for tire treads. This final wheel gives the tractor its classic farm vehicle shape.
Pro Tip: Make the rear wheel clearly larger than the front wheels for accurate tractor proportions.
Step 7: Color in your drawing!
Fun Facts
- Tractors are built to pull heavy tools across farms and fields.
- Many tractors have large rear wheels to help them grip soft ground.
- The exhaust pipe often sits above the hood to guide smoke upward.
- Tractor grilles help air move through the engine area.
Pin it now, Draw later!
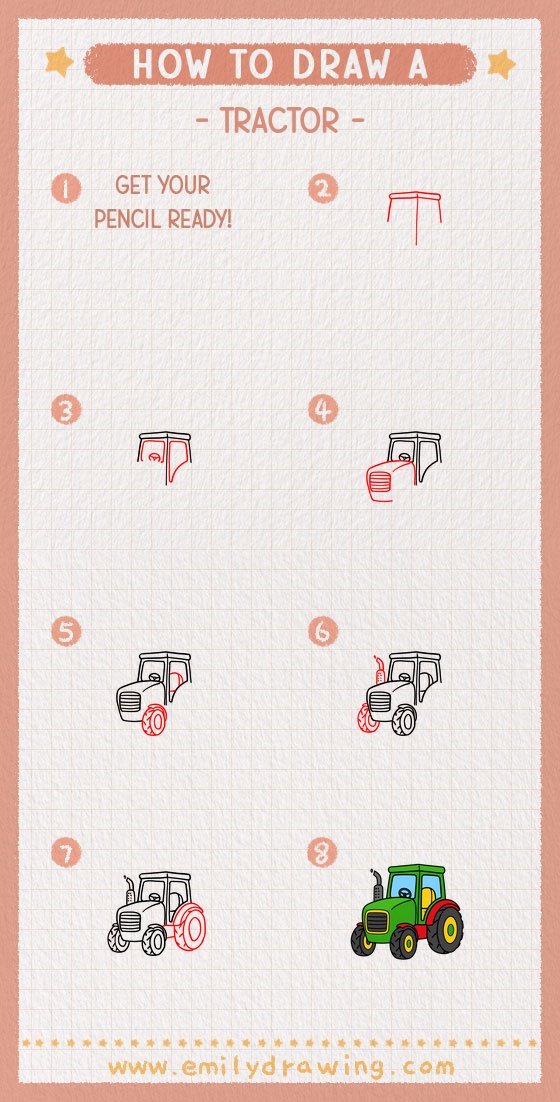
Trace your best lines with a black marker when you are happy with the sketch. Erase extra pencil marks gently, then color the tractor with bright farm colors. You can add grass, clouds, or a field background to complete your step by step drawing.
Keep practicing this drawing for beginners, and try changing the wheel size or cab shape next time.
Get the FREE Printable Drawing Guide
FREE Download Printable Tractor Drawing Tutorial
Frequently Asked Questions
Is this tractor drawing good for beginners?
Yes, this tractor drawing is good for beginners because it uses simple rounded shapes, ovals, and short lines.
What is the hardest part of drawing a tractor?
The wheels can be the trickiest part because they need clear outer tires, inner hubs, and curved tread marks.
How can I make my tractor drawing look more finished?
You can trace the outline, color the body, darken the tires, and add a simple farm background.



