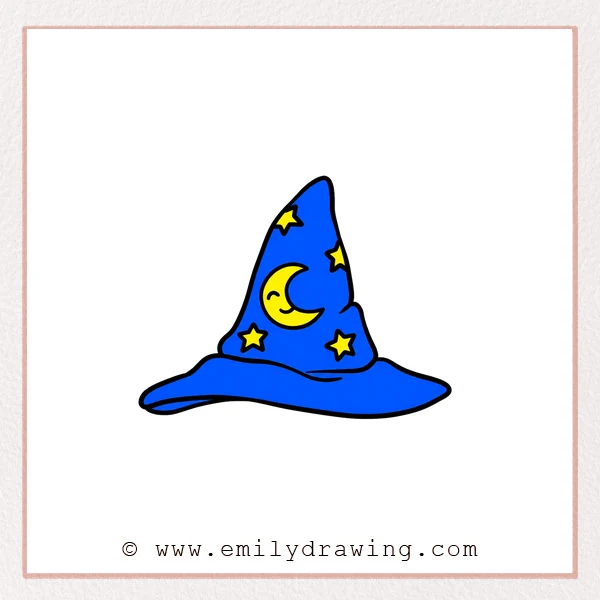
Learn how to draw a hat with a tall pointed crown and magical decorations. This drawing for beginners practices flowing outlines, small stars, and a crescent moon.
This easy drawing tutorial breaks the shapes into six manageable stages. Follow the step by step drawing at your own pace.
What You Will Need
- Drawing paper
- A pencil and eraser
- Colored pencils or crayons, if desired
Here are my RECOMMENDED Art Supplies!
- Crayola Coloring Set (140 Pieces – Mega Value!)
- 24 Colored Crayon Set
- A4 Printer Paper
- Crayola Coloring Pencils
- HP Home Printer with Instant Ink!
Time needed:
11 minutes.
Step-by-Step Drawing Guide
Step 1: Start the Pointed Crown
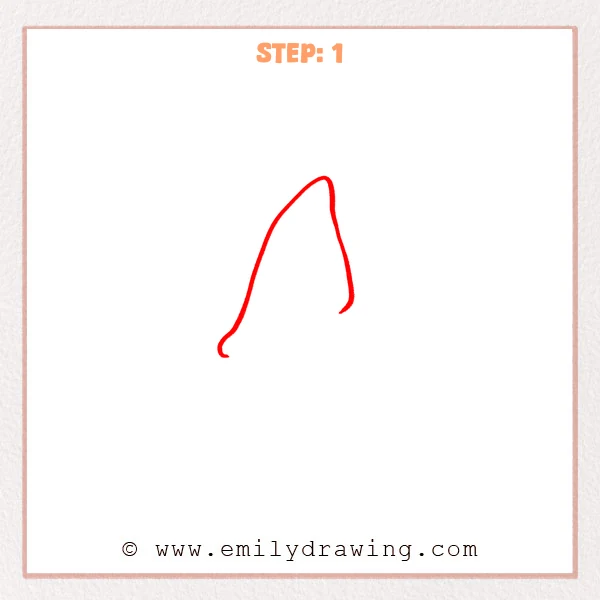
Draw a tall uneven crown with a softly rounded tip. Let the right edge bend inward and leave the bottom open.
Pro Tip: Make the crown taller than it is wide.
Step 2: Close the Lower Crown
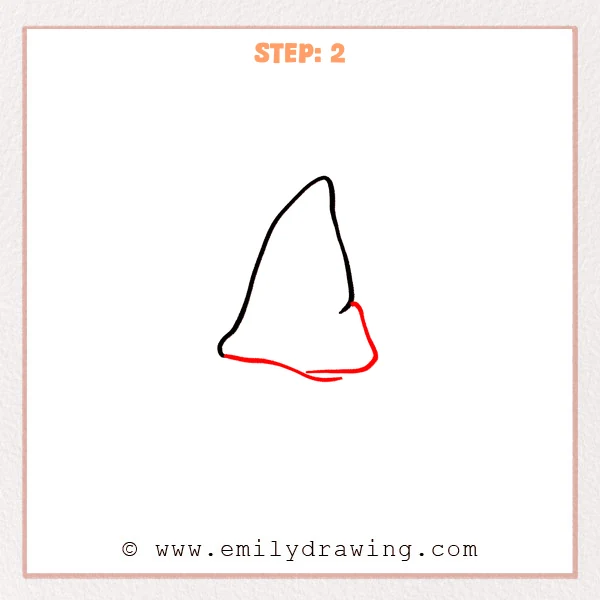
Extend the lower right edge outward and curve it across the base. Add a second shallow curve sweeping from the lower left toward the center.
Pro Tip: Keep the two lower curves close to suggest a soft fold.
Step 3: Spread the Brim
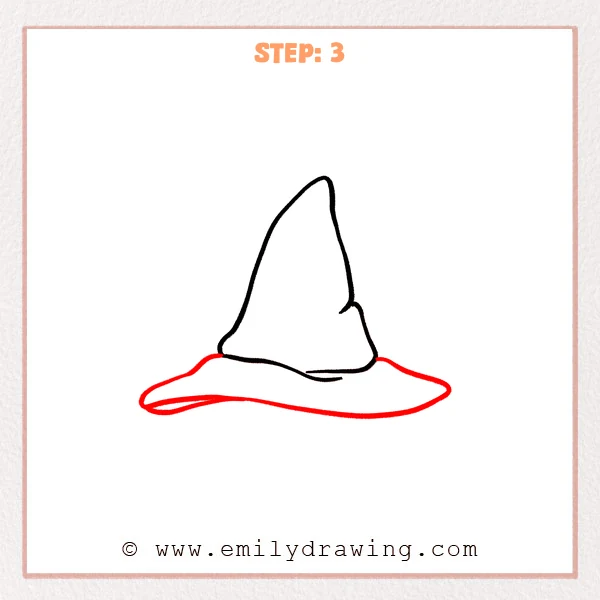
Draw a wide wavy brim extending from both crown corners. Add an extra curved edge along the lower left to show a folded underside.
Pro Tip: Extend the brim well beyond both sides of the crown.
Step 4: Add the Upper Stars
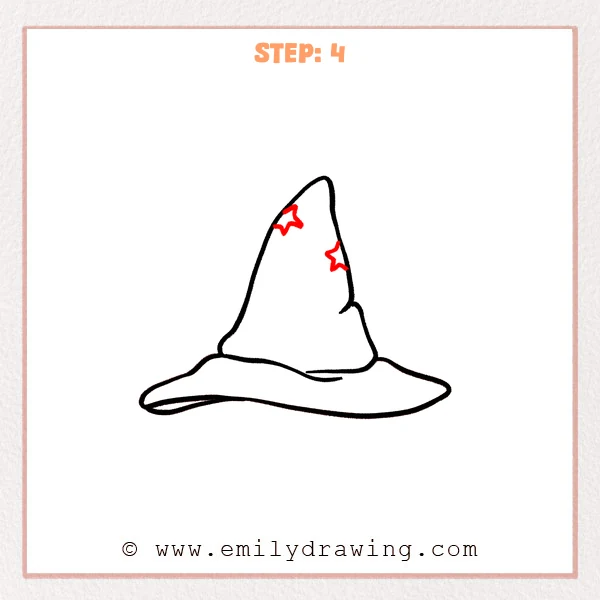
Draw two partial star outlines along the upper crown edges. Let each star meet the outside contour as though wrapping around the hat.
Pro Tip: Keep these stars small enough to fit beside the tip.
Step 5: Draw the Lower Stars
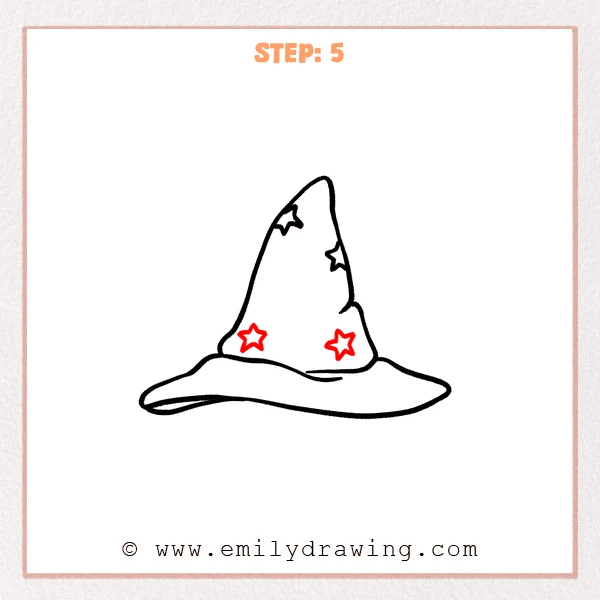
Add two complete five-pointed stars near the bottom of the crown. Leave a large open area between these stars and the upper decorations.
Pro Tip: Use small light strokes to plan each star point.
Step 6: Add the Smiling Moon
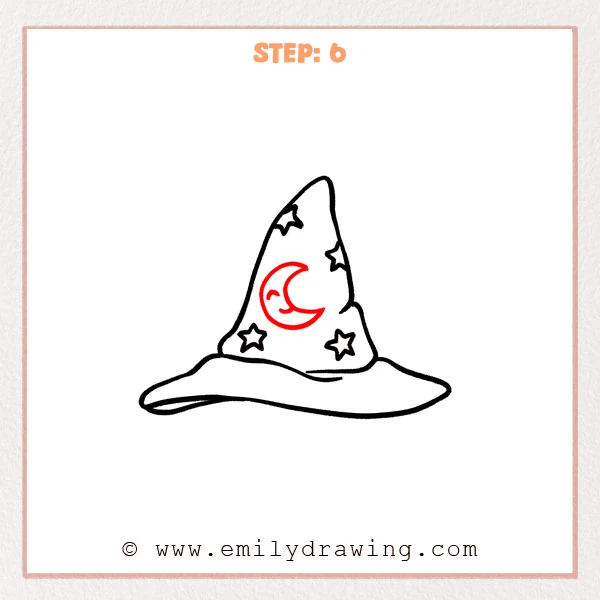
Draw a large crescent moon in the center of the crown. Add a short arched eye and a curved smile inside.
Pro Tip: Leave clear space between the moon and surrounding stars.
Step 7: Color in your drawing!
Fun Facts
- The hat’s wavy brim and uneven crown suggest soft, flexible material.
- Partial stars at the hat edges make the decoration appear to continue around the crown.
Pin it now, Draw later!
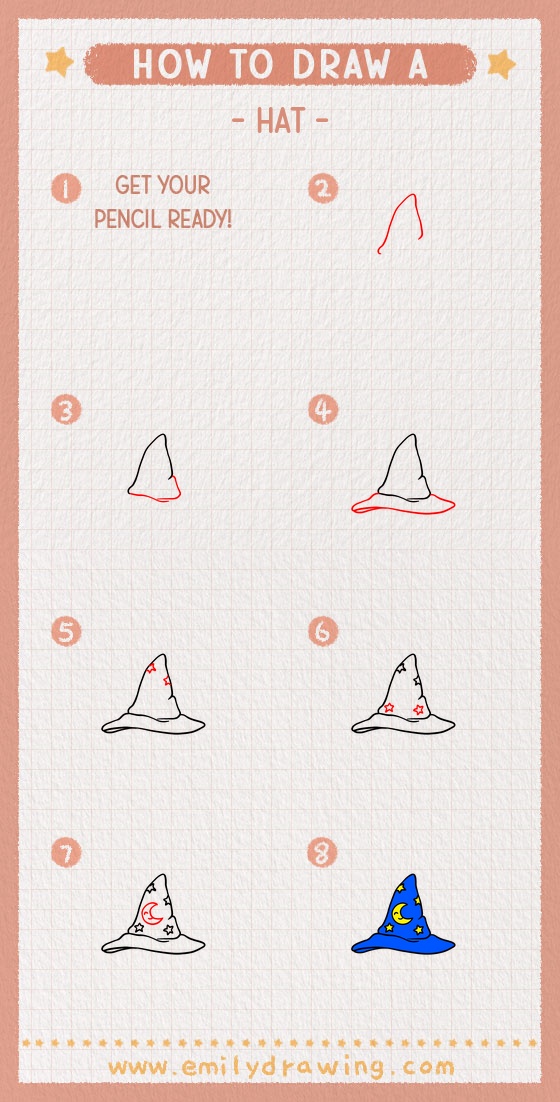
Your hat now has a pointed crown, wavy brim, four stars, and a smiling moon. Try a deep crown color with lighter decorations for a clear pattern. Draw another hat and experiment with new star placements.
Get the FREE Printable Drawing Guide
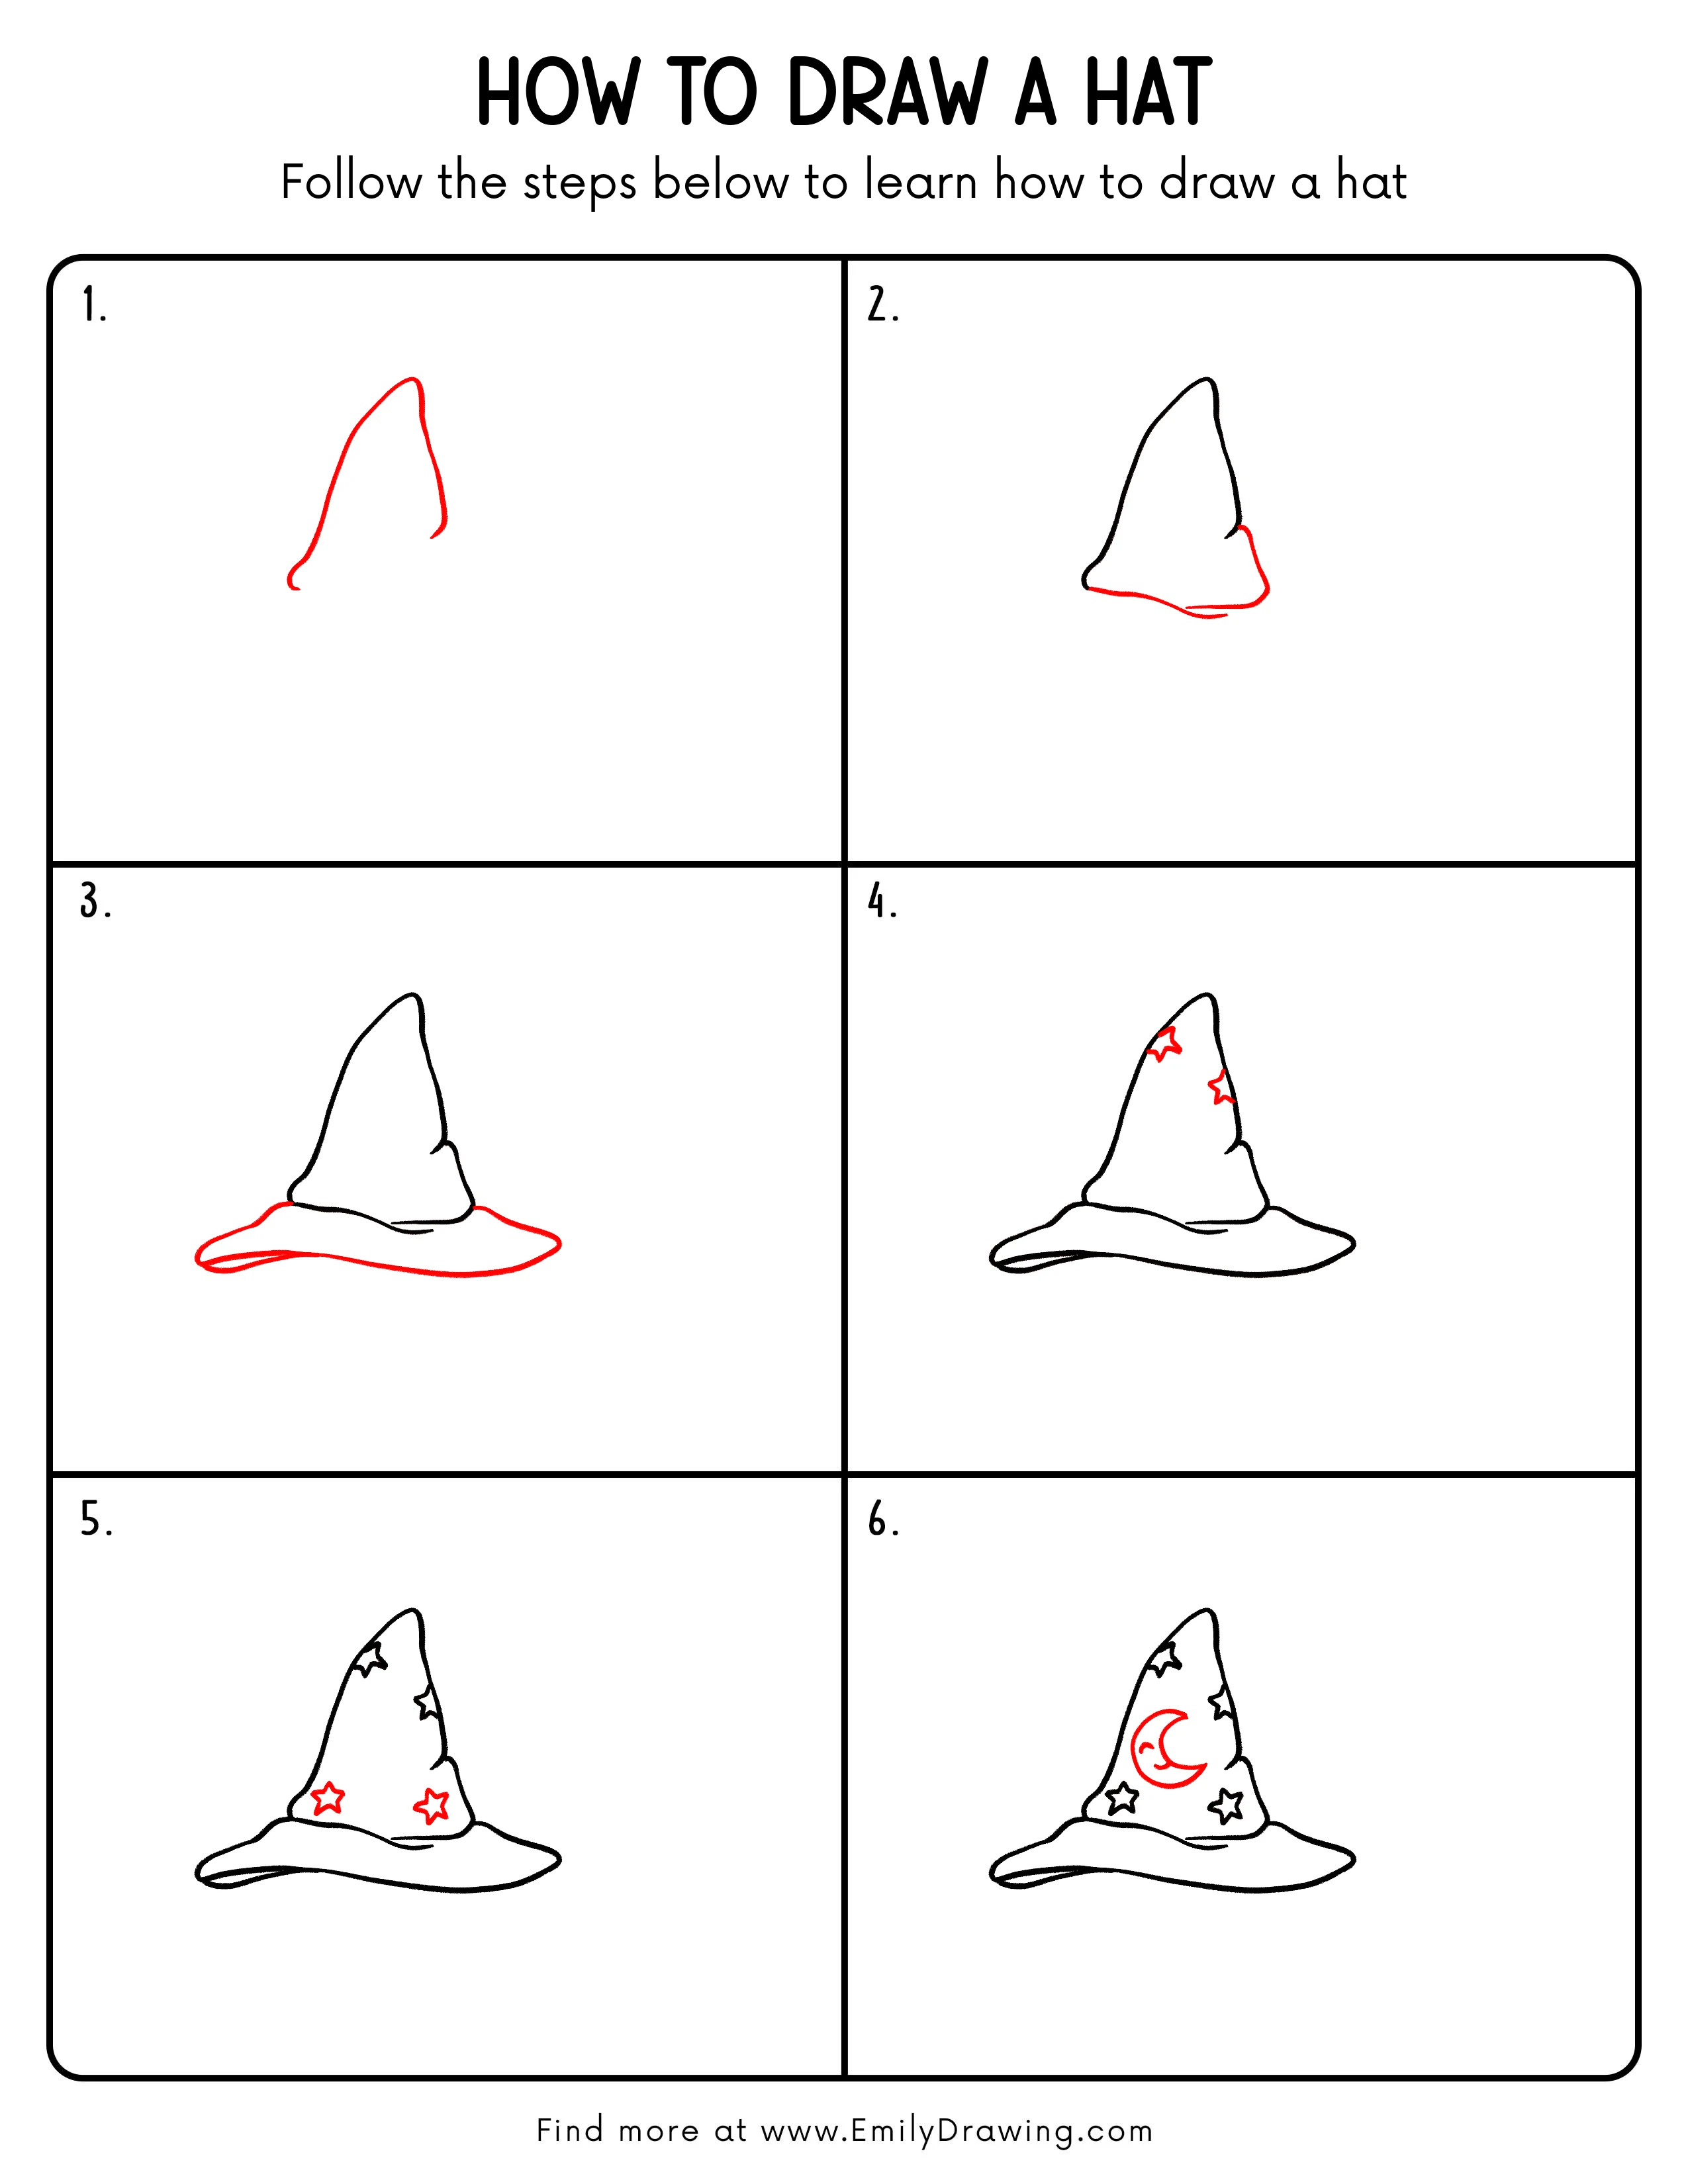
FREE Download Printable Hat Drawing Tutorial
Frequently Asked Questions
Does my hat need to be symmetrical?
No. The uneven crown and brim give this hat its relaxed, floppy appearance.
How do I draw the moon on the hat?
Join a broad outer curve to a smaller inward curve, creating two pointed ends.