
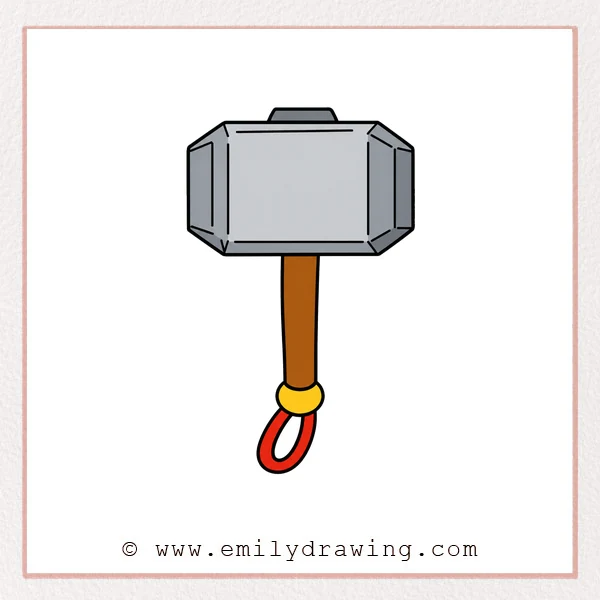
In this easy drawing tutorial, you will learn how to draw Thor’s hammer step by step.
This guide is made for beginners, using simple lines and clear shapes.
Take your time with each part, and keep the hammer strong and balanced.
What You Will Need
- Pencil
- Eraser
- Black marker or pen
- Drawing paper
- Coloring tools, if you want to add color
Here are my RECOMMENDED Art Supplies!
- Crayola Coloring Set (140 Pieces – Mega Value!)
- 24 Colored Crayon Set
- A4 Printer Paper
- Crayola Coloring Pencils
- HP Home Printer with Instant Ink!
Time needed:
12 minutes.
Step-by-Step Drawing Guide
Step 1: Draw the Top Edge of the Hammer Head
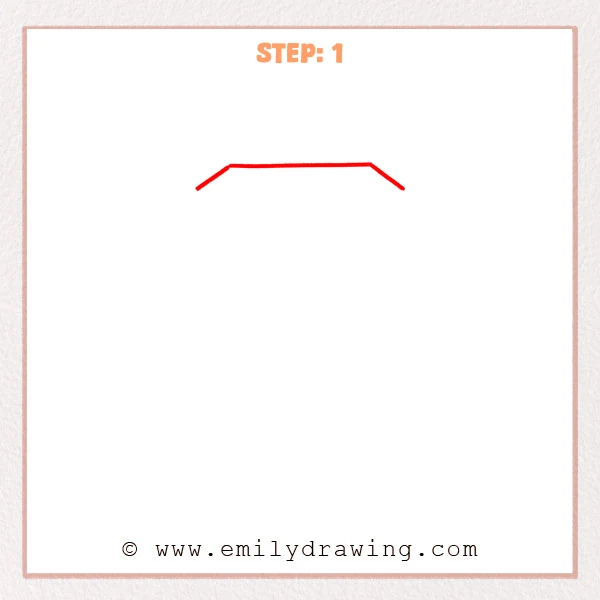
Start with a long horizontal line for the top edge of Thor’s hammer.
Add one short slanted line at each end to make the hammer head feel solid and heavy.
Pro Tip: Keep the middle line as straight as possible so the hammer head looks stable.
Step 2: Add the Raised Top Detail
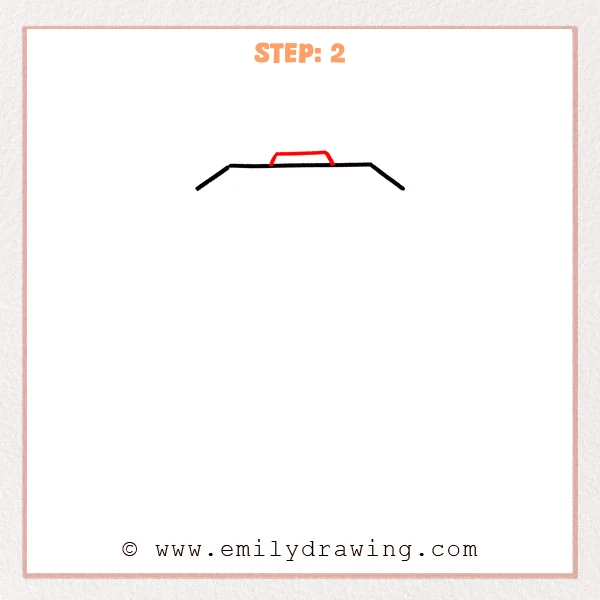
In the center of the hammer head’s top edge, draw a small trapezoid shape.
Let the short side lines lean slightly outward, and keep the top line flat like a sturdy metal detail.
Pro Tip: Place this raised detail in the center so Thor’s hammer looks more balanced.
Step 3: Draw the Side Outline of the Hammer Head
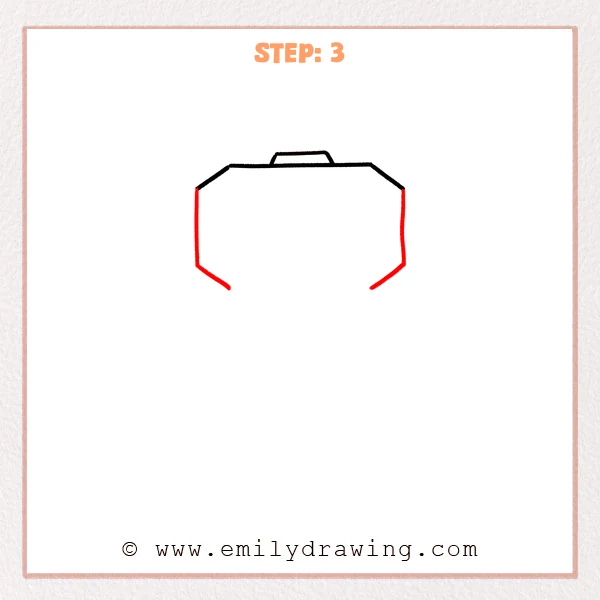
Draw a vertical line downward from each side to form the solid sides of the hammer head.
Add a short inward slanted line at the bottom of each side, leaving the center open for now.
Pro Tip: Keep both vertical side lines nearly the same height so Thor’s hammer looks even.
Step 4: Complete the Hammer Head Panels
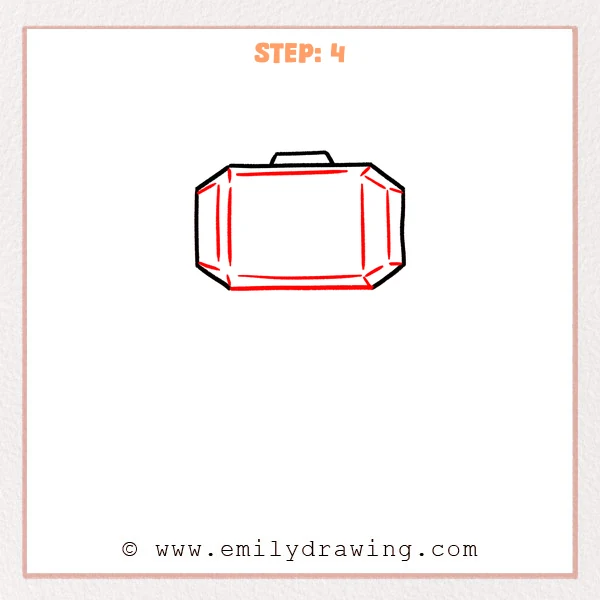
Connect the lower opening to complete the bottom edge of the hammer head.
Add long horizontal lines, vertical lines, and short slanted lines inside to divide the center panel and side facets.
Pro Tip: Keep the inside lines parallel to the outer outline so Thor’s hammer looks more three-dimensional.
Step 5: Draw the Basic Handle Shape
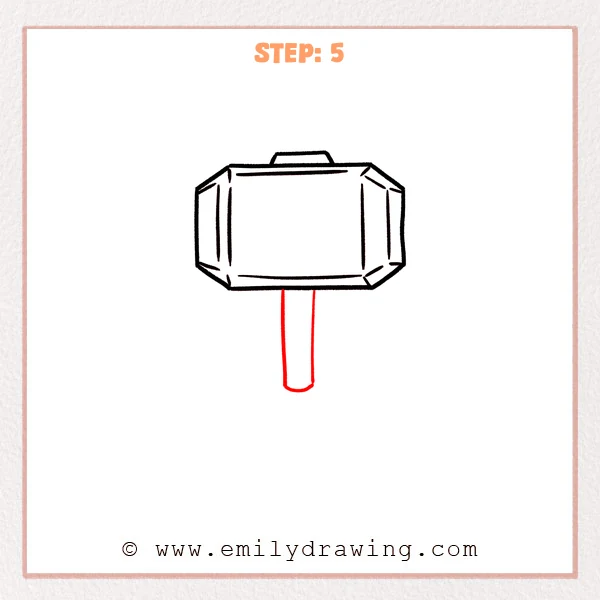
From the center of the hammer head’s bottom edge, draw two long vertical lines for Thor’s hammer handle.
Connect the bottom ends with a curved line to make the handle look smooth and complete.
Pro Tip: Keep the handle directly under the hammer head to make the whole hammer feel balanced.
Step 6: Add the Bottom Hanging Loop
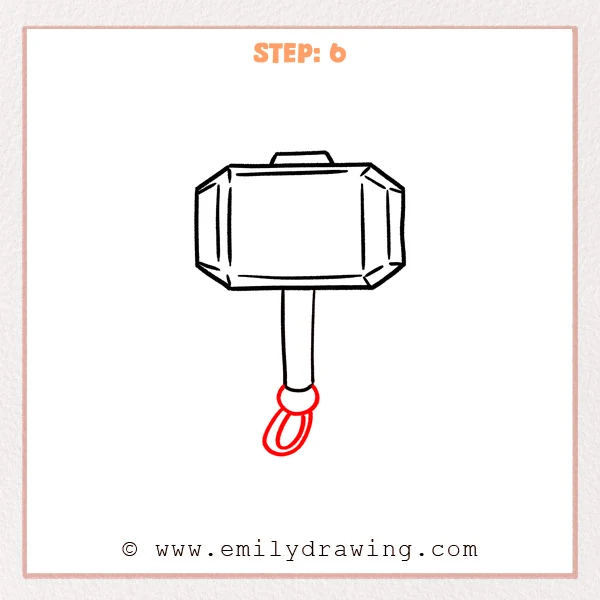
Draw a round connector ring at the bottom of the handle, wrapping around its end.
Then draw a long oval hanging loop below it, and add a smaller inner curve.
Pro Tip: Let the hanging loop tilt slightly to one side so Thor’s hammer looks more natural.
Step 7: Color in your drawing!
Fun Facts
Thor’s hammer is often shown as a powerful and heavy weapon.
Its wide hammer head and short handle make it a fun drawing for beginners.
Using straight edges and angled corners helps the hammer look strong.
Pin it now, Draw later!
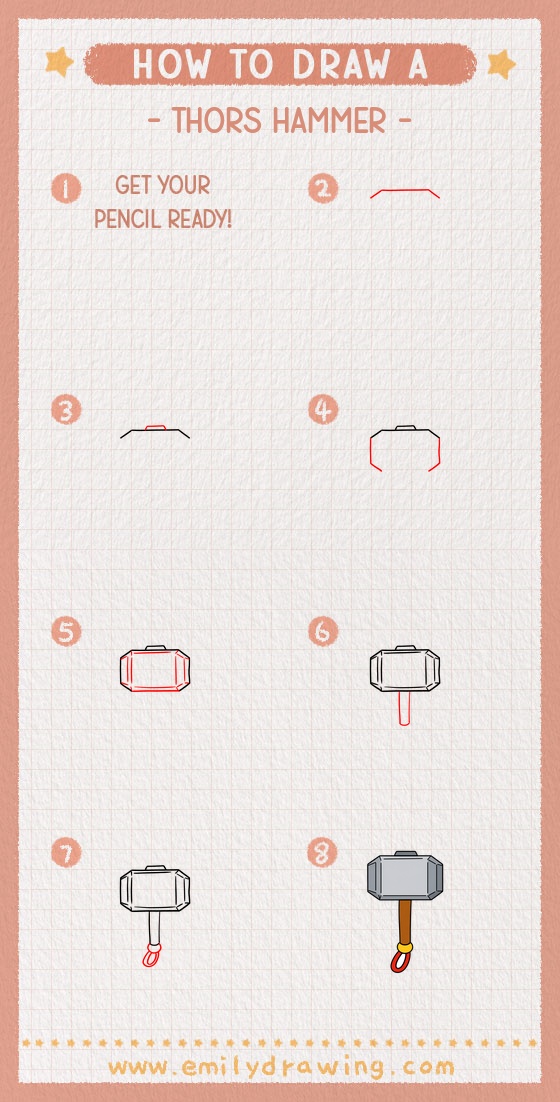
Now you know how to draw Thor’s hammer with a clear step by step drawing process.
You can trace the final lines with a marker, then erase any extra pencil marks.
Add gray, silver, or brown colors to finish your drawing, and try drawing it again with your own details.
Get the FREE Printable Drawing Guide
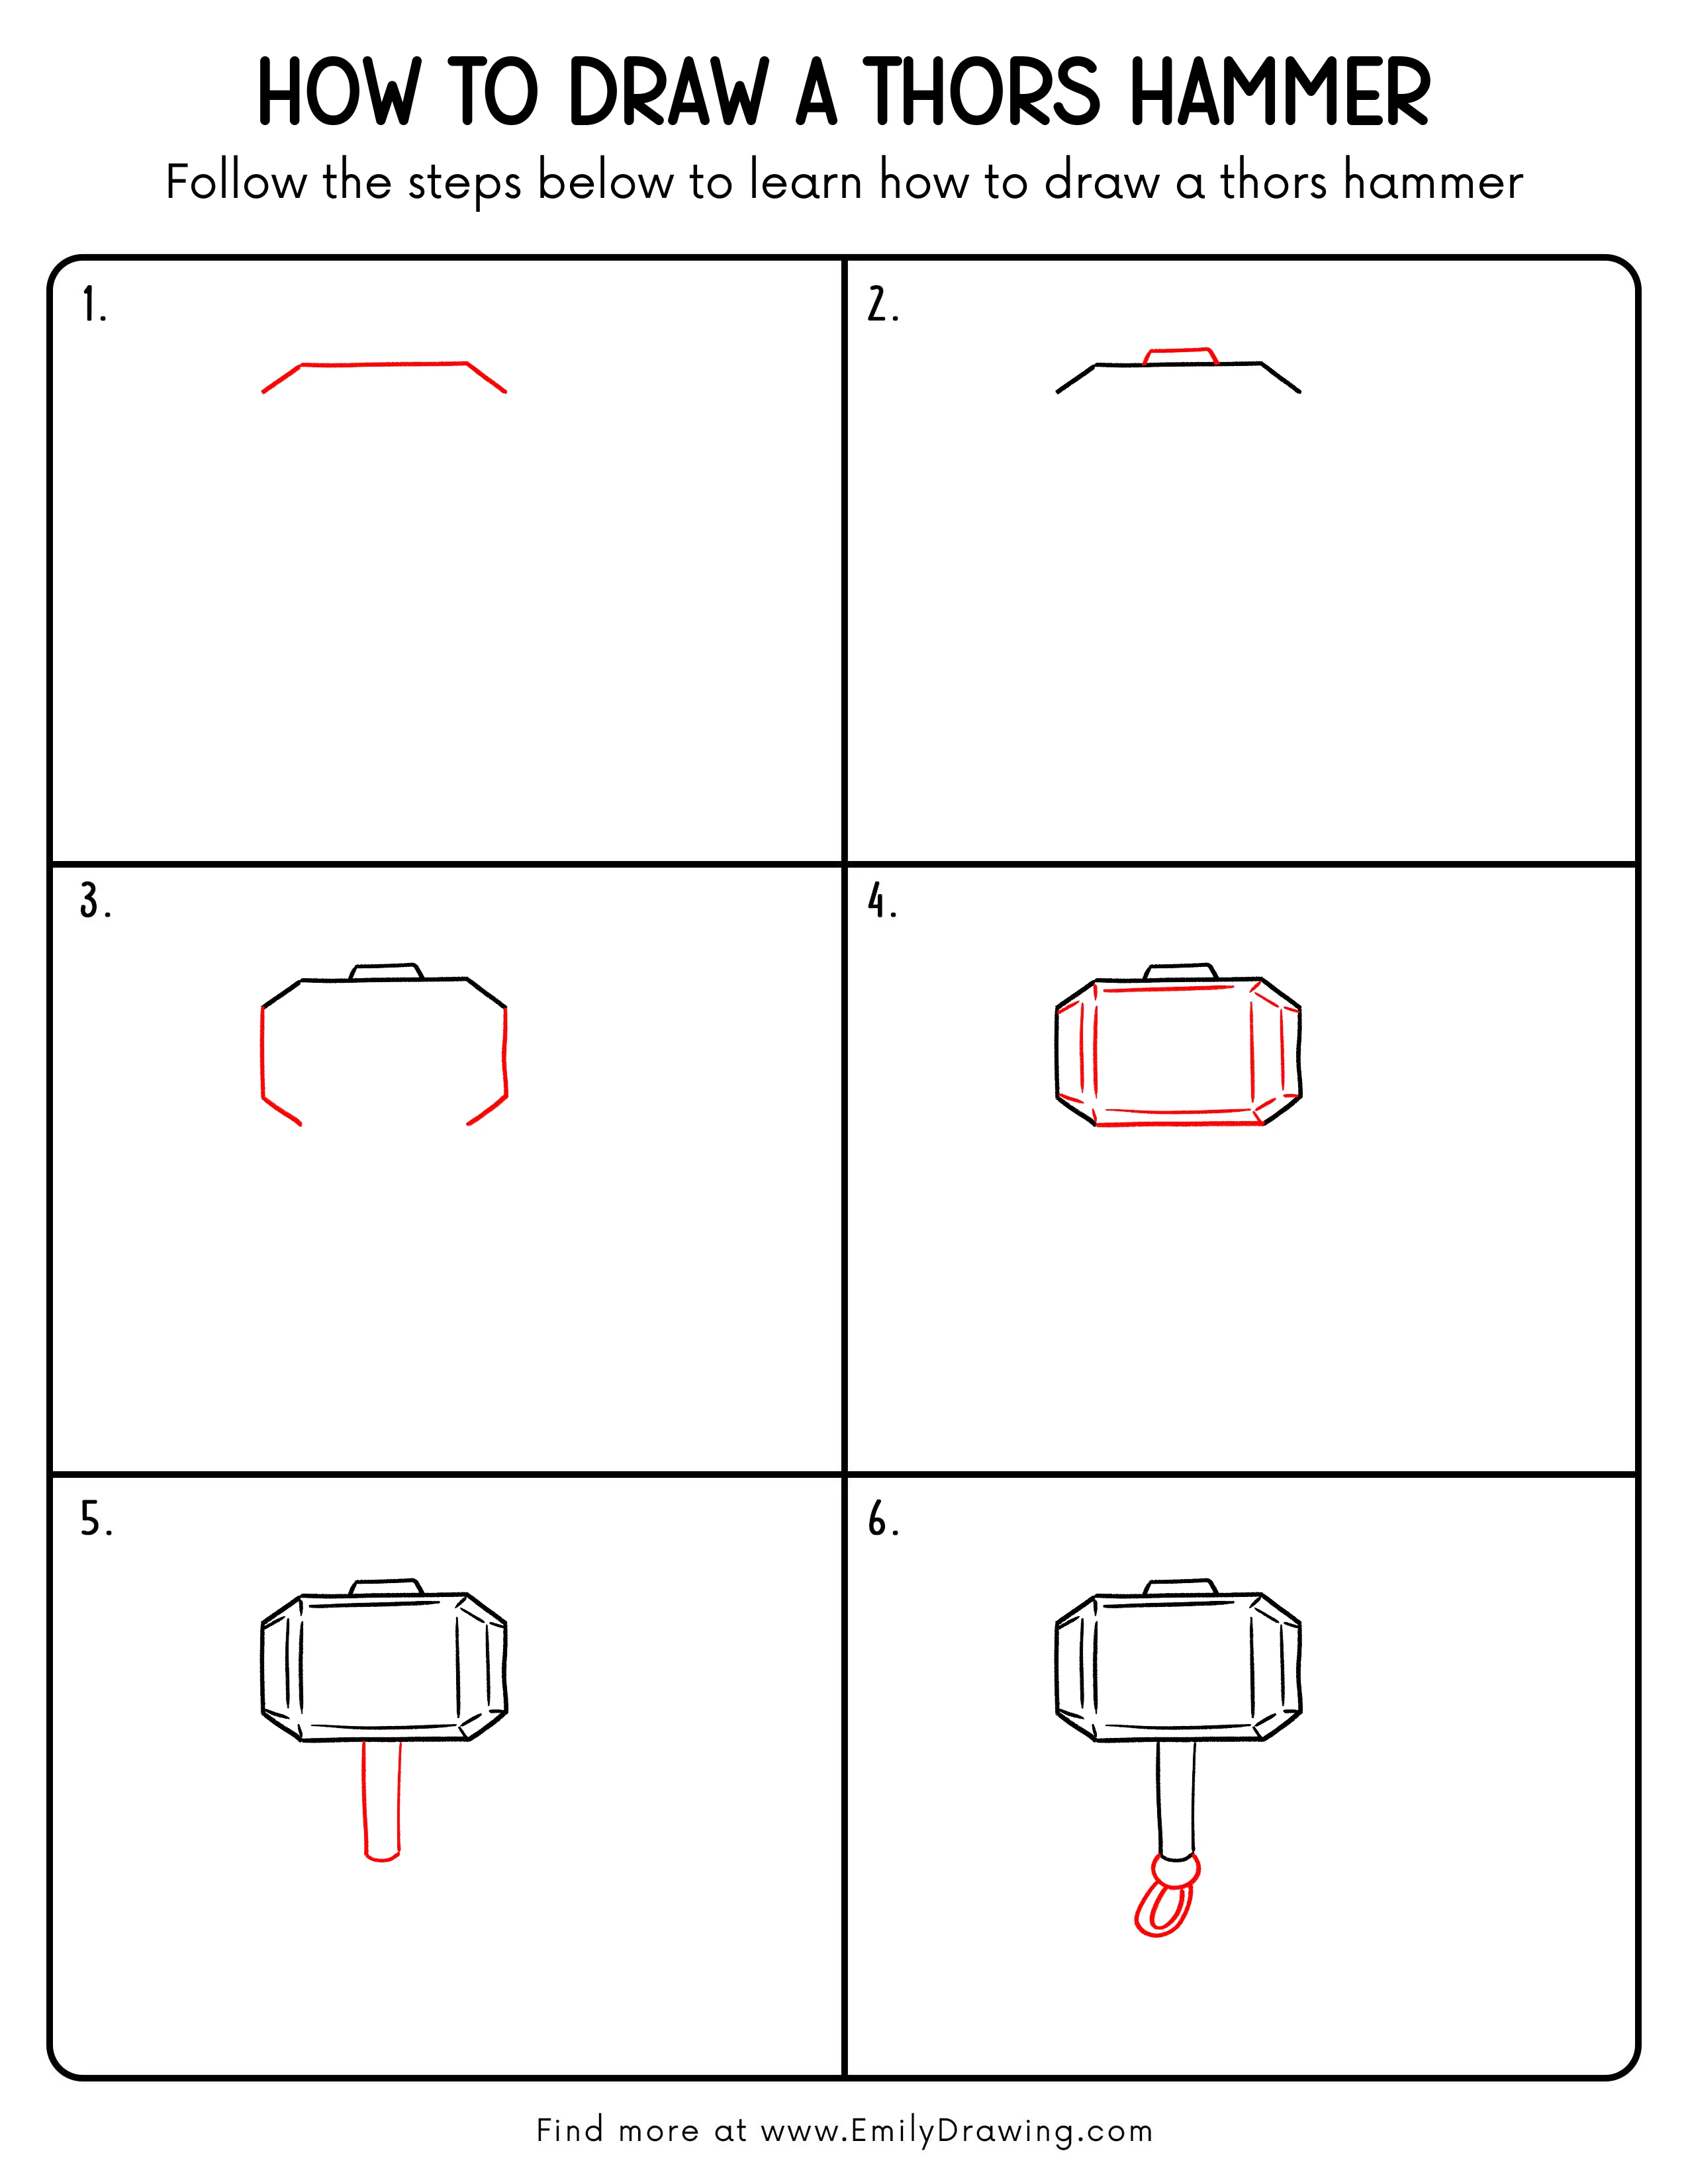
FREE Download Printable Thors Hammer Drawing Tutorial
Frequently Asked Questions
Is this Thor’s hammer drawing for beginners?
Yes, this drawing for beginners uses simple straight lines, curves, and basic shapes.
Can I color Thor’s hammer after drawing it?
Yes, you can use gray or silver for the hammer head and brown for the handle.
How can I make the hammer look more powerful?
Make the hammer head wide, keep the handle centered, and use clean, bold outlines.



