
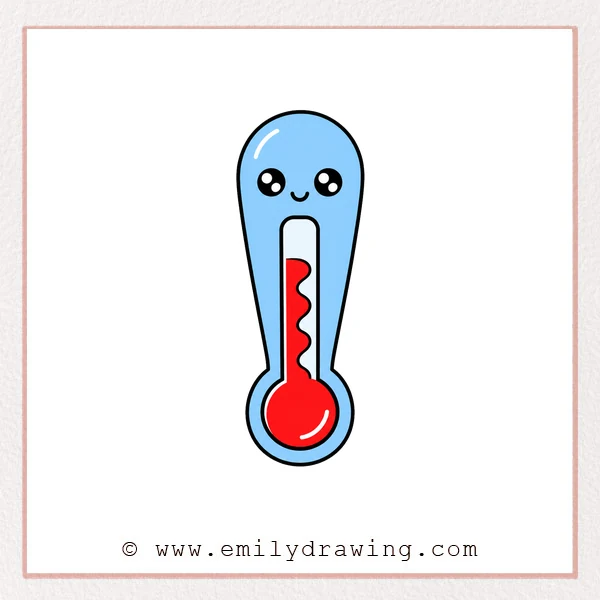
Learn how to draw thermometer with a cute face and simple rounded shapes. This easy drawing tutorial is made for beginners, using gentle lines and clear steps. Take your time, and build the thermometer one part at a time.
What You Will Need
- Pencil
- Eraser
- Black marker or pen
- Red marker or colored pencil
- Paper
Here are my RECOMMENDED Art Supplies!
- Crayola Coloring Set (140 Pieces – Mega Value!)
- 24 Colored Crayon Set
- A4 Printer Paper
- Crayola Coloring Pencils
- HP Home Printer with Instant Ink!
Time needed:
29 minutes.
Step-by-Step Drawing Guide
Step 1: Draw the Thermometer Outline
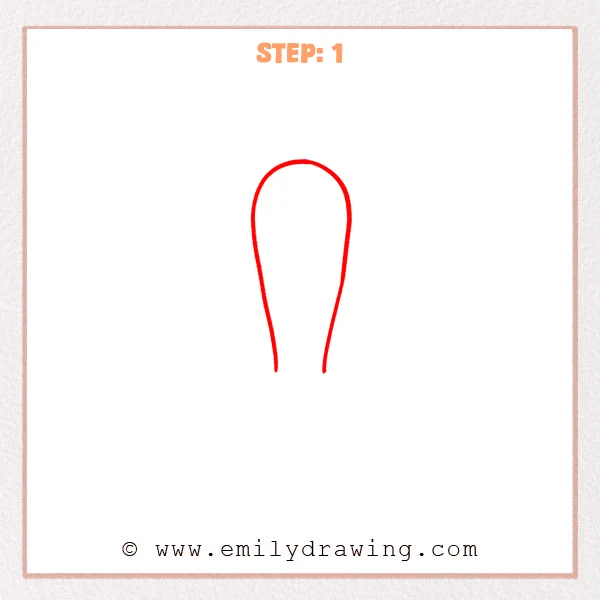
Start with a rounded top, then draw two long curved sides narrowing gently downward. Keep the bottom open for now, leaving space for the tube and scale details.
Pro Tip: Keep both curved sides as even as possible so the thermometer looks balanced.
Step 2: Add the Bottom Bulb
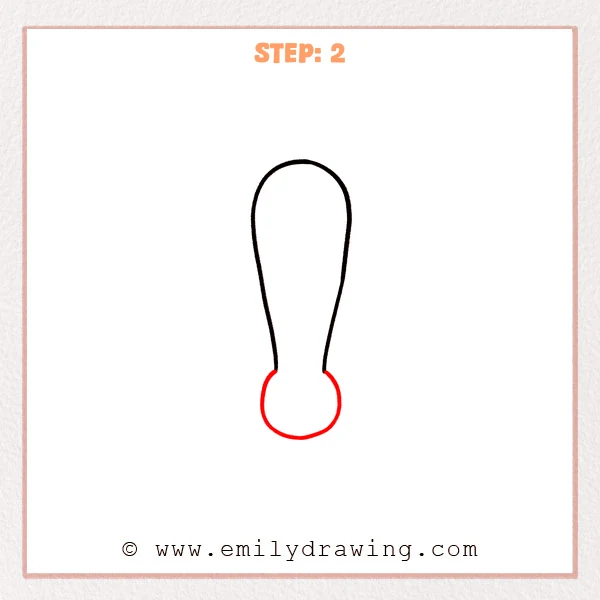
Draw a round bulb shape at the open bottom, connecting it to both side lines. This bulb becomes the liquid-holding part of the thermometer and completes the lower shape.
Pro Tip: Make the bulb wider than the upper tube so the thermometer’s proportions are clear.
Step 3: Draw the Cute Face
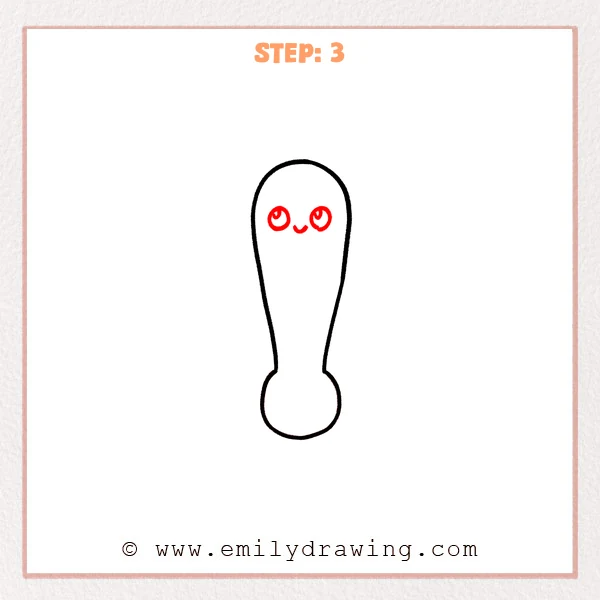
Add two round eyes on the upper part of the thermometer, with small curved highlights inside. Draw a tiny smiling curve below and between the eyes to make the thermometer look friendly.
Pro Tip: Keep both eyes at the same height so the expression looks neat and cute.
Step 4: Add the Inner Glass Tube
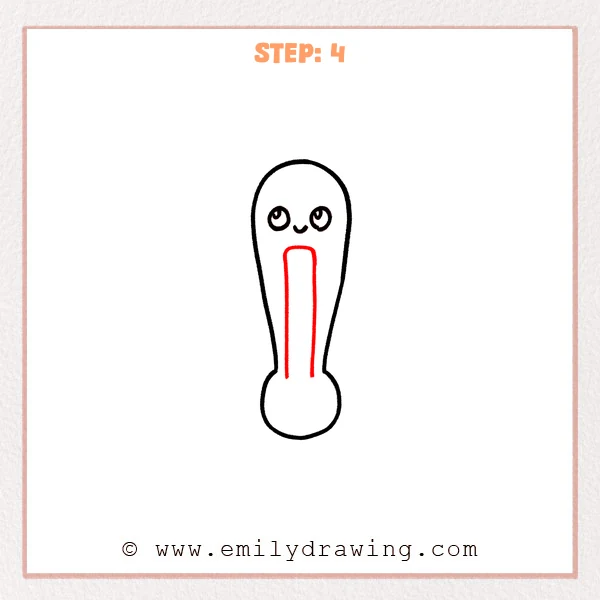
Draw a slim rounded rectangle in the center of the thermometer, extending downward below the face. Keep the bottom open and close to the top of the bulb, ready to connect the liquid area.
Pro Tip: Place the inner tube in the center, leaving nearly equal space on both sides.
Step 5: Add the Liquid Line and Highlight
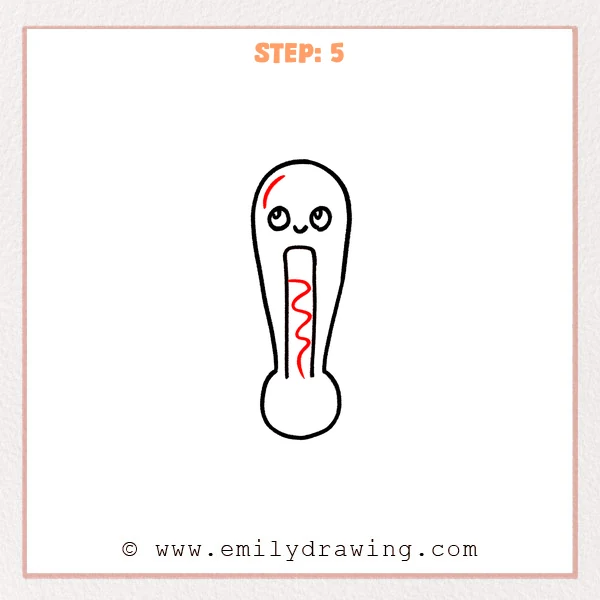
Draw a wavy liquid line inside the inner tube, flowing gently downward from the top. Add a short curved highlight near the upper left side to show the shiny glass surface.
Pro Tip: Keep the liquid line away from the tube edges so it stays easy to see.
Step 6: Draw the Liquid in the Bulb
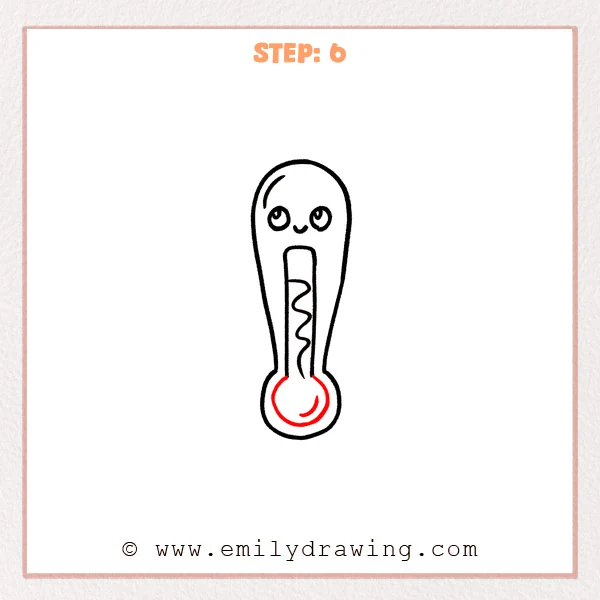
Add a large curved line inside the bottom bulb, connecting it to the base of the inner tube. This line shows the thermometer liquid and makes the bulb area look fuller.
Pro Tip: Curve the liquid line with the bulb’s outline, leaving an even border around it.
Step 7: Color in your drawing!
Fun Facts
- A thermometer helps measure temperature in air, water, or the body.
- Many thermometers use a bulb shape at the bottom to hold the measuring liquid.
- Digital thermometers show numbers, while classic thermometers use a rising line.
Pin it now, Draw later!
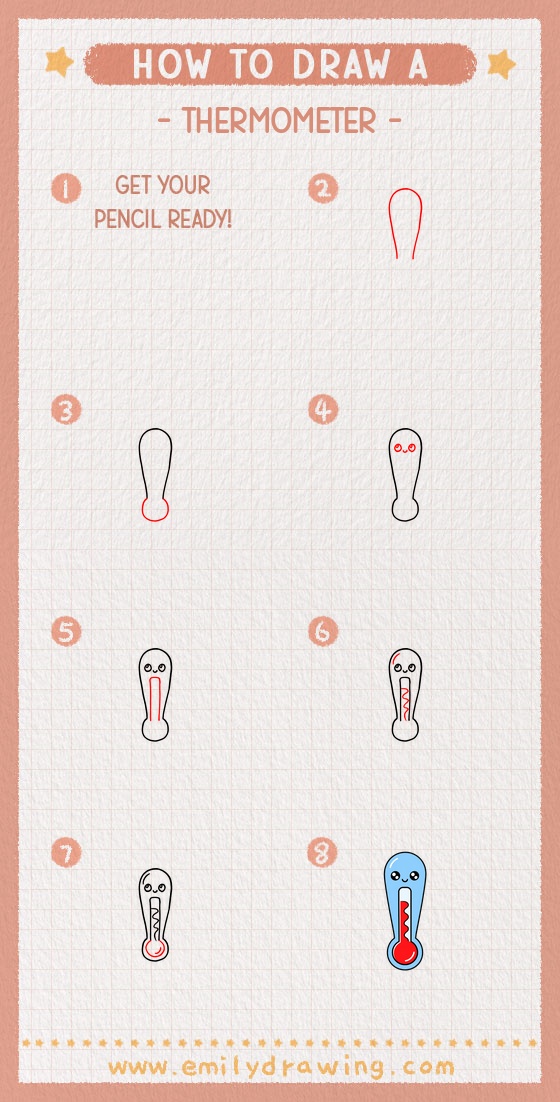
Trace the final thermometer outline with a black marker when you feel ready. Color the liquid line and bulb area red to make the temperature stand out. You can also add soft shadows or small sparkle marks around the glass for a cleaner finish.
Great work completing this step by step drawing. Keep practicing this drawing for beginners, and try changing the face or liquid level next time.
Get the FREE Printable Drawing Guide
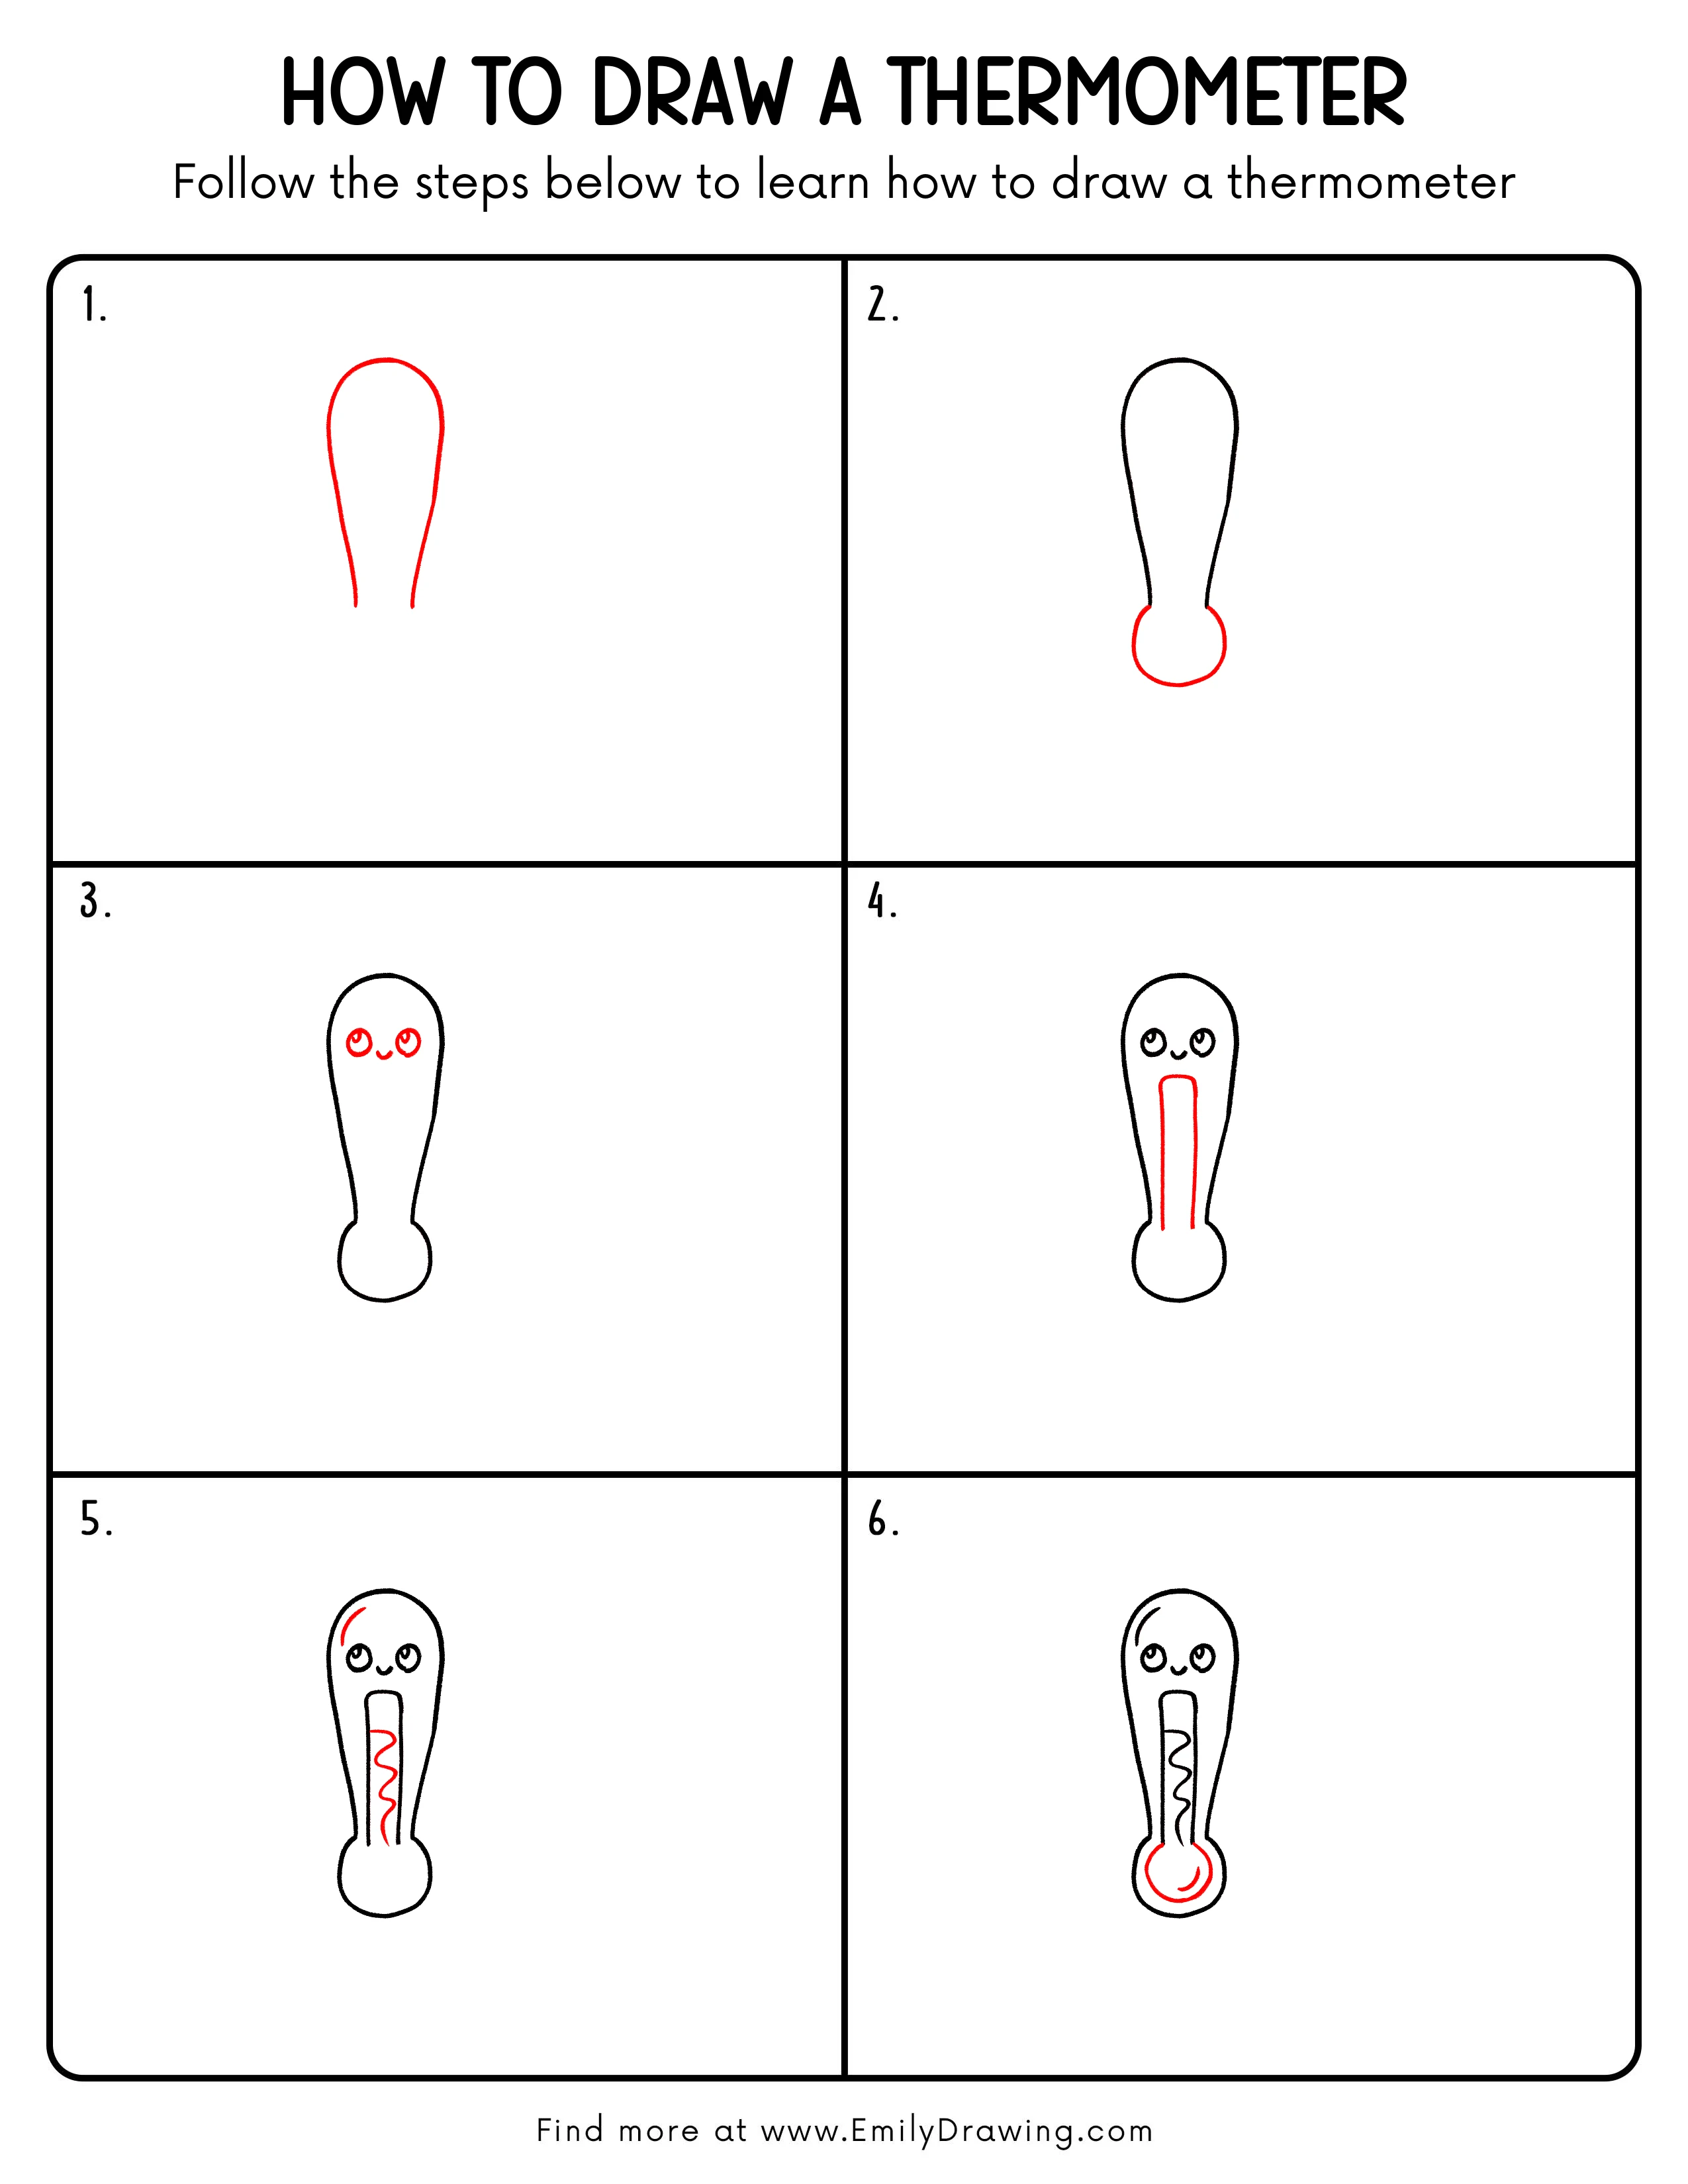
FREE Download Printable Thermometer Drawing Tutorial
Frequently Asked Questions
Is this thermometer drawing good for beginners?
Yes, this easy drawing tutorial uses simple curves, circles, and rounded rectangles. Beginners can follow each step slowly and adjust the lines as needed.
How can I make the thermometer look cuter?
Try making the eyes larger and the smile softer. You can also add rosy cheeks or tiny sparkle marks around the glass.
What colors should I use for this thermometer?
Use black for the outline and red for the liquid inside. Light blue or pale gray can be added softly to suggest shiny glass.



