
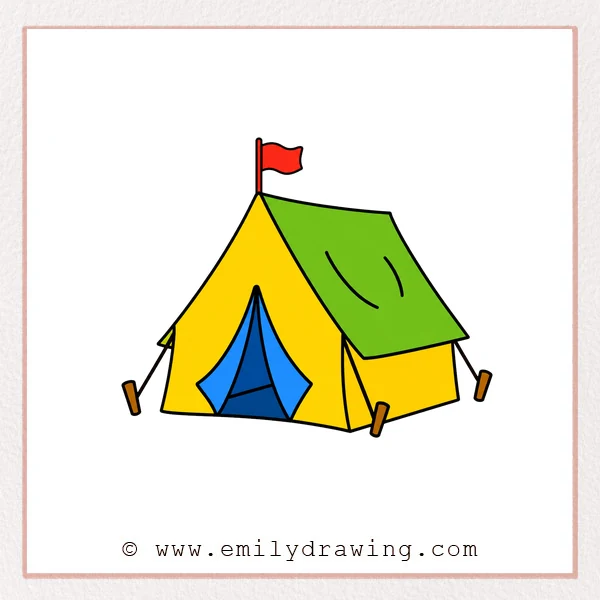
Learning how to draw tent is a fun way to practice simple shapes. This easy drawing tutorial uses slanted lines, panels, and small camping details. Take your time, and build the tent one step at a time.
What You Will Need
- Pencil
- Eraser
- Black marker
- Coloring tools
- Drawing paper
Here are my RECOMMENDED Art Supplies!
- Crayola Coloring Set (140 Pieces – Mega Value!)
- 24 Colored Crayon Set
- A4 Printer Paper
- Crayola Coloring Pencils
- HP Home Printer with Instant Ink!
Time needed:
25 minutes.
Step-by-Step Drawing Guide
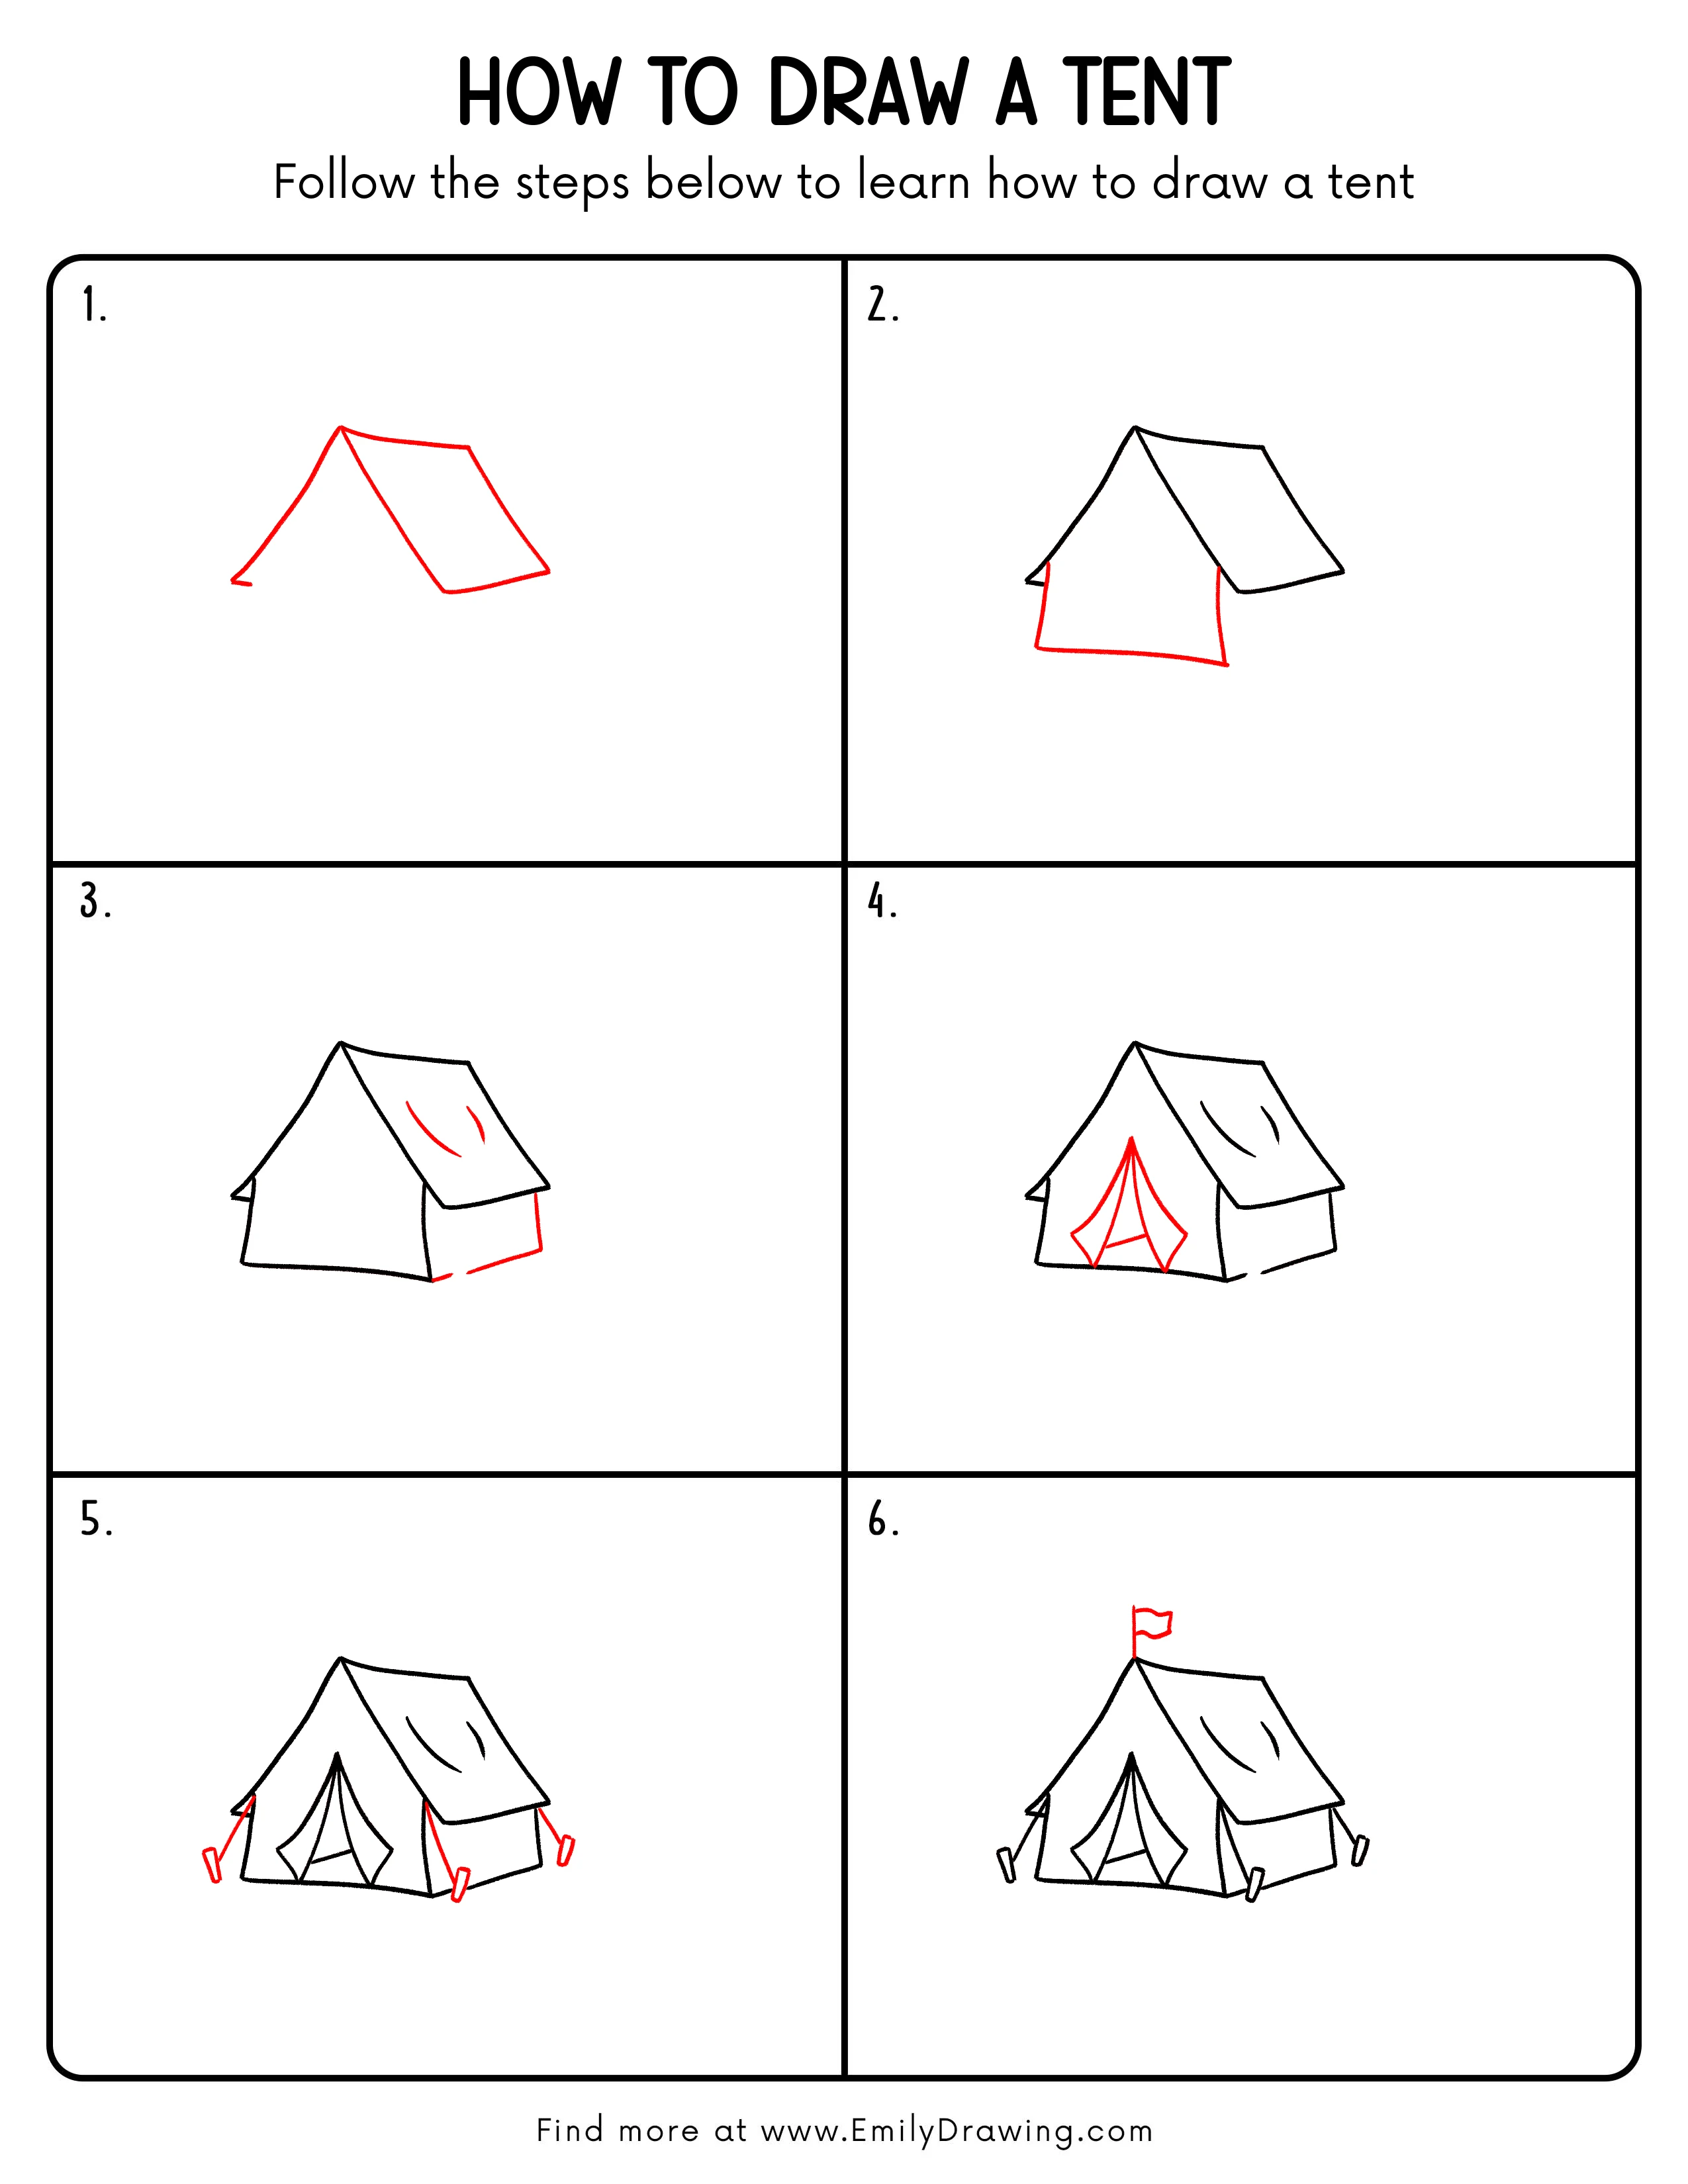
Step 1: Draw the Basic Tent Outline
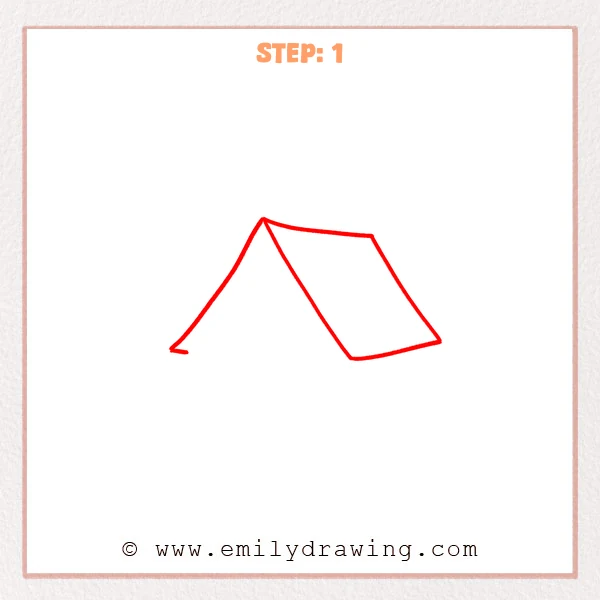
Start with a tall peak, then draw a slanted line down to the left. From the peak, add a four-sided tent panel on the right. Draw one middle slanted line to separate the front opening from the side.
Pro Tip: Keep the peak as the highest point, and avoid making both bottom edges exactly the same length.
Step 2: Add the Front Base of the Tent
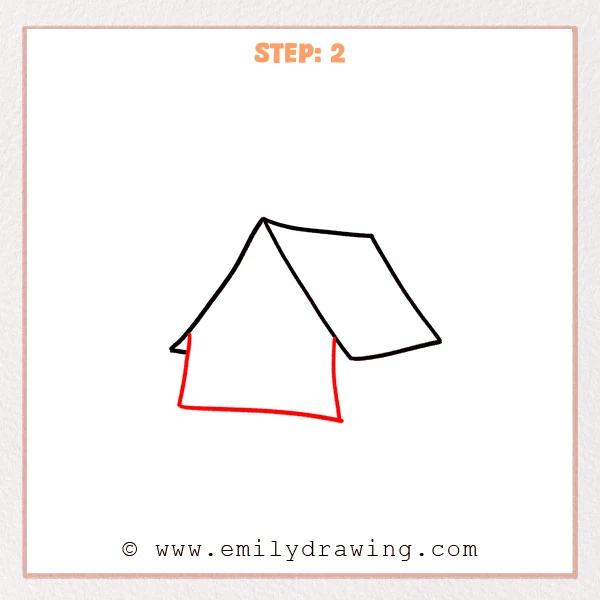
Add a long bottom line under the front opening so the tent feels stable. Then draw two short vertical lines to connect the front fabric to the base. This gives the front panel a clear standing shape.
Pro Tip: Let the bottom edge tilt slightly downward to the right for more depth.
Step 3: Add the Right Base and Fabric Lines
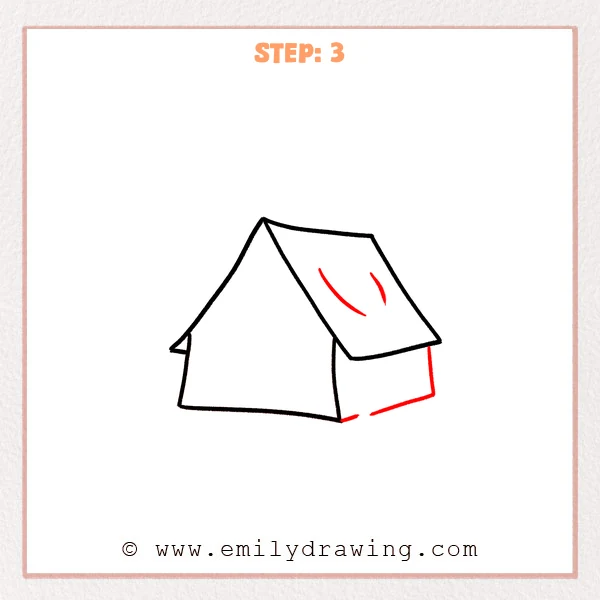
Draw a short base line and a vertical edge under the right side to complete the side support. Add two curved short lines on the right tent fabric. These marks show gentle folds in the material.
Pro Tip: Keep the fabric lines gently curved, not too straight or too long.
Step 4: Draw the Tent Door Flaps
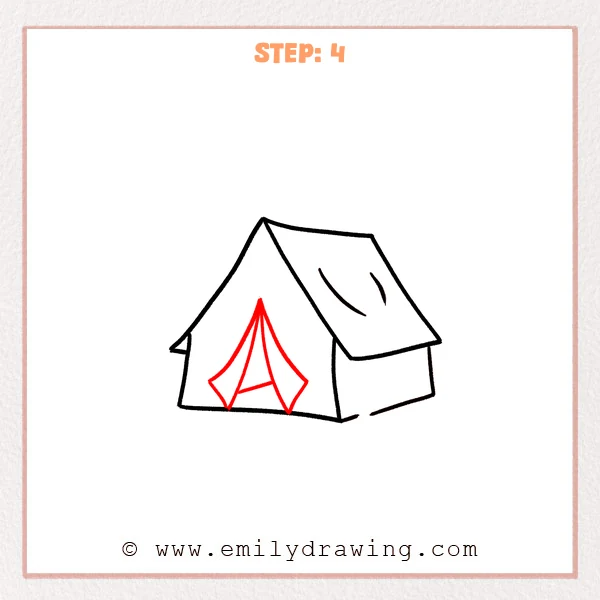
Add a pointed door flap on the front, drawing curved slanted lines from the top to both sides. Then draw the center opening line and a short diagonal line. This makes the flaps look open and ready to enter.
Pro Tip: Place the door point slightly above the middle of the front panel for a natural opening.
Step 5: Add the Guy Ropes and Stakes
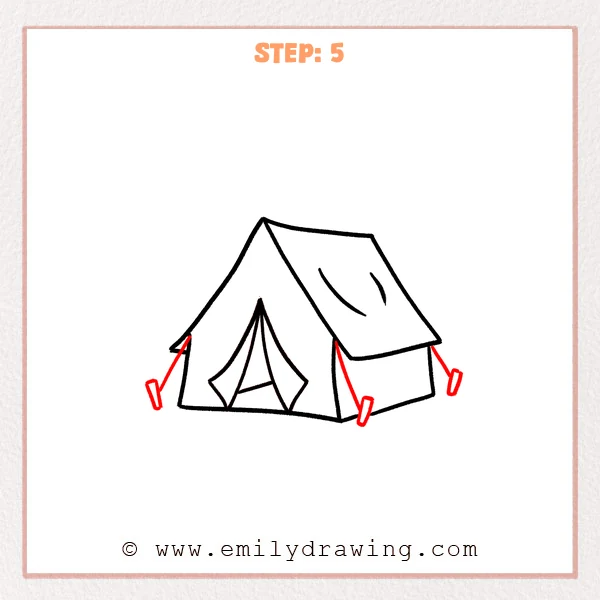
Draw a slanted guy rope on each side of the tent, pulling outward. Add a small stake at the end of each rope. These details show the tent secured to the ground.
Pro Tip: Keep the stakes much smaller than the tent so the proportions look accurate.
Step 6: Add the Small Flag on Top
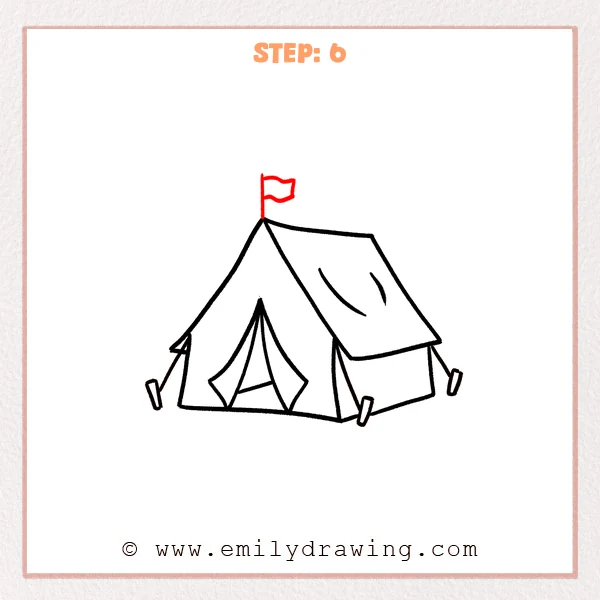
Draw a short flagpole rising from the highest point of the tent. Then add a small wavy flag beside it. This final detail gives the tent a cheerful camping feel.
Pro Tip: Do not make the flag too large; keep it lightly balanced on the tent peak.
Step 7: Color in your drawing!
Fun Facts
- Tents can be shaped like triangles, domes, cabins, or tunnels.
- The ropes on a tent help keep the fabric steady in wind.
- A small flag can make a campsite easier to spot.
- Drawing a tent is great practice for angles and simple perspective.
Pin it now, Draw later!
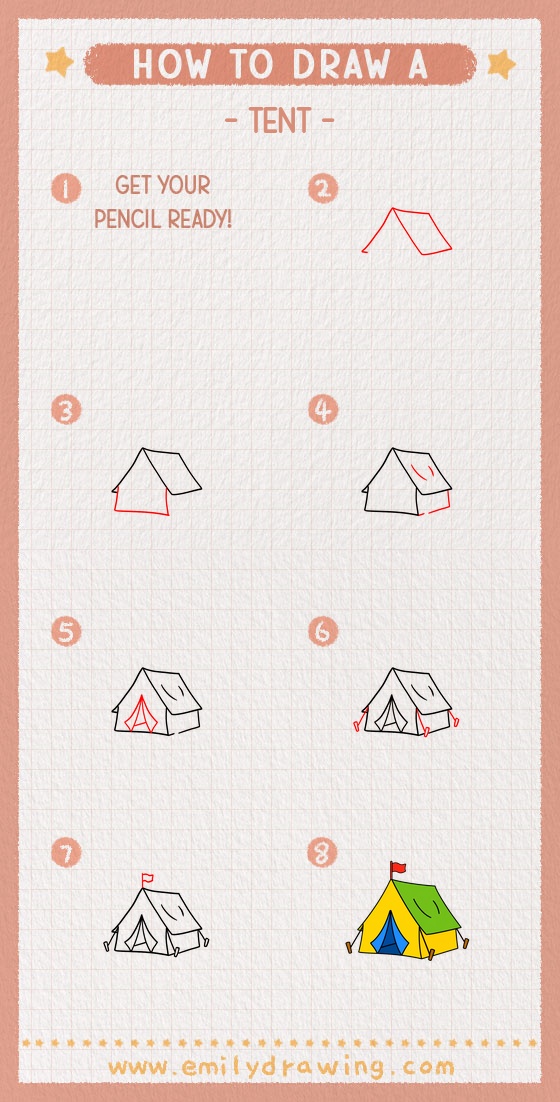
Now you know how to draw tent using a clear step by step drawing method. Trace your favorite lines with a marker, then erase any extra pencil marks. Add colors, grass, stars, or a campfire to finish your scene.
Try drawing another tent beside it to make a cozy campsite.
Get the FREE Printable Drawing Guide
FREE Download Printable Tent Drawing Tutorial
Frequently Asked Questions
Is this tent drawing good for beginners?
Yes, this drawing for beginners uses simple slanted lines and basic shapes.
How can I make the tent look more realistic?
Add soft fabric folds, small shadows, and ground details around the stakes.
What colors work well for a tent?
Green, orange, yellow, blue, or tan all work nicely for a camping tent.



