Hi there, young artists and grown-up helpers!
Are you ready to dive into a magical drawing adventure full of Irish charm and music? In this fun tutorial, we’ll learn how to draw a St. Patrick’s Day harp—and guess what? It’s super easy and tons of fun!
The harp is a very special instrument in Ireland—perfect for your Irish harp drawing adventure. It’s actually the national symbol of the country—you can even see it on Irish coins and passports! Isn’t that cool? Some say leprechauns love playing harps while guarding their pots of gold.
So grab your pencil, paper, and imagination—let’s get drawing! You can also pair it with our St. Patrick’s Day horseshoe drawing for a lucky Irish duo!
In this Celtic harp tutorial, we’ll break it down into 9 simple steps, plus coloring. By the end, you’ll have your very own St. Patrick’s Day harp to be proud of!
Materials:
- a piece of paper
- a pencil for the guiding lines and sketching
- an eraser
- a black sharpie or a pen for the outlines
- markers or colored pencils for coloring
- our printable drawing guide (Join my Email List below to get this Tutorial)
Here are my RECOMMENDED Art Supplies!
- Crayola Coloring Set (140 Pieces – Mega Value!)
- 24 Colored Crayon Set
- A4 Printer Paper
- Crayola Coloring Pencils
- HP Home Printer with Instant Ink!
Time needed:
15 minutes.
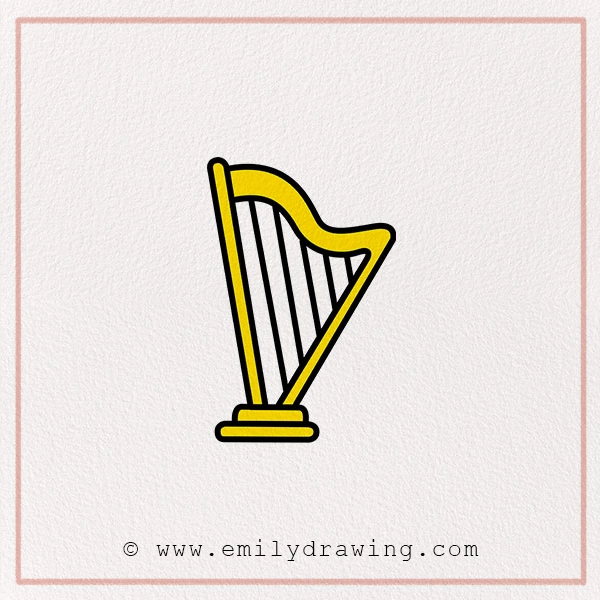
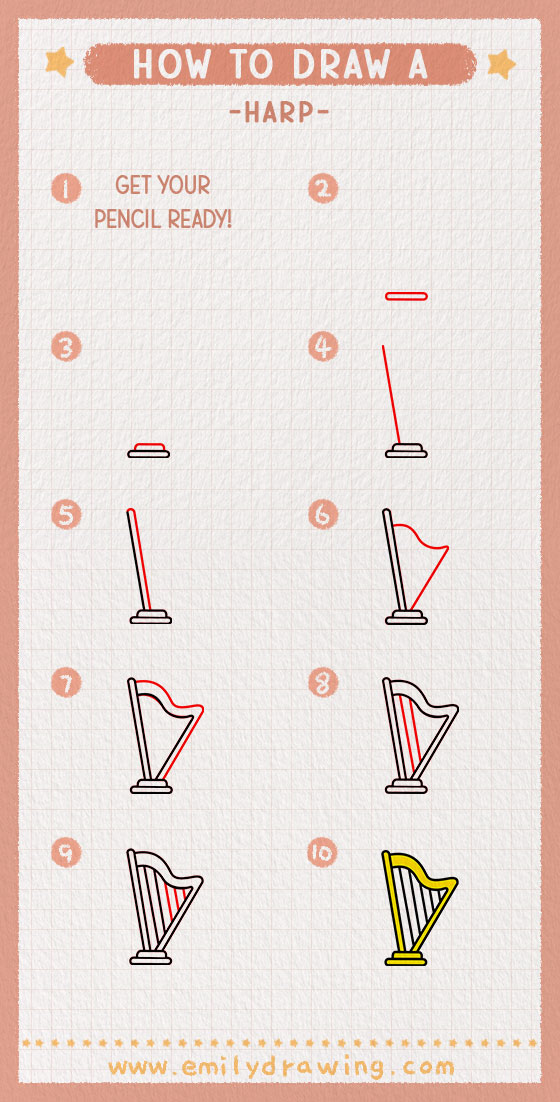
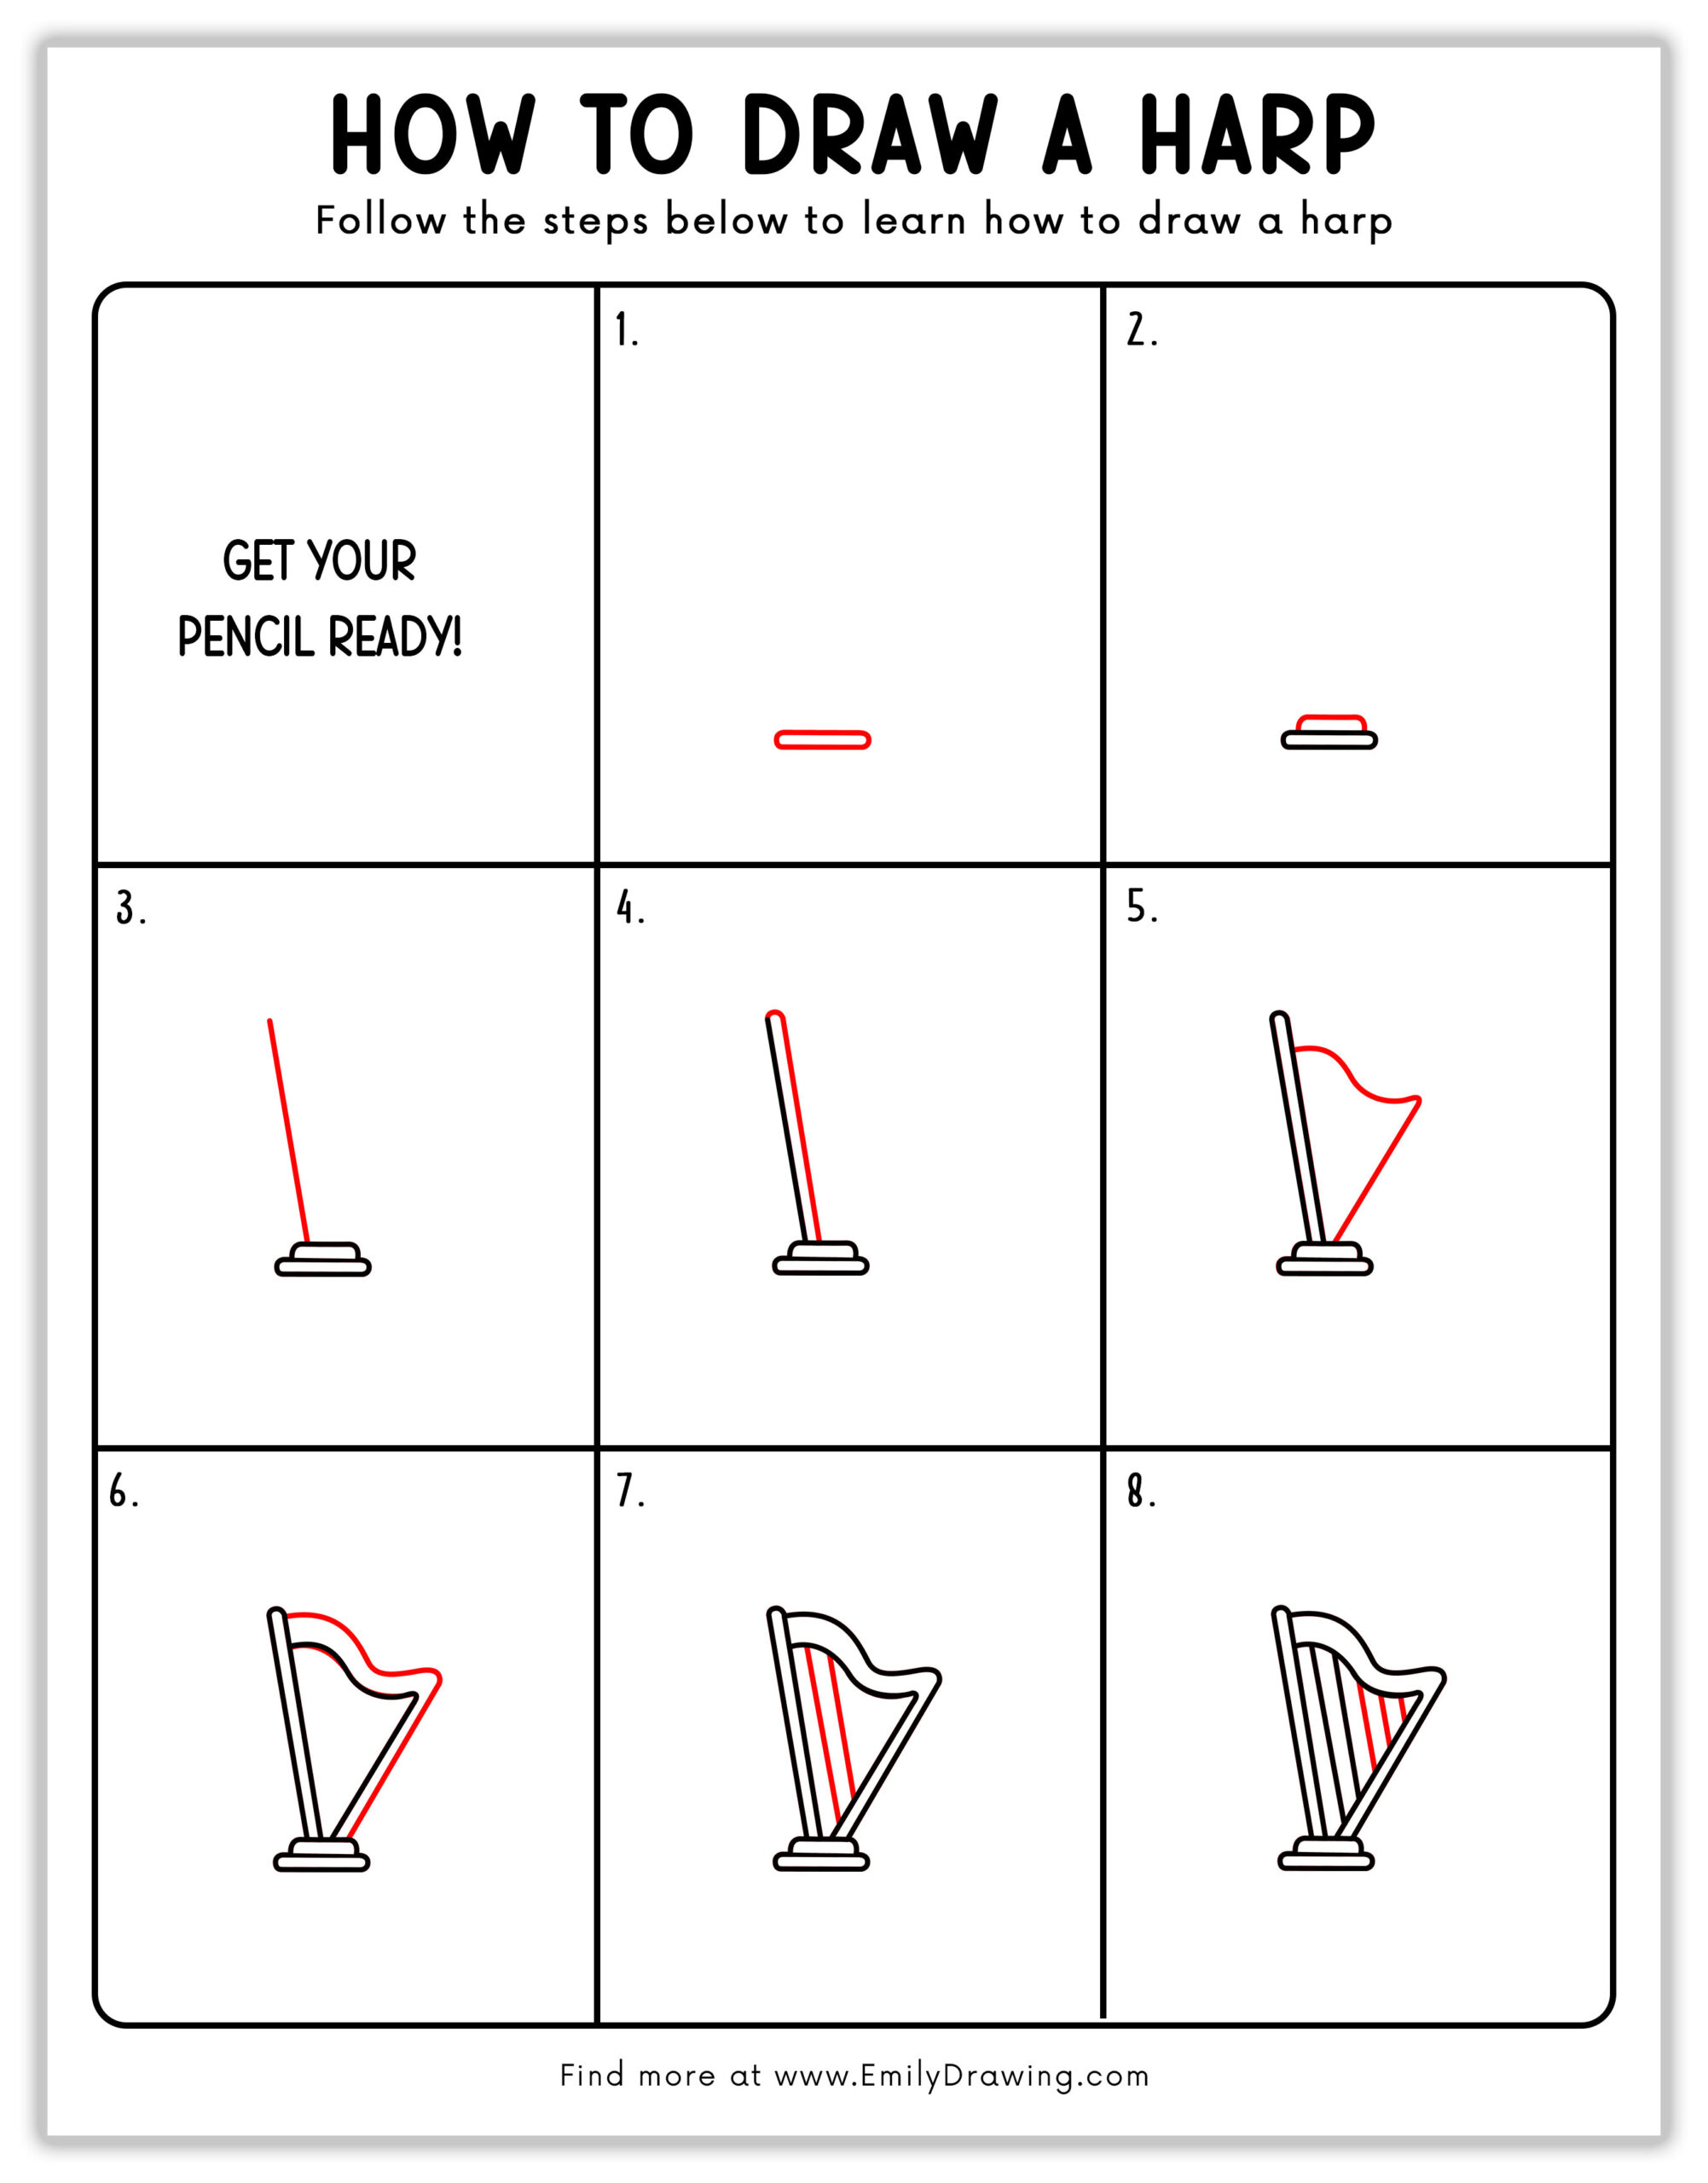
How to Draw a St. Patrick’s Day Harp — Let’s get started!
Step 1 – Draw the Harp’s Base.
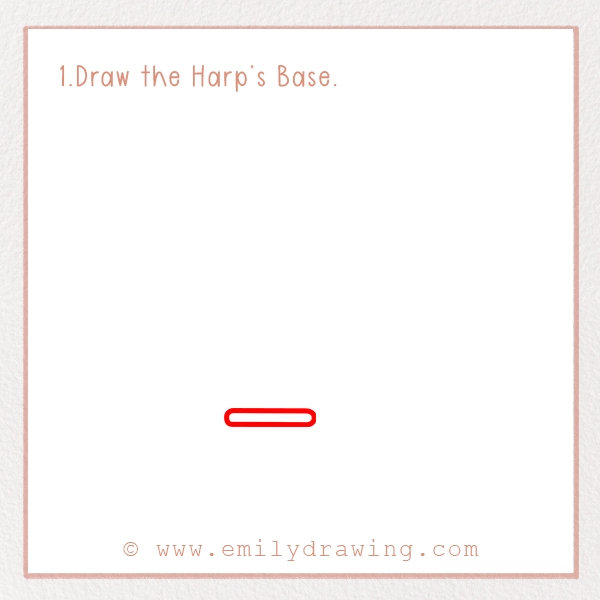
Start with a flat oval in the center of your paper. This is the harp’s base—it keeps everything balanced.
Now, just above that, draw a slightly smaller oval to create a layered pedestal.
Tip: Use light pencil strokes so you can erase or adjust as needed.
Step 2 – Add More Layers to the Base.
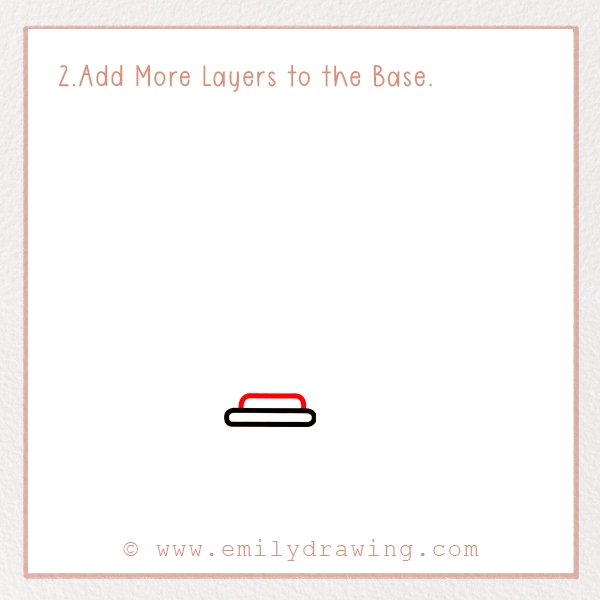
Add a third oval on top of the second one—just a little smaller again.
Now your harp is standing on a three-layered base—strong and elegant!
Fun thought: Picture a leprechaun standing there, strumming a tune!
Step 3 – Draw the First Side of the Harp.
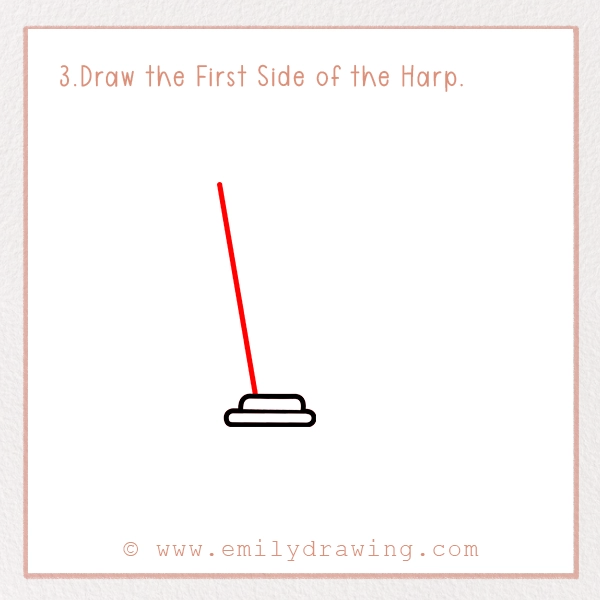
From the top center of the base, draw a diagonal line going up to the left.
This is one of the main support beams of the harp.
Use a ruler if you want it extra straight!
Step 4 – Thicken the Frame.
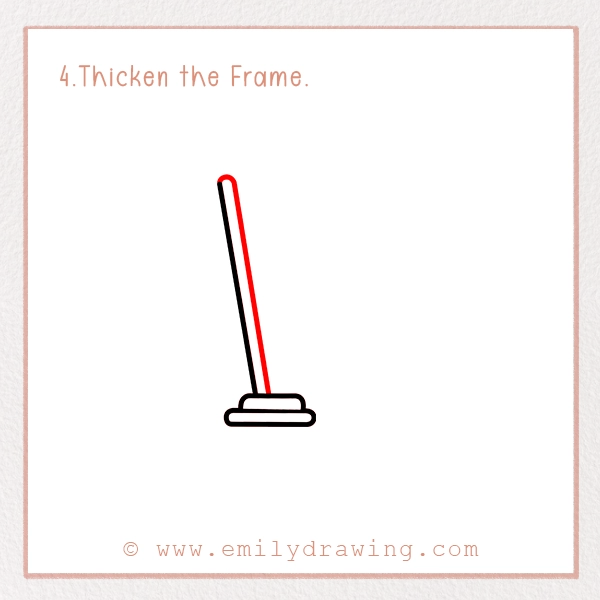
Draw a second line parallel to the first, then connect their tops with a short curved line.
This forms a sturdy wooden beam—an essential part of the harp’s frame.
Fun Fact: Real harps are often made of beautiful wood like maple or mahogany!
Step 5 – Make the Top Curve of the Harp.
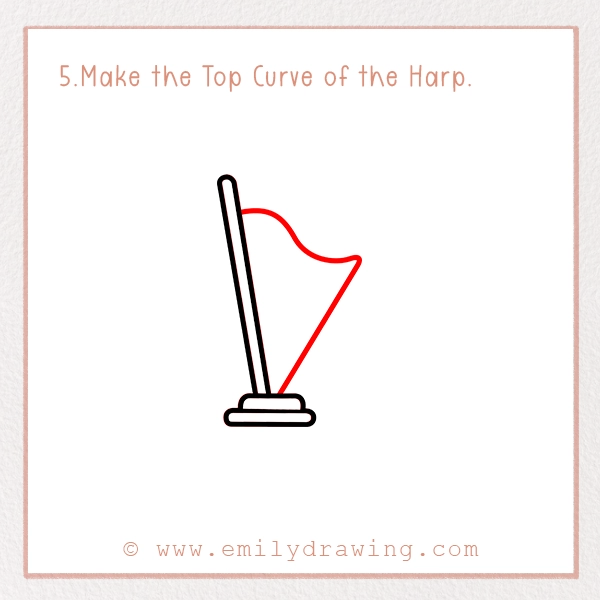
From the top of your beam, draw a curved line that arches up and to the right, then gently dips down—like a stretched rainbow.
Connect the end of the curve to the right side of the base. This is the signature harp shape!
Step 6 – Close the Harp Frame.
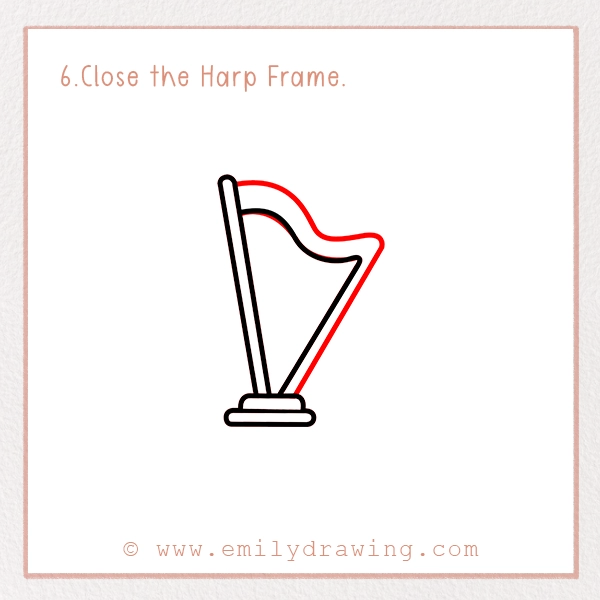
Now draw a line from the end of the curved top down to the base.
This completes the triangular shape of your harp.
Tip: Double-check your lines are neat and connected—your harp is almost ready to play!
Step 7 – Add the First Few Strings.
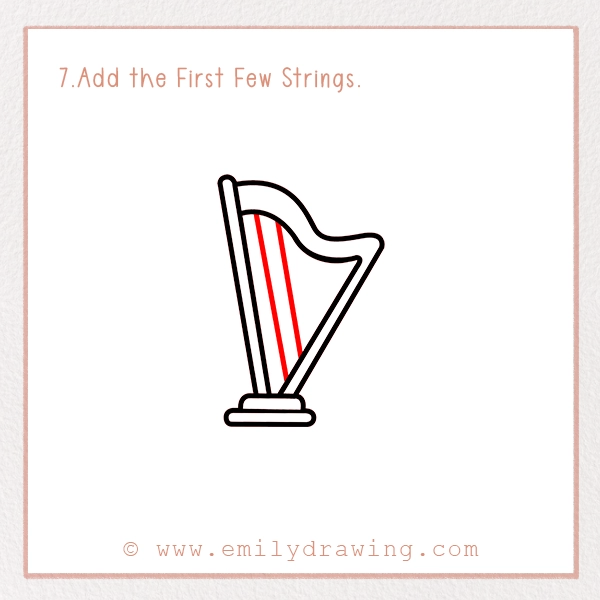
Inside the harp frame, draw three diagonal lines from the curved top to the vertical beam on the left.
These are your first harp strings!
Step 8 – Add More Strings.
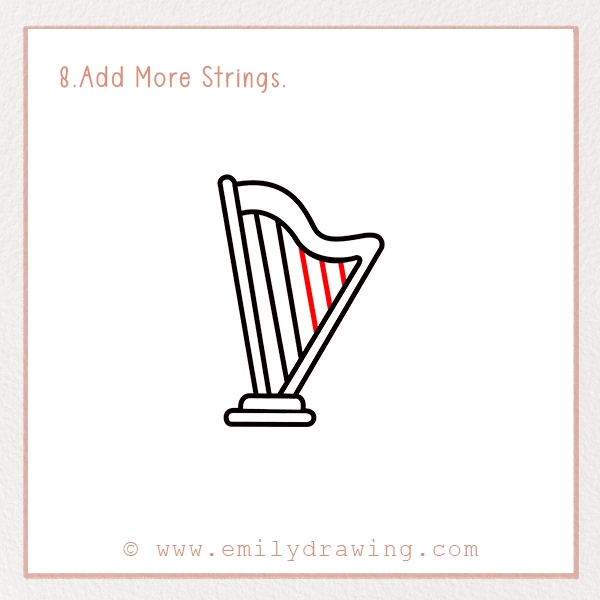
Add three or four more lines between the ones you just drew.
Space them out evenly. Now your harp looks full and ready for music!
Fun Fact: Some real harps have over 40 strings—that’s a lot of music!
Step 9 – Color Your Drawing!
Time to bring your drawing to life with color!
Try these ideas:
- Harp Frame: Gold or yellow
- Base: Dark gold, brown, or bronze
- Strings: Light gray or silver
- Extras: Add green shamrocks, sparkles, or a rainbow background—just like we did in our horseshoe drawing tutorial for more festive flair!
Creative Tip: Want to match the St. Patrick’s Day vibe? Try coloring the whole harp shiny green!
Pin it now, Draw later!
Fun Facts About Harps
- The harp is Ireland’s national instrument and appears on official emblems and coins.
- In Irish mythology, harps were magical, able to calm storms or lull people to sleep.
- Long ago, harp strings were made from goat gut (yep, really!).
- Even the Guinness beer logo features a harp—it’s a powerful Irish symbol!
Tips and Tricks for Better Drawing
- Use a ruler for the base and strings to keep them straight.
- Practice the top curve separately before drawing it on your final version.
- Sketch lightly first—you can always trace over with a marker later.
- Add fun details like music notes, fairy sparkles, or a leprechaun nearby!
- Try different poses—maybe your harp is floating or glowing!
Awesome work, artist! You just learned how to draw a beautiful St. Patrick’s Day harp. Whether you followed the steps exactly or added your own twist, you created something magical—and that’s worth celebrating!
Drawing isn’t just about making something perfect—it’s about having fun, learning, and expressing your creativity.
Show off your masterpiece! Ask a grown-up to help you post your drawing using #EmilyDrawing on social media. You might inspire someone else to get creative too!
Thanks for drawing with us.
Happy St. Patrick’s Day, and may your imagination always dance like a harp string in the wind! 🎶🍀✨
Get the FREE Printable Drawing Guide
FREE Download Printable Patrick’s Day Harp Drawings Tutorials